Part one, supplemented.
Cotans, hi.
I am Sasha and I indulge in neurons.
At the request of the workers, I finally gathered my thoughts and decided to gash a series of short and almost step-by-step instructions.
Instructions on how to train and deploy your neural network from scratch, at the same time making friends with the telegram bot.
Instructions for dummies like me.
Today we will choose the architecture of our neural network, test it and collect our first dataset for training.
Architecture choice
After the relatively successful launch of the
selfie2anime bot (using the ready-made
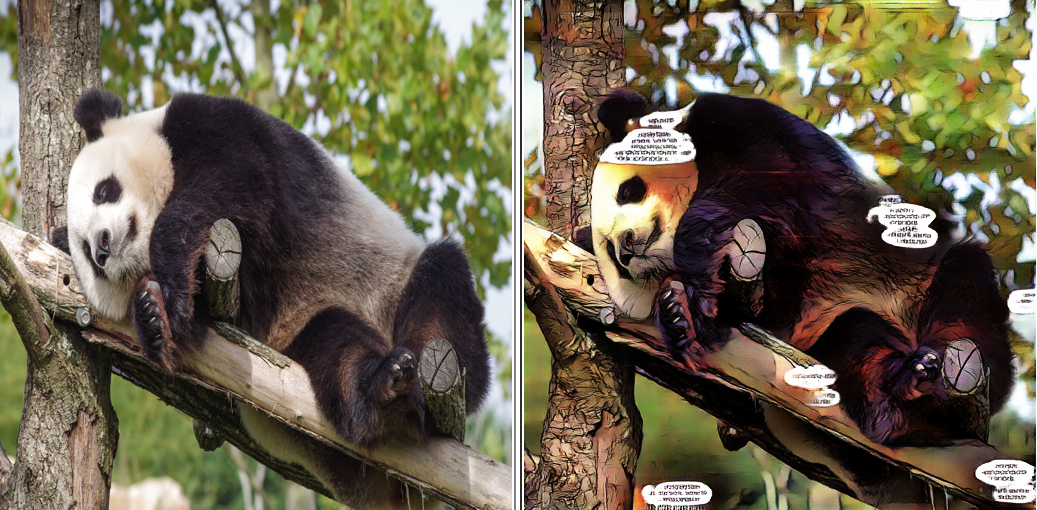
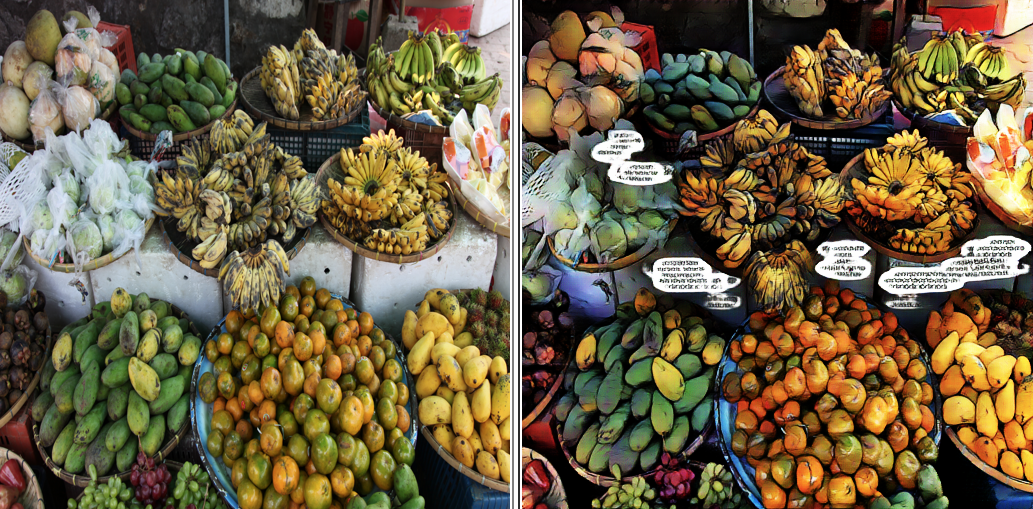
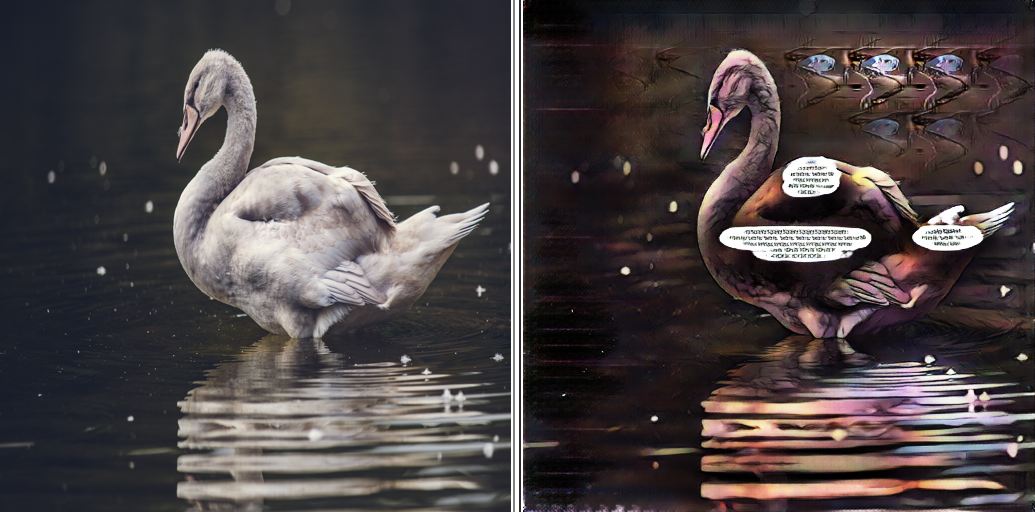
UGATIT model), I wanted to do the same, but mine. For example, a model that turns your photos into comics.
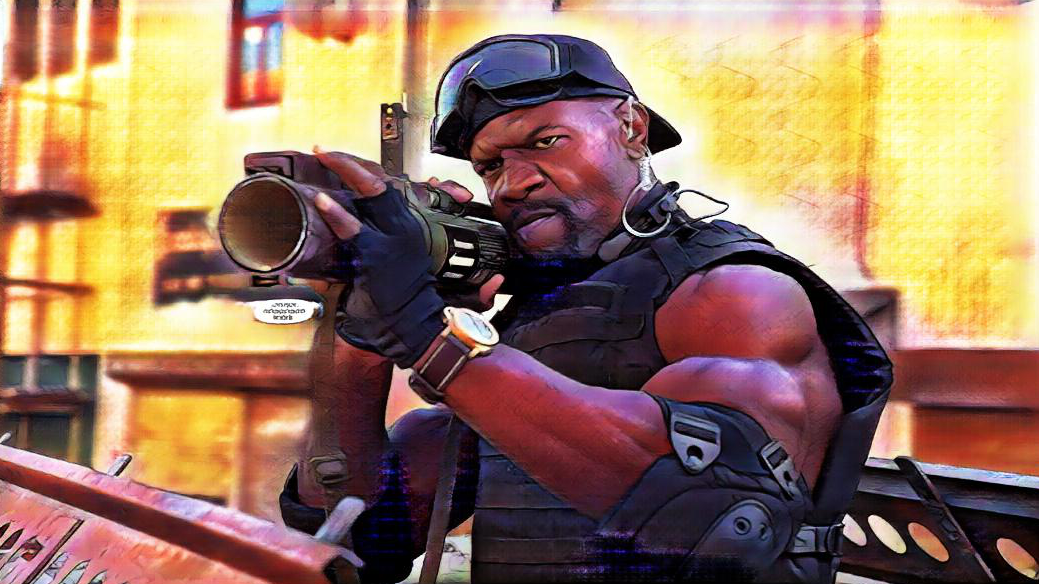
Here are some examples from my
photo2comicsbot , and we will do something similar.
Since the
UGATIT model was too heavy for my video card, I drew attention to an older, but less voracious analogy -
CycleGANIn this implementation, there are several model architectures and a convenient visual display of the learning process in the browser.
CycleGAN, like
architectures for transferring styles across a single image, does not require paired images for training. This is important, because otherwise we would have to redraw all the photos ourselves into comics to create a training set.
The task that we will set for our algorithm consists of two parts.
At the output, we should get a picture that:
a) similar to a comic book
b) similar to the original image
Point “a” can be implemented using the usual GAN, where the trained Critic will be responsible for “resembling comics”.
More on GAN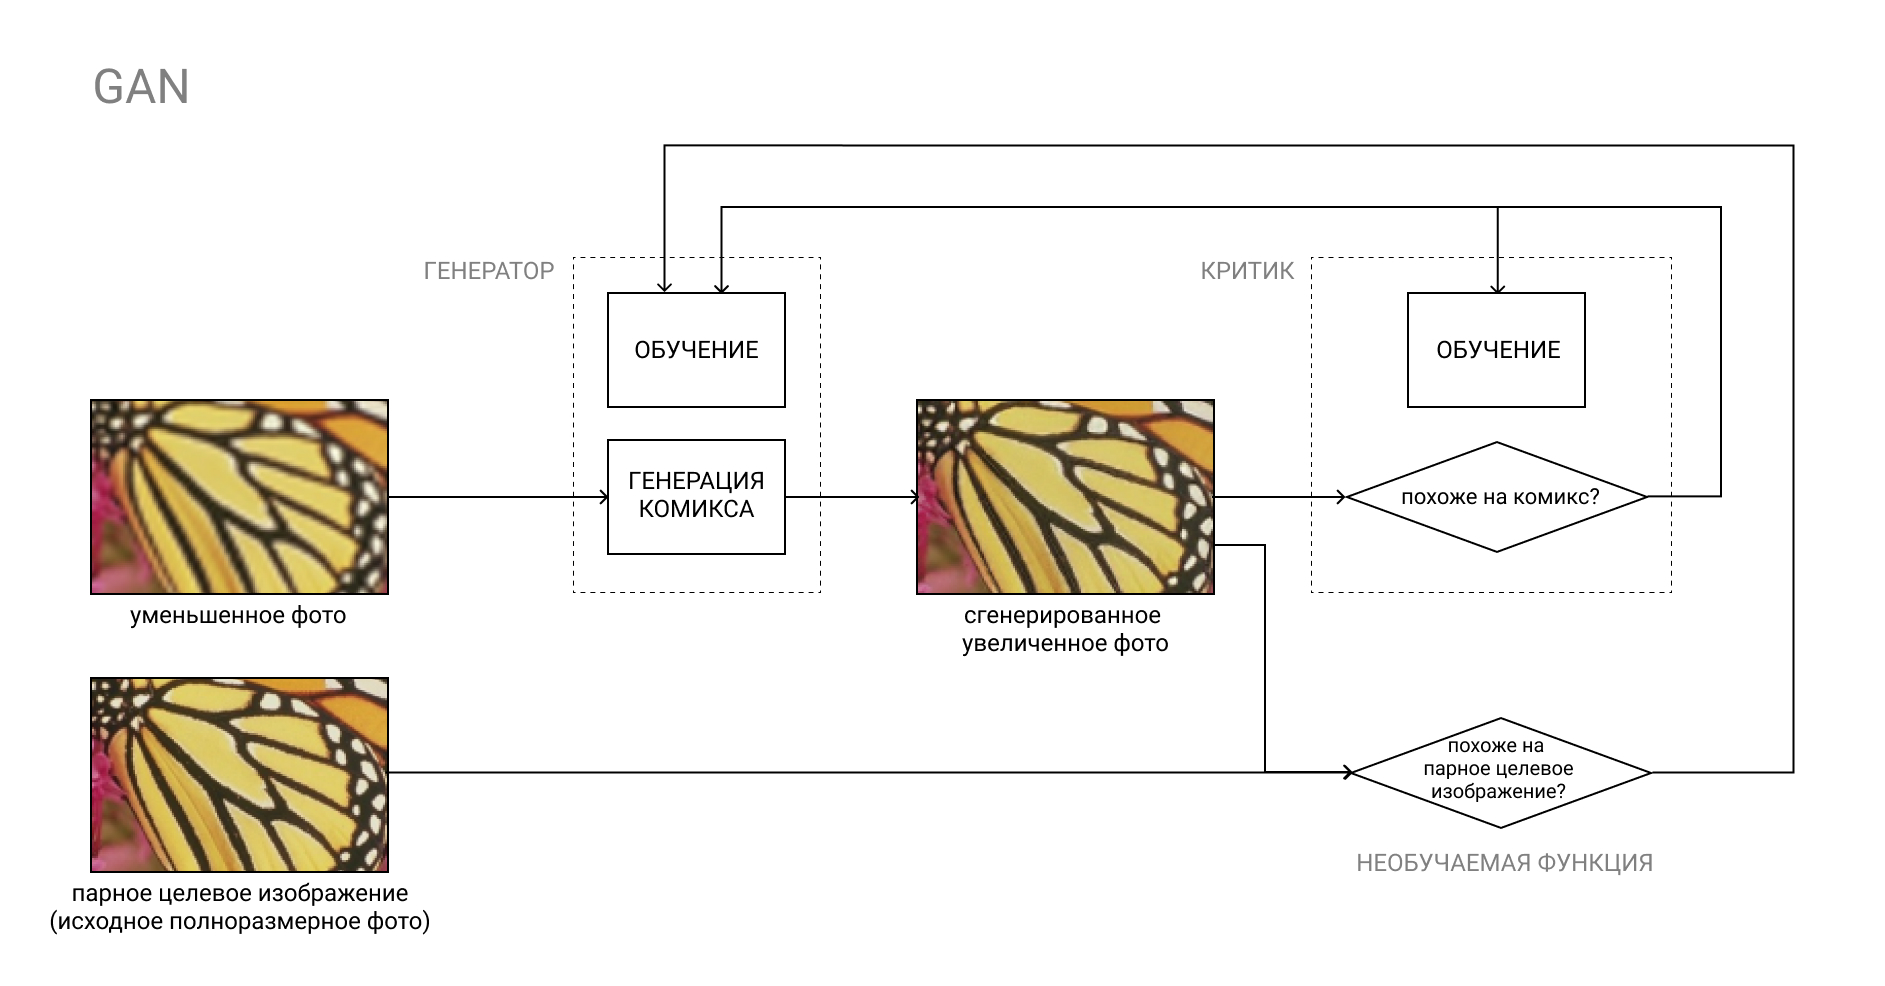
The GAN, or Generative Adversarial Network, is a pair of two neural networks: Generator and Critic.
The generator converts the input, for example, from a photo to a comic book, and the critic compares the resulting “fake” result with a real comic book. The Generator's job is to trick the Critic, and vice versa.
In the learning process, the Generator learns to create comics that are increasingly similar to real ones, and the Critic learns to better distinguish between them.
The second part is somewhat more complicated. If we had paired pictures, where there would be photographs in set “A”, and in set “B” they were, but redrawn into comics (that is, what we want to get from the model), we could just to compare the result produced by the Generator with the paired image from set “B” of our training set.
In our case, sets “A” and “B” are in no way connected with each other. In set “A” - random photos, in set “B” - random comics.
It is pointless to compare a fake comic with some random comic from set “B”, since this will at least duplicate the function of the Critic, not to mention the unpredictable result.
This is where the CycleGAN architecture comes to the rescue.
In short, this is a GAN pair, the first of which converts an image from category “A” (for example, a photo) to category “B” (for example, a comic book), and the second one back, from category “B” to category “A”.
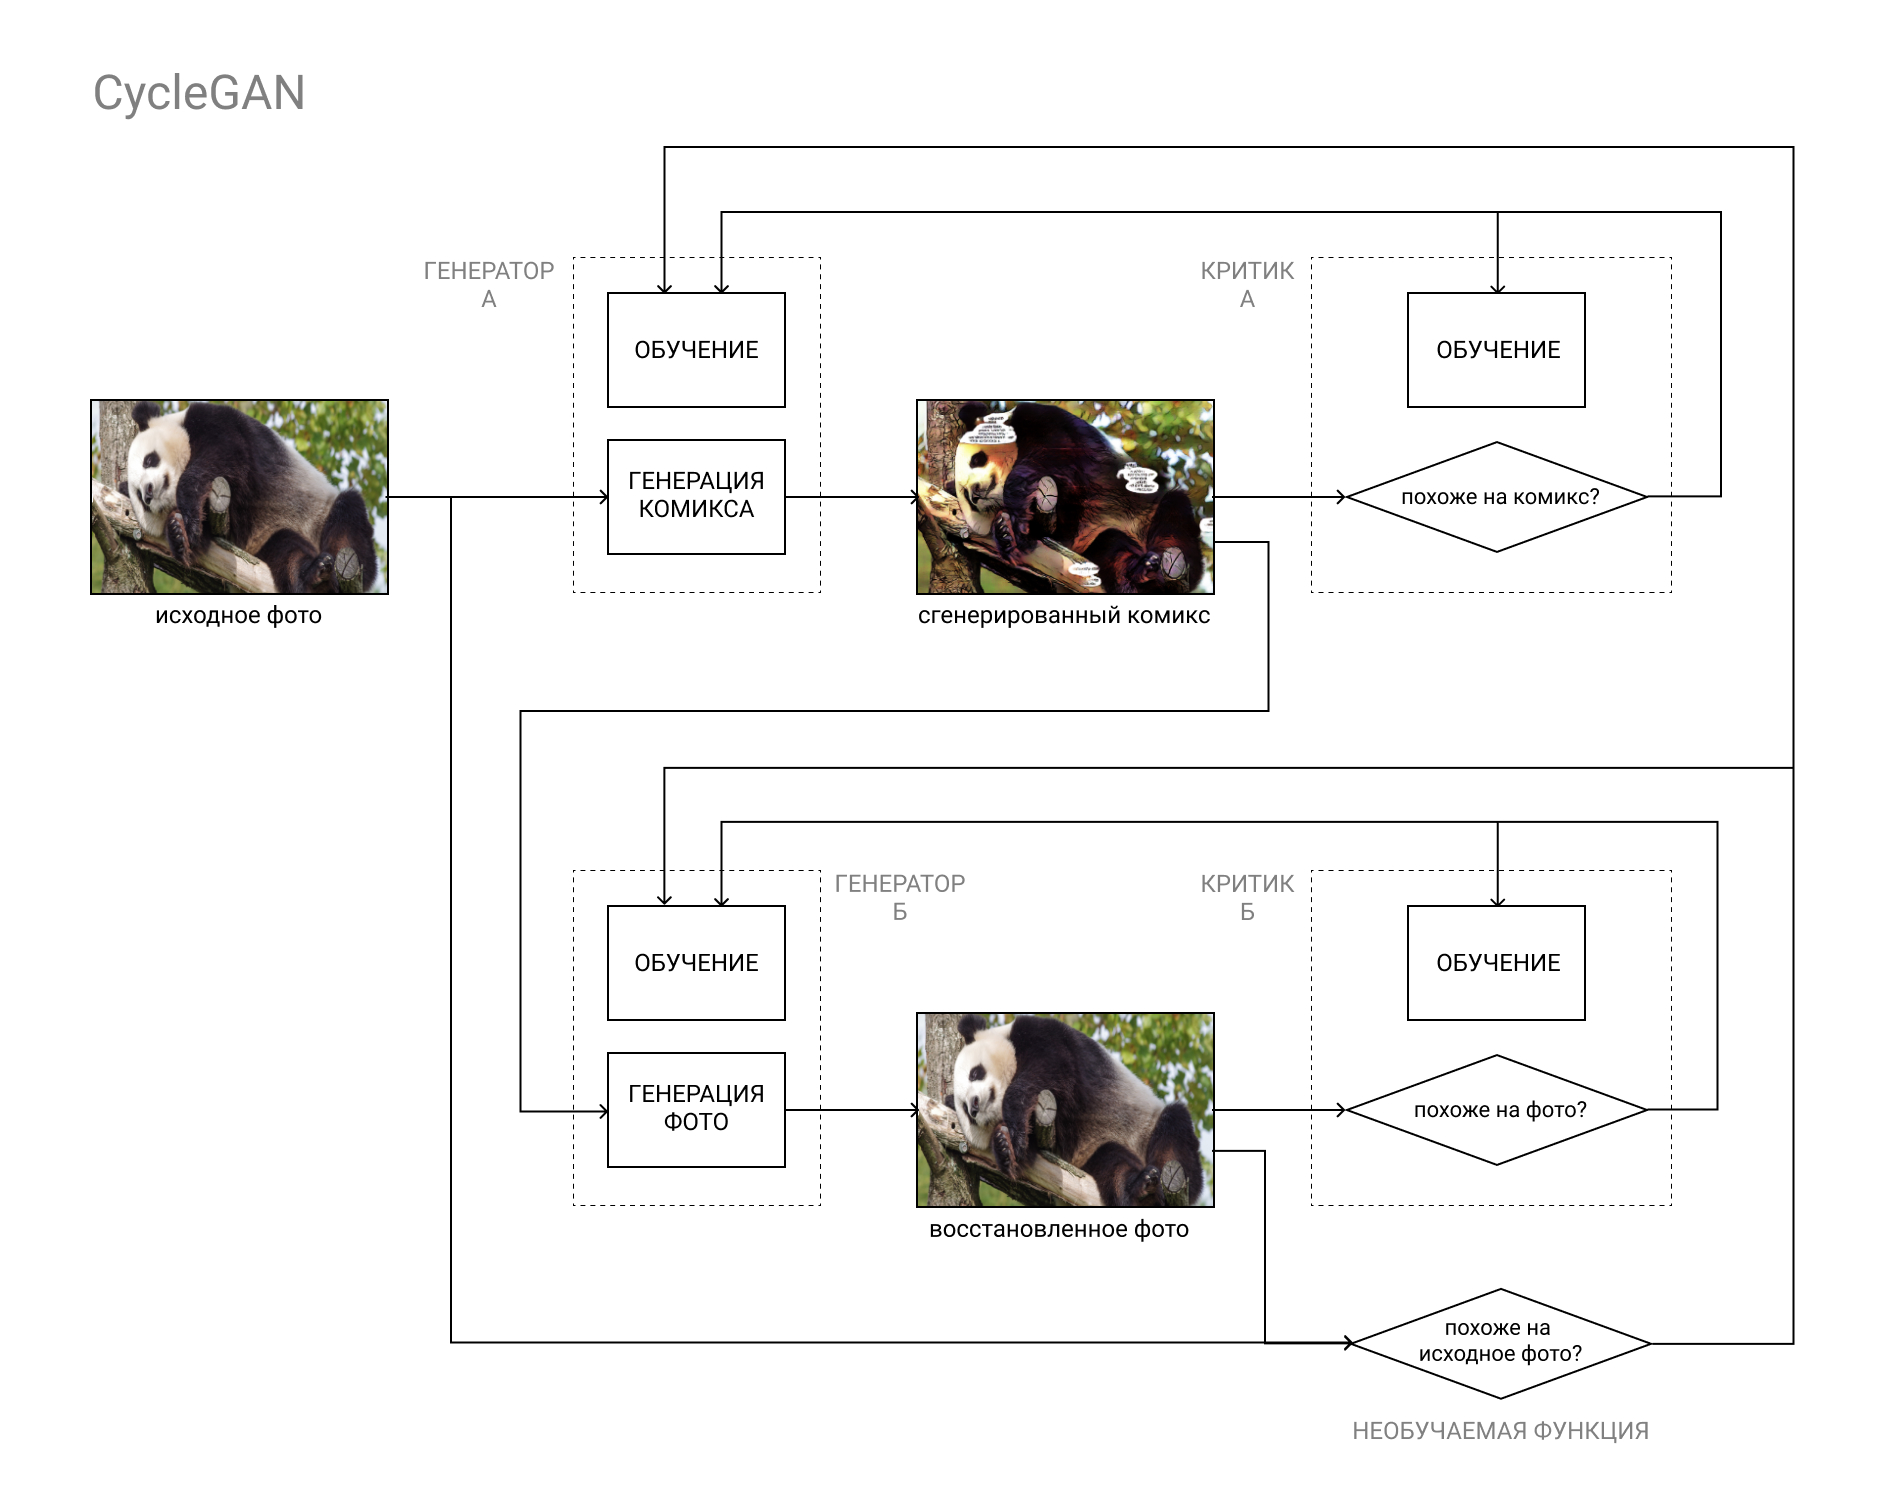
Models are trained both on the basis of comparing the original photo with the restored one (as a result of the cycle “A” - “B” - ”A”, “photo-comic-photo), and the data of the Critics, as in a regular GAN.
This makes it possible to complete both parts of our task: to generate a comic book that is indistinguishable from other comics, and at the same time resembles the original photo.
Model installation and verification
To implement our cunning plan, we need:
- CUDA-enabled graphics card with 8GB RAM
- Linux OS
- Miniconda / Anaconda with Python 3.5+
Video cards with less than 8GB of RAM can also work if you conjure with the settings. It will also work on Windows, but more slowly, I had a difference of at least 1.5-2 times.
If you don’t have a GPU with CUDA support, or you are too lazy to set it all up, you can always use Google Colab. If there is a sufficient number of people who want to, I’ll fill out the tutorial and how to crank up all of the following in a Google cloud.Miniconda can be taken hereInstallation instructionsAfter installing Anaconda / Miniconda (hereinafter referred to as conda), create a new environment for our experiments and activate it:
(Windows users need to start Anaconda Prompt first from the Start menu)conda create --name cyclegan conda activate cyclegan
Now all packages will be installed in the active environment without affecting the rest of the environment. This is convenient if you need certain combinations of versions of various packages, for example, if you are using someone else's old code and you need to install obsolete packages without spoiling your life and main working environment.
Next, simply follow the README.MD instructions from the distribution:
Save the CycleGAN distribution:
(or just download the archive from GitHub) git clone https://github.com/junyanz/pytorch-CycleGAN-and-pix2pix cd pytorch-CycleGAN-and-pix2pix
Install the necessary packages:
conda install numpy pyyaml mkl mkl-include setuptools cmake cffi typing conda install pytorch torchvision -c pytorch conda install visdom dominate -c conda-forge
Download the finished dataset and the corresponding model:
bash ./datasets/download_cyclegan_dataset.sh horse2zebra bash ./scripts/download_cyclegan_model.sh horse2zebra
Pay attention to what photos are in the downloaded dataset.
If you open the script files from the previous paragraph, you can see that there are other ready-made datasets and models for them.
Finally, test the model on the downloaded dataset:
python test.py --dataroot datasets/horse2zebra/testA --name horse2zebra_pretrained --model test --no_dropout
The results will be saved in the / results / horse2zebra_pretrained / folder
Creating a training set
An equally important step after choosing the architecture of the future model (and searching for a finished implementation on github) is to compile a dataset, or a data set, on which we will train and test our model.
Almost everything depends on what data we use. For example, UGATIT for the selfie2anime bot was trained on female selfies and female faces from anime. Therefore, with male photos, she behaves at least funny, replacing brutal bearded men with little girls with a high collar. In the photo, your humble servant after he learned that he is watching an anime.

As you already understood, it is worth selecting those photos / comics that you want to use at the input and get at the output. Are you planning to process selfies - add selfies and close-ups of faces from comics, photos of buildings - add photos of buildings and pages from comics with buildings.
As sample photos, I used
DIV2K and
Urban100 , flavored with photos of Google stars to enhance the diversity.
I took comics from the Marvel universe, the entire page, throwing out ads and announcements where the picture does not look like a comic book. I can’t attach the link for obvious reasons, but at the request of Marvel Comics you can easily find scanned options on your favorite sites with comics, if you know what I mean.
It is important to pay attention to the drawing, it differs in different series, and the color scheme.
I had a lot of deadpool and spiderman, so the skin goes very red.
An incomplete list of other public datasets can be found
here .
The folder structure in our dataset should be as follows:
selfie2comics
├── trainA
├── trainB
├── testA
└── testB
trainA - our photos (about 1000pcs)
testA - some photos for model tests (30pcs will be enough)
trainB - our comics (about 1000 pcs.)
testB - comics for tests (30pcs.)
It is advisable to place the dataset on an SSD, if possible.
That's all for today, in the next issue we will begin to train the model and get the first results!
Be sure to write if something went wrong with you, this will help improve leadership and ease the suffering of subsequent readers.
If you have already tried to train the model, feel free to share the results in the comments. See you soon!
⇨ Next part