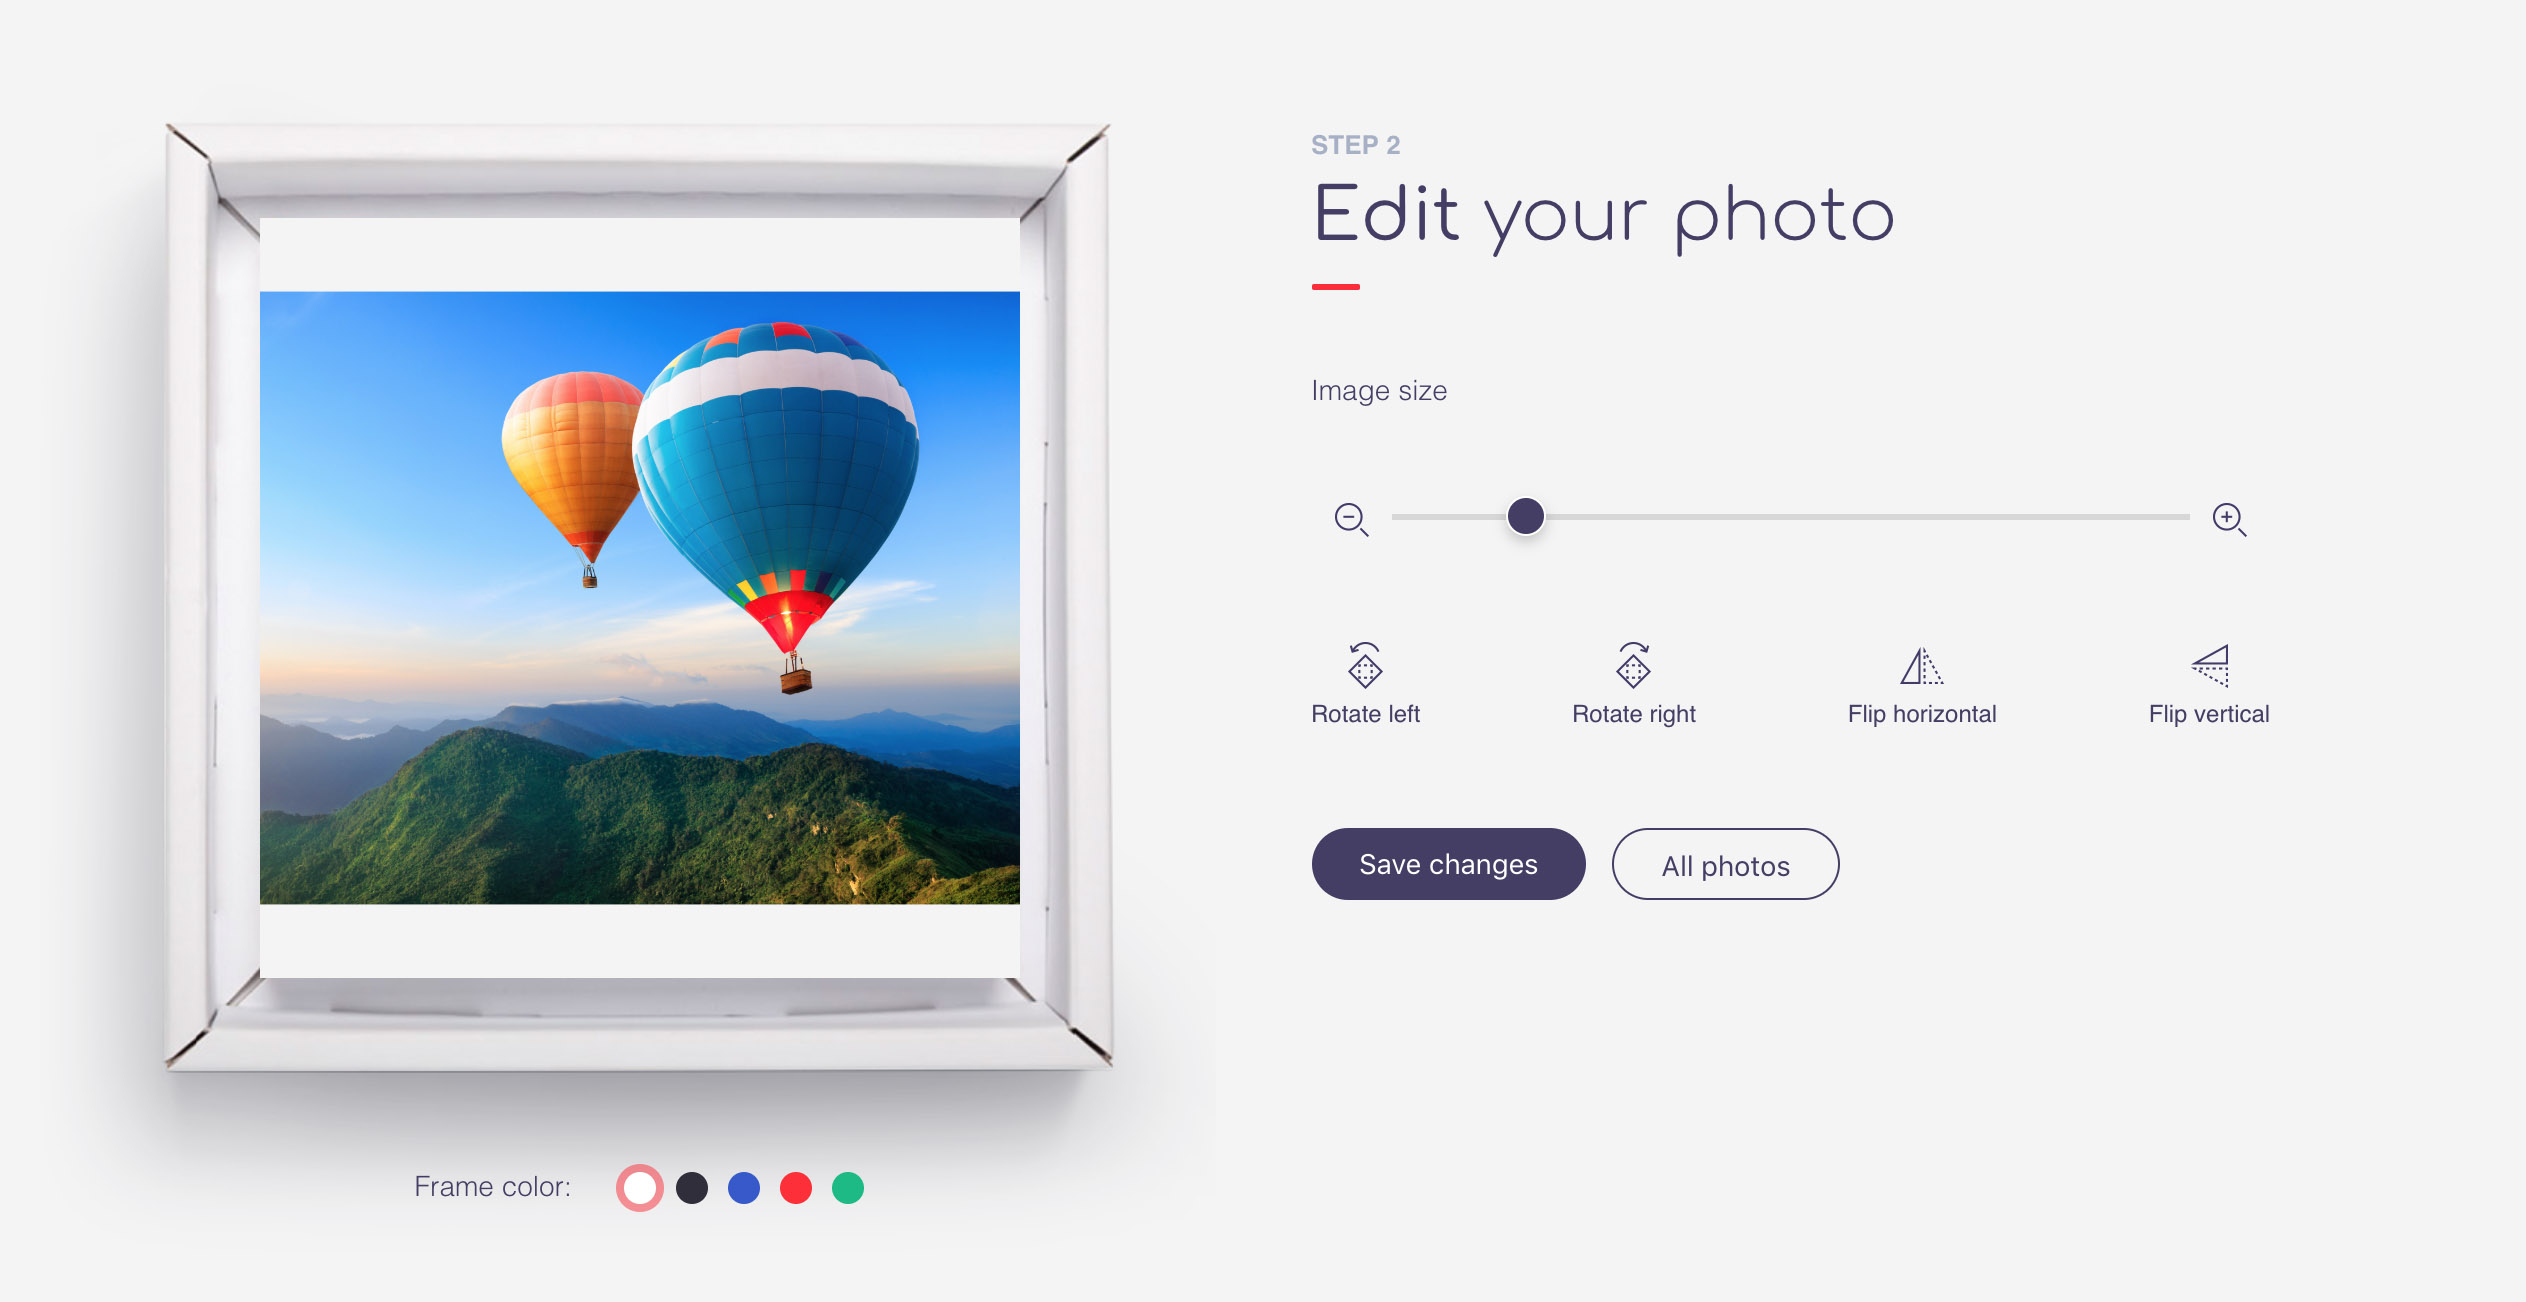
أتيحت لي الفرصة مؤخرًا لكتابة خدمة لمتجر عبر الإنترنت من شأنه أن يساعد في تقديم طلب لطباعة صوري.
افترضت الخدمة محرر صور "بسيط" أود أن أشاركه في إنشائه. وكل ذلك لأنه من بين وفرة جميع أنواع الإضافات لم أجد وظائف مناسبة ، بالإضافة إلى الفروق الدقيقة في تحويلات CSS ، أصبحت فجأة مهمة غير تافهة بالنسبة لي.

المهام الرئيسية:
- القدرة على تحميل الصور من جهازك و Google Drive و Instagram.
- تحرير الصور: تحريك ، تدوير ، انعكاس أفقي ورأسي ، تكبير ، محاذاة تلقائية للصورة لملء منطقة القص.
إذا تبين أن الموضوع مثير للاهتمام ، فسأصف في المنشور التالي بالتفصيل التكامل مع Google Drive و Instagram في الجزء الخلفي من التطبيق ، حيث تم استخدام حزمة NodeJS + Express الشهيرة.
لتنظيم الواجهة الأمامية ، اخترت إطار Vue الرائع. فقط لأنه يلهمني بعد رد فعل زاوي صعب ومزعج. أعتقد أنه ليس من المنطقي وصف الهندسة والطرق والمكونات الأخرى ، فلنذهب مباشرة إلى المحرر.
بالمناسبة ، يمكن عرض النسخة التجريبية من المحرر
هنا .
سنحتاج إلى مكونين:
تحرير - سيحتوي على المنطق وعناصر التحكم الرئيسية
معاينة - ستكون مسؤولة عن عرض الصورة
تحرير قالب المكون:<Edit> <Preview v-if="image" ref="preview" :matrix="matrix" :image="image" :transform="transform" @resized="areaResized" @loaded="imageLoaded" @moved="imageMoved" /> <input type="range" :min="minZoom" :max="maxZoom" step="any" @change="onZoomEnd" v-model.number="transform.zoom" :disabled="!imageReady" /> <button @click="rotateMinus" :disabled="!imageReady">Rotate left</button> <button @click="rotatePlus" :disabled="!imageReady">Rotate right</button> <button @click="flipY" :disabled="!imageReady">Flip horizontal</button> <button @click="flipX" :disabled="!imageReady">Flip vertical</button> </Edit>
يمكن أن يشغّل مكوّن المعاينة 3 أحداث:
حدث تحميل صورة - تحميل
تغيير حجم - حدث
تغيير حجم النافذة
حدث - صورة متحركة
معلمات:
صورة - رابط
صورةmatrix - مصفوفة تحويل لخاصية تحويل CSS
تحويل - كائن يصف التحول
من أجل التحكم بشكل أفضل في موضع الصورة ، فإن img لها موضع مطلق ، ويتم تعيين خاصية
التحويل إلى الأصل ، وهي النقطة المرجعية
للتحويل ، على القيمة الأولية "0 0" ، والتي تقابل الأصل في الزاوية اليسرى العليا للصورة الأصلية (قبل التحويل!).
المشكلة الرئيسية التي واجهتها هي أنك تحتاج إلى التأكد من أن نقطة أصل التحويل دائمًا في وسط منطقة التحرير ، وإلا ، أثناء التحويل ، سيتم تغيير الجزء المحدد من الصورة. يساعد استخدام
مصفوفة التحويل على حل هذه المشكلة.
تحرير المكون
خصائص مكون التحرير: export default { components: { Preview }, data () { return { image: null, imageReady: false, imageRect: {},
يتم تمرير قيم imageRect و areaRect إلينا من قبل مكون المعاينة ، مستدعين الأساليب imageLoaded و areaResized ، على التوالي ، الكائنات لها البنية:
{ size: { width: 100, height: 100 }, center: { x: 50, y: 50 } }
يمكن حساب قيم المركز في كل مرة ، ولكن من الأسهل تدوينها مرة واحدة.
إن خاصية المصفوفة المحسوبة هي نفس معاملات مصفوفة التحويل.
المهمة الأولى التي تحتاج إلى حل هي توسيط الصورة بنسبة عرضية تعسفية في منطقة الاقتصاص ، بينما يجب أن تكون الصورة قادرة على احتواء المناطق غير المكتملة تمامًا (فقط) أعلى وأسفل ، أو (فقط) اليسار واليمين مقبولة. مع أي تحويلات ، يجب الحفاظ على هذا الشرط.
أولاً ، سنحدد قيم التكبير ، ولهذا سنتحقق من نسبة العرض إلى الارتفاع ، مع مراعاة اتجاه الصورة.
طرق المكون: _setMinZoom(){ let rotate = this.matrix.c !== 0; let horizontal = this.imageRect.size.height < this.imageRect.size.width; let areaSize = (horizontal && !rotate || !horizontal && rotate) ? this.areaRect.size.width : this.areaRect.size.height; let imageSize = horizontal ? this.imageRect.size.width : this.imageRect.size.height; this.minZoom = areaSize/imageSize; if(this.transform.zoom < this.minZoom) this.transform.zoom = this.minZoom; }, _setMaxZoom(){ this.maxZoom = this.areaRect.size.width/config.image.minResolution; if(this.transform.zoom > this.maxZoom) this.transform.zoom = this.maxZoom; },
الآن دعنا ننتقل إلى التحولات. بادئ ذي بدء ، نصف الانعكاسات ، لأنها لا تغير المنطقة المرئية من الصورة.
طرق المكون: flipX(){ this.matrix.b == 0 && this.matrix.c == 0 ? this.transform.flip = !this.transform.flip : this.transform.flop = !this.transform.flop; }, flipY(){ this.matrix.b == 0 && this.matrix.c == 0 ? this.transform.flop = !this.transform.flop : this.transform.flip = !this.transform.flip; },
سوف تتطلب تحويلات التكبير والتدوير والإزاحة بالفعل تعديلات أصل التحويل.
طرق المكون: onZoomEnd(){ this._translate(); }, rotatePlus(){ this.transform.rotate += 90; this._setMinZoom(); this._translate(); }, rotateMinus(){ this.transform.rotate -= 90; this._setMinZoom(); this._translate(); }, imageMoved(translate){ this._translate(); },
إنها طريقة
_translate المسؤولة عن كل
التفاصيل الدقيقة للتحولات. يجب إدخال نظامين مرجعيين. الأولى ، دعنا نسميها صفر ، تبدأ في الزاوية اليسرى العليا من الصورة ، عندما نضرب الإحداثيات في مصفوفة التحويل ، ننتقل إلى نظام إحداثي آخر ، نسميه محليًا. في هذه الحالة ، يمكننا عكس الانتقال من المحلي إلى الصفر من خلال إيجاد
مصفوفة التحويل
العكسي .
اتضح أننا بحاجة إلى وظيفتين.
الأول هو الانتقال من صفر إلى النظام المحلي ، يقوم المتصفح بإجراء نفس التحويلات عندما نحدد خاصية تحويل css.
img { transform: matrix(a, b, c, d, tx, ty); }
والثاني - للعثور على الإحداثيات الأصلية للصورة ، بعد تحويل الإحداثيات بالفعل.
من الأنسب كتابة هذه الوظائف باستخدام طرق فصل منفصل.
فئة التحويل: class Transform { constructor(center, matrix){ this.init(center, matrix); } init(center, matrix){ if(center) this.center = Object.assign({},center); if(matrix) this.matrix = Object.assign({},matrix); } getOrigins(current){
طريقة الترجمة مع التعليقات التفصيلية: _translate(checkAlign = true){ const tr = new Transform(this.transform.center, this.matrix);
تعمل المحاذاة على إنشاء تأثير "لصق" الصورة على حواف الاقتصاص ، وتجنب الحقول الفارغة.
مكون المعاينة
تتمثل المهمة الرئيسية لهذا المكون في عرض الصورة وتطبيق التحولات والاستجابة لحركة زر الماوس المحصور فوق الصورة. من خلال حساب الإزاحة ، نقوم بتحديث المعلمات
convert.x و
convert.y ، في نهاية الحركة ، نشغل الحدث الذي تم
نقله ، ونخبر مكون التحرير أننا بحاجة إلى إعادة حساب موضع مركز التحويل وضبط convert.x و convert.y.
قالب مكون المعاينة:<div ref = "area" class = "edit-zone"
@ mousedown = "onMoveStart"
@ touchstart = "onMoveStart"
mouseup = "onMoveEnd"
@ touchend = "onMoveEnd"
@ mousemove = "onMove"
@ touchmove = "onMove">
<img
v-if = "image"
المرجع = "image"
تحميل = "imageLoaded"
: src = "image"
: style = "{'convert': convertStyle، 'convert-origin': convertOrigin}">
يتم فصل وظائف المحرر بدقة عن المشروع الرئيسي ويكمن
هنا .
آمل أن تكون هذه المواد مفيدة لك. شكرا لك!