
في مقال سابق ، ناقشنا أساسيات BottomAppBar ، التي قدمناها مؤخرًا في Google I / O 2018 كجزء من مكونات المواد لنظام Android . نظرنا في طريقة لتنفيذ BottomAppBar ودرسنا سماتها. يمكن لـ BottomAppBar أيضًا عرض عناصر القائمة وعناصر التحكم في درج التنقل التي استخدمناها في شريط الأدوات .
الآن يجب أن تكون عناصر القائمة والتحكم في درج التنقل جزءًا من BottomAppBar. الآن دعونا نرى كيفية استخدام القائمة ودرج التنقل مع BottomAppBar.
قائمة BottomAppBar
تحتاج أولاً إلى إنشاء ملف .xml في دليل res / menu لعناصر القائمة التي يجب عرضها في BottomAppBar. هذا هو ملف bottomappbar_menu.xml الخاص بي:
<?xml version="1.0" encoding="utf-8"?> <menu xmlns:tools="http://schemas.android.com/tools" xmlns:app="http://schemas.android.com/apk/res-auto" xmlns:android="http://schemas.android.com/apk/res/android"> <item android:id="@+id/app_bar_fav" android:icon="@drawable/baseline_favorite_white_24" android:title="@string/action_favorite" app:showAsAction="ifRoom"/> <item android:id="@+id/app_bar_search" android:icon="@drawable/baseline_search_white_24" android:title="@string/action_search" app:showAsAction="ifRoom"/> <item android:id="@+id/app_bar_settings" android:title="@string/action_settings" app:showAsAction="never"/> </menu>
في MainActivity ، التي تستدعي setSupportActionBar (bottom_app_bar) ، أضف التعليمات البرمجية التالية إلى الطريقة:
override fun onCreateOptionsMenu(menu: Menu): Boolean { val inflater = menuInflater inflater.inflate(R.menu.bottomappbar_menu, menu) return true }
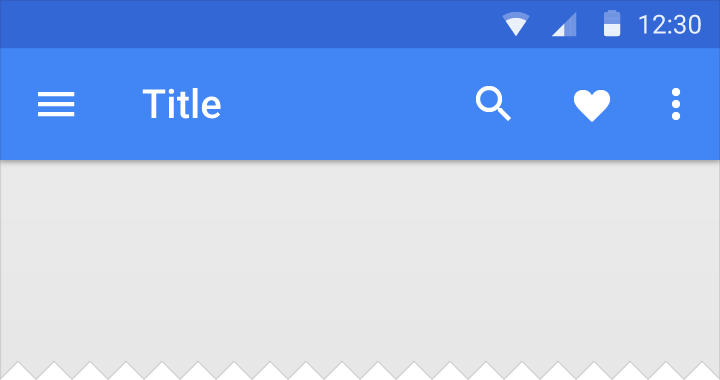
يجب أن تظهر عناصر القائمة الآن في BottomAppBar.
معالجة النقرات على عناصر القائمة
لمعالجة النقرات على عناصر القائمة ، تحتاج إلى إضافة الكود التالي إلى MainActivity:
override fun onOptionsItemSelected(item: MenuItem?): Boolean { when (item!!.itemId) { R.id.app_bar_fav -> toast("Fav menu item is clicked!") R.id.app_bar_search -> toast("Search menu item is clicked!") R.id.app_bar_settings -> toast("Settings item is clicked!") } return true }
الآن تم تكوين القائمة الموجودة في BottomAppBar ويجب أن تعمل بشكل صحيح:

التحكم بدرج التنقل في BottomAppBar
عادةً ما يتم تنفيذ ميزة التنقل في درج التنقل باستخدام NavigationView الموجود على الجانب الأيسر من التطبيق. مع BottomAppBar ، تغير سلوك درج التنقل. الآن Navigation Drawer هي نافذة مشروطة في أسفل التطبيق .

تحتاج أولاً إلى إنشاء نافذة مشروط نفسها:
fragment_bottomsheet.xml
<?xml version="1.0" encoding="utf-8"?> <androidx.constraintlayout.widget.ConstraintLayout xmlns:app="http://schemas.android.com/apk/res-auto" xmlns:tools="http://schemas.android.com/tools" xmlns:android="http://schemas.android.com/apk/res/android" android:layout_width="match_parent" android:layout_height="wrap_content"> <com.google.android.material.navigation.NavigationView android:id="@+id/navigation_view" android:layout_width="match_parent" android:layout_height="wrap_content" android:layout_gravity="bottom" android:layout_marginStart="8dp" android:layout_marginTop="8dp" android:layout_marginEnd="8dp" app:layout_constraintEnd_toEndOf="parent" app:layout_constraintStart_toStartOf="parent" app:layout_constraintTop_toTopOf="parent" app:menu="@menu/bottom_nav_drawer_menu"/> </androidx.constraintlayout.widget.ConstraintLayout>
يجب أن يكون ملف قائمة درج التنقل موجودًا في res / menu .
bottom_nav_drawer_menu.xml
<?xml version="1.0" encoding="utf-8"?> <menu xmlns:android="http://schemas.android.com/apk/res/android" xmlns:app="http://schemas.android.com/apk/res-auto"> <group android:checkableBehavior="none"> <item android:id="@+id/nav1" android:icon="@drawable/baseline_exposure_plus_1_black_24" android:title="@string/nav_item1" /> <item android:id="@+id/nav2" android:icon="@drawable/baseline_replay_10_black_24" android:title="@string/nav_item2" /> <item android:id="@+id/nav3" android:icon="@drawable/baseline_forward_10_black_24" android:title="@string/nav_item3" /> </group> </menu>
ثم تحتاج إلى إنشاء فئة تمتد إلى BottomSheetDialogFragment ، والتي ستنشئ نافذة مشروطة:
import android.os.Bundle import android.view.LayoutInflater import android.view.View import android.view.ViewGroup import com.google.android.material.bottomsheet.BottomSheetDialogFragment class BottomNavigationDrawerFragment: BottomSheetDialogFragment() { override fun onCreateView(inflater: LayoutInflater, container: ViewGroup?, savedInstanceState: Bundle?): View? { return inflater.inflate(R.layout.fragment_bottomsheet, container, false) } }
يجب إضافة أسطر التعليمات البرمجية التالية إلى طريقة onOptionsItemSelected ، والتي يتم استخدامها لمعالجة النقرات على عناصر القائمة. عند النقر فوق رمز التنقل ، سيتم إنشاء مثيل لكائن BottomNavigationDrawerFragment وعرض طريقة عرض التنقل.
android.R.id.home -> { val bottomNavDrawerFragment = BottomNavigationDrawerFragment() bottomNavDrawerFragment.show(supportFragmentManager, bottomNavDrawerFragment.tag) }
إليك رمز تخطيط MainActivity:
Activity_main.xml
<?xml version="1.0" encoding="utf-8"?> <androidx.constraintlayout.widget.ConstraintLayout xmlns:android="http://schemas.android.com/apk/res/android" xmlns:app="http://schemas.android.com/apk/res-auto" xmlns:tools="http://schemas.android.com/tools" android:layout_width="match_parent" android:layout_height="match_parent"> <TextView android:layout_width="wrap_content" android:layout_height="wrap_content" android:text="Hello World!" app:layout_constraintBottom_toBottomOf="parent" app:layout_constraintLeft_toLeftOf="parent" app:layout_constraintRight_toRightOf="parent" app:layout_constraintTop_toTopOf="parent" /> <androidx.coordinatorlayout.widget.CoordinatorLayout android:layout_width="match_parent" android:layout_height="match_parent"> <com.google.android.material.bottomappbar.BottomAppBar android:id="@+id/bottom_app_bar" android:layout_width="match_parent" android:layout_height="wrap_content" android:layout_gravity="bottom" app:backgroundTint="@color/colorPrimary" app:fabAlignmentMode="center" app:fabAttached="true" app:navigationIcon="@drawable/baseline_menu_white_24"/> <com.google.android.material.floatingactionbutton.FloatingActionButton android:id="@+id/fab" android:layout_width="wrap_content" android:layout_height="wrap_content" android:src="@drawable/baseline_add_white_24" app:layout_anchor="@id/bottom_app_bar" /> </androidx.coordinatorlayout.widget.CoordinatorLayout> </androidx.constraintlayout.widget.ConstraintLayout>
وللنقر على العناصر الموجودة في نافذة درج التنقل ، يمكنك استخدام الكود التالي داخل فئة BottomNavigationDrawerFragment:
navigation_view.setNavigationItemSelectedListener { menuItem -> // Bottom Navigation Drawer menu item clicks when (menuItem!!.itemId) { R.id.nav1 -> context!!.toast(getString(R.string.nav1_clicked)) R.id.nav2 -> context!!.toast(getString(R.string.nav2_clicked)) R.id.nav3 -> context!!.toast(getString(R.string.nav3_clicked)) } true }

يمكن العثور على شفرة المصدر الكاملة لهذه المقالة على Github . للمهتمين بهذا الموضوع ، اقرأ الجزء السابق من هذه المقالة والجزء التالي .
← تنفيذ BottomAppBar. الجزء 1: مكونات المواد لنظام Android
→ تنفيذ BottomAppBar. الجزء 3: سلوك Android