FFmpeg البدء باستخدام Visual Studio

تحية! بادئ ذي بدء ، أقوم بتطوير برنامج لتحديد أرقام السيارات على معالج رخيص الطاقة المنخفضة مثل Intel ATOM Z8350. لقد حصلنا على نتائج جيدة في تحديد الأرقام الروسية في صورة ثابتة (تصل إلى 97٪) بأداء جيد دون استخدام الشبكات العصبية. الشيء الوحيد المتبقي صغير - العمل باستخدام كاميرا IP صورة 1.

صورة
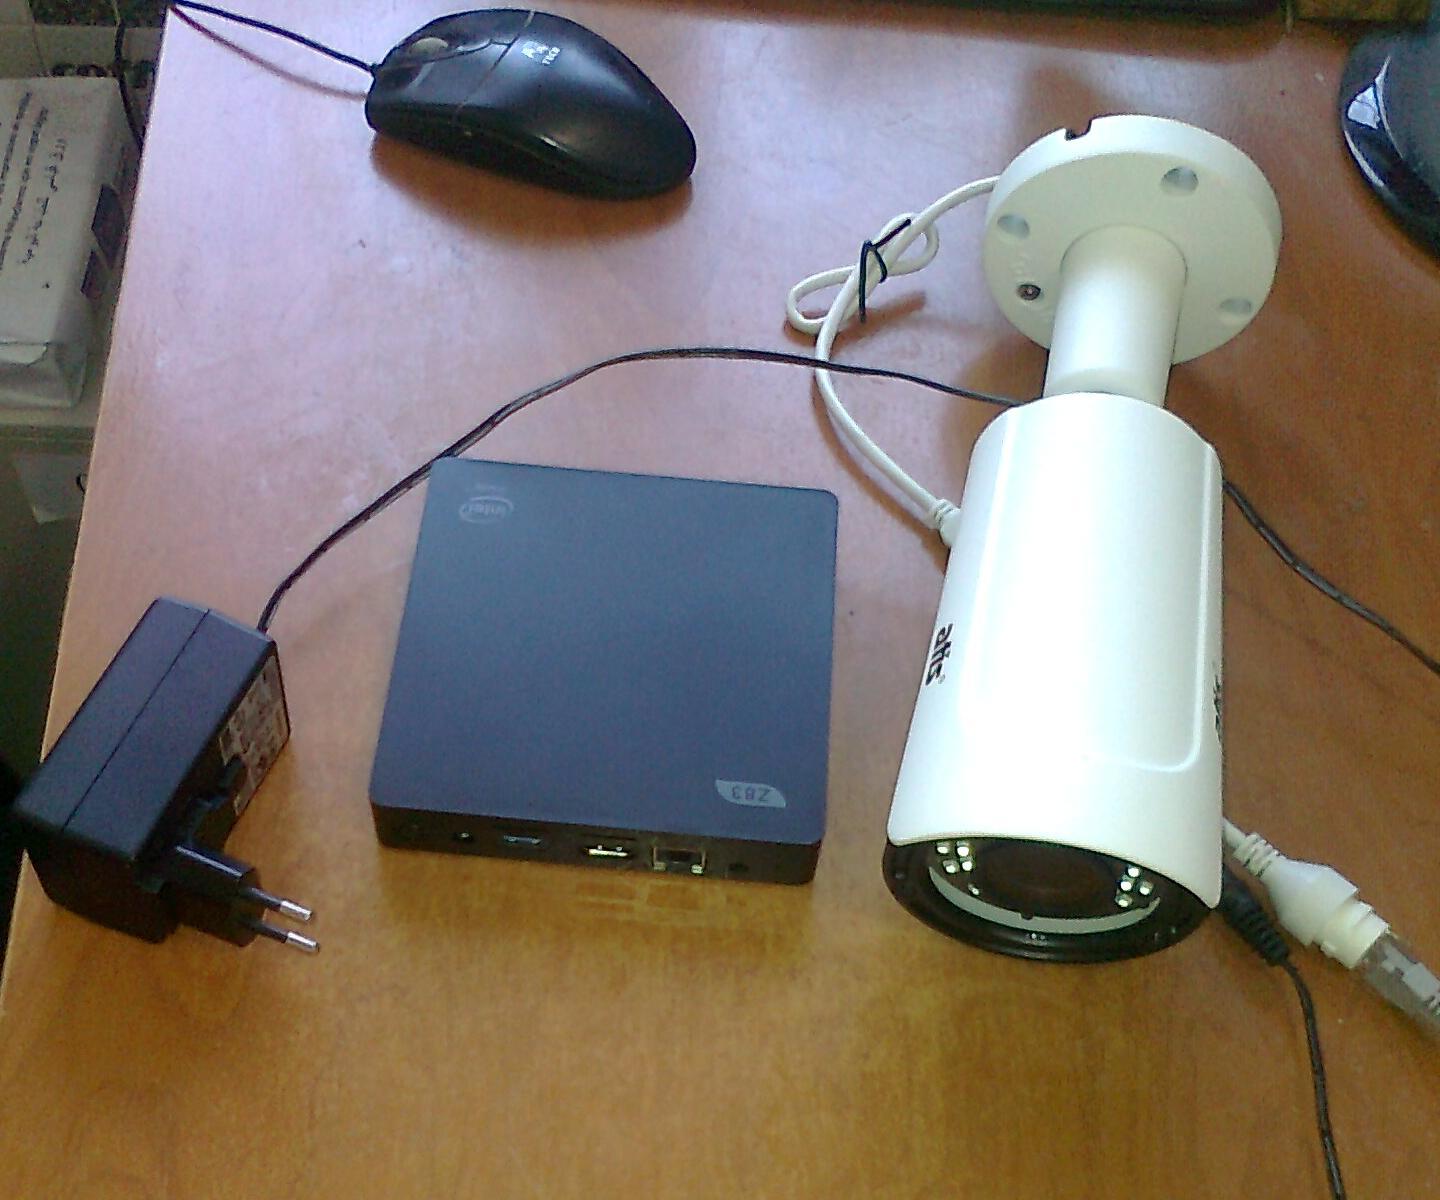
الشكل 1 الشكل 1. إنتل ATOM Z83II الكمبيوتر وكاميرا IP ATIS

FFmpeg هي مكتبة لإنشاء تطبيقات الفيديو أو حتى الأدوات المساعدة للأغراض العامة التي تأخذ كل عمل شاق من معالجة الفيديو ، والقيام بكل من فك التشفير والترميز و multiplexing و demultiplexing لك.

المهمة : كاميرا IP عالية الدقة الكاملة في معيار h.264 تنقل تيار RTSP. حجم الإطار الذي تم فك ضغطه هو 1920 × 1080 بكسل ، والتردد هو 25 إطارًا في الثانية. من الضروري تلقي إطارات فك الشفرة في ذاكرة الوصول العشوائي وحفظ كل 25 لقطة على القرص.

في هذا المثال ، سنقوم بفك تشفير الإطارات برمجياً. الهدف هو معرفة كيفية استخدام FFmpeg ومقارنة النتائج التي تم الحصول عليها باستخدام فك تشفير الأجهزة. سترى FFmpeg - إنه سهل!

تثبيت FFmpeg : يقترح العديد من الأشخاص إنشاء FFmpeg للأجهزة الخاصة بهم. أقترح استخدام تصميمات zeranoe ، مما يبسط المهمة إلى حد كبير. من المهم جدًا أن تشتمل مجموعات zeranoe على دعم DXVA2 ، والذي سيكون مفيدًا لنا فيما بعد لفك تشفير الأجهزة.

نذهب إلى الموقع https://ffmpeg.zeranoe.com/builds/ ونقوم بتنزيل أرشيفين مشتركين ومطورين قبل اختيار 32 أو 64 بت. الأرشيف ديف مخازن المكتبات (. ليب) وتشمل. يحتوي الأرشيف المشترك على .dlls الضرورية التي ستحتاج إلى إعادة كتابتها في مجلد مع البرنامج المستقبلي.

لذلك ، قم بإنشاء مجلد ffmpeg على محرك الأقراص C: \. سنقوم بإعادة كتابة الملفات من أرشيف ديف في ذلك.

توصيل FFmpeg بـ Visual Studio 2017: إنشاء مشروع جديد. انتقل إلى خصائص المشروع (مشروع - خصائص). بعد ذلك ، C / C ++ وحدد "دلائل إضافية للملفات المضمنة." عيّن القيمة: "C: \ ffmpeg \ dev \ include؛". بعد ذلك ، انتقل إلى دلائل مكتبة Linker-Extra وقم بتعيين القيمة على "C: \ ffmpeg \ dev \ lib؛". هذا كل شيء. يرتبط FFmpeg بمشروعنا.

المشروع الأول مع FFmpeg: برنامج فك تشفير الفيديو وتسجيل كل 25 لقطة على القرص. يرد مبدأ العمل مع ملف فيديو في FFmpeg في الرسم التخطيطي للشكل 2

صورة
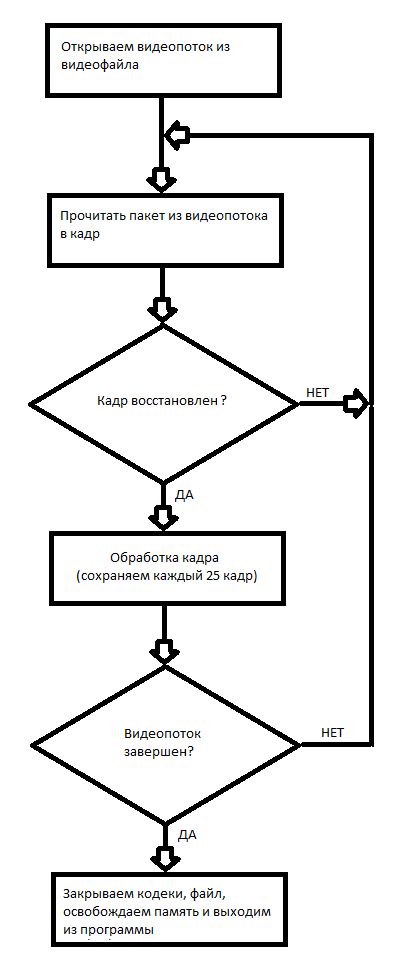
الشكل 2. مخطط كتلة العمل مع ملف الفيديو.

هنا هو رمز مشروع C ++
// 21  2019 //  ,  ,   http://dranger.com/ffmpeg/tutorial01.html // #include "pch.h" extern "C" { #include <libavcodec/avcodec.h> #include <libavformat/avformat.h> #include <libswscale/swscale.h> #include <libavformat/avio.h> #include <libavutil/pixdesc.h> #include <libavutil/hwcontext.h> #include <libavutil/opt.h> #include <libavutil/avassert.h> #include <libavutil/imgutils.h> #include <libavutil/motion_vector.h> #include <libavutil/frame.h> } <cut /> #include <stdio.h> #include <stdlib.h> #include <string.h> #pragma comment(lib, "avcodec.lib") #pragma comment(lib, "avformat.lib") #pragma comment(lib, "swscale.lib") #pragma comment(lib, "avdevice.lib") #pragma comment(lib, "avutil.lib") #pragma comment(lib, "avfilter.lib") #pragma comment(lib, "postproc.lib") #pragma comment(lib, "swresample.lib") #define _CRT_SECURE_NO_WARNINGS #pragma warning(disable : 4996) // compatibility with newer API #if LIBAVCODEC_VERSION_INT < AV_VERSION_INT(55,28,1) #define av_frame_alloc avcodec_alloc_frame #define av_frame_free avcodec_free_frame #endif void SaveFrame(AVFrame *pFrame, int width, int height, int iFrame) { FILE *pFile; char szFilename[32]; int y; //        sprintf(szFilename, "frame%d.ppm", iFrame); pFile = fopen(szFilename, "wb"); if (pFile == NULL) return; //    fprintf(pFile, "P6\n%d %d\n255\n", width, height); //    for (y = 0; y < height; y++) fwrite(pFrame->data[0] + y * pFrame->linesize[0], 1, width * 3, pFile); //   fclose(pFile); } <cut /> int main(int argc, char *argv[]) { AVFormatContext *pFormatCtx = NULL; int i, videoStream; AVCodecContext *pCodecCtxOrig = NULL; AVCodecContext *pCodecCtx = NULL; AVCodec *pCodec = NULL; AVFrame *pFrame = NULL; AVFrame *pFrameRGB = NULL; AVPacket packet; int frameFinished; int numBytes; uint8_t *buffer = NULL; struct SwsContext *sws_ctx = NULL; if (argc < 2) { printf("Please provide a movie file\n"); return -1; } //      av_register_all(); //     if (avformat_open_input(&pFormatCtx, argv[1], NULL, NULL) != 0) return -1; //     //      if (avformat_find_stream_info(pFormatCtx, NULL) < 0) return -1; //     : , ,    av_dump_format(pFormatCtx, 0, argv[1], 0); //    videoStream = -1; for (i = 0; i < pFormatCtx->nb_streams; i++) if (pFormatCtx->streams[i]->codec->codec_type == AVMEDIA_TYPE_VIDEO) { videoStream = i; break; } if (videoStream == -1) return -1; //   <cut /> //      pCodecCtxOrig = pFormatCtx->streams[videoStream]->codec; //      pCodec = avcodec_find_decoder(pCodecCtxOrig->codec_id); if (pCodec == NULL) { fprintf(stderr, "Unsupported codec!\n"); return -1; //    } //   pCodecCtx = avcodec_alloc_context3(pCodec); if (avcodec_copy_context(pCodecCtx, pCodecCtxOrig) != 0) { fprintf(stderr, "Couldn't copy codec context"); return -1; //   } //   if (avcodec_open2(pCodecCtx, pCodec, NULL) < 0) return -1; //     //     pFrame = av_frame_alloc(); //      RGB pFrameRGB = av_frame_alloc(); if (pFrameRGB == NULL) return -1; //        numBytes = avpicture_get_size(AV_PIX_FMT_RGB24, pCodecCtx->width, pCodecCtx->height); buffer = (uint8_t *)av_malloc(numBytes * sizeof(uint8_t)); //      . avpicture_fill((AVPicture *)pFrameRGB, buffer, AV_PIX_FMT_RGB24, pCodecCtx->width, pCodecCtx->height); //  SWS context       RGB sws_ctx = sws_getContext(pCodecCtx->width, pCodecCtx->height, pCodecCtx->pix_fmt, pCodecCtx->width, pCodecCtx->height, AV_PIX_FMT_RGB24, SWS_BILINEAR, NULL, NULL, NULL ); <cut /> //     25    i = 0; while (av_read_frame(pFormatCtx, &packet) >= 0) { //    ? if (packet.stream_index == videoStream) { //    avcodec_decode_video2(pCodecCtx, pFrame, &frameFinished, &packet); //    ? if (frameFinished) { //    RGB sws_scale(sws_ctx, (uint8_t const * const *)pFrame->data, pFrame->linesize, 0, pCodecCtx->height, pFrameRGB->data, pFrameRGB->linesize); //     if (++i % 25 == 0) SaveFrame(pFrameRGB, pCodecCtx->width, pCodecCtx->height,i); } } //   av_free_packet(&packet); } //      av_free(buffer); av_frame_free(&pFrameRGB); av_frame_free(&pFrame); avcodec_close(pCodecCtx); avcodec_close(pCodecCtxOrig); avformat_close_input(&pFormatCtx); return 0; } 


لأن تحتوي كاميرا IP الخاصة بي على 192.168.1.168 ، ثم مكالمة البرنامج:

 decode.exe rtsp://192.168.1.168 

أيضًا ، يمكن لهذا المثال فك تشفير ملفات الفيديو ، ويكفي الإشارة إلى موقعه.

وهكذا ، في هذا المثال ، تعلمنا فك تشفير ملفات الفيديو برمجياً وحفظ الإطارات المستلمة على القرص. يتم حفظ الإطارات بتنسيق .ppm. يمكنك استخدام IrfanView 64 أو GIMP على Windows لفتح هذه الملفات.

الخلاصة: يستغرق فك تشفير البرامج لتيار RTSP Full HD H.264 حتى مركزين من Intel ATOM Z8350 ؛ بالإضافة إلى ذلك ، يحدث فقدان الحزمة بشكل دوري ، ويرجع ذلك إلى تشفير جزء من الإطارات بشكل غير صحيح. هذه الطريقة أكثر قابلية للتطبيق لفك تشفير ملفات الفيديو المسجلة ، نظرًا لعدم الحاجة إلى التشغيل في الوقت الفعلي.

في المقالة التالية ، سأخبرك بكيفية فك شفرة دفق RTSP في الأجهزة.

أرشفة مع المشروع

برنامج العمل

روابط لمواد على FFmpeg:


1. البرنامج التعليمي حول العمل مع FFmpeg ، عفا عليه الزمن قليلاً.
2. معلومات مفيدة مختلفة على FFmpeg.
3. معلومات عن استخدام المكتبات المختلفة التي تقدمها FFmpeg.

Source: https://habr.com/ru/post/ar449198/


All Articles