Erstellen eines einfachen GraphQL-API-Servers auf Express und NodeJS

Ich schlage vor, eine kostenlose Übersetzung eines kurzen Artikels über die praktische Anwendung von GraphQL zu lesen. Das Original ist hier erhältlich ( En ).

Ein paar Worte zu GraphQL


GraphQL ist eine API-Abfragesprache, die einen deklarativen Ansatz zum Abrufen von Daten bietet. Kunden können nur die erforderlichen Daten von einem Webserver anfordern und nicht mehr. GraphQL wurde 2012 von Facebook entwickelt und wird immer noch unterstützt. Es wurde von vielen anderen großen und nicht so großen Unternehmen verwendet. Unter anderem Yelp, Shopify und Github.

Bei Verwendung von REST-APIs werden Anforderungen normalerweise an mehrere Adressen gesendet, um alle erforderlichen Daten in der Anwendung abzurufen. Mit der GraphQL-API können Sie die gesamte Anfrage an die Adresse senden und genau angeben, welche Daten Sie mit dieser Anfrage erhalten möchten. Daher ist GraphQL übrigens großartig, wenn es in einer langsamen mobilen Verbindung verwendet wird.

API-Versionen können für Entwicklungsteams Kopfschmerzen bereiten. Mit GraphQL können Sie sich darüber keine Sorgen machen. Mit GraphQL können Sie neue Felder und Typen (dies wird später erläutert) zu Ihrer GraphQL-API hinzufügen, ohne vorhandene Abfragen zu beeinflussen. Alte und nicht verwendete Felder können vor API-Clients ausgeblendet werden. Mit einer einzigen, sich weiterentwickelnden Version bietet die GraphQL-API Ihrer Anwendung ständigen Zugriff auf neue API-Implementierungen und bietet eine saubere und einfach zu wartende Codebasis.

Voraussetzung


Stellen Sie vor dem Start sicher, dass Node Version 6 und älter installiert ist. Sie können die Version mit dem folgenden Befehl überprüfen:

node -v 

Wenn Sie Node nicht installiert haben, rufen Sie die URL https://nodejs.org/ auf und befolgen Sie die Installationsanweisungen.

Anpassen von GraphQL und Express


Eine einfache Möglichkeit, einen Graph API-Server zu erstellen, ist die Verwendung von Express, einem beliebten Framework für Node.js. Installieren Sie Express mit npm:

 npm init npm install express --save 

Dann installieren Sie `graphql` und` express-graphql`:

 npm install graphql express-graphql --save 

Die anfängliche Struktur des Ordners lautet also wie folgt:

|---- node_modules
|---- package.json

Schnellstart in der GraphQL-API


In diesem kleinen Abschnitt werden wir versuchen, schnell eine einfache GraphQL-API zu erstellen. Dies ist wichtig für die weitere Erzählung, damit Ihnen klar wird, was genau wir tun und wie die mit GraphQL erstellte API aussieht. Wenn einige Punkte schwierig und unverständlich erscheinen, machen Sie sich keine Sorgen, wir werden darauf zurückkommen.

Jetzt verwenden wir das Objekt "buildSchema" aus "graphql", um das Schema ("Schema") zu erstellen. Erstellen Sie eine example.js-Datei in unserem Ordner.

 const express = require('express'); const { buildSchema } = require('graphql'); const graphqlHTTP = require('express-graphql'); let port = 3000; /*         GraphQL */ let schema = buildSchema(` type Query { postTitle: String, blogTitle: String } `); /* root      endpoint'a */ let root = { postTitle: () => { return 'Build a Simple GraphQL Server With Express and NodeJS'; }, blogTitle: () => { return 'scotch.io'; } }; const app = express(); app.use('/', graphqlHTTP({ schema: schema, rootValue: root, graphiql: true //  true,   GraphiQL })); // ( IDE       endpoint'), //  endpoint' GraphQL   app.listen(port); console.log('GraphQL API server running at localhost: ' + port); 

Jetzt können Sie `example.js` im Terminal ausführen:

 node example.js 

Jetzt können Sie auf localhost: 3000 GraphiQL entdecken. Damit können Sie Ihre API in einem Browser testen. Es unterstützt die automatische Vervollständigung und trifft Annahmen für Sie basierend auf den in Ihrem Schema verfügbaren Typen und Feldern.

Bild

Fordern wir nun unser Schema für "blogTitle" an:

Bild

So einfach können Sie die GraphQL-API anfordern.

Einführung


Jetzt verstehen Sie, wie GraphQL funktioniert, und wir können das Thema tiefer beginnen.
Beginnen wir mit der Erstellung eines GraphQL-Servers auf Basis von Express. Erstellen Sie nun in unserem Ordner den Ordner "src" und erstellen und speichern Sie darin die Datei "schema.js". Diese Datei sieht folgendermaßen aus:

 // Authors  Posts     // JSON     const Authors = require('./data/authors'); const Posts = require('./data/posts'); let { //    GraphQL,      GraphQLString, GraphQLList, GraphQLObjectType, /*          */ GraphQLNonNull, //        GraphQLSchema } = require('graphql'); 

Als nächstes erstellen Sie den Ordner "data" im Ordner "src". Wir werden 2 Dateien darin platzieren: 'autoren.js' und 'posts.js'.

Der Inhalt dieser Dateien ist ziemlich groß, sodass Sie sie nicht über einen Link zu Github oder unter dem Spoiler abrufen können.

Autoren.js
 const Authors = [ { id: '8dlx7ak38fd39dv79ad', name: 'Orinami Olatunji', twitterHandle: '@orinami_' }, { id: 'jd3kd03d0w9a0l35rh74', name: 'Ojima Udale', twitterHandle: '@uncooloj' }, { id: '0hy894hf0dlkfh9oinv', name: 'Xabi Alonso', twitterHandle: '@alonso' } ]; module.exports = Authors; 


posts.js
 const Posts = [ {'id':'0176413761b289e6d64c2c14a758c1c7','author_id':'0hy894hf0dlkfh9oinv','author':'alonso', 'category':'meteor','body':'Most developers and companies use two different apps for the marketing website and for the app itself. Thus, they can update each of the apps without affecting the other. [Stripe](https://stripe.com/), [Digital Ocean](https://www.digitalocean.com/) and many other companies follow this technique. Most Meteor apps also do the same.\n\nSo, in a scenario like this, sometimes we need to show the login state of the app on the landing page too. For an example, see our Kadira home page (\u003chttps://kadira.io\u003e). If you are logged into the Kadira app (\u003chttps://ui.kadira.io\u003e), we show a button with "Open Kadira UI" on the home page, which replaces the login button.\n\n[![Login State Example on Kadira](https://cldup.com/q9nKu_OIhQ.png)
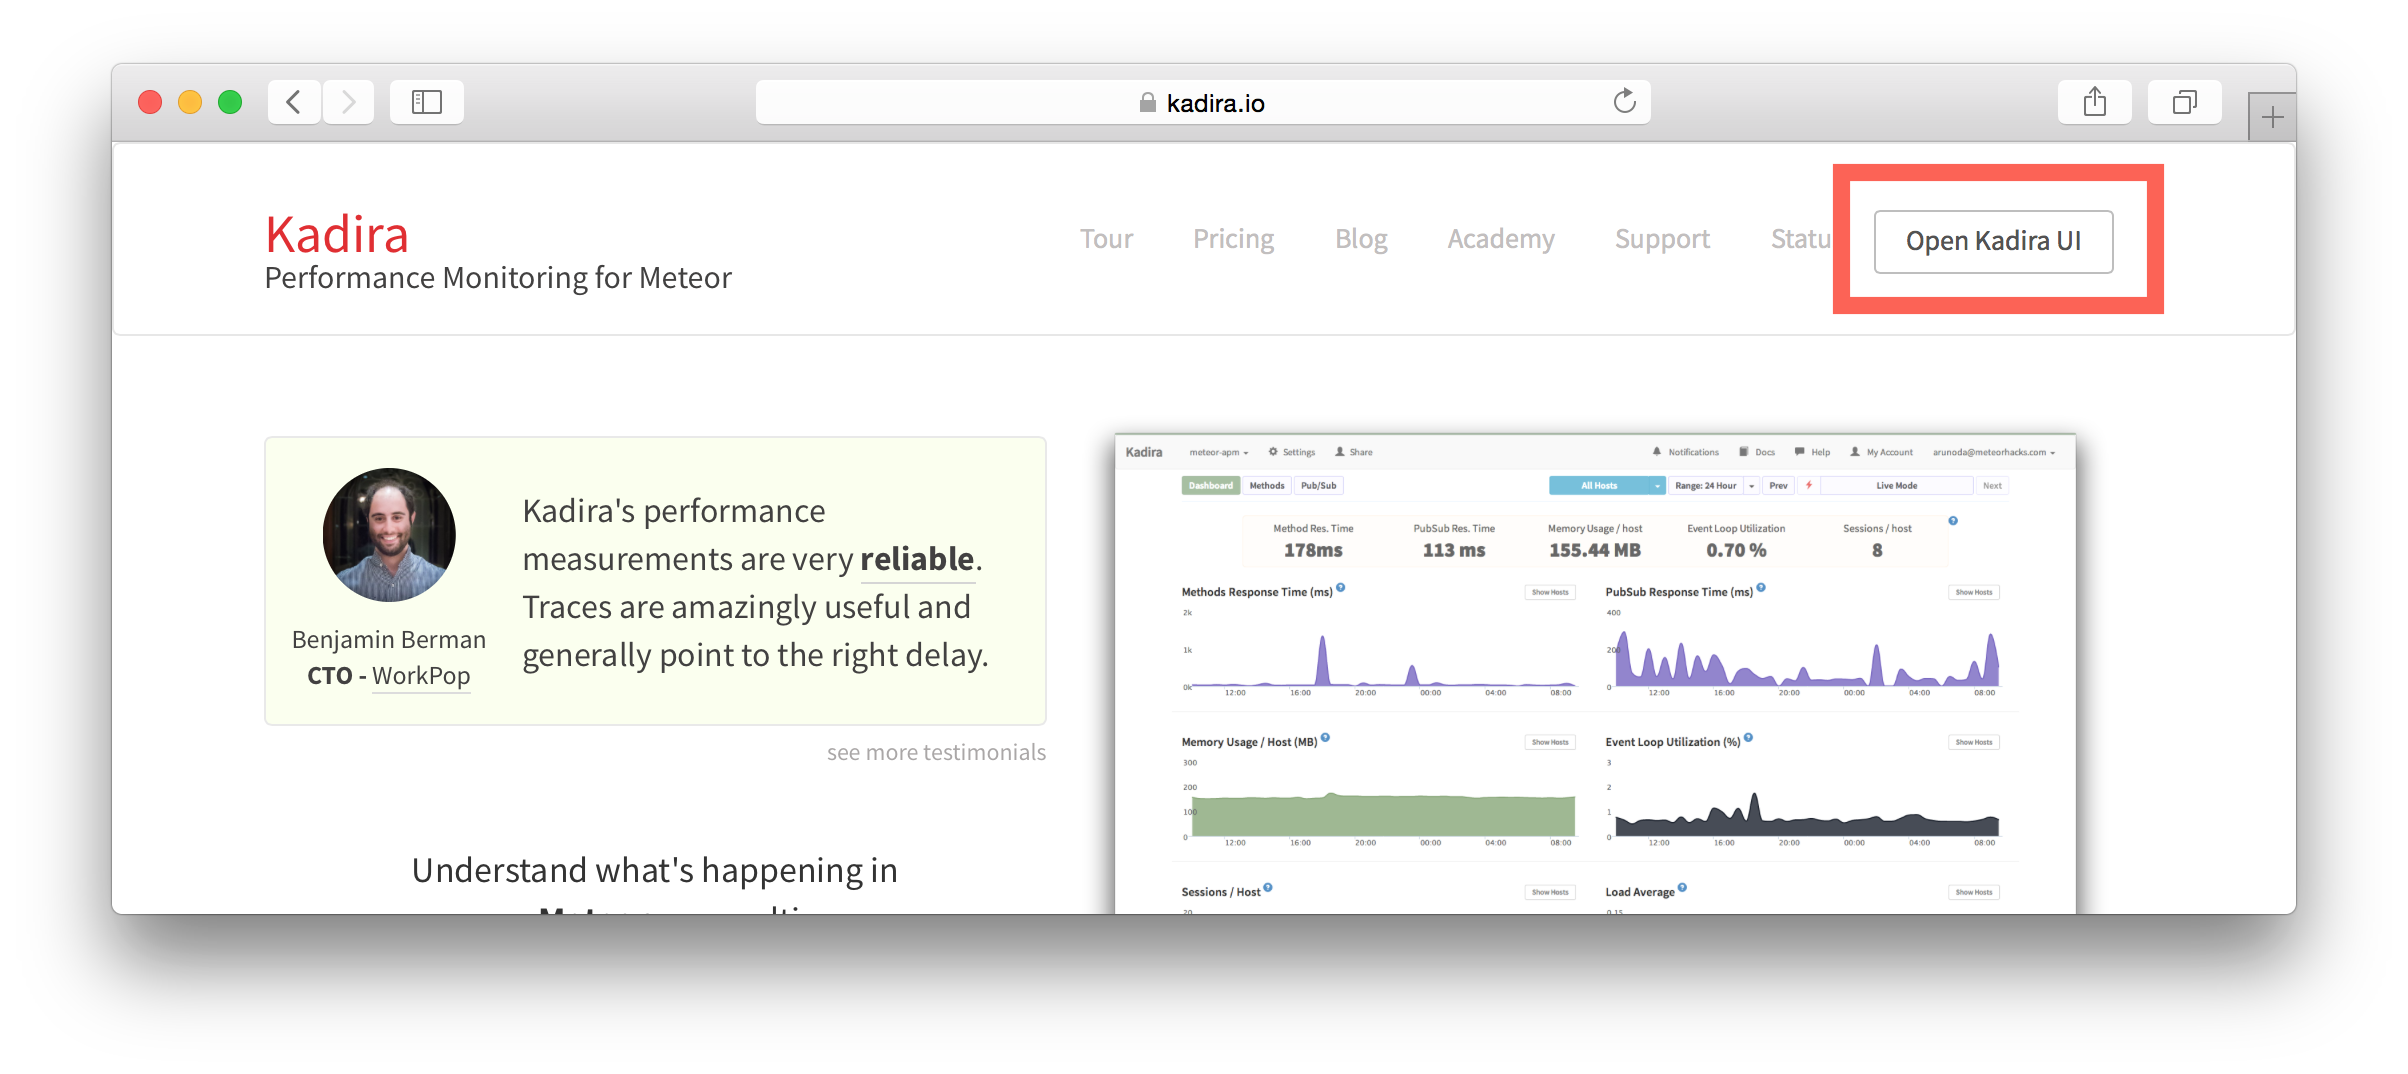
](https://kadira.io)\n\n## How Did We Do It?\n\nMeteor does not have a built-in way to share login states across multiple apps or subdomains. So, we have to find an alternative way to do so.\n\nAs a solution, we can use browser cookies to share the login state between multiple domains. That\'s exactly what we did. We wrapped this up into a Meteor package, which now you can also use.\n\nIn this guide, I\'m going to explain how to share the login state between multiple domains using the [`kadira:login-state`](https://github.com/kadirahq/meteor-login-state) package.\n\n### On Meteor App\n\nFirst of all, install the `kadira:login-state` package in your Meteor app:\n\n~~~\nmeteor add kadira:login-state\n~~~\n\nThen, you need to add a new entry in the `public` object as the `loginState` in the `settings.json` file for your app. (If you haven\'t created the settings.json yet, you need to create it first.)\n\n~~~json\n{\n "public": {\n "loginState": {\n "domain": ".your-domain-name.com",\n "cookieName": "app-login-state-cookie-name"\n }\n }\n}\n~~~\n\nThe `domain` field must be your main domain name, starting with a dot. It allows you to share the login state, which can be accessed from any of its subdomains. You can use any appropriate identifier, such as `cookieName`.\n\nNow, everything has been set up on the Meteor app.\n\n### On the Static App (the Landing Page)\n\nNow we have to show the login state of the app on the landing page. For this, we need to add support for the login state for the static app (or landing page).\n\nActually, there are three different ways to do this. Here I will show you how to do so by pasting a few lines of JavaScript code.\n\nYou need to create a JavaScript file in your js folder. I create it as `js/login_state.js`. After that, copy and paste the following code snippet into it:\n\n~~~javascript\nLoginState = {};\n\nLoginState.get = function(cookieName) {\n var loginState = getCookie(cookieName);\n if(loginState) {\n return JSON.parse(decodeURIComponent(loginState));\n } else {\n return false;\n }\n};\n\nfunction getCookie(cname) {\n var name = cname + "=";\n var ca = document.cookie.split(\';\');\n for(var i=0; i \u003c ca.length; i++) {\n var c = ca[i];\n while (c.charAt(0)==\' \') c = c.substring(1);\n if (c.indexOf(name) != -1) return c.substring(name.length,c.length);\n }\n return;\n}\n~~~\n\nInsert that file into the head section of your HTML document: \n\n`\u003cscript src="js/login-state.js"\u003e\u003c/script\u003e`\n\n\u003e If you prefer, you can also use [Browserify](https://github.com/kadirahq/meteor-login-state#installing-via-browserify) or [Bower](https://github.com/kadirahq/meteor-login-state#installing-via-bower) to load the above JS file.\n\u003e The package name for both Browserify and Bower is `meteor-login-state`.\n\nThen, use the following code to get the login state of your app. You need to provide the relevant `cookieName` to do so: \n\n~~~javascript\nvar loginState = LoginState.get("app-login-state-cookie-name");\nif(loginState) {\n // the user has loggedIn to the meteor app\n // see the loginState Object for the addtional data\n // (append your code here!)\n console.log(loginState);\n} else {\n // user has not loggedIn yet.\n // (append your code here!) \n}\n~~~\n\nThe `loginState` object will be something like this:\n\n~~~json\n{\n timestamp: 1435835751489,\n username: "username",\n userId: "meteor-user-id",\n email: "user@email.com"\n url: "https://ui.kadira.io"\n}\n~~~\n\nNow you can do whatever you need to do with the login state.\n\nGive it a try and let me know what you think.','date':{'$date':'2015-07-07T00:00:00.000Z'},'layout':'blog_post','slug':'sharing-meteor-login-state-between-sub-domains','summary':'In this blog we\'ll show you how we shared login state between our static web app and our Meteor app Kadira UI.','title':'Sharing the Meteor Login State Between Subdomains'}, {'id':'03390abb5570ce03ae524397d215713b','author_id':'0hy894hf0dlkfh9oinv','author':'alonso', 'category':'product','body':'Here is a common feedback we received from our users:\n\n\u003e Hi, I have a suggestion. It would be great if I could "dismiss" errors or mark them as resolved on my end. This way, I can keep track of which errors I have resolved.\n\nToday we are happy to announce new Kadira feature which allows you to track **status** to errors. With that, you can mark errors as "Ignored", "Fixing" or "Fixed".\n\nOnce you mark an error as "Ignored", it will be hidden. \n\nBut you can click on "Show Ignored Errors" checkbox or filter by "ignored" status to view them again.\n\n![show ignored errors](https://cldup.com/XvoJk9RGWf.gif)\n\nYou can also filter errors by status like this:\n\n![filtering errors with status](https://cldup.com/76JZ6wmbVb.gif)\n\nWe are rolling out this feature to all our paid users. [Give it a try](https://ui.kadira.io/apps/AUTO/errors/overview?metric=count).\n\n### What's next?\n\nRight now we are planning to add few more feature related this. Could you help us on [prioritizing](https://orinami.typeform.com/to/hyTwsy) them? Trust me, [it won\'t take a minute](https://orinami.typeform.com/to/hyTwsy).','date':{'$date':'2015-09-01T00:00:00.000Z'},'slug':'tracking-error-status-on-kadira','summary':'Lot of users asked us to add a feature to set status for errors in the Kadira Error Manager. Now, we\'ve that functionality.','title':'New Feature: Tracking Error Status with Kadira'}, {'id':'0be4bea0330ccb5ecf781a9f69a64bc8','author_id':'8dlx7ak38fd39dv79ad','author':'orinami', 'category':'product','body':'\u003cscript type="text/javascript" src="https://gumroad.com/js/gumroad.js"\u003e\u003c/script\u003e\n\nWe are working on the next few major feature releases for Kadira. We would like to know your preference. Pre-order the feature you would most like to see in the next major release (scheduled for August 1).\n\n## Real Client Monitoring\n\nWith Real Client Monitoring, you can learn how your app behaves in actual clients and find client-side bottlenecks. You\'ll be able to see:\n\n* Load time of your app\n* Time taken to connect to the DDP Server\n* Time taken to load the initial subscriptions\n* Time taken to render initial subscriptions\n* Latency values for your methods and publications. You can also break them down into:\n * Network latency for sending requests\n * Server queue time\n * Server processing time\n * Network latency for receiving result/data\n\nComparisons with all of these metrics can be made against countries and browsers (mobiles, desktop, etc.).\n\n\u003e This is an add-on for your app and we charge [**$25 for 50K DDP connections per month**](https://gumroad.com/l/LyDy). You can also enable this add-on even if you have a free plan.\n\u003e\n\u003e 1 DDP connection = 1 Reatime client who established a DDP connection\n\n\u003ca href="https://gumroad.com/l/LyDy" class="gumroad-button"\u003ePre Order Now!\u003c/a\u003e\n\n## CPU/Memory Profiling\n\nYou\'ll be able to create CPU and memory profiles for your app in both development and production. This is an add-on for your app.\n\nThe add-on shows:\n\n* CPU-intensive packages in your app\n* CPU-intensive functions and who created them\n* Capture and compare heap dumps and learn how to find memory leaks with them\n\n\u003e You can enable this add-on for a [**$20/month**](https://gumroad.com/l/EqEf) flat free for you app. You can also enable this add-on even if you have a free plan.\n\n\u003ca href="https://gumroad.com/l/EqEf" class="gumroad-button"\u003ePre Order Now!\u003c/a\u003e\n\n## Better Error Manager\n\nCurrently, we track errors for methods only. With Error Manager, you\'ll be able to track all the server-side and client-side errors.\n\nThe improved Error Manager will be available for any app with a [**paid plan**](https://gumroad.com/l/fRGA).\n\n\u003e Client-side errors will be routed through your app. In future, you\'ll be able to send them directly to Kadira without routing them through your app.\n\n\u003ca href="https://gumroad.com/l/fRGA" class="gumroad-button"\u003ePre Order Now!\u003c/a\u003e','date':{'$date':'2014-06-30T00:00:00.000Z'},'layout':'blog_post','slug':'what-should-kadira-build-next','summary':'We are working on the next few major feature releases for Kadira. We would like to know your preference. Pre-order the feature you would most like to see in the next major release (scheduled for August 1).','title':'What Should Kadira Build Next?'}, {'id':'19085291c89f0d04943093c4ff16b664','author_id':'8dlx7ak38fd39dv79ad','author':'orinami', 'category':'product','body':'Everybody hates errors -- whether it\'s in a Meteor app or not. Unfortunately, errors are something we can\'t avoid. So we must track and handle errors even though, we have tested our app a lot.\n\nIn the recent past, technology has been changed rapidly. But, how we track and fix errors hasn\'t changed that much specially for apps running live on production.\n\nTake a look at the following process. It\'s the process we often used to track and fix errors.\n\n* Capture errors via either logs or using some third party web service.\n* Look for error message and stack trace.\n* Try to locate the relevant place in the code.\n* Then try to fix it.\n\nI don\'t think I need to talk more about this because we all follow the same process.\n\n### Client Side Errors\n\nManaging server side errors is pretty easy compared with client side errors. For server errors all we need to focus on our servers. But tracking client side errors is not that simple.\n\nAlso, we can\'t really depend on stack traces because of the minified code. Even though we capture errors, it\'s not easy as server side errors due to the vendor specific issues and constraints. \n\n## Let\'s fix this!\n\nSo, we\'ve decided to find a cure for this and found a way.\n\nWhat we are doing is pretty simple. Along with capturing the error, we also capture the **context** and **events** related to the error. Then you can reproduce them in your development environment and identify and fix any issues quickly.\n\nCheck following error trace which has been captured with Kadira.\n\n![Server Side Meteor Error Trace on Kadira](https://i.cloudup.com/RLwjKSU464.png)\n\nIt contains:\n\n* input parameters for the error;\n* user, who\'s got this error;\n* all the DB, HTTP and other events that have occurred; and\n* the error message and the stack trace.\n\nNow it\'s super-easy to fix the error since you can clearly see what cause the error and it\'s context. We track all kinds of errors including pubsub, method, uncaught exceptions and internal Meteor errors.\n\n### What About Client Side Errors?\n\nWe do the same for client side errors as well. Look at the following error trace.\n\n![Client Side Meteor Error Trace on Kadira](https://cldup.com/-sxdlAvujw.png)\n\nIt has:\n\n* browser information;\n* user information; \n* all the Meteor method calls, subscriptions, sessions and all related events that have occurred;\n* a complete flow of the error starting from the page load event; and\n* the actual error message and stack trace.\n\nNow I think you know what to do with this information.\n\n\u003e we track events using client side zones. So, you need to add [`zones`](https://github.com/meteorhacks/zones) package into your app in addition to [`kadira`](https://github.com/meteorhacks/kadira). Otherwise, you can\'t see events.\n\n## Public Beta\n\nToday, we are happy to announce the public beta of the Kadira\'s Error Tracking solution and invite all of you to start tracking errors with Kadira.\n\nWe\'ve worked so hard on this over the last few months and a lot of people have helped us to test our error tracking solutions—thank you! \n\nSimply update the [`kadira`](https://github.com/meteorhacks/kadira) smart package and visit Errors section on the [Kadira UI](https://ui.kadira.io/).\n\n![Error Tracking with Kadira](https://cldup.com/hBQIhPgzhU.png)\n\n\u003e Error Tracking is free and unrestricted throughout public beta period.\n\nGive it a try and let us know how it goes.','date':{'$date':'2014-09-08T00:00:00.000Z'},'layout':'blog_post','slug':'awesome-error-tracking-solution-for-meteor-apps-with-kadira','summary':'Error tracking is so much important and goes side by side with performance issues. This is the public beta announcement of Kadira\'s error tracking solution.','title':'Awesome Error Tracking Solution for Meteor Apps with Kadira'}, {'id':'1afff9dfb0b97b5882c72cb60844e034','author_id':'8dlx7ak38fd39dv79ad','author':'orinami','category':'product','body':'You might have seen the [EventLoop Utilization](http://support.kadira.io/knowledgebase/articles/372876-event-loop-utilization) chart in our Dashboard. But, it was not correctly working across different hosting platforms. Actually, that value does not reflect any meaning in some situations.\n\n![CPU Usage tracking with Kadira](https://i.cloudup.com/eisfJAuiJW.gif)\n\nSo, we\'ve replaced EventLoop Utilization with [CPU Usage](http://support.kadira.io/knowledgebase/articles/378890-cpu-usage). It\'s the actual percentage of CPU spent on your app. Still, you need to be [careful](http://support.kadira.io/knowledgebase/articles/378890-cpu-usage) with analyzing CPU Usage because, some hosting providers have implemented CPU restrictions. But you can see the correct CPU Usage of your app.\n\n\u003e Please upgrade [kadira](https://atmospherejs.com/package/kadira) smart package in order to track CPU Usage. Apply following code:\n\u003e\n\u003e `mrt update`\n\n## How do we track CPU Usage?\n\nThere is no direct API to track CPU usage of your app within your app. But, we are using [usage](https://github.com/orinami/node-usage) npm module for that. In Linux and Solaris, it uses the **/proc** filesystem to read the CPU usage. So, it is very efficient.\n\nHave a good time with improving your application.','date':{'$date':'2014-06-12T00:00:00.000Z'},'layout':'blog_post','slug':'tracking-cpu-usage-with-kadira','summary':'We\'ve replaced EventLoop Utilization chart with actual CPU Usage. See why?','title':'Tracking Meteor CPU Usage with Kadira'}, {'id':'1bd16dfab1de982317d2ba4382ec8c86','author_id':'8dlx7ak38fd39dv79ad','author':'orinami','category':'meteor','body':'Today is holiday for Sri Lanka. But for me, it\'sa hackday. I started playing with React and wrote few simple apps. That\'sa nice experience.\n\nSo, I started thinking why not trying to implement SSR support. It\'s worth trying since now we\'ve all the tools we need.\n\n**Guys, It was a successful experience. Now we\'ve pure SSR support for Meteor.**\n\n### How It Works.\n\nLet\'s have a look at first.\n\n* Demo App: \u003chttp://flow-react-ssr.meteor.com/\u003e\n* Demo App Code: \u003chttps://github.com/orinami/hello-react-meteor\u003e\n\n\u003ciframe width="960" height="720" src="https://www.youtube.com/embed/Qj2eppT27BU?rel=0\u0026amp;showinfo=0" frameborder="0" allowfullscreen="1"\u003e\n\u003c/iframe\u003e\n\nBasically, you just write your Meteor app as you do normally, but using React as the frontend. You use generic Meteor pub/sub to fetch data to the client and render your pages. \n\nHere, you need to use [FlowRouter](https://atmospherejs.com/meteorhacks/flow-router-ssr) and [ReactLayout](https://github.com/orinami/hello-react-meteor/blob/master/lib/react_layout.js) to render react components. ReactLayout is a pretty simple wrapper around `React.render()` which works both on the server and the client.\n\nIn the server, there is very interesting thing is happening. FlowRouter generate an isolated environment for each route. It use existing subscriptions to fetch data and assign them to collections in that environment. So, you don\'t need to change any of your code for the SSR support. \n\nThen when ReactLayout render components, it gets the data filtered by subscriptions for that route. (You can also use component level subscriptions.) \n\nAfter that ReactLayout handover the generate HTML to FlowRouter. This is designed in a way that we can add other layout engine support as well. So, FlowRrouter still doesn\'t directly works with the layout engine.\n\n### Where we can go\n\nThis is just the base work for SSR and there\'sa lot to be done to build a production ready version. But, now everything is clear and it\'sa matter of time we build and ship it. \n\n\u003e This is the something we are going to release with FlowRouter 3.0. We are very close to release FlowRouter 2.0.\n\nI\'ll talk more about this in the upcoming **Kadira Show** and if you like to work on this, just drop me a message.','date':{'$date':'2015-07-01T00:00:00.000Z'},'layout':'blog_post','slug':'meteor-ssr-support-using-flow-router-and-react','summary':'This is an experiment orinami did to implement Server Side Renderng(SSR) using Flow Router and React.','title':'Meteor Server Side Rendering Support with FlowRouter and React'}, {'id':'285292901bb38be8f57dd2885c517826','author_id':'8dlx7ak38fd39dv79ad','author':'orinami','category':'user-story','body':'[Brent Abrahams](http://cn.linkedin.com/pub/brent-abrahams/87/372/ba1) is a mathematics teacher who has build an online curriculum management app [Standbench](http://cn.linkedin.com/pub/brent-abrahams/87/372/ba1) for his organization using Meteor. He has a [nice story](http://meteorhacks.com/meteor-in-production-a-case-study.html) with the initial stage of his applications and how he used Oplog with his application.\n\nRecently, we was able to figure out a potential issue of one of his server with the data from Kadira. This is how he talked about it.\n\n"Kadira did give me a heads-up a couple of days ago that one of my servers was in trouble, as I saw an unusual increase in the number of publications and methods being called. So I restarted the server and watched everything settle back into the normal pattern. That was nice! The real-time aspect of the Kadira admin console is just great."\n\nBrent also showed how he used Kadira with his development workflow.\n\n\u003ciframe width="640" height="480" src="//www.youtube.com/embed/MUTn6hdfV64" frameborder="0" allowfullscreen="1"\u003e\n\u003c/iframe\u003e','date':{'$date':'2014-05-27T00:00:00.000Z'},'layout':'blog_post','slug':'user-stories-brent-abrahams','summary':'Denis has been using Kadira from the initial beta release and helped us a lot on identifying issues with Kadira. This is how he is using Kadira.','title':'How Brent is using Kadira with his development workflow'}, {'id':'2f6b59fd0b182dc6e2f0051696c70d70','author_id':'8dlx7ak38fd39dv79ad','author':'orinami','category':'other','body':'This is a short guide to remind you about means, histograms and percentiles in statistics. Then, we will discuss why all these matter and when we can use each of them.\n\n## Our Data Set\n\nFirst, we need a data set so we can calculate these measurements. We will look at a collection of response times collected over a minute from a web app. Here are those values (they are in milliseconds):\n\n~~~\n255, 168, 125, 11102, 59, 120, 500, 2, 98, 25\n~~~\n\nBy just looking at the data set, it\'s hard to get a clear picture. \nIt would be impossible, if we had a larger data set. (Normally, we\'ll have larger data sets.)\n\n\u003e You can access these values in a [Google Sheet](https://docs.google.com/spreadsheets/d/1JsDB2ryWKBcSLRy-YHIjfIs-ESFZq2k3N7ggdVz5O84/edit?usp=sharing), which also has each of the measurements we are looking at in this article.\n\n## Analyzing the Data Set\n\nNow we need to analyze this data set and get some information from it. That\'s why we need to build some measurements.\n\n## Mean\n\nMean is the easiest measurement to generate. Simply add all the numbers together and divide by the number of items.\n\nFor this data set, the mean is **1245.4 milliseconds.**\n\nThat is, on average it took more than 1245 milliseconds to process a single request.\n\n\u003e The mean is a good measurement for representing a whole data set as a single value.\n\n## Histograms\n\nSometimes mean **does not** represent a data set accurately. For our data set, we got a mean of 1245 milliseconds. But, just by looking at the data set, we know a lot of requests took less than 200 milliseconds. So, the mean is not a good representation for our data set.\n\nMean has a higher value because it\'s sensitive to **outliers** like 11,102 milliseconds.\n\nSo, a histogram is the answer. It gives us a better view of the data set.\n\nHere\'s the histogram for our data set:\n\n![](https://cldup.com/CLt8N20YIH.png)\n\nIn the histogram, we group data points into equal groups. We call such a group a bin. The size of our bins (binSize) is 1000 milliseconds.\n\nIt\'s clear that we\'ve an outlier. We can get even more information if we make our bin size smaller.\n\n\u003e A histogram is a good tool for visualizing a data set. We can see what really happened.\n\n### Summarizing\n\nHistograms are always useful for visualizing a data set. But, we can\'t measure two different histograms and compare them easily. That\'s why we need to generate summary measurements from a histogram (or from the data set directly). \n\nLet\'s have a look at a few such measurements.\n\n#### Median\n\nMedian is the value in middle of the data set. We can simply get it by sorting the data set and picking the value in the middle. In our data set, it\'s **122.5 milliseconds.**\n\nWhat does the median represent? For 50% of the events, our response time was shorter than 125.5 milliseconds.\n\n\u003e So, the median gives us useful information about our data set and it\'s not sensitive to outliers.\n\n#### Percentiles\n\nTo calculate a percentile, we need to sort our data set and divide it into 100 equal groups. So, the 90th percentile is the value at beginning of the 90th group.\n\nIn our case, the 90th percentile is **1560.2 milliseconds.**\n\nThis means that more than 10% of our user base experienced a response time of 1560 milliseconds or higher. Alternatively, 90% of our users had a response time less than 1560 milliseconds.\n\n\u003e Median is equivalent to the 50th percentile. Percentiles are not sensitive to outliers.\n\n## Using All These Measurements\n\nWe can\'t say that one measurement is good or bad. Each of them has its own purpose. Let\'s discuss this. \n\n\u003e We will use the *response time* as an example metric, but our comments hold for any kind of metric. \n\n**Mean is a good measurement if we need to compare response times in different periods.**\n\nFor example, we can plot means for each minute as a graph to see how it behaves. Since it\'s sensitive to outliers, we **can** see them as well. Have a look at the following graph:\n\n![](https://cldup.com/hDcS9KuQb5.png)\n\nThere\'sa spike at the end of this chart. So, we can tell that there was something wrong then. We can now drill down into the data set at that time and find the problem.\n\n**That\'s when histograms and summary measurements come in handy.**\n\nLet\'s have a look at the histogram of our data set at that time:\n\n![](https://cldup.com/QM0ghRvB-a.png)\n\nHere, the 99th percentile is very high compared with the other percentiles, which indicates that there is an outlier.\n\nBut interestingly, our 90th and 95th percentiles are also quite high. So, that seems like a problem.\n\n\u003e Normally, we try to reduce response times. That\'s why we never look at lower percentile values like the 5th percentile. But, depending on your data set, you can pick any percentile you want.\n\nFor the response time, we usually look at the median, the 90th, 95th and 99th percentiles. It\'s up to you to decide which percentile you are going to look at. \n\nIf the response time is very critical to your app, you can try to reduce the 99th percentile. Otherwise, you could try to optimize the response time for the 90th or 95th percentile.\n\nIf you are really not worried about the response time, you could try to optimize the median.','date':{'$date':'2015-08-24T00:00:00.000Z'},'layout':'blog_post','slug':'mean-histogram-and-percentiles','summary':'A short guide to means, histograms and percentiles and how we can use them in a real situation.','title':'Understanding Mean, Histogram and Percentiles'}, {'id':'3d7a3853bf435c0f00e46e15257a94d9','author_id':'8dlx7ak38fd39dv79ad','author':'orinami','category':'product','body':'Today, I\'m very excited to be launching Kadira Debug version 2. This version comes with a lot of UI improvements and few CPU related functionalities.\n\n## Installation\n\nThis version of Kadira Debug is published as a new package: `kadira:debug`. So, you need to remove `meteorhacks:kadira-debug` if it\'s in your app:\n\n~~~\nmeteor remove meteorhacks:kadira-debug\nmeteor add kadira:debug\n~~~\n\nAfter you\'ve added `kadira:debug`, simply visit \u003chttp://debug.kadiraio.com/debug\u003e and you\'ll be able to see what\'s going on in your app.\n\nLet me show you couple of new features and enhancements that we\'ve added.\n\n### CPU Usage Monitoring\n\nThese days we do many things on the client side, which means there is a lot of CPU activities on the client side of your app. Sometimes, your app will become slower to use because of these activities.\n\nNow, we\'ve a real-time CPU usage monitor based on [EventLoop usage](https://kadira.io/platform/kadira-debug/cpu-monitoring):\n\n[![CPU Usage Monitoring](https://cldup.com/CVKvhaFDhA.png)](https://kadira.io/platform/kadira-debug/cpu-monitoring)\n\n### Improved Event Stream\n\nIn the previous version, the event stream was very hard to use if there was a lot of data in it. Now the event stream will pause if you click on it. Also, now you\'ll be able to filter the event stream for the data you actually need:\n\n\u003ca href="https://kadira.io/platform/kadira-debug/event-stream"\u003e\n \u003cimg \n src="https://cldup.com/i7bxh6m2WL.jpg" \n alt="Improved Event Stream" \n data-gif="https://cldup.com/aQC6-NFYNK.gif"/\u003e\n\u003c/a\u003e\n\n### CPU Profiling\n\nNow you can analyze both client and server CPU profiles using our CPU analyzer. Earlier it was only available inside our Kadira app and it was a bit hard to use. Now anyone can use it.\n\n[![Kadira CPU Analyzer](https://cldup.com/JNPqRdYhrv.png)](https://kadira.io/platform/kadira-debug/cpu-profiling)\n\n### Lots of UI Improvements\n\nBesides these major changes, we\'ve added many UI improvements, making Kadira Debug very productive to use. \n\nTry the new [Kadira Debug](http://debug.kadiraio.com/debug) and let us know what you think about it.','date':{'$date':'2015-07-20T00:00:00.000Z'},'layout':'blog_post','slug':'introducing-kadira-debug-v2','summary':'Today, we are introducing a new version of Kadira Debug. It comes with many UI improvements and support for CPU profiling.','title':'Introducing Kadira Debug, Version 2'} ]; module.exports = Posts; 


Typen in GraphQL


GraphQL hat das Modul 'grapql / type', mit dem der Typ bestimmt wird. Typen können aus dem Modul 'graphql / type' oder aus dem Stammmodul 'graphql' importiert werden.

Grundlegende Typen sind ID , String , Int , Float und Boolean . Wir fügen auch den Autorentyp hinzu. Fügen Sie dazu unserer Datei schema.js Folgendes hinzu:

 const AuthorType = new GraphQLObjectType({ name: "Author", description: "This represent an author", fields: () => ({ id: {type: new GraphQLNonNull(GraphQLString)}, name: {type: new GraphQLNonNull(GraphQLString)}, twitterHandle: {type: GraphQLString} }) }); 


Wie Sie sehen können, mussten wir zum Hinzufügen eines neuen Typs ein Objekt der GraphQLObjectType-Klasse erstellen und einige seiner Eigenschaften vorschreiben. Name und Beschreibung - um den Typ zu beschreiben, Felder zum Definieren von Attributen des Typs Autor: ID, Name und TwitterHandler.

Weitere Details zu Typen finden Sie unter graphql.org/graphql-js/type/.

Jetzt erstellen wir einen Typ für Beiträge:

 const PostType = new GraphQLObjectType({ name: "Post", description: "This represent a Post", fields: () => ({ id: {type: new GraphQLNonNull(GraphQLString)}, title: {type: new GraphQLNonNull(GraphQLString)}, body: {type: GraphQLString}, author: { type: AuthorType, resolve: function(post) { return _.find(Authors, a => a.id == post.author_id); } } }) }); 


Fügen Sie dies zu schema.js hinzu. Dadurch wird ein PostType-Objekt erstellt, das in der Stammabfrage verwendet wird (wörtlich die Stammabfrage. Tatsächlich der Einstiegspunkt in unsere GraphQL-API).

Wurzel Wurzel


Die Stammabfrage wird verwendet, um die Ressourcen anzuzeigen, die den Clients Ihrer Anwendung zur Verfügung stehen. Wir könnten 2 Ressourcen zur Verfügung stellen: Autoren und Beiträge.

Fügen wir unserer Datei "schema.js" Folgendes hinzu:
 const BlogQueryRootType = new GraphQLObjectType({ name: 'BlogAppSchema', description: "Blog Application Schema Query Root", fields: () => ({ authors: { type: new GraphQLList(AuthorType), description: "List of all Authors", resolve: function() { return Authors } }, posts: { type: new GraphQLList(PostType), description: "List of all Posts", resolve: function() { return Posts } } }) }); 


Hier ist die Stammabfrage als BlogQueryRootType definiert. Wenn Sie bemerken, wurde hier ein neuer Typ deklariert: new GraphQLList (). Es wird ein Wrapper um andere Typen erstellt, der eine Liste dieser Typen darstellt.

Schemadefinition


Das Diagramm definiert, wie die Daten in Ihrer Anwendung generiert werden sollen und wie die Daten miteinander verbunden werden sollen. Die Definition des Schemas wirkt sich darauf aus, wie die Daten in Ihrer Datenbank (oder Ihren Datenbanken) gespeichert werden. In der Schemadefinition bestimmen Sie auch, welche Abfragen, Mutationen und Abonnements für Ihre Datenanzeigeschnittstelle verfügbar sind.

Fügen wir unserer Datei ein Schema hinzu:
 const BlogAppSchema = new GraphQLSchema({ query: BlogQueryRootType /*       ,    .       . mutation: BlogMutationRootType */ }); 


Hier wird der Abfrage das BlogQueryRootType-Objekt zugewiesen, das als Root-API-Anforderung verwendet wird.

Implementierung der GraphQL-API


Wir brauchen das `lodash` Paket. `Lodash` ist ein Javascript-Toolkit, das saubere, leistungsstarke Methoden zum Bearbeiten von Objekten und Sammlungen bietet. Wenn Sie mit der Unterstrichbibliothek vertraut waren, ist dies großartig! Lodash wurde daraus erstellt, indem zusätzliche Funktionen hinzugefügt und einige Probleme mit der Unterstrichleistung gelöst wurden.

 npm install lodash --save 


Mit diesem Befehl wird die lodash-Bibliothek installiert und die entsprechende Abhängigkeit zur Datei package.json hinzugefügt.

Fügen Sie den folgenden Code oben in die Datei schema.js ein.

 const _ = require('lodash'); 


Schauen wir uns nun die Datei schema.js an. So sollte die Datei am Ende aussehen.

 const _ = require('lodash'); // Authors  Posts     // JSON     const Authors = require('./data/authors'); const Posts = require('./data/posts'); let { //    GraphQL,      GraphQLString, GraphQLList, GraphQLObjectType, /*          */ GraphQLNonNull, //        GraphQLSchema } = require('graphql'); const AuthorType = new GraphQLObjectType({ name: "Author", description: "This represent an author", fields: () => ({ id: { type: new GraphQLNonNull(GraphQLString)}, name: { type: new GraphQLNonNull(GraphQLString)}, twitterHandler: {type: GraphQLString} }) }); const PostType = new GraphQLObjectType({ name: "s", description: "This represent a s", fields: () => ({ id: {type: new GraphQLNonNull(GraphQLString)}, title: {type: new GraphQLNonNull(GraphQLString)}, body: {type: GraphQLString}, author: { type: AuthorType, resolve: function(post) { return _.find(Authors, a => a.id == post.author_id); } } }) }); const BlogQueryRootType = new GraphQLObjectType({ name: "BlogAppSchema", description: "Blog Application Schema Query Root", fields: () => ({ authors: { type: new GraphQLList(AuthorType), description: "List of all Authors", resolve: function() { return Authors } }, posts: { type: new GraphQLList(PostType), description: "List of all Posts", resolve: function() { return Posts } } }) }); const BlogAppSchema = new GraphQLSchema({ query: BlogQueryRootType /*       ,    .       . mutation: BlogMutationRootType */ }); module.exports = BlogAppSchema; 

Wenn Sie in PostType feststellen, haben wir ein zusätzliches Auflösungsattribut. Auflösen ist eine Funktion, mit der Daten bearbeitet, ihre Werte konvertiert usw. werden können. und bringen Sie sie zum Ende der Operation zurück.

BlogAppSchema wird mithilfe von module.exports in die Datei server.js exportiert. Erstellen Sie

nun die Datei server.js im Stammordner und fügen Sie den folgenden Code hinzu:

 const express = require('express'); const graphqlHTTP = require('express-graphql'); const schema = require('./src/schema.js'); let port = 3000; const app = express(); app.use('/', graphqlHTTP({ schema: schema, graphiql: true })); app.listen(port); console.log('GraphQL API server running at localhost:'+ port); 

Überprüfen Sie jetzt unser Ergebnis auf localhost: 3000. Öffnen Sie dazu ein Terminal und führen Sie folgende Schritte aus:

 node server.js 


Ergebnis:


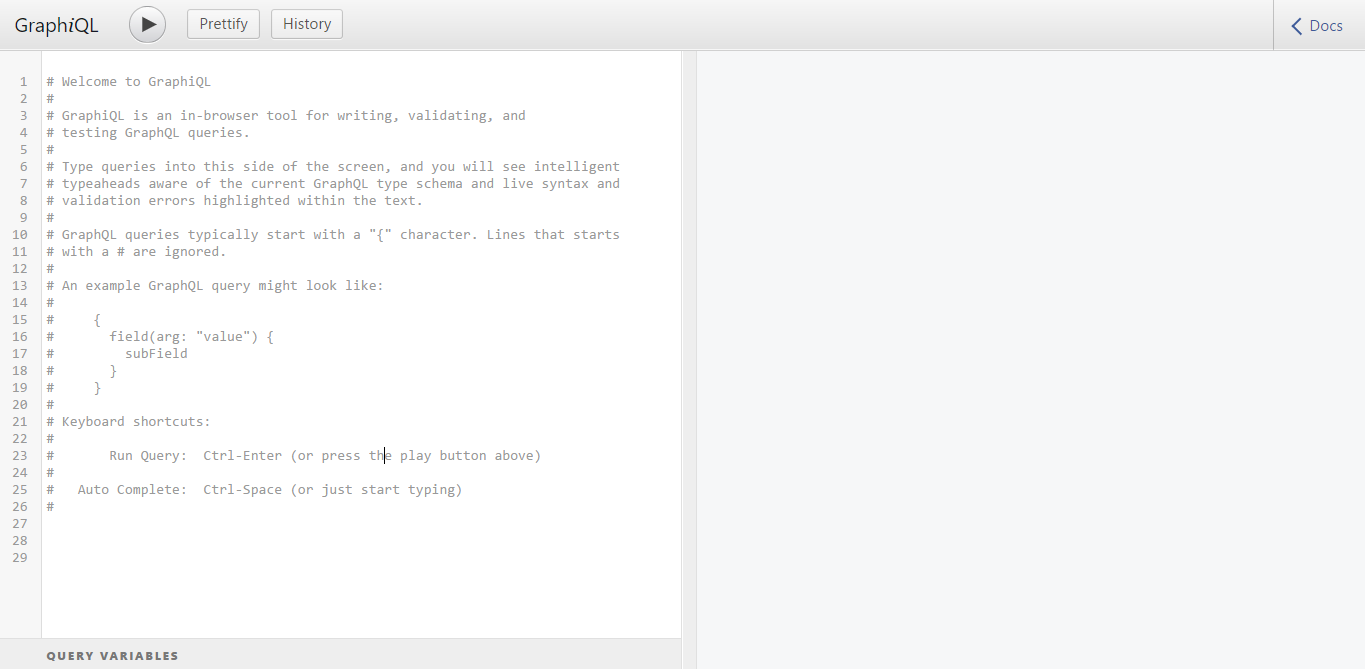
Dies ist graphiql, es hilft Ihnen, die API im Browser zu testen. Also die folgende Abfrage:

  { posts { id title author { name } } } 

Wird ein Ergebnis wie dieses geben:
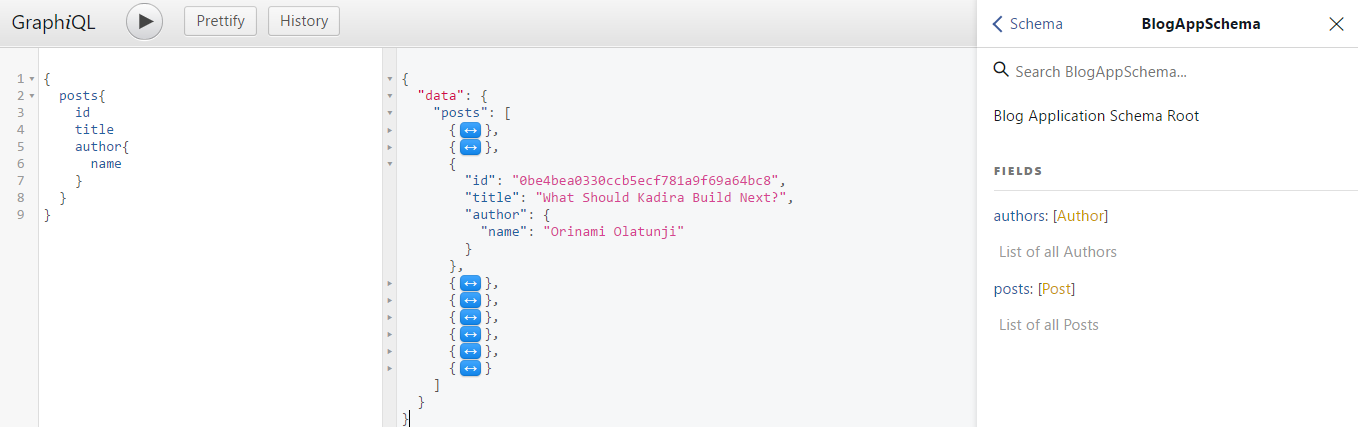


Fazit


Ich bin so froh, dass ich diese Lektion mit dir beendet habe. Jetzt wissen Sie, wie Sie eine GraphQL-API basierend auf Express und NodeJS erstellen. Ich hoffe, die Lektion war interessant und Sie haben viel daraus gelernt.

Wenn Sie mehr über GraphQL erfahren möchten, besuchen Sie graphql.org .

Source: https://habr.com/ru/post/de424199/


All Articles