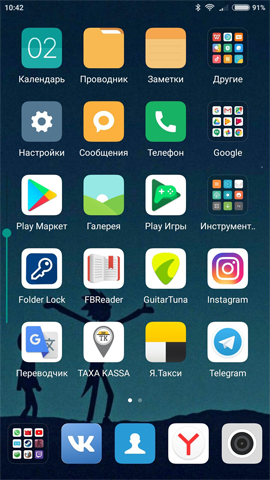
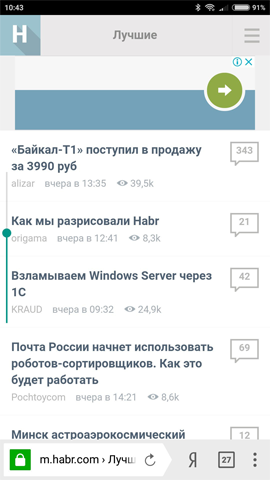
Hace mucho tiempo, mi madre tenía una aplicación en el teléfono que me permitía cambiar el brillo de la pantalla deslizando el dedo por el borde izquierdo. Mamá se acostumbró a él, luego cambió a un teléfono nuevo y allí esa aplicación ya desapareció de la tienda. En realidad, al no haber encontrado análogos, decidí escribirlo yo mismo y dárselo para su cumpleaños. Una guía paso a paso para crear y el resultado se encuentra en este artículo.
Para crear esta aplicación, necesitamos dos permisos: permiso para cambiar la configuración del sistema (ajustar directamente el brillo) y permiso para superponer sobre otras aplicaciones. Ambos permisos desde Android 6.0 no pueden obtenerse simplemente especificándolos en el manifiesto; deben solicitarse por separado del usuario.
La estructura de nuestra aplicación será la siguiente: la actividad principal, que tendrá dos botones, uno iniciará el servicio, que dibujará el SeekBar para controlar el brillo, y el segundo detendrá este servicio. Comencemos con nuestra actividad principal. Así es como se ve el archivo de marcado:
Marcado principal Actividad<?xml version="1.0" encoding="utf-8"?> <LinearLayout xmlns:android="http://schemas.android.com/apk/res/android" xmlns:app="http://schemas.android.com/apk/res-auto" android:layout_width="match_parent" android:layout_height="match_parent" android:orientation="vertical" > <Button android:id="@+id/startService" android:layout_width="match_parent" android:layout_height="wrap_content" android:layout_alignParentTop="true" android:layout_centerHorizontal="true" android:layout_marginTop="27dp" android:text=" " /> <Button android:id="@+id/stopService" android:layout_width="match_parent" android:layout_height="wrap_content" android:layout_alignLeft="@+id/startService" android:layout_below="@+id/startService" android:layout_marginTop="39dp" android:text=" " /> </LinearLayout>
Y así es como se verá la actividad en sí:
actividad principal import android.content.Intent; import android.net.Uri; import android.os.Build; import android.os.Bundle; import android.provider.Settings; import android.support.v7.app.AppCompatActivity; import android.view.View; import android.widget.Button; public class MainActivity extends AppCompatActivity { @Override protected void onCreate(Bundle savedInstanceState) { super.onCreate(savedInstanceState); setContentView(R.layout.activity_main);
Ahora creemos el servicio BrightnessChekingService, sus funciones que ya he indicado anteriormente. No lo olvide: en caso de que lo cree manualmente, debe registrarlo en el manifiesto
BrilloChekingService import android.app.Service; import android.content.Context; import android.content.Intent; import android.graphics.PixelFormat; import android.os.Build; import android.os.IBinder; import android.provider.Settings; import android.view.Gravity; import android.view.WindowManager; import android.widget.SeekBar; public class BrightnessChekingService extends Service{ private WindowManager windowManager; private WindowManager.LayoutParams params; private VerticalSeekBar seekBar; private Context context; public void onCreate () { super.onCreate();
Y finalmente, creemos una clase VerticalSeekBar que será una versión personalizada de un SeekBar normal, la diferencia será que nuestro SeekBar estará ubicado verticalmente
VerticalSeekBar import android.content.Context; import android.graphics.Canvas; import android.util.AttributeSet; import android.view.MotionEvent; import android.widget.SeekBar; public class VerticalSeekBar extends SeekBar { public VerticalSeekBar (Context context) { super(context); } public VerticalSeekBar(Context context, AttributeSet attrs, int defStyle) { super(context, attrs, defStyle); } public VerticalSeekBar(Context context, AttributeSet attrs) { super(context, attrs); } protected void onSizeChanged(int w, int h, int oldw, int oldh) { super.onSizeChanged(h, w, oldh, oldw); } public synchronized void setProgress(int progress) { super.setProgress(progress); onSizeChanged(getWidth(), getHeight(), 0, 0); } protected synchronized void onMeasure(int widthMeasureSpec, int heightMeasureSpec) { super.onMeasure(heightMeasureSpec, widthMeasureSpec); setMeasuredDimension(getMeasuredHeight(), getMeasuredWidth()); } protected void onDraw(Canvas c) { c.rotate(-90); c.translate(-getHeight(), 0); super.onDraw(c); } @Override public boolean onTouchEvent(MotionEvent event) { if (!isEnabled()) { return false; } switch (event.getAction()) { case MotionEvent.ACTION_DOWN: case MotionEvent.ACTION_MOVE: case MotionEvent.ACTION_UP: setProgress(getMax() - (int) (getMax() * event.getY() / getHeight())); onSizeChanged(getWidth(), getHeight(), 0, 0); break; case MotionEvent.ACTION_CANCEL: break; } return true; } }
Así se verá el manifiesto de la aplicación:
Manifiesto <?xml version="1.0" encoding="utf-8"?> <manifest xmlns:android="http://schemas.android.com/apk/res/android" package="com.example.bright"> <uses-permission android:name="android.permission.WRITE_SETTINGS" /> <uses-permission android:name="android.permission.SYSTEM_ALERT_WINDOW" /> <application android:allowBackup="true" android:icon="@mipmap/ic_launcher" android:label="@string/app_name" android:roundIcon="@mipmap/ic_launcher_round" android:supportsRtl="true" android:theme="@style/AppTheme"> <activity android:name=".MainActivity"> <intent-filter> <action android:name="android.intent.action.MAIN" /> <category android:name="android.intent.category.LAUNCHER" /> </intent-filter> </activity> <service android:name=".BrightnessChekingService" android:enabled="true" android:exported="true"></service> </application> </manifest>
Eso es todo, un simple, pero hecho con un regalo de cumpleaños del alma para mamá está listo. Tenemos tal cosa:


Para la demostración, eliminé la línea que establece la transparencia, ya que en este modo la tira es casi invisible. Si lo desea, puede agregar botones que regulen el tamaño de la tira, su posición en la pantalla y la transparencia.
Aquí puedes tomar el apkshnik. Si alguien lo usa, me gustaría recibir un comentario, ya que lo probé solo en el séptimo Android. Y quiero expresar mi profunda gratitud a aquellos que ya están probando la aplicación y notificando errores: me ayudas increíblemente. Gracias