Tengo dudas de que el emulador JTAG de Texas Instruments para depurar procesadores sea un dispositivo tan extendido que sería interesante para alguien resucitarlo. Sin embargo, el artículo puede ser útil para aquellos que intentan reanimar algo basado en un sistema Linux de una sola tarjeta, con recursos e información limitados. Puede considerar esto como un trabajo práctico con U-Boot.
En lugar del prólogo
Cualquiera que depure programas para sistemas embebidos sabe que necesita usar dispositivos especiales para conectarse a los procesadores. Los adaptadores llamados emuladores JTAG se utilizan para la familia de procesadores de Texas Instruments.
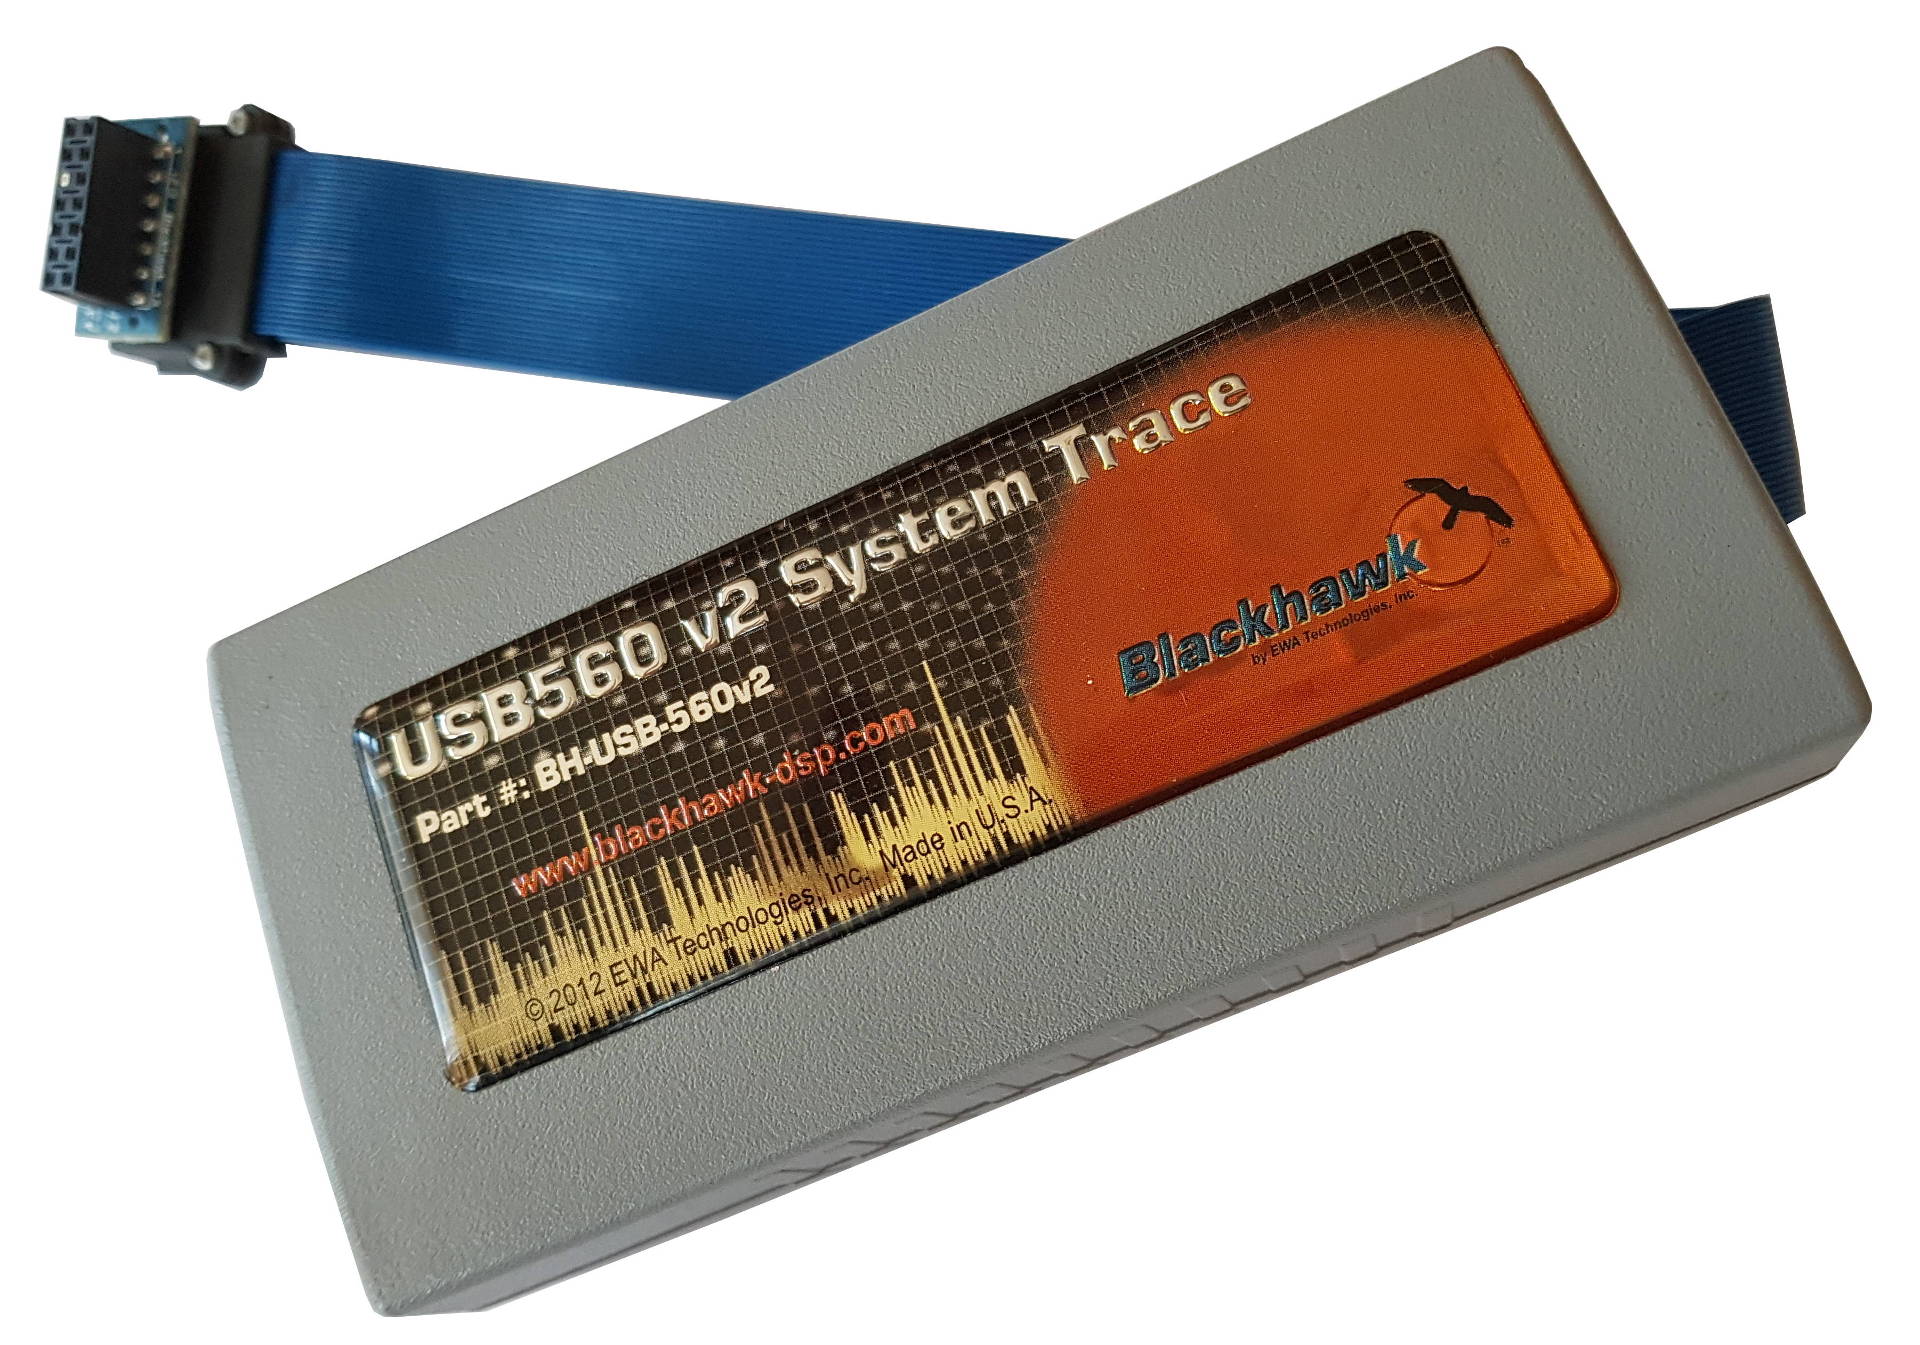
Hay muchos, y de diferentes fabricantes. En mi parque, entre otros, aparece Blackhawk USB560v2 . Debo admitir que no es la pieza de hierro más barata. Y entonces un día dejó de trabajar sin razón aparente.
Síntomas
Todo sucedió un día, el dispositivo dejó de cargarse y se detectó a través de USB. El LED parpadeó, pero no entró en el estado "listo para usar".
Este dispositivo tiene un modo documentado entretenido: después de 10-15 descargas fallidas, debería haber cambiado a un modo especial (modo seguro) que permitiría volver a actualizarlo. Sin embargo, mi dispositivo se negó a cambiar a este modo, no alcanzó la etapa de numeración USB y, por lo tanto, no hubo posibilidad de actualizar con la utilidad estándar. La correspondencia con el servicio de soporte no condujo a nada: se negaron a ayudarme con el equipo técnico, solo ofrecieron enviarles (a su propio costo) un dispositivo en los EE. UU. Para su diagnóstico y reparación.
No había más remedio que comenzar una reparación independiente.
Ubuntu está instalado en el host, algunas utilidades usadas están incluidas en la distribución, algunas se instalan a través de apt.
Inspección externa
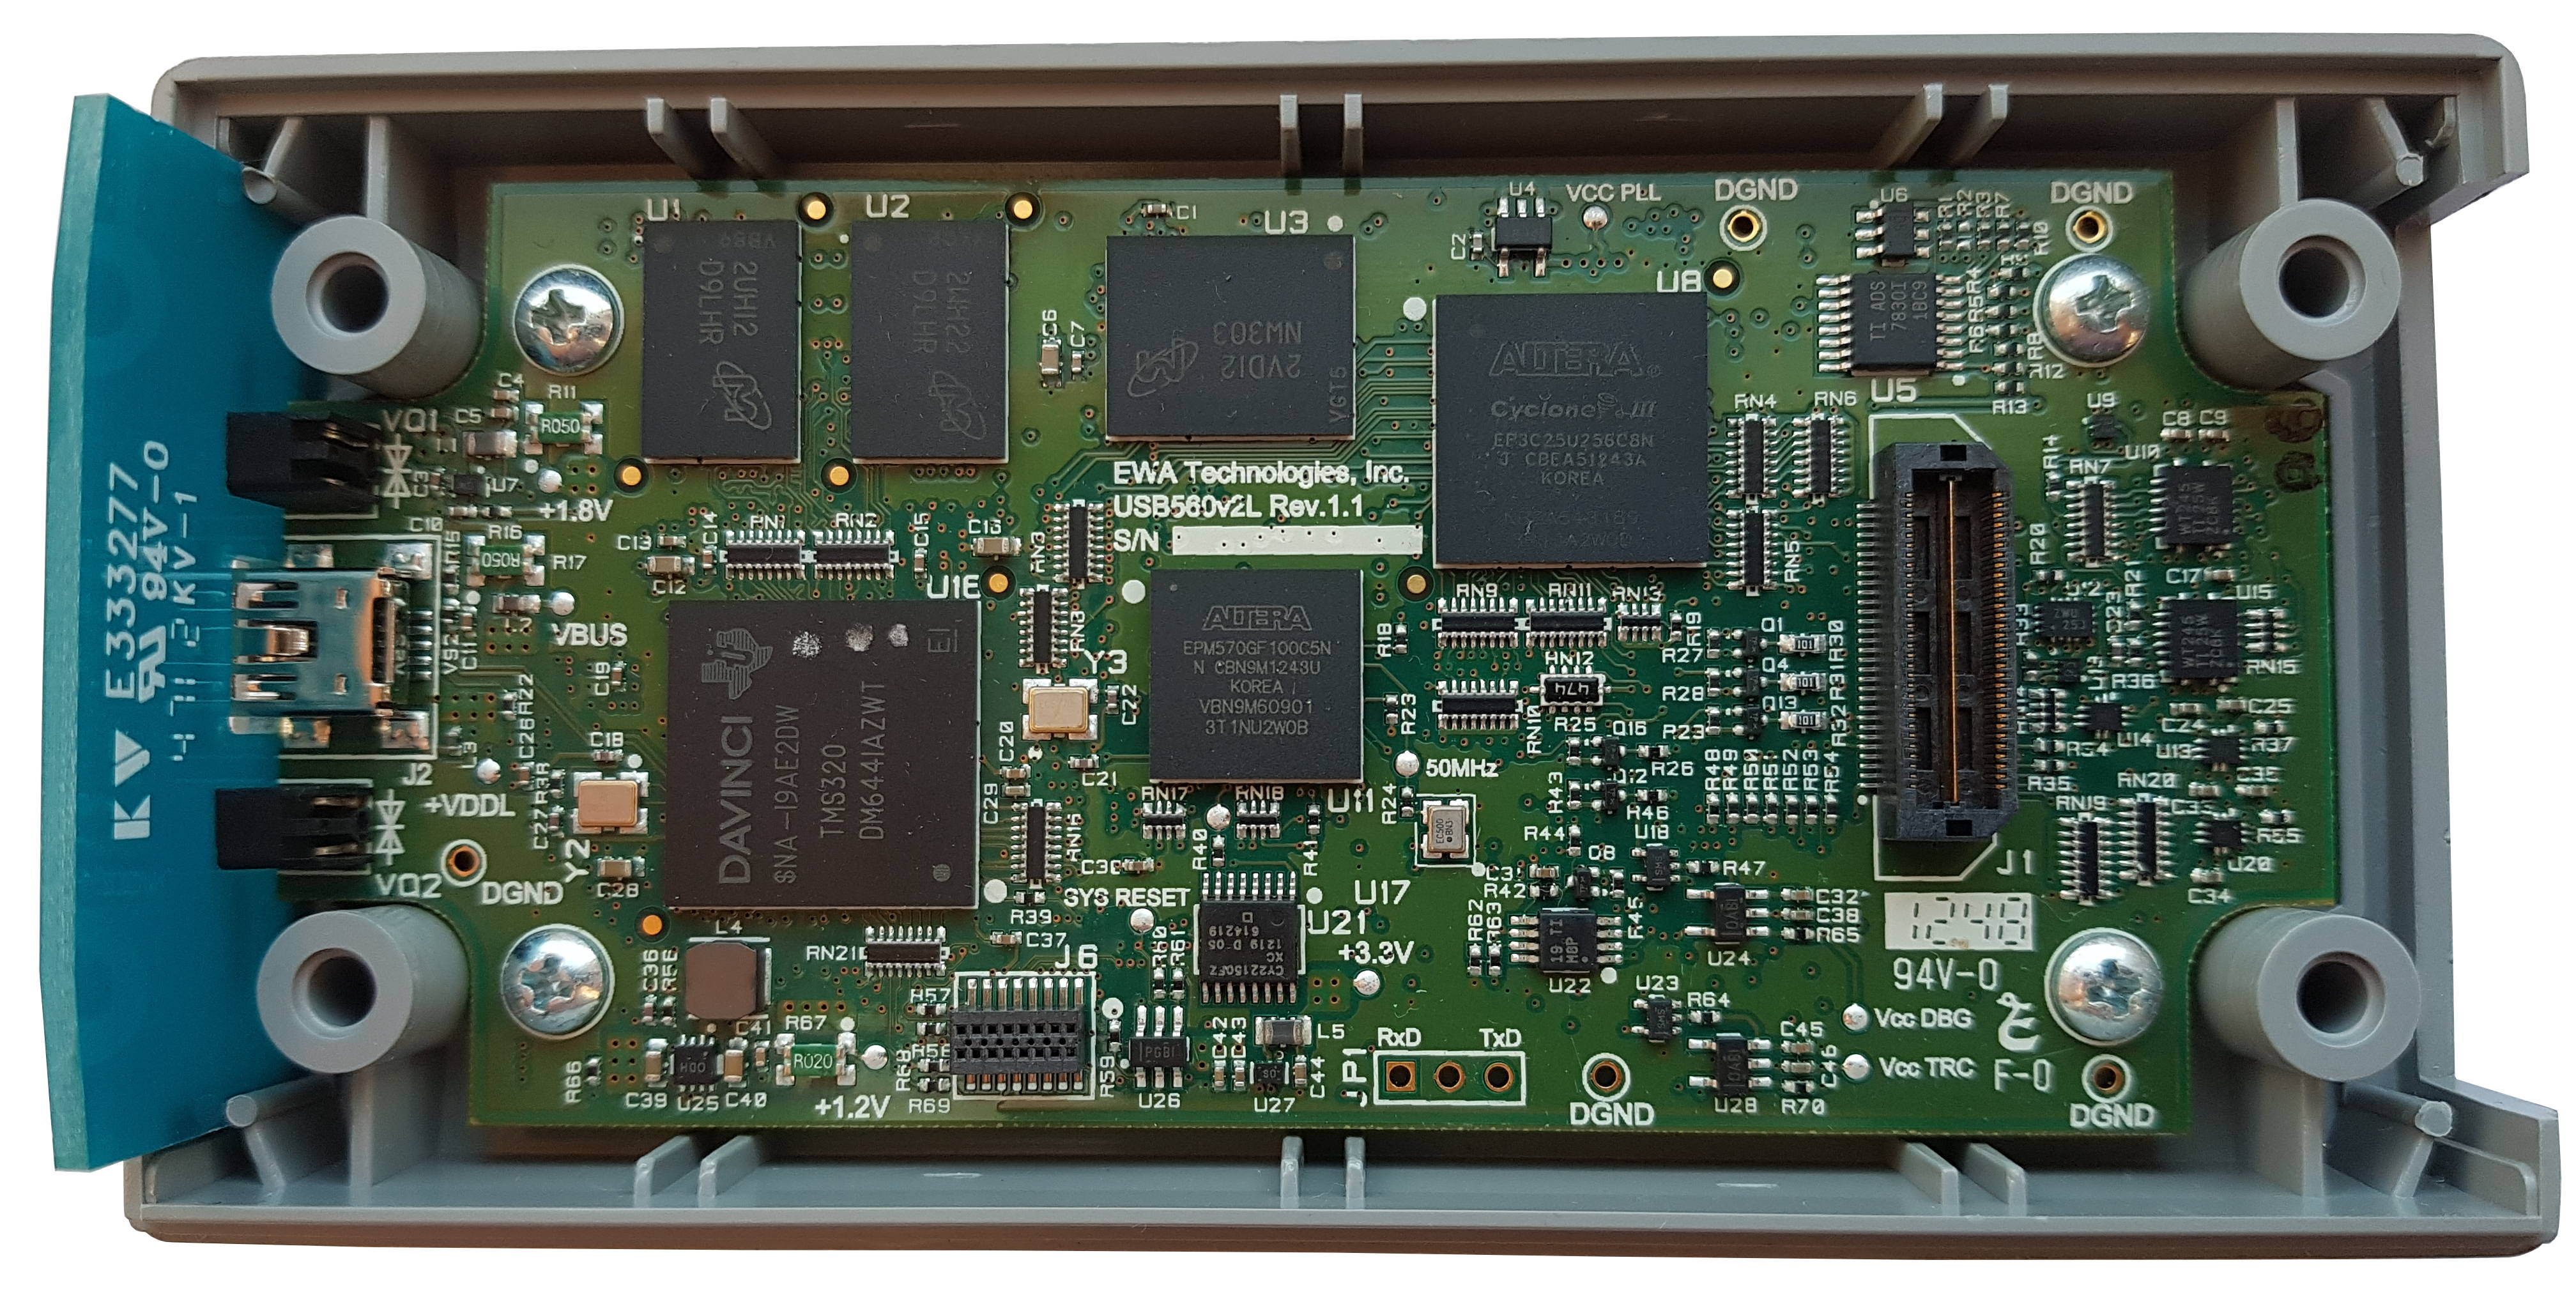
Desmontamos, miramos el tablero. En el tablero se encuentran:
Me gustó especialmente el conector UART cuidadosamente desgastado, que, además, se crió para un peine estándar de 2,54 mm, por lo que se firmaron los contactos. No he visto esto durante mucho tiempo, un máximo de cinco puntos en el tablero, e incluso con marcas insignificantes como TP1, etc.
Empecemos
Conectamos USB-UART (no se olvide del nivel, aquí es 3.3 V). Comenzamos minicom, recibimos:
TI UBL Version: 1.13, Flash type: NAND Booting PSP Boot Loader PSPBootMode = NAND Starting NAND Copy... Initializing NAND flash... Manufacturer ID = 0x0000002C Device ID = 0x000000A1 Pages Per Block = 0x00000040 Number of Blocks = 0x00000400 Bytes Per Page = 0x00000800 Valid MagicNum found at block 0x00000001, page 0x00000008 NAND Boot success. DONE U-Boot 2010.12 (May 09 2012 - 13:10:23) Cores: ARM 257 MHz, DSP 513 MHz DDR: 162 MHz I2C: ready DRAM: 256 MiB NAND: 128 MiB MMC: Bad block table found at page 65472, version 0x01 Bad block table found at page 65408, version 0x01 In: serial Out: serial Err: serial Read USBID pin : DEVICE Read boot progress legacy : 0 Read boot progress : 0 Write boot progress legacy : 0 Write boot progress : 0 Hit any key to stop autoboot: 0 Loading from NAND 128MiB 1,8V 8-bit, offset 0x60000 Image Name: Linux-2.6.10_mvl401-xds560 Image Type: ARM Linux Kernel Image (uncompressed) Data Size: 1236292 Bytes = 1.2 MiB Load Address: 80008000 Entry Point: 80008000 NAND read from offset 60000 failed -74 ** Read error
Como puede ver, la secuencia es bastante estándar: primero se carga el gestor de arranque (TI UBL), luego U-Boot, que a su vez carga el kernel de Linux.
Según el registro, es obvio que algo ha volado en el NAND Flash interno, cuando se carga el kernel de Linux, la suma de comprobación no converge. Sin embargo, puede interrumpir la descarga e ingresar a la consola U-Boot.
Echa un vistazo a los comandos disponibles:
Hay muchos de ellos U-Boot > help ? - alias for 'help' askenv - get environment variables from stdin base - print or set address offset boot - boot default, ie, run 'bootcmd' bootd - boot default, ie, run 'bootcmd' bootm - boot application image from memory cmp - memory compare coninfo - print console devices and information cp - memory copy crc32 - checksum calculation echo - echo args to console editenv - edit environment variable eeprom - EEPROM sub-system env - environment handling commands exit - exit script false - do nothing, unsuccessfully fatinfo - print information about filesystem fatload - load binary file from a dos filesystem fatls - list files in a directory (default /) go - start application at address 'addr' help - print command description/usage i2c - I2C sub-system iminfo - print header information for application image imxtract- extract a part of a multi-image itest - return true/false on integer compare loadb - load binary file over serial line (kermit mode) loads - load S-Record file over serial line loady - load binary file over serial line (ymodem mode) loop - infinite loop on address range md - memory display mdc - memory display cyclic mii - MII utility commands mm - memory modify (auto-incrementing address) mmc - MMC sub system mmcinfo - display MMC info mtest - simple RAM read/write test mw - memory write (fill) mwc - memory write cyclic nand - NAND sub-system nboot - boot from NAND device nm - memory modify (constant address) printenv- print environment variables reset - Perform RESET of the CPU run - run commands in an environment variable saveenv - save environment variables to persistent storage saves - save S-Record file over serial line setenv - set environment variables showvar - print local hushshell variables sleep - delay execution for some time source - run script from memory test - minimal test like /bin/sh true - do nothing, successfully usb - USB sub-system usbboot - boot from USB device version - print monitor version
Veamos las variables de entorno:
U-Boot > printenv autokern=0x60000 autoroot=/dev/mtdblock3 baudrate=115200 bootcmd=nboot 80700000 0 ${autokern}; run setbootargsnand; bootm setbootargsnand=setenv bootargs mem=64M console=ttyS0,${baudrate}n8 root=${autoroot} rw rootfstype=jffs2 ip=off stderr=serial stdin=serial stdout=serial ver=U-Boot 2010.12 (May 09 2012 - 13:10:23) Environment size: 338/16380 bytes
Lo primero que intenté fue desactivar la comprobación y arrancar usando los comandos U-Boot.
U-Boot > setenv verify n U-Boot > boot
Avanzado un poco más, pero no mucho:
Además el dispositivo se cuelga.
Se puede ver en las variables de entorno que la imagen del núcleo se encuentra en NAND Flash con un desplazamiento de 0x60000, cuando se carga, se copia en la dirección 0x80700000 (de acuerdo con el mapa de memoria del procesador, este es el espacio de direcciones de la DRAM externa) y se carga. El tamaño de la imagen del núcleo, como se puede ver en el registro, es 1236292 bytes. Traté de hacer esto manualmente. Suponemos que la imagen se almacena en el formato uImage, por lo que arrojamos 64 bytes en el encabezado, obtenemos 1236356 bytes = 0x12DD84:
U-Boot > nand read 80700000 60000 12dd84 U-Boot > iminfo
Luego, quería bombear el volcado de imagen a la computadora para jugar con él. No se me ocurrió nada mejor que escribir un registro de consola con la salida de memoria en la pantalla y luego convertirlo a un archivo binario.
Ejecute minicom con registro:
minicom -C orig-uImage.txt
Mostramos el contenido de la memoria en la pantalla:
U-Boot > md.b 80700000 12dd84
Salimos de minicom, editamos el registro, eliminamos las líneas adicionales y lo convertimos al binario:
xxd -r -seek -0x80700000 orig-uImage.txt orig-uImage
Quería reempaquetar la imagen para que no produjera errores de suma de verificación. Elimine los primeros 64 bytes y luego cree una nueva uImage:
mkimage -A arm -T kernel -C none -a 80008000 -e 80008000 -n "Linux-2.6.10_mvl401-xds560" -d orig-uImage patched-uImage
Rellene el archivo resultante utilizando el protocolo YModem:
U-Boot > loady
Intentamos arrancar, pero también colgamos en la etapa de desempaquetar el kernel:
U-Boot > bootm
Era de esperarse lo que uno podría esperar aquí. Pero al menos subieron el flujo de trabajo para compartir archivos, no está mal.
Todo lo que tenemos es un archivo de firmware del sitio web del fabricante , USB560v2_firmware_5.0.573.0.bin . Supuse que este archivo contiene una imagen del núcleo, pero sería razonable esperar que el archivo esté encriptado con al menos una clave simple. Por lo tanto, lo admito, me quebré y le escribí al fabricante una solicitud para que me proporcionara una uImage ininterrumpida para poder cargarla en el dispositivo y arrancar desde ella, y luego ya podría volver a actualizar el dispositivo con la utilidad estándar a través de USB. Incluso se refirió a los términos de la GPL (bajo la cual se distribuye Linux), según los cuales no estaría de más proporcionar los códigos fuente del núcleo además.
Inmediatamente después de enviar la solicitud, sin embargo, decidí intentar descomprimir el archivo de firmware, como un archivo simple. Y, he aquí, ¡resultó!
tar -xf USB560v2_firmware_5.0.573.0.bin
Después de desempacar, aparecieron dos archivos: uImage y rootfs.tar.gz . Lo que recetó el médico es una imagen del núcleo y un sistema de archivos raíz.
Queda por llenar uImage en la memoria del dispositivo usando YModem y comenzar, lo cual hice. El dispositivo arrancó con éxito en el mismo modo seguro, colgué esos. apoyo del fabricante y, pensando que voy a obtener el dispositivo la próxima vez, me fui a la cama con calma.
Segunda serie
Sin embargo, al día siguiente me esperaba una desagradable sorpresa. El dispositivo ha dejado de cargarse correctamente. Lo que simplemente no intenté, recibí un error:
INIT: PANIC: segmentation violation! sleeping for 30 seconds.
Registro de arranque de kernel largo Starting kernel ... Uncompressing Linux................................................................................. done, booting thelLinux version 2.6.10_mvl2 CPU: ARM926EJ-Sid(wb) [41069265] revision 5 (ARMv5TEJ) CPU0: D VIVT write-back cache CPU0: I cache: 16384 bytes, associativity 4, 32 byte lines, 128 sets CPU0: D cache: 8192 bytes, associativity 4, 32 byte lines, 64 sets Machine: DaVinci EVM Memory policy: ECC disabled, Data cache writeback Built 1 zonelists Kernel command line: mem=64M console=ttyS0,115200n8 root=/dev/mtdblock3 rw rootfstype=jffs2 ip=off PID hash table entries: 512 (order: 9, 8192 bytes) Console: colour dummy device 80x30 Dentry cache hash table entries: 16384 (order: 4, 65536 bytes) Inode-cache hash table entries: 8192 (order: 3, 32768 bytes) Memory: 64MB = 64MB total Memory: 62080KB available (2118K code, 448K data, 136K init) Mount-cache hash table entries: 512 (order: 0, 4096 bytes) CPU: Testing write buffer coherency: ok spawn_desched_task(00000000) desched cpu_callback 3/00000000 ksoftirqd started up. desched cpu_callback 2/00000000 desched thread 0 started up. NET: Registered protocol family 16 Registering platform device 'nor_davinci.0'. Parent at platform Registering platform device 'nand_davinci.0'. Parent at platform DaVinci I2C DEBUG: 12:46:30 Mar 29 2012 Registering platform device 'i2c'. Parent at platform musb_hdrc: version 2.2a/db-0.4.8 [cppi-dma] [peripheral] [debug=0] Registering platform device 'musb_hdrc'. Parent at platform musb_hdrc: USB Peripheral mode controller at c4800000 using DMA, IRQ 12 JFFS2 version 2.2. (NAND) (C) 2001-2003 Red Hat, Inc. yaffs Mar 29 2012 12:46:15 Installing. Registering platform device 'davincifb.0'. Parent at platform Console: switching to colour frame buffer device 90x30 Serial: 8250/16550 driver $Revision: 1.90 $ 2 ports, IRQ sharing disabled Registering platform device 'serial8250'. Parent at platform ttyS0 at MMIO 0x1c20000 (irq = 40) is a 16550A io scheduler noop registered io scheduler anticipatory registered RAMDISK driver initialized: 1 RAM disks of 32768K size 1024 blocksize Registering platform device 'ti_davinci_emac'. Parent at platform TI DaVinci EMAC: MAC address is 00:00:00:04:12:64 TI DaVinci EMAC Linux version updated 4.0 TI DaVinci EMAC: Installed 1 instances. netconsole: not configured, aborting i2c /dev entries driver elevator: using anticipatory as default io scheduler NAND device: Manufacturer ID: 0x2c, Chip ID: 0xa1 (Unknown NAND 128MiB 1,8V 8-bit) Scanning device for bad blocks Creating 8 MTD partitions on "nand_davinci.0": 0x00000000-0x00020000 : "params" 0x00020000-0x00060000 : "bootloader" 0x00060000-0x00260000 : "safekernel" 0x00260000-0x01260000 : "saferootfs" 0x01260000-0x01460000 : "kernel" 0x01460000-0x02860000 : "rootfs" 0x02860000-0x03860000 : "application" 0x03860000-0x03c60000 : "logging" nand_davinci: hardware revision: 2.1 mice: PS/2 mouse device common for all mice NET: Registered protocol family 2 IP: routing cache hash table of 512 buckets, 4Kbytes TCP: Hash tables configured (established 4096 bind 8192) NET: Registered protocol family 1 NET: Registered protocol family 17 jffs2_scan_eraseblock(): Magic bitmask 0x1985 not found at 0x0000016c: 0xffef instead Empty flash at 0x00a237fc ends at 0x00a23800 Empty flash at 0x00c3b7d8 ends at 0x00c3b800 mtd->read(0x1f320 bytes from 0xec0ce0) returned ECC error mtd->read(0x1fb8c bytes from 0xf20474) returned ECC error VFS: Mounted root (jffs2 filesystem). Freeing init memory: 136K mtd->read(0x44 bytes from 0xf39da8) returned ECC error mtd->read(0x988 bytes from 0xf39420) returned ECC error mtd->read(0x44 bytes from 0xed8d20) returned ECC error jffs2_get_inode_nodes(): Data CRC failed on node at 0x00ed8d20: Read 0xa8462b94, calculated 0xa03c90e8 mtd->read(0xa7e bytes from 0xed82a0) returned ECC error jffs2_get_inode_nodes(): Data CRC failed on node at 0x00c3ad78: Read 0x31ac7e30, calculated 0xa52ecb11 jffs2_get_inode_nodes(): Data CRC failed on node at 0x00a22d9c: Read 0x31ac7e30, calculated 0xe9f89c4c mtd->read(0x988 bytes from 0xf39420) returned ECC error mtd->read(0xa7e bytes from 0xed82a0) returned ECC error INIT: version 2.85 booting INIT: PANIC: segmentation violation! sleeping for 30 seconds. jffs2_get_inode_nodes(): Data CRC failed on node at 0x00a2ad10: Read 0x5fa921cc, calculated 0x5282f1d9 INIT: PANIC: segmentation violation! sleeping for 30 seconds.
Llegué a la conclusión de que el sistema de archivos raíz también estaba dañado. Bueno, entonces necesitas flashearlo también.
Primero, escriba uImage en NAND, para no cargarlo a través de UART cada vez (debo admitir que, a una velocidad de 115200, se carga un tiempo notable incluso con un tamaño de un megabyte). Cuando trabajamos con NAND, por si acaso, alineamos el tamaño de la imagen con el tamaño de la página NAND hacia arriba (me encontré con tal recomendación en alguna parte), y el tamaño de la página aquí es 1024 bytes = 0x800 (ver el primer registro).
U-Boot > loady ... U-Boot > nand erase 60000 12DC00 U-Boot > nand write 80700000 60000 12DC00
Desde el registro de arranque del kernel, seleccione la información útil:
Creating 8 MTD partitions on "nand_davinci.0": 0x00000000-0x00020000 : "params" 0x00020000-0x00060000 : "bootloader" 0x00060000-0x00260000 : "safekernel" 0x00260000-0x01260000 : "saferootfs" 0x01260000-0x01460000 : "kernel" 0x01460000-0x02860000 : "rootfs" 0x02860000-0x03860000 : "application" 0x03860000-0x03c60000 : "logging"
Por lo tanto, el sistema de archivos raíz debe escribirse en NAND con un desplazamiento de 0x260000. Solo queda entender en qué formato. Recordamos las variables de entorno U-Boot, en particular, esta línea:
setbootargsnand=setenv bootargs mem=64M console=ttyS0,${baudrate}n8 root=${autoroot} rw rootfstype=jffs2 ip=off
Entonces, necesitamos convertir nuestro rootfs.tar.gz , pescado del archivo de firmware, al formato JFFS2. En el aviso con el Wiki de Texas Instruments, hacemos esto ( sudo necesita sudo para tar , por lo que genera errores al ejecutar el comando mknod ):
mkdir rootfs sudo tar -xf rootfs.tar.gz -C rootfs mkfs.jffs2 -n -r rootfs -e 16 -o rootfs.jffs2
Cargamos el archivo resultante en la memoria del dispositivo y luego lo copiamos en la sección NAND deseada (el tamaño también se redondea a la página):
U-Boot > loady ... U-Boot > nand erase 260000 39f000 U-Boot > nand write 80700000 260000 39f000
Cruzamos los dedos, reiniciamos, bueno, ahora todo está definitivamente bien.
Registro completo muy largo de descarga exitosa TI UBL Version: 1.13, Flash type: NAND Booting PSP Boot Loader PSPBootMode = NAND Starting NAND Copy... Initializing NAND flash... Manufacturer ID = 0x0000002C Device ID = 0x000000A1 Pages Per Block = 0x00000040 Number of Blocks = 0x00000400 Bytes Per Page = 0x00000800 Valid MagicNum found at block 0x00000001, page 0x00000008 NAND Boot success. DONE U-Boot 2010.12 (May 09 2012 - 13:10:23) Cores: ARM 257 MHz, DSP 513 MHz DDR: 162 MHz I2C: ready DRAM: 256 MiB NAND: 128 MiB MMC: Bad block table found at page 65472, version 0x01 Bad block table found at page 65408, version 0x01 In: serial Out: serial Err: serial Read USBID pin : DEVICE Read boot progress legacy : 3 Read boot progress : 10 Write boot progress legacy : 2 Write boot progress : 9 Hit any key to stop autoboot: 0 Loading from NAND 128MiB 1,8V 8-bit, offset 0x1260000 Image Name: Linux-2.6.10_mvl401-xds560 Image Type: ARM Linux Kernel Image (uncompressed) Data Size: 1235632 Bytes = 1.2 MiB Load Address: 80008000 Entry Point: 80008000
Epílogo
Sí, el procedimiento final resultó no ser muy complicado; de hecho, aquí no hay mucha ingeniería inversa real. Pero personalmente aprendí muchas cosas nuevas sobre cosas de bajo nivel durante el proceso de arranque de Linux incorporado, aprendí a trabajar con la consola U-Boot.
Para propietarios de Blackhawk USB560v2Se puede ver que los chicos no se molestaron con la protección. Después de iniciar Linux, aparece un mensaje en la consola para iniciar sesión. El inicio de sesión root sin contraseña le permite iniciar sesión con acceso administrativo y hacer cualquier cosa con el dispositivo. Lo más interesante está en el /usr/local/bin .
Pero esta es una historia completamente diferente.
Espero que haya sido interesante.