Saya sarankan membaca terjemahan bebas dari artikel pendek tentang aplikasi praktis GraphQL. Dokumen asli tersedia di sini (
En ).
Beberapa kata tentang GraphQL
GraphQL adalah bahasa permintaan API yang menawarkan pendekatan deklaratif untuk mengambil data. Ini memungkinkan pelanggan untuk meminta hanya data yang diperlukan dari server web dan tidak lebih. Dikembangkan kembali pada tahun 2012 oleh Facebook, yang masih didukung, GraphQL mulai digunakan oleh banyak perusahaan besar lainnya dan tidak demikian. Antara lain, Yelp, Shopify dan Github.
Saat menggunakan REST API, permintaan biasanya dikirim ke beberapa alamat untuk mendapatkan semua data yang diperlukan dalam aplikasi. API GraphQL memungkinkan Anda untuk mengirim seluruh permintaan ke alamat yang menunjukkan data apa yang ingin Anda terima dengan permintaan ini. Oleh karena itu, omong-omong, GraphQL sangat bagus ketika digunakan dalam koneksi seluler yang lambat.
Versi API dapat menjadi sakit kepala bagi tim pengembangan. Dengan GraphQL, Anda tidak perlu khawatir. GraphQL memungkinkan Anda untuk menambahkan bidang dan jenis baru (ini akan dibahas nanti) di GraphQL API Anda, tanpa memengaruhi kueri yang ada, bidang lama dan tidak terpakai dapat disembunyikan dari klien API. Menggunakan versi tunggal yang terus berkembang, GraphQL API menyediakan aplikasi Anda dengan akses konstan ke implementasi API baru dan menyediakan basis kode yang bersih dan mudah dirawat.
Prasyarat
Sebelum Anda mulai, pastikan Node versi 6 dan yang lebih lama diinstal. Anda dapat memeriksa versi dengan perintah:
node -v
Jika Anda belum menginstal Node, buka URL:
https://nodejs.org/ dan ikuti instruksi pemasangan.
Menyesuaikan GraphQL dan Express
Cara mudah untuk membuat server Graph API adalah dengan menggunakan Express, kerangka kerja populer untuk Node.js. Instal Express menggunakan npm:
npm init npm install express --save
Kemudian instal `graphql` dan` express-graphql`:
npm install graphql express-graphql --save
Jadi, struktur awal folder adalah sebagai berikut:
|---- node_modules
|---- package.json
Mulai cepat di GraphQL API
Di bagian kecil ini, kami akan mencoba membuat API GraphQL dengan cepat. Ini penting untuk narasi lebih lanjut, sehingga menjadi jelas bagi Anda apa yang sebenarnya kami lakukan, seperti apa API yang dibuat menggunakan GraphQL. Jika beberapa poin akan tampak sulit dan tidak bisa dipahami, jangan khawatir, kami akan kembali kepada mereka.
Jadi sekarang kita akan menggunakan objek `buildSchema` dari` graphql` untuk membuat skema (` skema '). Buat file example.js di folder kami.
const express = require('express'); const { buildSchema } = require('graphql'); const graphqlHTTP = require('express-graphql'); let port = 3000; let schema = buildSchema(` type Query { postTitle: String, blogTitle: String } `); let root = { postTitle: () => { return 'Build a Simple GraphQL Server With Express and NodeJS'; }, blogTitle: () => { return 'scotch.io'; } }; const app = express(); app.use('/', graphqlHTTP({ schema: schema, rootValue: root, graphiql: true
Sekarang Anda dapat menjalankan `example.js` di terminal:
node example.js
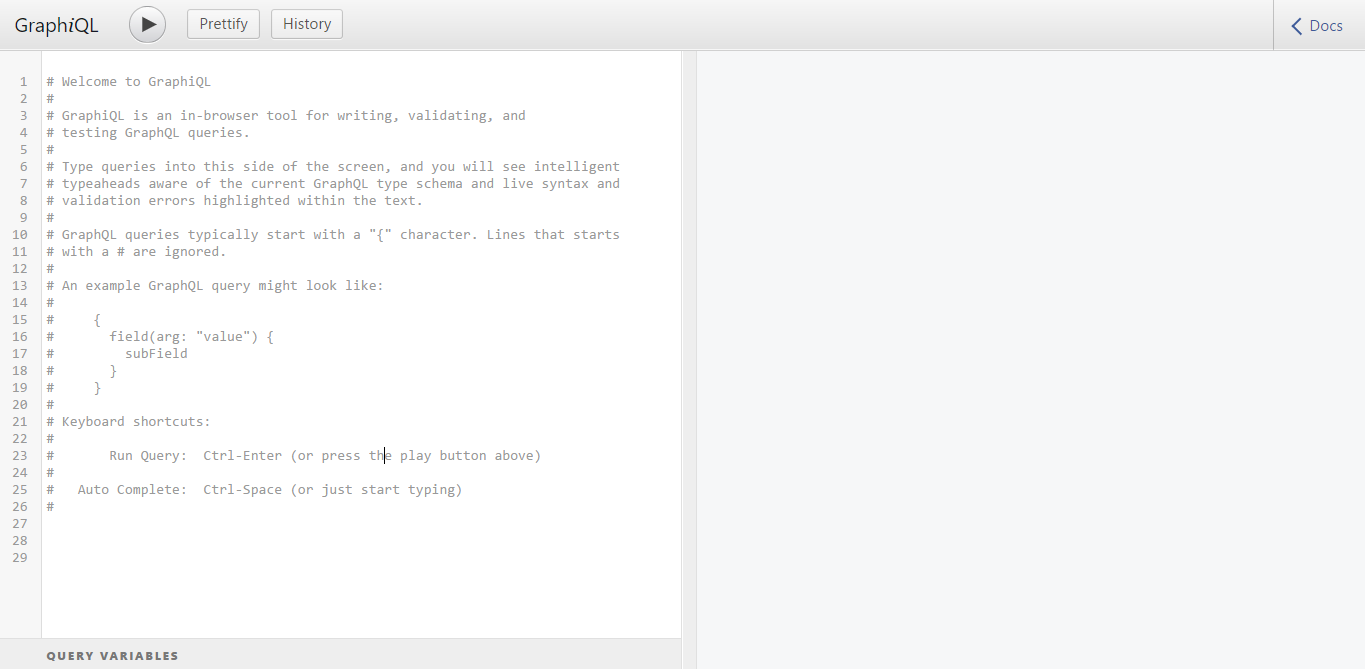
Sekarang di localhost: 3000 Anda dapat menemukan GraphiQL. Ini akan memungkinkan Anda untuk menguji API Anda di browser. Ini mendukung pelengkapan otomatis dan membuat asumsi untuk Anda berdasarkan pada jenis dan bidang yang tersedia dalam skema Anda.

Sekarang mari kita minta skema kami untuk `blogTitle`:

Sangat sederhana, Anda dapat meminta API GraphQL.
Pendahuluan
Sekarang Anda mengerti cara kerja GraphQL dan kami bisa memulai topik lebih dalam.
Mari kita mulai dengan membuat server GraphQL berdasarkan Express. Sekarang, di folder kami, buat folder `src`, dan di dalamnya buat dan simpan file` schema.js`. File ini akan terlihat seperti ini:
Selanjutnya, buat folder `data` di folder` src`. Kami akan menempatkan 2 file di dalamnya: 'author.js' dan 'posts.js'.
Konten file-file ini cukup besar, sehingga Anda tidak dapat membawanya
melalui tautan di Github atau di bawah spoiler.
penulis.js const Authors = [ { id: '8dlx7ak38fd39dv79ad', name: 'Orinami Olatunji', twitterHandle: '@orinami_' }, { id: 'jd3kd03d0w9a0l35rh74', name: 'Ojima Udale', twitterHandle: '@uncooloj' }, { id: '0hy894hf0dlkfh9oinv', name: 'Xabi Alonso', twitterHandle: '@alonso' } ]; module.exports = Authors;
posts.js const Posts = [ {'id':'0176413761b289e6d64c2c14a758c1c7','author_id':'0hy894hf0dlkfh9oinv','author':'alonso', 'category':'meteor','body':'Most developers and companies use two different apps for the marketing website and for the app itself. Thus, they can update each of the apps without affecting the other. [Stripe](https://stripe.com/), [Digital Ocean](https://www.digitalocean.com/) and many other companies follow this technique. Most Meteor apps also do the same.\n\nSo, in a scenario like this, sometimes we need to show the login state of the app on the landing page too. For an example, see our Kadira home page (\u003chttps://kadira.io\u003e). If you are logged into the Kadira app (\u003chttps://ui.kadira.io\u003e), we show a button with "Open Kadira UI" on the home page, which replaces the login button.\n\n[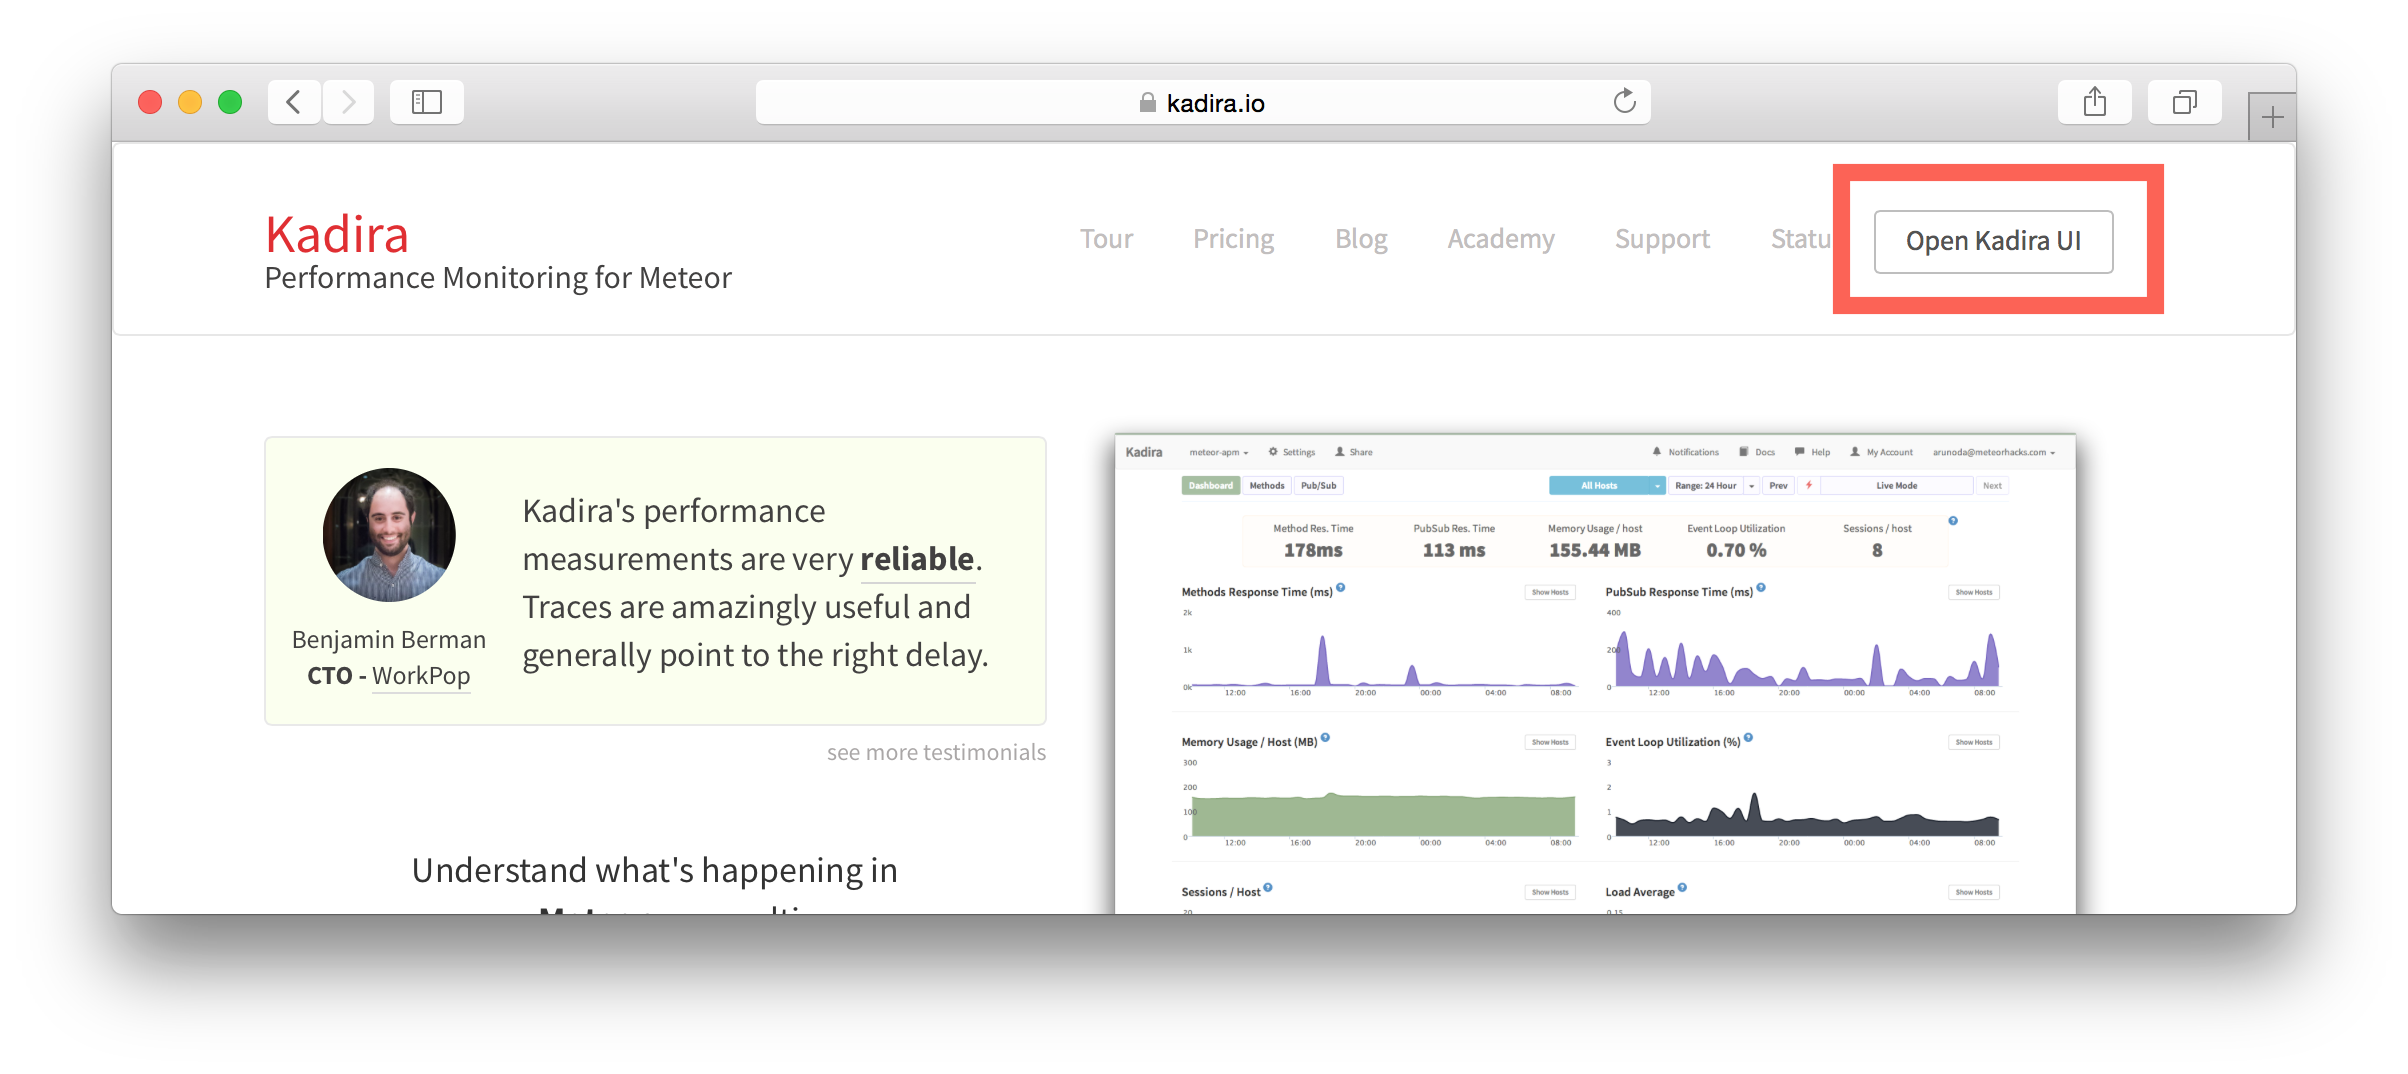](https://kadira.io)\n\n## How Did We Do It?\n\nMeteor does not have a built-in way to share login states across multiple apps or subdomains. So, we have to find an alternative way to do so.\n\nAs a solution, we can use browser cookies to share the login state between multiple domains. That\'s exactly what we did. We wrapped this up into a Meteor package, which now you can also use.\n\nIn this guide, I\'m going to explain how to share the login state between multiple domains using the [`kadira:login-state`](https://github.com/kadirahq/meteor-login-state) package.\n\n### On Meteor App\n\nFirst of all, install the `kadira:login-state` package in your Meteor app:\n\n~~~\nmeteor add kadira:login-state\n~~~\n\nThen, you need to add a new entry in the `public` object as the `loginState` in the `settings.json` file for your app. (If you haven\'t created the settings.json yet, you need to create it first.)\n\n~~~json\n{\n "public": {\n "loginState": {\n "domain": ".your-domain-name.com",\n "cookieName": "app-login-state-cookie-name"\n }\n }\n}\n~~~\n\nThe `domain` field must be your main domain name, starting with a dot. It allows you to share the login state, which can be accessed from any of its subdomains. You can use any appropriate identifier, such as `cookieName`.\n\nNow, everything has been set up on the Meteor app.\n\n### On the Static App (the Landing Page)\n\nNow we have to show the login state of the app on the landing page. For this, we need to add support for the login state for the static app (or landing page).\n\nActually, there are three different ways to do this. Here I will show you how to do so by pasting a few lines of JavaScript code.\n\nYou need to create a JavaScript file in your js folder. I create it as `js/login_state.js`. After that, copy and paste the following code snippet into it:\n\n~~~javascript\nLoginState = {};\n\nLoginState.get = function(cookieName) {\n var loginState = getCookie(cookieName);\n if(loginState) {\n return JSON.parse(decodeURIComponent(loginState));\n } else {\n return false;\n }\n};\n\nfunction getCookie(cname) {\n var name = cname + "=";\n var ca = document.cookie.split(\';\');\n for(var i=0; i \u003c ca.length; i++) {\n var c = ca[i];\n while (c.charAt(0)==\' \') c = c.substring(1);\n if (c.indexOf(name) != -1) return c.substring(name.length,c.length);\n }\n return;\n}\n~~~\n\nInsert that file into the head section of your HTML document: \n\n`\u003cscript src="js/login-state.js"\u003e\u003c/script\u003e`\n\n\u003e If you prefer, you can also use [Browserify](https://github.com/kadirahq/meteor-login-state#installing-via-browserify) or [Bower](https://github.com/kadirahq/meteor-login-state#installing-via-bower) to load the above JS file.\n\u003e The package name for both Browserify and Bower is `meteor-login-state`.\n\nThen, use the following code to get the login state of your app. You need to provide the relevant `cookieName` to do so: \n\n~~~javascript\nvar loginState = LoginState.get("app-login-state-cookie-name");\nif(loginState) {\n // the user has loggedIn to the meteor app\n // see the loginState Object for the addtional data\n // (append your code here!)\n console.log(loginState);\n} else {\n // user has not loggedIn yet.\n // (append your code here!) \n}\n~~~\n\nThe `loginState` object will be something like this:\n\n~~~json\n{\n timestamp: 1435835751489,\n username: "username",\n userId: "meteor-user-id",\n email: "user@email.com"\n url: "https://ui.kadira.io"\n}\n~~~\n\nNow you can do whatever you need to do with the login state.\n\nGive it a try and let me know what you think.','date':{'$date':'2015-07-07T00:00:00.000Z'},'layout':'blog_post','slug':'sharing-meteor-login-state-between-sub-domains','summary':'In this blog we\'ll show you how we shared login state between our static web app and our Meteor app Kadira UI.','title':'Sharing the Meteor Login State Between Subdomains'}, {'id':'03390abb5570ce03ae524397d215713b','author_id':'0hy894hf0dlkfh9oinv','author':'alonso', 'category':'product','body':'Here is a common feedback we received from our users:\n\n\u003e Hi, I have a suggestion. It would be great if I could "dismiss" errors or mark them as resolved on my end. This way, I can keep track of which errors I have resolved.\n\nToday we are happy to announce new Kadira feature which allows you to track **status** to errors. With that, you can mark errors as "Ignored", "Fixing" or "Fixed".\n\nOnce you mark an error as "Ignored", it will be hidden. \n\nBut you can click on "Show Ignored Errors" checkbox or filter by "ignored" status to view them again.\n\n\n\nYou can also filter errors by status like this:\n\n\n\nWe are rolling out this feature to all our paid users. [Give it a try](https://ui.kadira.io/apps/AUTO/errors/overview?metric=count).\n\n### What's next?\n\nRight now we are planning to add few more feature related this. Could you help us on [prioritizing](https:
Ketik dalam GraphQL
GraphQL memiliki modul 'grapql / type' yang digunakan untuk menentukan jenisnya. Jenis dapat diimpor dari modul 'graphql / type' atau dari modul root 'graphql'.Jenis dasar termasuk ID , String , Int , Float dan Boolean . Kami juga menambahkan jenis Penulis. Untuk melakukan ini, tambahkan ke file schema.js kami: const AuthorType = new GraphQLObjectType({ name: "Author", description: "This represent an author", fields: () => ({ id: {type: new GraphQLNonNull(GraphQLString)}, name: {type: new GraphQLNonNull(GraphQLString)}, twitterHandle: {type: GraphQLString} }) });
Seperti yang Anda lihat, untuk menambahkan tipe baru yang kami butuhkan: buat objek kelas GraphQLObjectType dan tentukan beberapa propertinya. Nama dan Deskripsi - untuk mendeskripsikan tipe, Fields untuk mendefinisikan atribut tipe Author: id, name, dan twitterHandler.Lebih detail tentang jenis di graphql.org/graphql-js/type/Sekarang mari kita buat jenis untuk posting: const PostType = new GraphQLObjectType({ name: "Post", description: "This represent a Post", fields: () => ({ id: {type: new GraphQLNonNull(GraphQLString)}, title: {type: new GraphQLNonNull(GraphQLString)}, body: {type: GraphQLString}, author: { type: AuthorType, resolve: function(post) { return _.find(Authors, a => a.id == post.author_id); } } }) });
Tambahkan ini ke schema.js. Ini akan membuat objek PostType yang akan digunakan dalam Root Query (Secara harfiah kueri root. Bahkan, titik masuk ke API GraphQL kami).Root root
Root Query digunakan untuk mengungkapkan sumber daya yang tersedia untuk klien aplikasi Anda. Kami dapat menyediakan 2 sumber daya: penulis dan pos.Mari tambahkan ke file `schema.js` kami: const BlogQueryRootType = new GraphQLObjectType({ name: 'BlogAppSchema', description: "Blog Application Schema Query Root", fields: () => ({ authors: { type: new GraphQLList(AuthorType), description: "List of all Authors", resolve: function() { return Authors } }, posts: { type: new GraphQLList(PostType), description: "List of all Posts", resolve: function() { return Posts } } }) });
Di sini, kueri root didefinisikan sebagai BlogQueryRootType. Jika Anda perhatikan, tipe baru telah dideklarasikan di sini: GraphQLList baru (). Itu membuat pembungkus di sekitar jenis lain yang mewakili daftar jenis ini.Definisi skema
Diagram mendefinisikan bagaimana Anda ingin data dalam aplikasi Anda dihasilkan dan bagaimana Anda ingin data terhubung satu sama lain. Definisi skema memengaruhi bagaimana data akan disimpan dalam basis data Anda (atau basis data). Dalam definisi skema, Anda juga menentukan kueri, mutasi, dan langganan mana yang akan tersedia untuk antarmuka tampilan data Anda.Mari tambahkan skema ke file kami: const BlogAppSchema = new GraphQLSchema({ query: BlogQueryRootType });
Di sini, kueri ditugaskan objek BlogQueryRootType, yang akan digunakan sebagai permintaan API root.Implementasi GraphQL API
Kami membutuhkan paket `lodash`. `Lodash` adalah toolkit Javascript yang menyediakan metode bersih, berkinerja tinggi untuk memanipulasi objek dan koleksi. Jika Anda terbiasa dengan perpustakaan garis bawah, ini bagus! Lodash dibuat darinya dengan menambahkan fungsionalitas tambahan dan menyelesaikan beberapa masalah dengan kinerja garis bawah. npm install lodash --save
Dengan perintah ini, perpustakaan lodash akan diinstal dan dependensi yang sesuai ditambahkan ke file package.json.Tambahkan kode berikut ke bagian atas file schema.js. const _ = require('lodash');
Sekarang mari kita lihat file schema.js. Beginilah tampilan file pada akhirnya. const _ = require('lodash');
Jika Anda perhatikan di PostType, kami memiliki atribut ketetapan tambahan. Resolve adalah fungsi yang dapat memanipulasi data, mengonversi nilainya, dll. dan kembalikan ke akhir operasi.BlogAppSchema akan diekspor ke file server.js menggunakan module.exportsSekarang, buat file server.js di folder root dan tambahkan kode ini: const express = require('express'); const graphqlHTTP = require('express-graphql'); const schema = require('./src/schema.js'); let port = 3000; const app = express(); app.use('/', graphqlHTTP({ schema: schema, graphiql: true })); app.listen(port); console.log('GraphQL API server running at localhost:'+ port);
Sekarang periksa hasil kami di localhost: 3000. Untuk melakukan ini, buka terminal dan lakukan: node server.js
Hasil:
 Ini adalah graphiql, ini akan membantu Anda menguji API di browser. Jadi pertanyaan berikut:
 { posts { id title author { name } } }
Akan memberikan hasil seperti ini: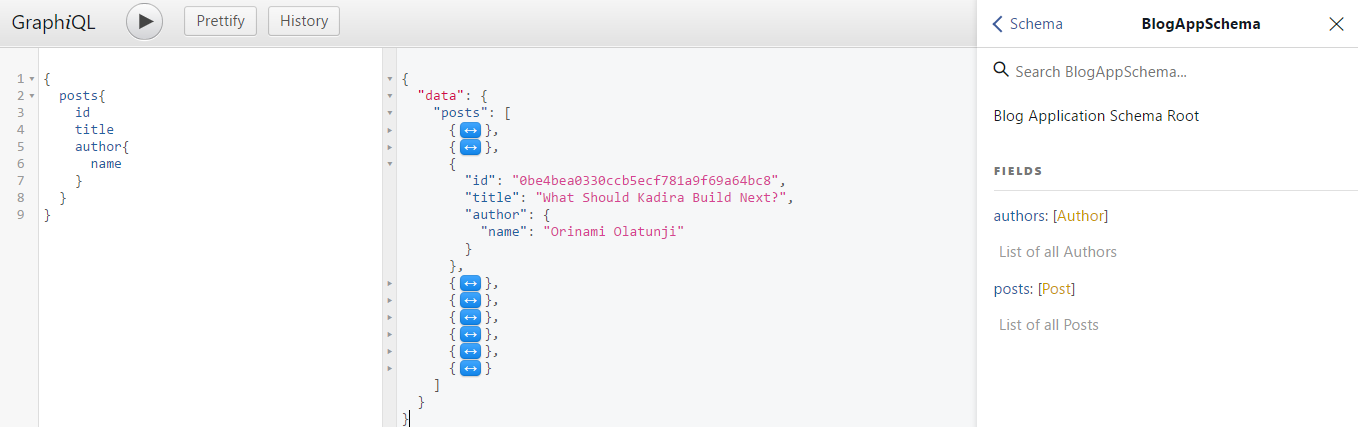
Kesimpulan
Saya sangat senang saya menyelesaikan pelajaran ini dengan Anda. Sekarang Anda tahu cara membuat GraphQL API berdasarkan Express dan NodeJS. Saya harap pelajarannya menarik dan Anda belajar banyak dari itu.Jika Anda ingin tahu lebih banyak tentang GraphQL, kunjungi graphql.org .