
Kubernetes dengan cepat menjadi standar untuk pengiriman dan penskalaan aplikasi kemas dan pengelolaannya. Ini adalah solusi open source yang sangat fleksibel dan serbaguna. Ini memiliki dokumentasi yang luas, dan tidak selalu mudah untuk menemukan bagian yang tepat di dalamnya. Karena itu, Kubernetes sangat sulit untuk dikuasai. Setelah merencanakan cluster, Anda masih perlu menginstalnya, tetapi di sini juga, semuanya tidak berjalan lancar. Oleh karena itu, ada alat penyebaran, seperti Kubespray, yang menyederhanakan pekerjaan. Saya akan berbicara tentang penyebaran kluster Kubernetes secara otomatis menggunakan Kubespray di cloud OpenStack (Open Telekom Cloud).
Untuk penyebaran Kubernetes otomatis, Kubespray menggunakan inisialisasi aplikasi, konfigurasi, dan alat pengiriman yang memungkinkan. Dan Kubespray menyediakan perpustakaan untuk menginisialisasi sumber daya pada platform cloud yang berbeda. Untuk melakukan ini, gunakan alat "infrastruktur sebagai kode" Terraform. Proyek Kubespray sekarang mendukung awan Terraform untuk AWS, OpenStack, dan Paket. Alat ini digunakan bersama dengan pustaka OpenStack untuk menyediakan infrastruktur dalam skenario ini.
Persyaratan
Pertama, mari kita lihat prasyarat penyebaran. Mereka dibagi menjadi dua kategori: persyaratan untuk Kubespray dan persyaratan untuk perpustakaan penyedia.
Kubespray membutuhkan komponen-komponen berikut:
- Python 2.7 (atau lebih tinggi)
- Kemungkinan 2.7 (atau lebih tinggi)
- Jinja 2.9 (atau lebih tinggi)
Persyaratan Perpustakaan Penyedia OpenStack:
- Terraform 0,11 (atau lebih tinggi)
Untuk menginstal Terraform, Anda perlu mengunduh paket yang sesuai dari situs web Hashicorp dan unzip. Maka path ke file yang tidak dibongkar harus disimpan dalam variabel PATH. Gunakan perintah terraform untuk memeriksa apakah semuanya diinstal. Cari tahu lebih lanjut di sini.
Bergantung pada sistem operasinya, Ansible dapat diinstal dengan beberapa perintah. Lihat dokumentasi yang memungkinkan. Di sini saya menggunakan Ubuntu dan menginstal Ansible sebagai berikut.
sudo apt update sudo apt install ansible
Maka Anda perlu menginstal dependensi Kubespray. Ini dilakukan oleh perintah berikut. Tetapi pertama-tama Anda harus mengkloning repositori.
git clone https://github.com/kubernetes-sigs/kubespray sudo pip install -r requirements.txt
Untuk menggunakan Open Telekom Cloud, konfigurasikan data akses menggunakan .ostackrc di direktori root dan muat variabel lingkungan.
Perencanaan cluster
Kubernetes sangat fleksibel, sehingga cluster dapat disesuaikan dengan kebutuhan Anda. Di sini kami tidak akan mempertimbangkan opsi yang berbeda untuk cluster. Anda dapat membaca tentang ini di dokumentasi Kubernetes di Membuat kluster khusus dari awal. Sebagai contoh, kita akan membuat cluster dari master dengan etcd dan dua node yang berfungsi. Cluster tidak akan memiliki IP mengambang, jadi itu tidak akan tersedia dari Internet.
Kita juga perlu memilih CNI (Container Network Interface). Ada beberapa opsi (cilium, calico, flannel, weave net, dll.), Tetapi kami akan mengambil flanel yang tidak perlu dikonfigurasi. Calico akan berfungsi, tetapi Anda harus mengonfigurasi port OpenStack Neutron untuk subnet layanan dan pod.
Untuk mengelola kluster di dasbor Kubernetes setelah penerapan, kita perlu menginstal dasbor ini.
Konfigurasi Cluster
Jalankan perintah berikut di direktori repositori, tentukan nama yang diinginkan dalam variabel $ CLUSTER.
cp -LRp contrib/terraform/openstack/sample-inventory \ inventory/$CLUSTER cd inventory/$CLUSTER ln -s ../../contrib/terraform/openstack/hosts ln -s ../../contrib
Setelah menjalankan perintah, edit file inventaris / $ CLUSTER / cluster.tf.
# your Kubernetes cluster name here cluster_name = "k8s-test-cluster" az_list=["eu-de-01", "eu-de-02"] dns_nameservers=["100.125.4.25", "8.8.8.8"] # SSH key to use for access to nodes public_key_path = "~/.ssh/id_rsa.pub" # image to use for bastion, masters, standalone etcd instances, and nodes image = "Standard_CentOS_7_latest" # user on the node (ex. core on Container Linux, ubuntu on Ubuntu, etc.) ssh_user = "linux" # 0|1 bastion nodes number_of_bastions = 0 flavor_bastion = "s2.xlarge.4" # standalone etcds number_of_etcd = 0 flavor_etcd = "s2.xlarge.4" # masters number_of_k8s_masters = 0 number_of_k8s_masters_no_etcd = 0 number_of_k8s_masters_no_floating_ip = 1 number_of_k8s_masters_no_floating_ip_no_etcd = 0 flavor_k8s_master = "s2.xlarge.4" # nodes number_of_k8s_nodes = 0 number_of_k8s_nodes_no_floating_ip = 2 flavor_k8s_node = "s2.xlarge.4" # GlusterFS # either 0 or more than one #number_of_gfs_nodes_no_floating_ip = 1 #gfs_volume_size_in_gb = 150 # Container Linux does not support GlusterFS image_gfs = "Standard_CentOS_7_latest" # May be different from other nodes #ssh_user_gfs = "linux" #flavor_gfs_node = "s2.xlarge.4" # networking network_name = "k8s-test-network" external_net = "Externel_Network_ID" subnet_cidr = "192.168.100.0/24" floatingip_pool = "admin_external_net" bastion_allowed_remote_ips = ["0.0.0.0/0"]
Deskripsi variabel baca di sini. Dalam contoh ini, kita akan membuat sebuah cluster dengan satu master dan dua node kerja Kubernet berdasarkan versi terbaru dari CentOS 7 dan s2.xlarge.4. etcd juga menginstal pada wizard.
Penyebaran infrastruktur
Sekarang kita siap untuk menggunakan infrastruktur cluster menggunakan Terraform. Gambar tersebut menunjukkan seperti apa infrastruktur setelah penyebaran. Detail di bawah.

Untuk memulai penyebaran Terraform, buka direktori inventaris / $ CLUSTER / dan jalankan perintah berikut. Pertama, instal plugin yang diperlukan. Untuk melakukan ini, kita memerlukan argumen init dan path ke plugins.
terraform init ../../contrib/terraform/openstack
Operasi ini sangat cepat. Terraform sekarang siap untuk menggunakan infrastruktur dengan argumen yang berlaku.
terraform apply -var-file=cluster.tf ../../contrib/terraform/openstack
Setelah beberapa detik, Terraform akan menunjukkan hasil yang serupa, dan instance akan tersedia untuk bekerja.
Apply complete! Resources: 3 added, 0 changed, 0 destroyed.
Untuk memeriksa ketersediaan server, jalankan perintah Ansible berikut, dan kemudian kita akan pergi ke folder root repositori.
$ ansible -i inventory/$CLUSTER/hosts -m ping all example-k8s_node-1 | SUCCESS => { "changed": false, "ping": "pong" } example-etcd-1 | SUCCESS => { "changed": false, "ping": "pong" } example-k8s-master-1 | SUCCESS => { "changed": false, "ping": "pong" }
Penyebaran Cluster Kubernetes
Infrastruktur digunakan, sekarang Anda perlu menginstal cluster Kubernetes. Pertama, konfigurasikan variabel cluster dalam inventaris file / $ CLUSTER / group_vars / all / all.yml. Di sini Anda perlu mengatur nilai cloud_provider ke openstack, dan untuk bin_dir, path tempat file akan diinstal. Dalam contoh kami, kami menggunakan konfigurasi berikut.
## Directory where etcd data stored etcd_data_dir: /var/lib/etcd ## Directory where the binaries will be installed bin_dir: /usr/local/bin ## The access_ip variable is used to define how other nodes should access ## the node. This is used in flannel to allow other flannel nodes to see ## this node for example. The access_ip is really useful AWS and Google ## environments where the nodes are accessed remotely by the "public" ip, ## but don't know about that address themselves. #access_ip: 1.1.1.1 ## External LB example config ## apiserver_loadbalancer_domain_name: "elb.some.domain" #loadbalancer_apiserver: # address: 1.2.3.4 # port: 1234 ## Internal loadbalancers for apiservers #loadbalancer_apiserver_localhost: true ## Local loadbalancer should use this port instead, if defined. ## Defaults to kube_apiserver_port (6443) #nginx_kube_apiserver_port: 8443 ### OTHER OPTIONAL VARIABLES ## For some things, kubelet needs to load kernel modules. For example, dynamic kernel services are needed ## for mounting persistent volumes into containers. These may not be loaded by preinstall kubernetes ## processes. For example, ceph and rbd backed volumes. Set to true to allow kubelet to load kernel ## modules. #kubelet_load_modules: false ## Upstream dns servers used by dnsmasq #upstream_dns_servers: # - 8.8.8.8 # - 8.8.4.4 ## There are some changes specific to the cloud providers ## for instance we need to encapsulate packets with some network plugins ## If set the possible values are either 'gce', 'aws', 'azure', 'openstack', 'vsphere', 'oci', or 'external' ## When openstack is used make sure to source in the openstack credentials ## like you would do when using nova-client before starting the playbook. ## Note: The 'external' cloud provider is not supported. ## TODO(riverzhang): https://kubernetes.io/docs/tasks/administer-cluster/running-cloud-controller/#running-cloud-controller-manager cloud_provider: openstack ## Set these proxy values in order to update package manager and docker daemon to use proxies #http_proxy: "" #https_proxy: "" ## Refer to roles/kubespray-defaults/defaults/main.yml before modifying no_proxy #no_proxy: "" ## Some problems may occur when downloading files over https proxy due to ansible bug ## https://github.com/ansible/ansible/issues/32750. Set this variable to False to disable ## SSL validation of get_url module. Note that kubespray will still be performing checksum validation. #download_validate_certs: False ## If you need exclude all cluster nodes from proxy and other resources, add other resources here. #additional_no_proxy: "" ## Certificate Management ## This setting determines whether certs are generated via scripts. ## Chose 'none' if you provide your own certificates. ## Option is "script", "none" ## note: vault is removed #cert_management: script ## Set to true to allow pre-checks to fail and continue deployment #ignore_assert_errors: false ## The read-only port for the Kubelet to serve on with no authentication/authorization. Uncomment to enable. #kube_read_only_port: 10255 ## Set true to download and cache container download_container: false ## Deploy container engine # Set false if you want to deploy container engine manually. #deploy_container_engine: true ## Set Pypi repo and cert accordingly #pyrepo_index: https://pypi.example.com/simple #pyrepo_cert: /etc/ssl/certs/ca-certificates.crt
Sekarang konfigurasikan file inventaris / $ CLUSTER / group_vars / k8s-cluster / k8s-cluster.yml. Untuk variabel kube_network_plugin, setel flanel atau belacu (Anda perlu mengonfigurasi port OpenStack Neutron ). Kami akan memiliki flanel ini, yang tidak perlu dikonfigurasi. Untuk variabel resolvconf_mode, atur docker_dns. Nilai ini memberitahu Kubespray untuk mengatur parameter daemon Docker. Di bawah ini Anda melihat contoh konfigurasi untuk kluster kami.
# Kubernetes configuration dirs and system namespace. # Those are where all the additional config stuff goes # the kubernetes normally puts in /srv/kubernetes. # This puts them in a sane location and namespace. # Editing those values will almost surely break something. kube_config_dir: /etc/kubernetes kube_script_dir: "{{ bin_dir }}/kubernetes-scripts" kube_manifest_dir: "{{ kube_config_dir }}/manifests" # This is where all the cert scripts and certs will be located kube_cert_dir: "{{ kube_config_dir }}/ssl" # This is where all of the bearer tokens will be stored kube_token_dir: "{{ kube_config_dir }}/tokens" # This is where to save basic auth file kube_users_dir: "{{ kube_config_dir }}/users" kube_api_anonymous_auth: true ## Change this to use another Kubernetes version, eg a current beta release kube_version: v1.13.3 # kubernetes image repo define kube_image_repo: "gcr.io/google-containers" # Where the binaries will be downloaded. # Note: ensure that you've enough disk space (about 1G) local_release_dir: "/tmp/releases" # Random shifts for retrying failed ops like pushing/downloading retry_stagger: 5 # This is the group that the cert creation scripts chgrp the # cert files to. Not really changeable... kube_cert_group: kube-cert # Cluster Loglevel configuration kube_log_level: 2 # Directory where credentials will be stored credentials_dir: "{{ inventory_dir }}/credentials" # Users to create for basic auth in Kubernetes API via HTTP # Optionally add groups for user kube_api_pwd: "{{ lookup('password', credentials_dir + '/kube_user.creds length=15 chars=ascii_letters,digits') }}" kube_users: kube: pass: "{{kube_api_pwd}}" role: admin groups: - system:masters ## It is possible to activate / deactivate selected authentication methods (basic auth, static token auth) #kube_oidc_auth: false #kube_basic_auth: false #kube_token_auth: false ## Variables for OpenID Connect Configuration https://kubernetes.io/docs/admin/authentication/ ## To use OpenID you have to deploy additional an OpenID Provider (eg Dex, Keycloak, ...) # kube_oidc_url: https:// ... # kube_oidc_client_id: kubernetes ## Optional settings for OIDC # kube_oidc_ca_file: "{{ kube_cert_dir }}/ca.pem" # kube_oidc_username_claim: sub # kube_oidc_username_prefix: oidc: # kube_oidc_groups_claim: groups # kube_oidc_groups_prefix: oidc: # Choose network plugin (cilium, calico, contiv, weave or flannel) # Can also be set to 'cloud', which lets the cloud provider setup appropriate routing kube_network_plugin: flannel # Setting multi_networking to true will install Multus: https://github.com/intel/multus-cni kube_network_plugin_multus: false # Kubernetes internal network for services, unused block of space. kube_service_addresses: 10.233.0.0/18 # internal network. When used, it will assign IP # addresses from this range to individual pods. # This network must be unused in your network infrastructure! kube_pods_subnet: 10.233.64.0/18 # internal network node size allocation (optional). This is the size allocated # to each node on your network. With these defaults you should have # room for 4096 nodes with 254 pods per node. kube_network_node_prefix: 24 # The port the API Server will be listening on. kube_apiserver_ip: "{{ kube_service_addresses|ipaddr('net')|ipaddr(1)|ipaddr('address') }}" kube_apiserver_port: 6443 # (https) #kube_apiserver_insecure_port: 8080 # (http) # Set to 0 to disable insecure port - Requires RBAC in authorization_modes and kube_api_anonymous_auth: true kube_apiserver_insecure_port: 0 # (disabled) # Kube-proxy proxyMode configuration. # Can be ipvs, iptables kube_proxy_mode: ipvs # A string slice of values which specify the addresses to use for NodePorts. # Values may be valid IP blocks (eg 1.2.3.0/24, 1.2.3.4/32). # The default empty string slice ([]) means to use all local addresses. # kube_proxy_nodeport_addresses_cidr is retained for legacy config kube_proxy_nodeport_addresses: >- {%- if kube_proxy_nodeport_addresses_cidr is defined -%} [{{ kube_proxy_nodeport_addresses_cidr }}] {%- else -%} [] {%- endif -%} # If non-empty, will use this string as identification instead of the actual hostname #kube_override_hostname: >- # {%- if cloud_provider is defined and cloud_provider in [ 'aws' ] -%} # {%- else -%} # {{ inventory_hostname }} # {%- endif -%} ## Encrypting Secret Data at Rest (experimental) kube_encrypt_secret_data: false # DNS configuration. # Kubernetes cluster name, also will be used as DNS domain cluster_name: cluster.local # Subdomains of DNS domain to be resolved via /etc/resolv.conf for hostnet pods ndots: 2 # Can be dnsmasq_kubedns, kubedns, coredns, coredns_dual, manual or none dns_mode: coredns # Set manual server if using a custom cluster DNS server #manual_dns_server: 10.xxx # Enable nodelocal dns cache enable_nodelocaldns: False nodelocaldns_ip: 169.254.25.10 # Can be docker_dns, host_resolvconf or none resolvconf_mode: docker_dns # Deploy netchecker app to verify DNS resolve as an HTTP service deploy_netchecker: false # Ip address of the kubernetes skydns service skydns_server: "{{ kube_service_addresses|ipaddr('net')|ipaddr(3)|ipaddr('address') }}" skydns_server_secondary: "{{ kube_service_addresses|ipaddr('net')|ipaddr(4)|ipaddr('address') }}" dnsmasq_dns_server: "{{ kube_service_addresses|ipaddr('net')|ipaddr(2)|ipaddr('address') }}" dns_domain: "{{ cluster_name }}" ## Container runtime ## docker for docker and crio for cri-o. container_manager: docker ## Settings for containerized control plane (etcd/kubelet/secrets) etcd_deployment_type: docker kubelet_deployment_type: host helm_deployment_type: host # K8s image pull policy (imagePullPolicy) k8s_image_pull_policy: IfNotPresent # audit log for kubernetes kubernetes_audit: false # dynamic kubelet configuration dynamic_kubelet_configuration: false # define kubelet config dir for dynamic kubelet #kubelet_config_dir: default_kubelet_config_dir: "{{ kube_config_dir }}/dynamic_kubelet_dir" dynamic_kubelet_configuration_dir: "{{ kubelet_config_dir | default(default_kubelet_config_dir) }}" # pod security policy (RBAC must be enabled either by having 'RBAC' in authorization_modes or kubeadm enabled) podsecuritypolicy_enabled: false # Make a copy of kubeconfig on the host that runs Ansible in {{ inventory_dir }}/artifacts # kubeconfig_localhost: false # Download kubectl onto the host that runs Ansible in {{ bin_dir }} # kubectl_localhost: false # dnsmasq # dnsmasq_upstream_dns_servers: # - /resolvethiszone.with/10.0.4.250 # - 8.8.8.8 # Enable creation of QoS cgroup hierarchy, if true top level QoS and pod cgroups are created. (default true) # kubelet_cgroups_per_qos: true # A comma separated list of levels of node allocatable enforcement to be enforced by kubelet. # Acceptable options are 'pods', 'system-reserved', 'kube-reserved' and ''. Default is "". # kubelet_enforce_node_allocatable: pods ## Supplementary addresses that can be added in kubernetes ssl keys. ## That can be useful for example to setup a keepalived virtual IP # supplementary_addresses_in_ssl_keys: [10.0.0.1, 10.0.0.2, 10.0.0.3] ## Running on top of openstack vms with cinder enabled may lead to unschedulable pods due to NoVolumeZoneConflict restriction in kube-scheduler. ## See https://github.com/kubernetes-sigs/kubespray/issues/2141 ## Set this variable to true to get rid of this issue volume_cross_zone_attachment: false # Add Persistent Volumes Storage Class for corresponding cloud provider ( OpenStack is only supported now ) persistent_volumes_enabled: false ## Container Engine Acceleration ## Enable container acceleration feature, for example use gpu acceleration in containers # nvidia_accelerator_enabled: true ## Nvidia GPU driver install. Install will by done by a (init) pod running as a daemonset. ## Important: if you use Ubuntu then you should set in all.yml 'docker_storage_options: -s overlay2' ## Array with nvida_gpu_nodes, leave empty or comment if you dont't want to install drivers. ## Labels and taints won't be set to nodes if they are not in the array. # nvidia_gpu_nodes: # - kube-gpu-001 # nvidia_driver_version: "384.111" ## flavor can be tesla or gtx # nvidia_gpu_flavor: gtx
Terakhir, edit file inventaris / $ CLUSTER / group_vars / k8s-cluster / addons.yml dan atur dashboard_enabled menjadi true untuk mengatur dasbor. Contoh Konfigurasi:
# Kubernetes dashboard # RBAC required. see docs/getting-started.md for access details. dashboard_enabled: true # Helm deployment helm_enabled: false # Registry deployment registry_enabled: false # registry_namespace: kube-system # registry_storage_class: "" # registry_disk_size: "10Gi" # Metrics Server deployment metrics_server_enabled: false # metrics_server_kubelet_insecure_tls: true # metrics_server_metric_resolution: 60s # metrics_server_kubelet_preferred_address_types: "InternalIP" # Local volume provisioner deployment local_volume_provisioner_enabled: false # local_volume_provisioner_namespace: kube-system # local_volume_provisioner_storage_classes: # local-storage: # host_dir: /mnt/disks # mount_dir: /mnt/disks # fast-disks: # host_dir: /mnt/fast-disks # mount_dir: /mnt/fast-disks # block_cleaner_command: # - "/scripts/shred.sh" # - "2" # volume_mode: Filesystem # fs_type: ext4 # CephFS provisioner deployment cephfs_provisioner_enabled: false # cephfs_provisioner_namespace: "cephfs-provisioner" # cephfs_provisioner_cluster: ceph # cephfs_provisioner_monitors: "172.24.0.1:6789,172.24.0.2:6789,172.24.0.3:6789" # cephfs_provisioner_admin_id: admin # cephfs_provisioner_secret: secret # cephfs_provisioner_storage_class: cephfs # cephfs_provisioner_reclaim_policy: Delete # cephfs_provisioner_claim_root: /volumes # cephfs_provisioner_deterministic_names: true # Nginx ingress controller deployment ingress_nginx_enabled: false # ingress_nginx_host_network: false # ingress_nginx_nodeselector: # node.kubernetes.io/node: "" # ingress_nginx_tolerations: # - key: "node.kubernetes.io/master" # operator: "Equal" # value: "" # effect: "NoSchedule" # ingress_nginx_namespace: "ingress-nginx" # ingress_nginx_insecure_port: 80 # ingress_nginx_secure_port: 443 # ingress_nginx_configmap: # map-hash-bucket-size: "128" # ssl-protocols: "SSLv2" # ingress_nginx_configmap_tcp_services: # 9000: "default/example-go:8080" # ingress_nginx_configmap_udp_services: # 53: "kube-system/kube-dns:53" # Cert manager deployment cert_manager_enabled: false # cert_manager_namespace: "cert-manager"
Setelah mengubah konfigurasi, jalankan playbook yang mungkin dengan konfigurasi kami dengan menjalankan perintah berikut.
ansible-playbook --become -i inventory/$CLUSTER/hosts cluster.yml
Kemungkinan melakukan beberapa operasi, dan jika semuanya selesai dengan sukses, cluster akan terlihat seperti pada gambar ini.

Pengujian
Untuk menguji cluster, masukkan wizard, beralih ke pengguna root, dan di kubectl jalankan perintah info-cluster kubectl untuk mendapatkan informasi cluster. Anda akan melihat informasi tentang titik akhir wizard dan layanan di cluster. Jika semuanya baik-baik saja dengan cluster, buat pengguna dashboard Kubernetes menggunakan perintah berikut.
# Create service account kubectl create serviceaccount cluster-admin-dashboard-sa # Bind ClusterAdmin role to the service account kubectl create clusterrolebinding cluster-admin-dashboard-sa \ --clusterrole=cluster-admin \ --serviceaccount=default:cluster-admin-dashboard-sa # Parse the token kubectl describe secret $(kubectl -n kube-system get secret | awk '/^cluster-admin-dashboard-sa-token-/{print $1}') | awk '$1=="token:"{print $2}'
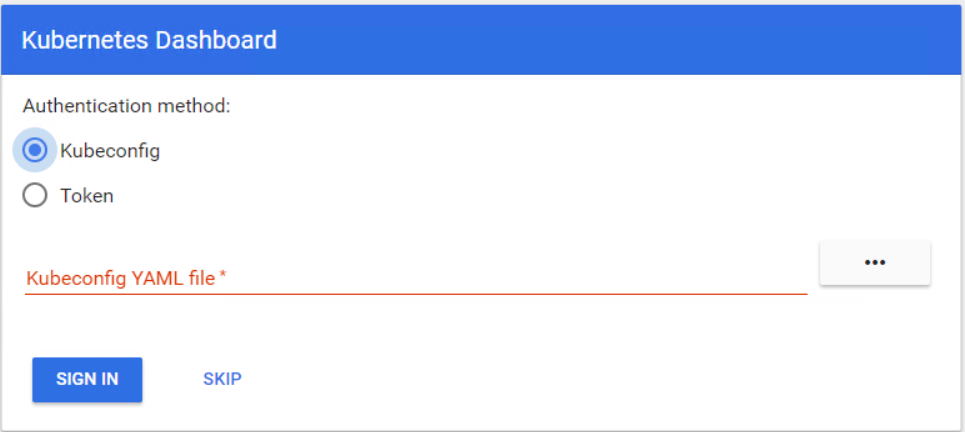
Sekarang Anda bisa masuk ke dasbor menggunakan token. Pertama, Anda perlu membuat terowongan ke panduan Kubernetes, karena dasbornya masih terbuka untuk localhost di port 8001. Setelah itu, Anda bisa mengakses dasbor menggunakan localhost: 8001 URL. Sekarang pilih Token, masukkan token dan login.
Anda siap untuk mulai bekerja di kluster Kubernetes. Pada artikel ini, Anda melihat betapa mudahnya untuk menggunakan dan mengkonfigurasi cluster Kubernetes di cloud OpenStack.