 最近,FLProg项目获得了很大的欢迎,我再也没有足够的时间为用户所需的外围设备创建模块。同时,在该网站的用户中,有足够多的人精通C语言,可以帮助我开发该程序。我决定给他们适当的工具。因此,在1.10.3版中,可以使用集成的C代码创建自定义块,这导致了相当意外的结果。该工具不仅对精通编程的用户感兴趣,而且对以前没有编写过代码的用户也很感兴趣。他们首先从编写简单的块开始(例如,获得对数-我在标准块中没有这样的块)以使用库的严重块结尾。因此,我想打破有关使用该程序的一些预想的课程顺序,而我将依次告诉您如何创建此类块。在本课程中,将为数字指南针HMC5883L创建一个块。为单位的基础上已经采取了这一文章。图书馆是从这里拿来的。因此,运行程序并创建一个新项目。在元素库中,转到“自定义”选项卡,然后选择新块将位于的自定义块库的树枝。然后点击“创建块”按钮,
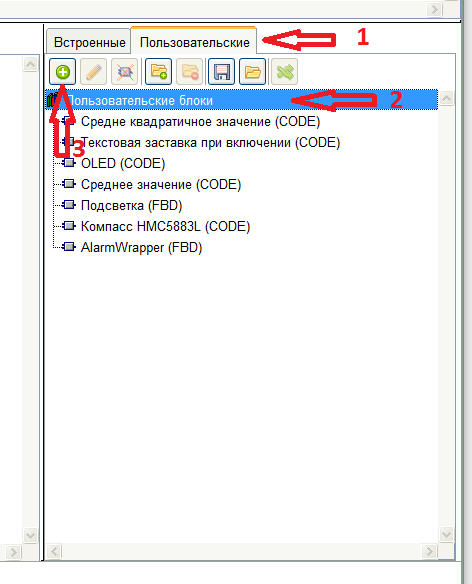 将打开一个窗口,其中包含该块的编程语言。提供FBD,LAD和代码语言。 LAD和FBD语言将在其他课程中讨论,现在选择“代码”。
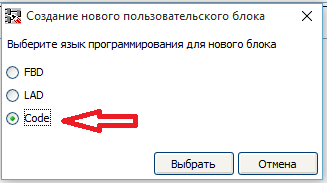 用户块编辑器窗口打开。上部是参数选项卡(1),下部是代码段(2)。
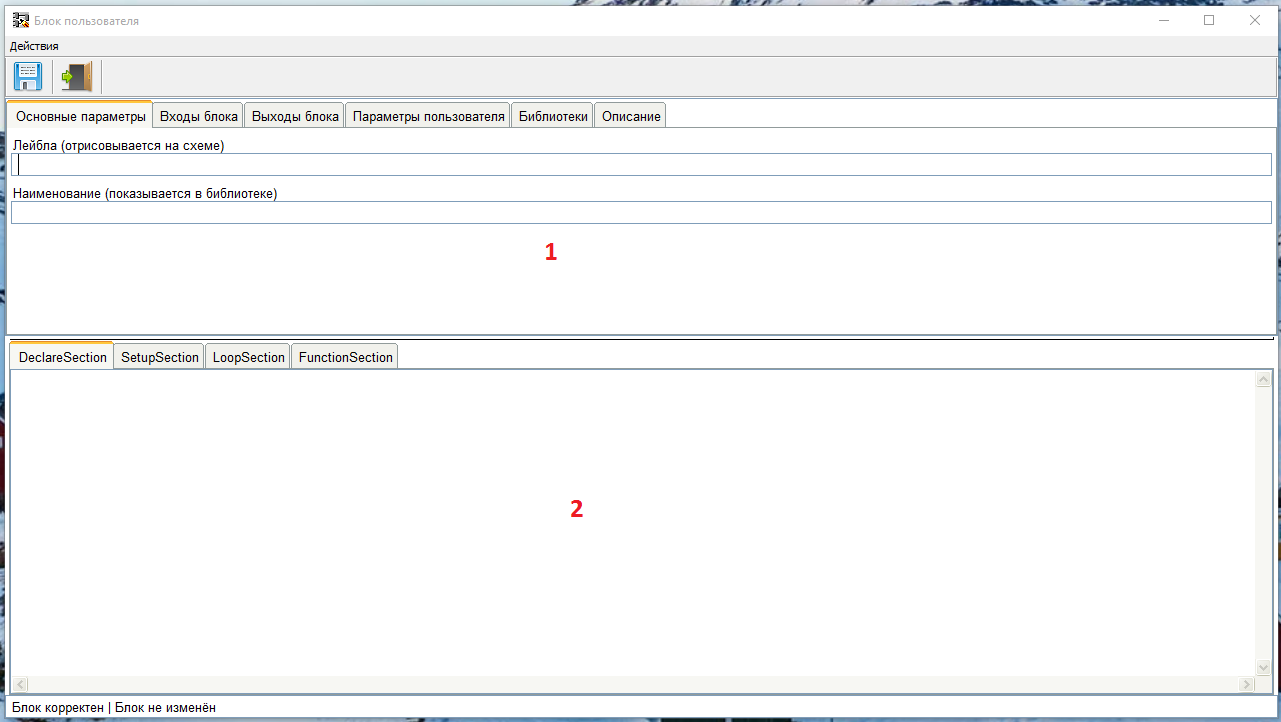 我们填写主要参数。
 块的输入和输出以相同的方式创建。我们的块将没有任何输入,因此我们跳过此选项卡,然后转到“块输出”选项卡。该块将具有三个输出-沿X,Y和Z轴的方向。要创建输出,请单击“添加输出”按钮。
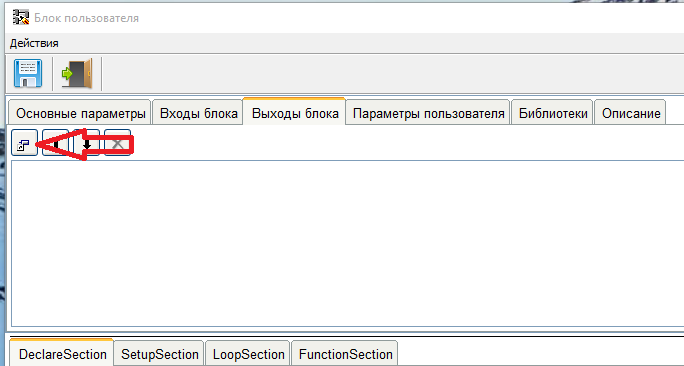 登录创建窗口将打开。它与在主程序中创建变量的窗口非常相似,因此我将不对其进行详细描述。块的输出值以Float格式提交-因此,我们选择相同的输入类型。由于输出名称将出现在代码中,因此输出名称受到C语言中变量名称的限制。写评论没有任何限制。
 以同样的方式,我们创建其余的输出。
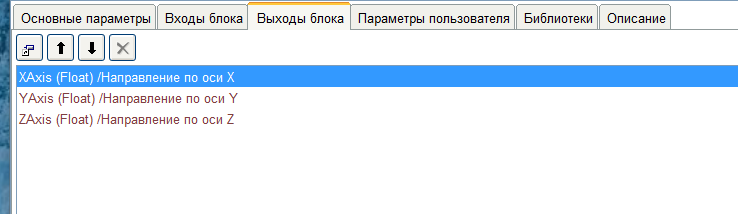 现在,我们将设置用户在使用块时要设置的参数。这就是传感器的灵敏度。根据说明,从以下系列中进行选择:0.88、1.3、1.9、2.5、4.0、4.7、5.6、8.1转到选项卡“用户设置”,然后单击“添加参数”按钮。
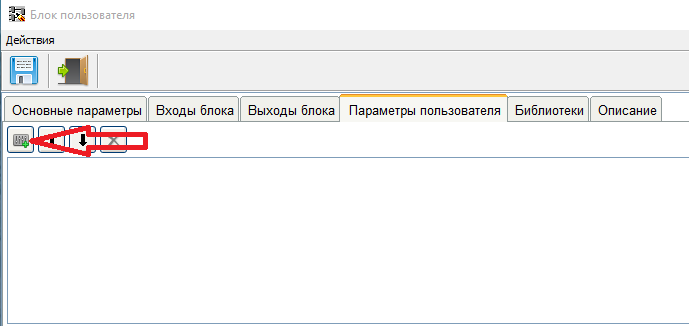 将打开一个用于创建用户参数的窗口。由于我们具有Float类型的参数,因此选择此类型。参数名称没有限制,因为在生成的代码中此名称将被参数值替换。评论文字也没有限制。
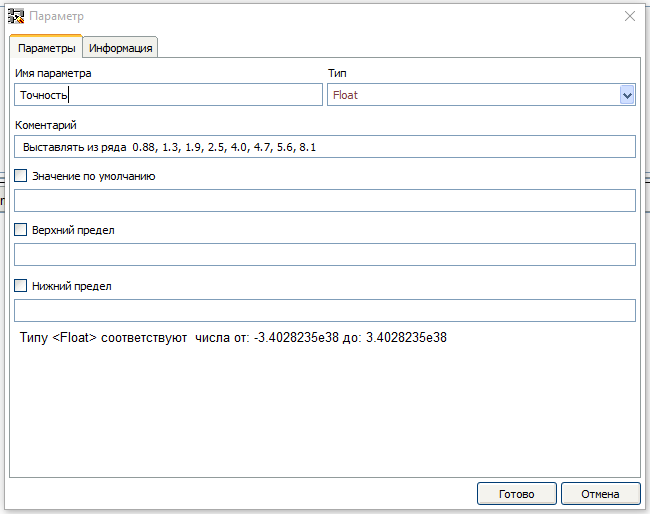 创建参数时,可以设置默认值。在这种情况下,使用块时,无需设置参数值。也可以设置参数值的边界,如果输入的值超出这些边界,则该块将被视为不正确。现在让我们来照顾图书馆。让我们转到“库”标签。块工作中使用的库可以直接加载到块中。为此,请单击“下载库”按钮。
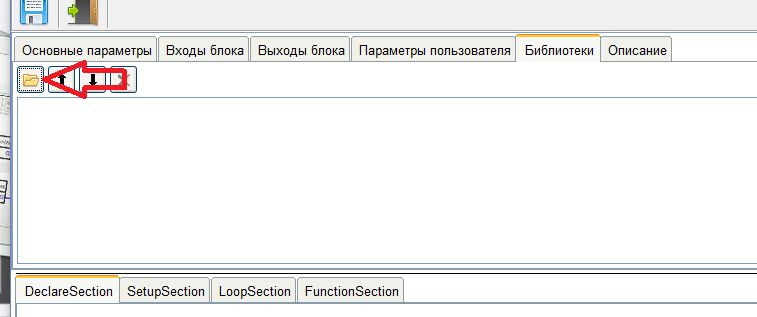 将打开一个用于选择带有库的文件夹的窗口。
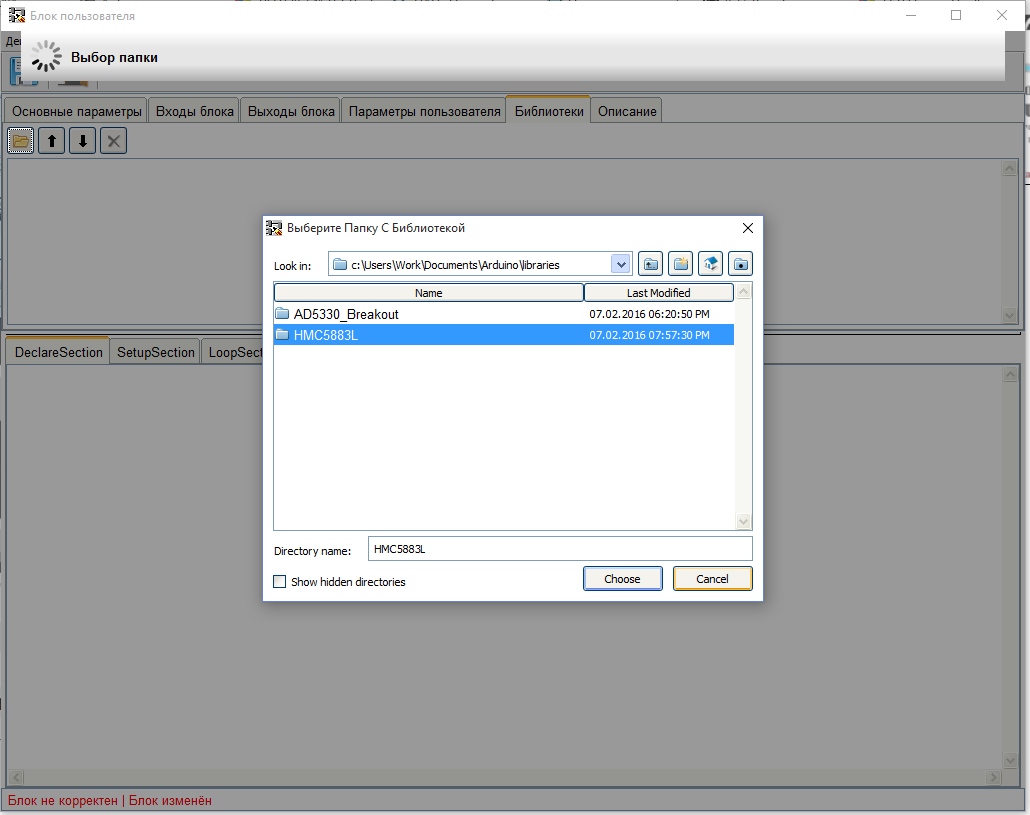 选择库文件夹后,它将被加载到块中,并显示在已加载库的列表中。如有必要,可以加载几个库来运行该块。
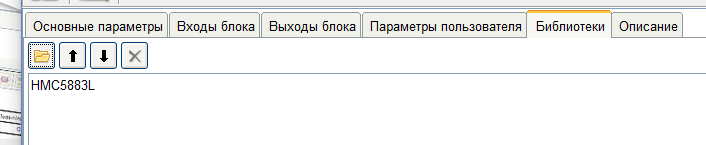 在项目中使用块时,在编译方案之前,程序将检查库目录中该块中是否存在加载的库,如果没有,则将卸载丢失的库。在“描述”选项卡上,最好写出如何使用本机,其用途等。此说明将帮助其他用户使用它。现在转到代码区域,第一个选项卡是“ DeclareSection”部分。在此选项卡上,您需要注册必需库的连接,变量,数组和结构的声明。我们将以库中的示例为指导填充本节。
示例中的“声明”部分的代码。
#include <Wire.h>
#include <HMC5883L.h>
HMC5883L compass;
int error = 0;
转移到该块时,除去了不必要的注释,尽管除了C语言本身的用法之外,对其使用没有任何限制。还添加了一些变量,这些变量将在以后的代码中派上用场。在原始示例中,它们在“循环”部分中声明。在这里,它们被移至“声明”部分。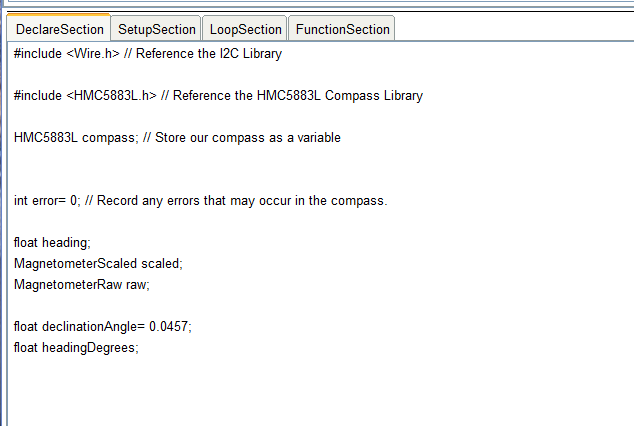 今天,在“声明”部分中,您可以使用任何类型的变量声明,数组和结构的声明。#define指令已正确处理。您不能使用这种类型的声明:
typedef struct{
...
...}
test;
必须以这种形式重做:struct test{
...
...
};
您不能使用extern类型。原来这是一个相当大的问题,我希望在不久的将来解决。现在,让我们继续“ SetupSection”部分。在这里,代码从示例中几乎一对一传输。示例代码void setup()
{
// Initialize the serial port.
Serial.begin(9600);
Serial.println("Starting the I2C interface.");
Wire.begin(); // Start the I2C interface.
Serial.println("Constructing new HMC5883L");
compass = HMC5883L(); // Construct a new HMC5883 compass.
Serial.println("Setting scale to +/- 1.3 Ga");
error = compass.SetScale(1.3); // Set the scale of the compass.
if(error != 0) // If there is an error, print it out.
Serial.println(compass.GetErrorText(error));
Serial.println("Setting measurement mode to continous.");
error = compass.SetMeasurementMode(Measurement_Continuous); // Set the measurement mode to Continuous
if(error != 0) // If there is an error, print it out.
Serial.println(compass.GetErrorText(error));
}
已从示例中删除了限制该节的节标题和括号(它们是程序在编译过程中插入的)。也将所有诊断输出移至该命令。这是发生了什么事。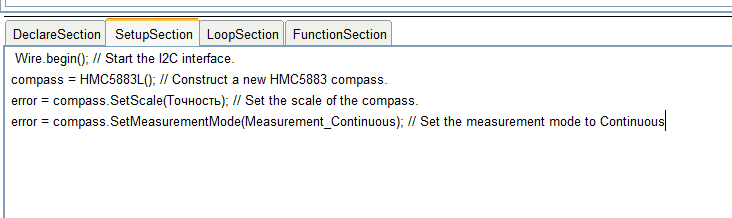 请注意,代替了Precision参数,而是插入了Precision参数。编译块时,将插入用户输入的值而不是该名称。现在让我们进入“循环”部分。
示例库中的原始代码void loop()
{
MagnetometerRaw raw = compass.ReadRawAxis();
MagnetometerScaled scaled = compass.ReadScaledAxis();
int MilliGauss_OnThe_XAxis = scaled.XAxis;
float heading = atan2(scaled.YAxis, scaled.XAxis);
float declinationAngle = 0.0457;
heading += declinationAngle;
if(heading < 0)
heading += 2*PI;
if(heading > 2*PI)
heading -= 2*PI;
float headingDegrees = heading * 180/M_PI;
Output(raw, scaled, heading, headingDegrees);
}
与“设置”部分中一样,删除部分标题和边界括号。它们将被程序自动插入代码中。我们还将在“循环”部分中删除变量的声明。在本节中,声明临时变量是非常不希望的,因为如果在项目中多次使用该块,则在重新声明变量时会发生错误。结果就是这样的代码: 在代码的结尾,我们调用Output函数(raw,scaled,heading,headingDegrees)。原则上,您可以不使用它,但我决定将其作为创建函数的示例。因此,转到选项卡“ FunctionSection”。要创建新功能,请单击“添加功能”按钮。
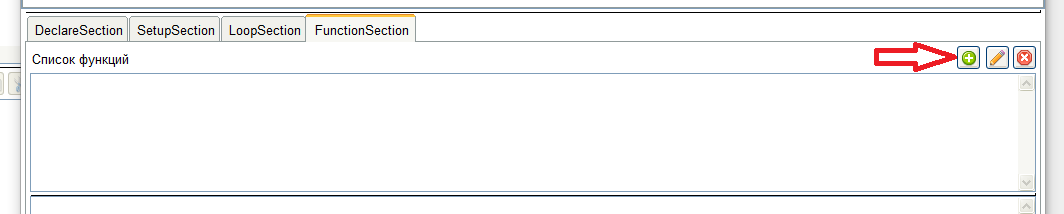 输入函数标题的窗口将打开,我们在其中输入其定义。
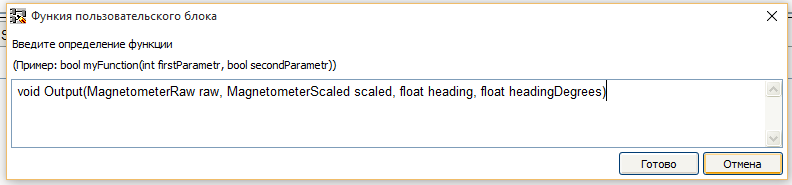 创建标题后,编写功能代码。
示例中的原始功能代码void Output(MagnetometerRaw raw, MagnetometerScaled scaled, float heading, float headingDegrees)
{
Serial.print("Raw:\t");
Serial.print(raw.XAxis);
Serial.print(" ");
Serial.print(raw.YAxis);
Serial.print(" ");
Serial.print(raw.ZAxis);
Serial.print(" \tScaled:\t");
Serial.print(scaled.XAxis);
Serial.print(" ");
Serial.print(scaled.YAxis);
Serial.print(" ");
Serial.print(scaled.ZAxis);
Serial.print(" \tHeading:\t");
Serial.print(heading);
Serial.print(" Radians \t");
Serial.print(headingDegrees);
Serial.println(" Degrees \t");
}
我们在命令行中删除与输出相关的所有内容,并将值分配给块的输出。好吧,像往常一样,删除标题和边界括号。这是结果。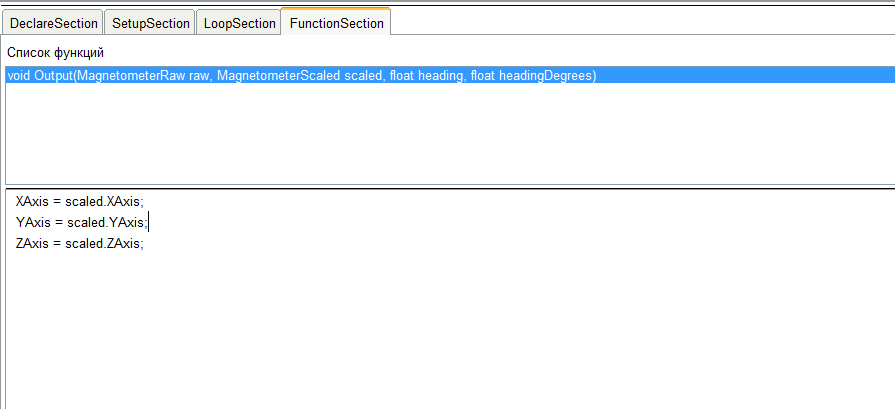 块上的工作已完成。在块编辑器中工作时有点摆设。在代码的任何字段中,都可以使用上下文菜单插入输入,参数输出或函数调用模板的名称。
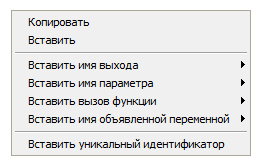 我们通过点击“退出”按钮完成工作。
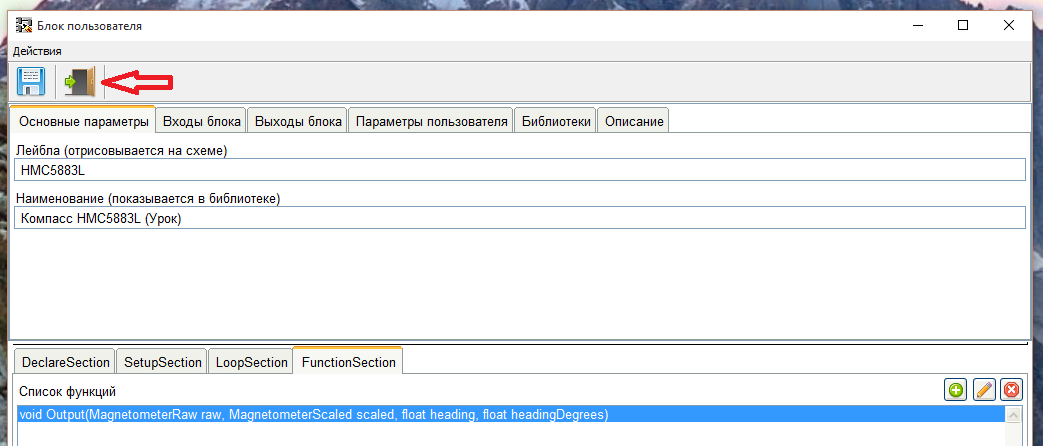 保存该块后,它可以在项目中用作常规块。对于大多数读完本书的患者来说,这是本课程的视频版本。