教程的视频版本
光学字符识别 ( OCR )使计算机能够读取图像中的文本,从而使应用程序能够理解符号,文章,传单,文本页面,菜单或任何文本形式的东西。 Mobile Vision Text API为Android开发人员提供了功能强大且可靠的OCR功能,该功能支持大多数Android设备,并且不会增加应用程序的大小。
在本教程中,您将创建一个应用程序,在该应用程序中,将在视频录制过程中识别并播放掉落到框架中的所有文本。
我们还发布了有关其他Mobile Vision功能的文章:
源代码可以在这里下载。
或从命令行克隆GitHub存储库:
$ git clone https://github.com/googlesamples/android-vision.git
visionSamples存储库包含许多与Mobile Vision相关的示例项目。 本课仅使用两个:
 ocr-codelab / ocr-reader-start是本课程中将使用的初始代码。
- ocr-codelab / ocr-reader-complete-完成的应用程序的完整代码。 您可以使用它来进行故障排除或直接转到正在运行的应用程序。
Google Play服务更新
您可能需要升级已安装的Google Repository版本才能使用Mobile Vision Text API 。
打开Android Studio并打开SDK Manager :
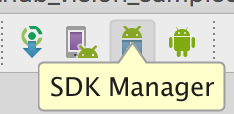
确保Google Repository最新的。 它必须至少是版本26 。

添加Google Play服务依赖项并创建要运行的应用程序
现在您可以打开入门项目:
选择启动目录 下载的代码中的ocr-reader ( 文件 > 打开 > ocr-codelab/ocr-reader-start )。
将Google Play Services依赖项添加到应用程序。 没有这种依赖性, Text API将不可用。
该项目可能表明缺少整数/ google_play_services_version文件并给出了错误。 这是正常现象,我们将在下一步中进行修复。
在app模块中打开build.gradle文件,然后更改依赖关系块以在其中包含play-services-vision依赖关系。 一切准备就绪后,文件应如下所示:
dependencies { implementation fileTree(dir: 'libs', include: ['*.jar']) implementation 'com.android.support:support-v4:26.1.0' implementation 'com.android.support:design:26.1.0' implementation 'com.google.android.gms:play-services-vision:15.0.0' }
请点击 
Gradle同步按钮。
请点击  开始按钮。
开始按钮。
几秒钟后,您将看到“读取文本”屏幕,但这只是一个黑屏。

由于未配置CameraSource没有任何反应。 来吧
如果不成功,您可以打开一个项目 ocr-reader-complete并确保其正常运行。 该项目是课程的现成版本,如果该版本不起作用,则应检查设备和Android Studio设置是否一切正常。
配置TextRecognizer和CameraSource
首先,我们将创建TextRecognizer 。 该检测器对象处理图像并确定其中显示哪些文本。 初始化后, TextRecognizer可用于检测所有类型的图像中的文本。 找到createCameraSource方法并创建一个TextRecognizer :
OcrCaptureActivity.java
private void createCameraSource(boolean autoFocus, boolean useFlash) { Context context = getApplicationContext();
现在TextRecognizer准备就绪。 但是,它可能还无法正常工作。 如果设备的内存不足或Google Play Services无法加载OCR依赖项,则TextRecognizer对象将无法工作。 在开始将其用于文本识别之前,我们必须验证它已准备就绪。 初始化TextRecognizer之后,我们将把此检查添加到createCameraSource :
OcrCaptureActivity.java
现在,我们已经验证了TextRecognizer准备就绪,可以使用它来识别单个帧。 但是我们想做一些更有趣的事情:以视频模式阅读文本。 为此,我们将创建一个预先配置为控制摄像机的CameraSource 。 我们需要为拍摄设置高分辨率,并启用自动对焦以应对识别小文本的任务。 如果您确定用户会看到大块的文本(例如符号),则可以使用较低的分辨率,然后帧处理会更快:
OcrCaptureActivity.java
完成后,这是createCameraSource方法的外观:
OcrCaptureActivity.java
private void createCameraSource(boolean autoFocus, boolean useFlash) { Context context = getApplicationContext();
如果您运行该应用程序,您将看到视频已经开始! 但是要处理来自摄像机的图像,我们需要将最后一个TODO添加到createCameraSource :创建一个Processor来处理文本到达时的内容。
创建OcrDetectorProcessor
您的应用程序现在可以使用TextRecognizer的发现方法来检测单个框架上的文本。 因此,您可以在例如照片中找到文本。 但是,为了在视频拍摄期间直接读取文本,您需要实现一个Processor ,该Processor将在屏幕上显示文本后立即对其进行处理。
转到OcrDetectorProcessor类OcrDetectorProcessor实现Detector.Processor接口:
OcrDetectorProcessor.java
public class OcrDetectorProcessor implements Detector.Processor<TextBlock> { private GraphicOverlay<OcrGraphic> graphicOverlay; OcrDetectorProcessor(GraphicOverlay<OcrGraphic> ocrGraphicOverlay) { graphicOverlay = ocrGraphicOverlay; } }
要实现此接口,您需要重写两个方法。 第一个方法receiveDetections在检测到它们时从TextRecognizer接收TextBlocks 。 第二个release ,用于在销毁TextRecognizer时释放资源。 在这种情况下,我们只需要清除图形画布,这将导致删除所有OcrGraphic对象。
我们将获取TextBlocks并为处理器检测到的每个文本块创建OcrGraphic对象。 我们将在下一步中实现其绘制的逻辑。
OcrDetectorProcessor.java
@Override public void receiveDetections(Detector.Detections<TextBlock> detections) { graphicOverlay.clear(); SparseArray<TextBlock> items = detections.getDetectedItems(); for (int i = 0; i < items.size(); ++i) { TextBlock item = items.valueAt(i); if (item != null && item.getValue() != null) { Log.d("Processor", "Text detected! " + item.getValue()); OcrGraphic graphic = new OcrGraphic(graphicOverlay, item); graphicOverlay.add(graphic); } } } @Override public void release() { graphicOverlay.clear(); }
现在处理器已经准备就绪,我们需要配置textRecognizer以使用它。 返回到OcrCaptureActivity中的createCameraSource方法中最后剩余的TODO :
OcrCaptureActivity.java
现在运行该应用程序。 此时,将相机悬停在文本上方时,您将看到调试消息“检测到文本!” 在Android Monitor Logcat ! 但这不是一种直观的方法来可视化TextRecognizer看到的内容,对吗?
在下一步中,我们将在屏幕上绘制此文本。
在屏幕上绘制文字
让我们在OcrGraphic实现draw方法。 我们需要了解图像中是否有文本,将其边界的坐标转换为画布框架,然后绘制边界和文本。
OcrGraphic.java
@Override public void draw(Canvas canvas) {
启动应用程序并在以下示例文本上对其进行测试:

您应该看到屏幕上出现一个带有文本的框架! 您可以使用TEXT_COLOR来处理文本的颜色。
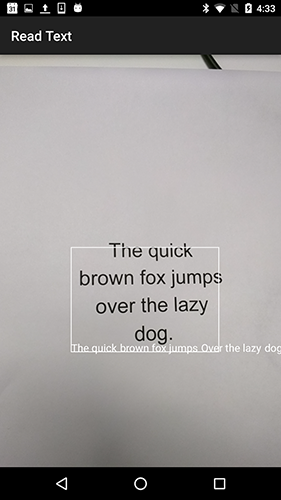
这样呢
文本周围的框架看起来正确,但是文本在其底部。
这是因为即使看到的句子分为几行,引擎也会将其在TextBlock识别的所有文本作为单个句子传输。 如果您需要获得全部报价,那么这非常方便。 但是,如果您想知道每一行文本在哪里,该怎么办?
您可以通过调用getComponents从TextBlock获得Lines ,然后对每一行进行排序,从而轻松获得其位置和其中的文本。 这使您可以在实际显示的位置绘制文本。
OcrGraphic.java
@Override public void draw(Canvas canvas) {
重试此文本:
太好了! 您甚至可以根据需要将找到的文本分解成更小的部分。 您可以在每一行上调用getComponents并获取Elements (拉丁词)。 可以配置textSize ,使文本占用屏幕上实际文本的空间。

单击时播放文本
现在,来自摄像机的文本将转换为结构化的行,并将这些行显示在屏幕上。 让我们对他们做些其他的事情。
使用Android内置的TextToSpeech API和OcrGraphic的contains方法,当您单击文本时,我们可以教应用程序大声说出来。
首先,让我们在OcrGraphic实现contains方法。 我们只需要检查x和y坐标是否在显示的文本范围内。
OcrGraphic.java
public boolean contains(float x, float y) {
您可能会注意到Draw方法有很多共同点! 在这个项目中,您应该能够重用代码,但是在这里,我们将所有内容保留为例。
现在,让我们转到OcrCaptureActivity的onTap方法,并处理对文本的单击(如果该位置有一个单击)。
OcrCaptureActivity.java
private boolean onTap(float rawX, float rawY) {
您可以运行该应用程序,并确保实际上通过Android Monitor Logcat处理了单击文本的Android Monitor Logcat 。
让我们来谈谈应用程序吧! 转到“ Activity的开头并找到onCreate方法。 启动应用程序时,我们必须初始化TextToSpeech引擎以备将来使用。
OcrCaptureActivity.java
@Override public void onCreate(Bundle bundle) {
尽管事实上我们正确地初始化了TextToSpeech ,但仍然需要处理一般错误,例如,当您第一次单击文本时引擎仍未就绪时。
TextToSpeech也取决于语言。 您可以根据识别的文本的语言来更改语言。 语言识别没有内置在Mobile Vision Text API ,但是可以通过Google Translate API 。 作为用于文本识别的语言,您可以使用用户设备的语言。
很好,剩下的就是在onTap方法中添加文本播放代码。
OcrCaptureActivity.java
private boolean onTap(float rawX, float rawY) {
现在,当您启动应用程序并单击检测到的文本时,设备将播放它。 试试看!
完成时间
现在您有了一个应用程序,可以识别相机中的文字并大声朗读!
您可以将获得的文本识别知识应用到其他应用程序中。 例如,从名片中读取地址和电话号码,从各种文档的照片中搜索文本。 简而言之,请在可能需要识别图像中文本的任何地方使用OCR 。
来源