很久以前,我母亲在电话上安装了一个应用程序,该应用程序使我可以通过沿手指的左边缘滑动手指来更改屏幕的亮度。 妈妈已经习惯了,然后换了新手机,那个应用程序已经从商店中消失了。 实际上,由于没有找到类似物,我决定自己写它,并送给她生日。 本文提供了创建和结果的分步指南。
要创建此应用程序,我们需要两个权限-更改系统设置(直接调整亮度)的权限和覆盖其他应用程序顶部的权限。 自从Android 6.0以来,不能仅通过在清单中指定它们就获得这两个权限-必须与用户分开请求它们。
我们的应用程序的结构如下-主要活动,它将具有两个按钮-一个将启动服务,这将绘制SeekBar以控制亮度,第二个将停止该服务。 让我们从我们的主要活动开始。 标记文件如下所示:
标记mainActivity<?xml version="1.0" encoding="utf-8"?> <LinearLayout xmlns:android="http://schemas.android.com/apk/res/android" xmlns:app="http://schemas.android.com/apk/res-auto" android:layout_width="match_parent" android:layout_height="match_parent" android:orientation="vertical" > <Button android:id="@+id/startService" android:layout_width="match_parent" android:layout_height="wrap_content" android:layout_alignParentTop="true" android:layout_centerHorizontal="true" android:layout_marginTop="27dp" android:text=" " /> <Button android:id="@+id/stopService" android:layout_width="match_parent" android:layout_height="wrap_content" android:layout_alignLeft="@+id/startService" android:layout_below="@+id/startService" android:layout_marginTop="39dp" android:text=" " /> </LinearLayout>
这是活动本身的外观:
mainActivity import android.content.Intent; import android.net.Uri; import android.os.Build; import android.os.Bundle; import android.provider.Settings; import android.support.v7.app.AppCompatActivity; import android.view.View; import android.widget.Button; public class MainActivity extends AppCompatActivity { @Override protected void onCreate(Bundle savedInstanceState) { super.onCreate(savedInstanceState); setContentView(R.layout.activity_main);
现在,让我们创建BrightnessChekingService服务,我上面已经指出了它的功能。 不要忘记-如果您手动创建它,则必须在清单中注册它
BrightnessChekingService import android.app.Service; import android.content.Context; import android.content.Intent; import android.graphics.PixelFormat; import android.os.Build; import android.os.IBinder; import android.provider.Settings; import android.view.Gravity; import android.view.WindowManager; import android.widget.SeekBar; public class BrightnessChekingService extends Service{ private WindowManager windowManager; private WindowManager.LayoutParams params; private VerticalSeekBar seekBar; private Context context; public void onCreate () { super.onCreate();
最后,让我们创建一个VerticalSeekBar类,它将是常规SeekBar的自定义版本,不同之处在于我们的SeekBar将垂直放置
垂直搜索栏 import android.content.Context; import android.graphics.Canvas; import android.util.AttributeSet; import android.view.MotionEvent; import android.widget.SeekBar; public class VerticalSeekBar extends SeekBar { public VerticalSeekBar (Context context) { super(context); } public VerticalSeekBar(Context context, AttributeSet attrs, int defStyle) { super(context, attrs, defStyle); } public VerticalSeekBar(Context context, AttributeSet attrs) { super(context, attrs); } protected void onSizeChanged(int w, int h, int oldw, int oldh) { super.onSizeChanged(h, w, oldh, oldw); } public synchronized void setProgress(int progress) { super.setProgress(progress); onSizeChanged(getWidth(), getHeight(), 0, 0); } protected synchronized void onMeasure(int widthMeasureSpec, int heightMeasureSpec) { super.onMeasure(heightMeasureSpec, widthMeasureSpec); setMeasuredDimension(getMeasuredHeight(), getMeasuredWidth()); } protected void onDraw(Canvas c) { c.rotate(-90); c.translate(-getHeight(), 0); super.onDraw(c); } @Override public boolean onTouchEvent(MotionEvent event) { if (!isEnabled()) { return false; } switch (event.getAction()) { case MotionEvent.ACTION_DOWN: case MotionEvent.ACTION_MOVE: case MotionEvent.ACTION_UP: setProgress(getMax() - (int) (getMax() * event.getY() / getHeight())); onSizeChanged(getWidth(), getHeight(), 0, 0); break; case MotionEvent.ACTION_CANCEL: break; } return true; } }
这是应用程序清单的外观:
宣言 <?xml version="1.0" encoding="utf-8"?> <manifest xmlns:android="http://schemas.android.com/apk/res/android" package="com.example.bright"> <uses-permission android:name="android.permission.WRITE_SETTINGS" /> <uses-permission android:name="android.permission.SYSTEM_ALERT_WINDOW" /> <application android:allowBackup="true" android:icon="@mipmap/ic_launcher" android:label="@string/app_name" android:roundIcon="@mipmap/ic_launcher_round" android:supportsRtl="true" android:theme="@style/AppTheme"> <activity android:name=".MainActivity"> <intent-filter> <action android:name="android.intent.action.MAIN" /> <category android:name="android.intent.category.LAUNCHER" /> </intent-filter> </activity> <service android:name=".BrightnessChekingService" android:enabled="true" android:exported="true"></service> </application> </manifest>
仅此而已,就准备好了,但是准备给妈妈的生日礼物已经准备好了。 我们有这样的事情:
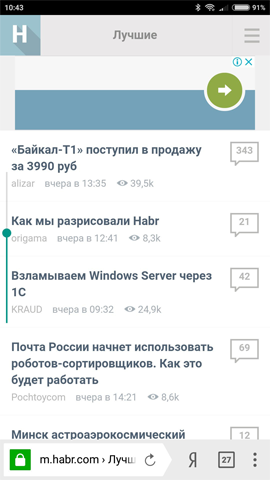
为了演示,我删除了设置透明度的行,因为在这种模式下,条几乎是不可见的。 如果需要,可以添加按钮来控制条的大小,条在屏幕上的位置和透明度。
在这里,您可以使用apkshnik。 如果有人会使用它,我想获得反馈,因为我仅在第七个android上进行了测试。 我想对那些已经在测试应用程序并报告错误的人表示由衷的感谢,您将为我提供极大的帮助。 谢谢你