最近,我有机会为在线商店编写服务,这将有助于下订单打印我的照片。
该服务假定了一个“简单”的图像编辑器,我想分享该创建器。 所有这些都是因为在各种各样的插件中,我找不到合适的功能,此外,CSS转换的细微差别对我来说突然变成了一件不平凡的任务。
主要任务:
- 能够从您的设备,Google云端硬盘和Instagram上传图像。
- 图像编辑:移动,旋转,水平和垂直反射,缩放,自动图像对齐以填充裁切区域。
如果这个话题很有趣,我将在下一个出版物中详细介绍应用程序后端部分与Google Drive和Instagram的集成,其中使用了流行的NodeJS + Express组合。
对于前端的组织,我选择了出色的Vue框架。 只是因为它在Angular和烦人的React之后激发了我的灵感。 我认为描述体系结构,路线和其他组件没有任何意义,让我们直接去编辑器。
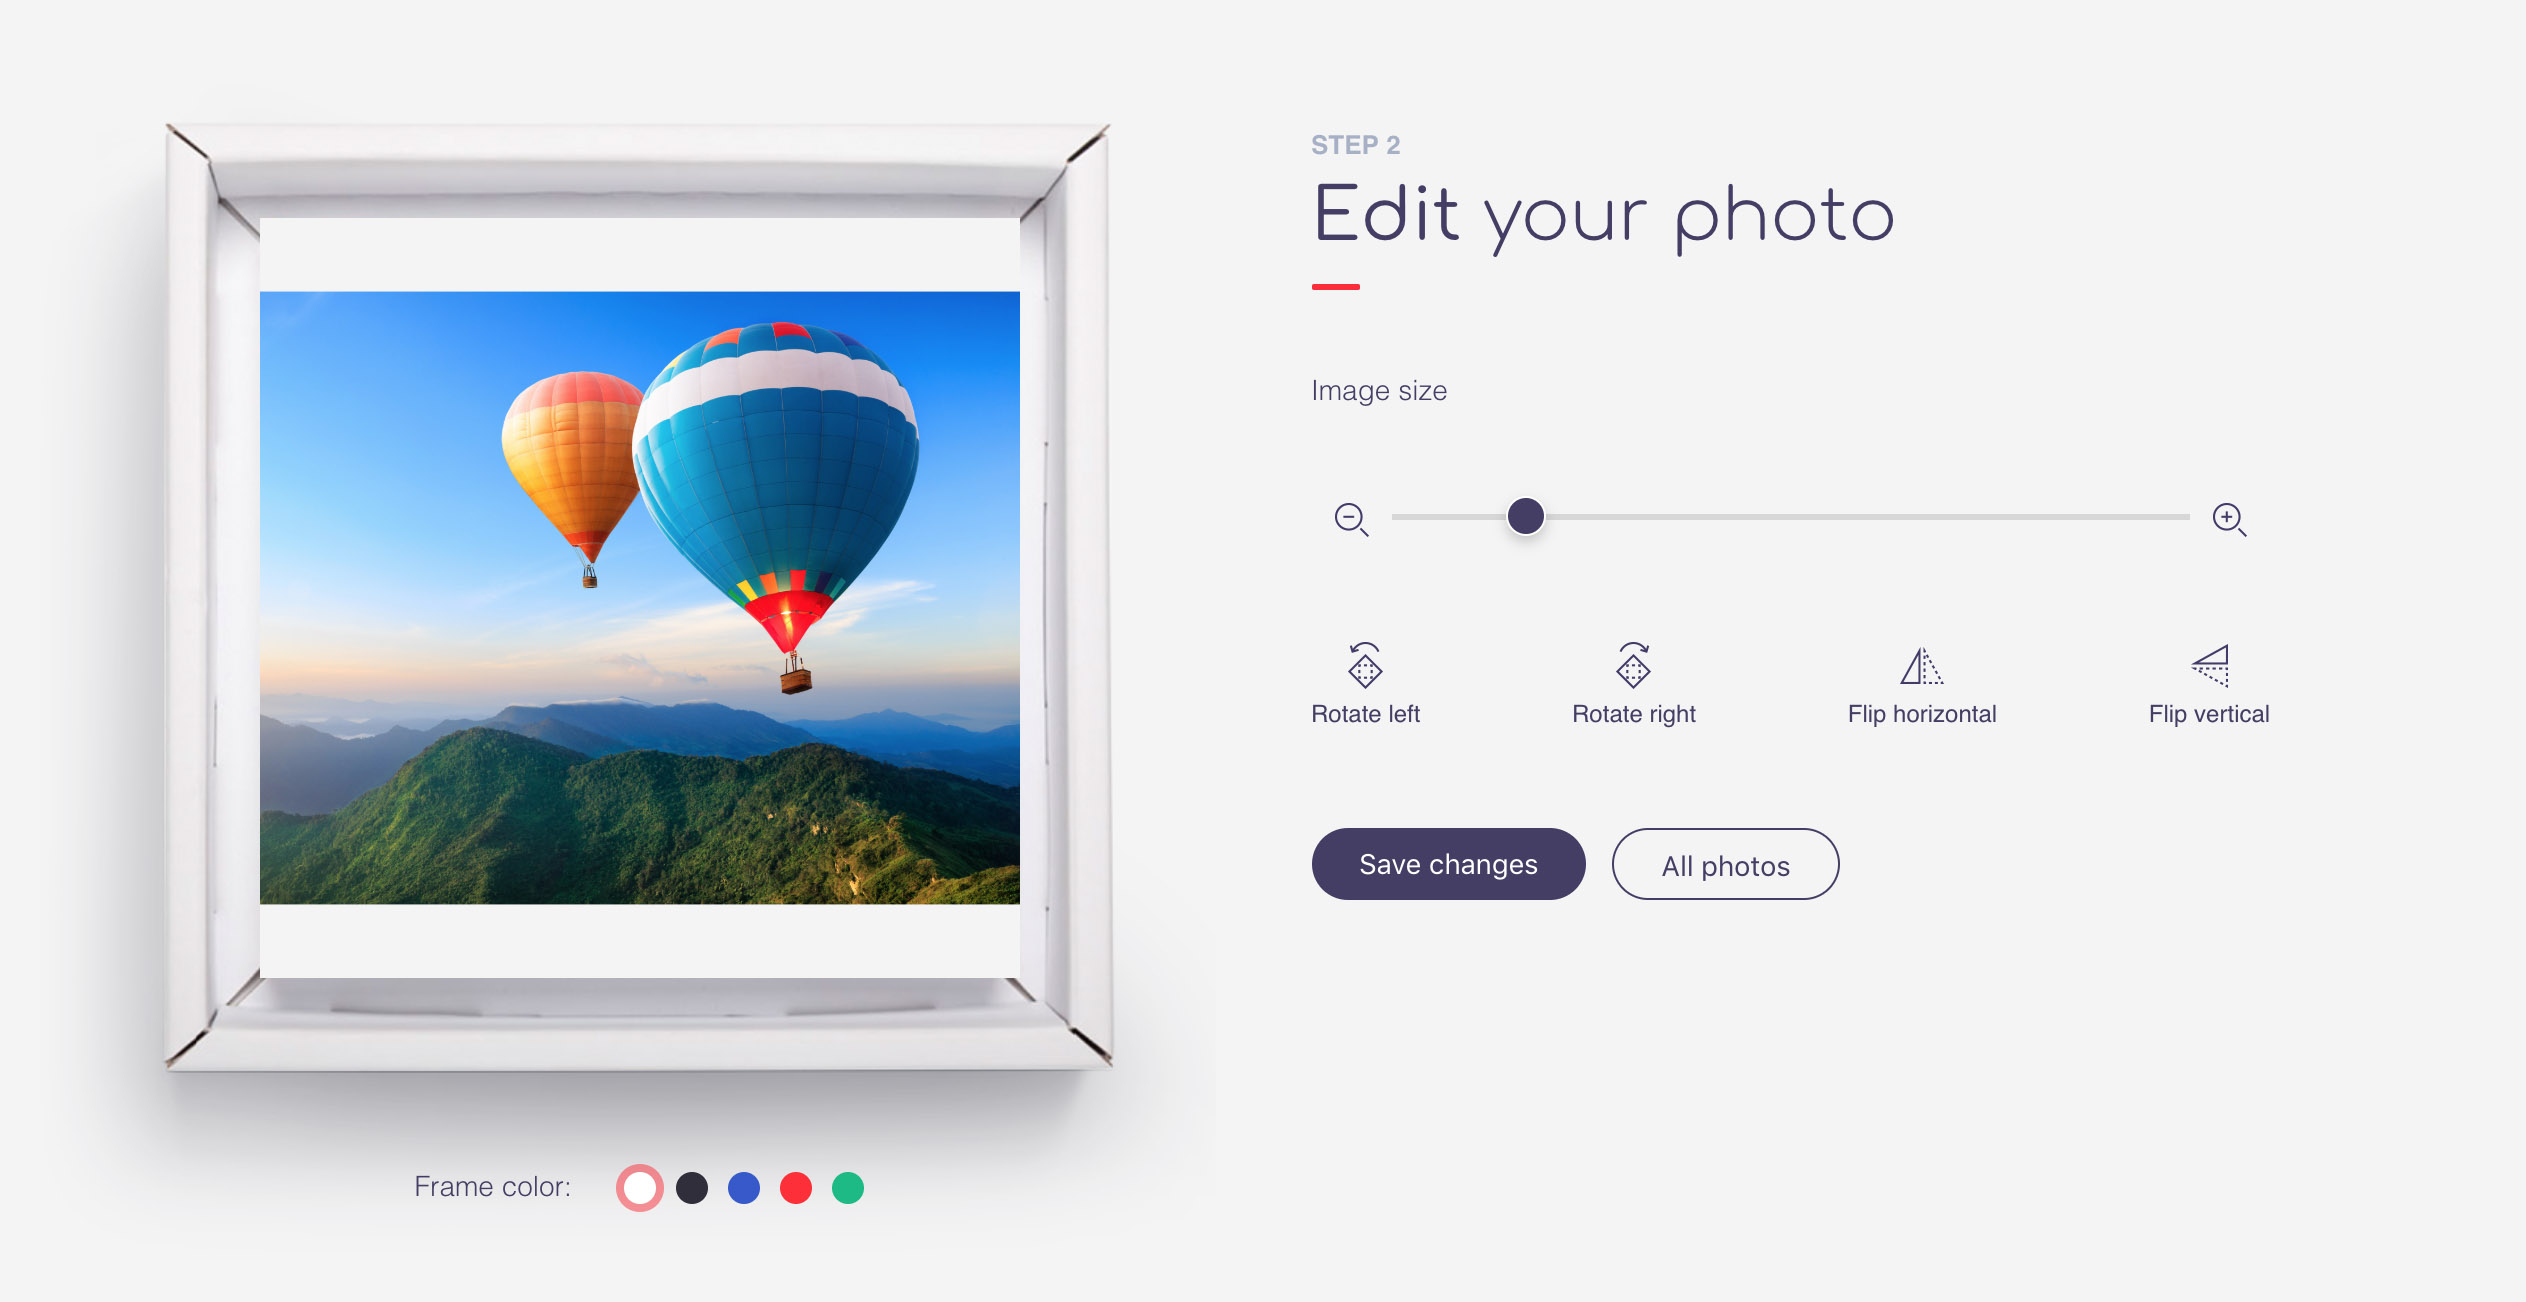
顺便说一下,可以在
此处查看编辑器的演示。
我们将需要两个组件:
编辑 -将包含主要逻辑和控件
预览 -将负责显示图片
组件模板编辑:<Edit> <Preview v-if="image" ref="preview" :matrix="matrix" :image="image" :transform="transform" @resized="areaResized" @loaded="imageLoaded" @moved="imageMoved" /> <input type="range" :min="minZoom" :max="maxZoom" step="any" @change="onZoomEnd" v-model.number="transform.zoom" :disabled="!imageReady" /> <button @click="rotateMinus" :disabled="!imageReady">Rotate left</button> <button @click="rotatePlus" :disabled="!imageReady">Rotate right</button> <button @click="flipY" :disabled="!imageReady">Flip horizontal</button> <button @click="flipX" :disabled="!imageReady">Flip vertical</button> </Edit>
预览组件可以触发3个事件:
已加载 -图片加载事件
调整大小 -窗口
调整大小事件
已移动 -图片移动事件
参数:
图片 -
图片链接
matrix-转换CSS属性的转换矩阵
transform-描述转换的对象
为了更好地控制图像的位置,img具有绝对定位,并且
transform-origin属性(
变换参考点)设置为初始值“ 0 0”,该值对应于原始图像(变换之前!)的左上角。
我遇到的主要问题是,您需要确保变换原点始终位于编辑区域的中心,否则,在变换过程中,图像的选定部分将会移动。 使用此
变换矩阵有助于解决此问题。
组件编辑
编辑组件的属性: export default { components: { Preview }, data () { return { image: null, imageReady: false, imageRect: {},
预览组件将imageRect和areaRect的值传递给我们,分别调用imageLoaded和areaResized方法,对象具有以下结构:
{ size: { width: 100, height: 100 }, center: { x: 50, y: 50 } }
每次可以计算中心值,但是将它们记一次更容易。
计算出的矩阵属性与变换矩阵的系数相同。
需要解决的第一个任务是以任意纵横比将图像居中放置在作物区域中,而图像应该能够完全适合,上方和下方(仅)或左侧和右侧(仅)的未填充区域是可以接受的。 进行任何转换时,必须保持此条件。
首先,我们将限制缩放值,为此,我们将考虑图像的方向来检查纵横比。
组成方法: _setMinZoom(){ let rotate = this.matrix.c !== 0; let horizontal = this.imageRect.size.height < this.imageRect.size.width; let areaSize = (horizontal && !rotate || !horizontal && rotate) ? this.areaRect.size.width : this.areaRect.size.height; let imageSize = horizontal ? this.imageRect.size.width : this.imageRect.size.height; this.minZoom = areaSize/imageSize; if(this.transform.zoom < this.minZoom) this.transform.zoom = this.minZoom; }, _setMaxZoom(){ this.maxZoom = this.areaRect.size.width/config.image.minResolution; if(this.transform.zoom > this.maxZoom) this.transform.zoom = this.maxZoom; },
现在,让我们继续进行转换。 首先,我们描述反射,因为它们不会移动图像的可见区域。
组成方法: flipX(){ this.matrix.b == 0 && this.matrix.c == 0 ? this.transform.flip = !this.transform.flip : this.transform.flop = !this.transform.flop; }, flipY(){ this.matrix.b == 0 && this.matrix.c == 0 ? this.transform.flop = !this.transform.flop : this.transform.flip = !this.transform.flip; },
缩放,旋转和位移的转换将已经需要转换原点调整。
组成方法: onZoomEnd(){ this._translate(); }, rotatePlus(){ this.transform.rotate += 90; this._setMinZoom(); this._translate(); }, rotateMinus(){ this.transform.rotate -= 90; this._setMinZoom(); this._translate(); }, imageMoved(translate){ this._translate(); },
_translate方法负责转换的所有微妙之处。 必须引入两个参考系统。 首先,我们将其称为零,从图像的左上角开始,当我们将坐标乘以变换矩阵时,我们转到另一个坐标系,将其称为局部坐标系。 在这种情况下,我们可以通过找到
逆变换
矩阵来逆转从局部到零的过渡。
事实证明,我们需要两个功能。
第一种是从零到本地系统,当我们指定css transform属性时,浏览器执行相同的转换。
img { transform: matrix(a, b, c, d, tx, ty); }
第二个-查找已经变换坐标的图像的原始坐标。
使用单独的类的方法编写这些函数是最方便的。
转换类别: class Transform { constructor(center, matrix){ this.init(center, matrix); } init(center, matrix){ if(center) this.center = Object.assign({},center); if(matrix) this.matrix = Object.assign({},matrix); } getOrigins(current){
_Translate方法,带有详细注释: _translate(checkAlign = true){ const tr = new Transform(this.transform.center, this.matrix);
对齐会产生将图像“粘贴”到裁切边缘的效果,避免出现空白区域。
预览组件
该组件的主要任务是显示图像,应用变换并响应夹在图像上的鼠标按钮的移动。 计算偏移量后,我们更新参数
transform.x和
transform.y ,在运动结束时触发已
移动的事件,告诉Edit组件需要重新计算变换中心的位置并调整transform.x和transform.y。
预览组件模板:<div ref =“ area”类=“编辑区”
@ mousedown =“ onMoveStart”
@ touchstart =“ onMoveStart”
mouseup =“ onMoveEnd”
@ touchend =“ onMoveEnd”
@ mousemove =“ onMove”
@ touchmove =“ onMove”>
<img
v-if =“ image”
ref =“图片”
load =“ imageLoaded”
:src =“图像”
:style =“ {'transform':transformStyle,'transform-origin':transformOrigin}”>
编辑器的功能与主项目完全分开,位于
此处 。
我希望这些材料对您有用。 谢谢你