有一天,我需要一个可以通过USB从桌面程序控制的设备,也可以通过Android应用程序进行控制。 唯一的特点是未使用HID,CDC和其他标准设备类别。 数据传输是通过批量传输和端点进行的。 使用usb的基础是libusb库。
我们将创建一个测试应用程序,通过该应用程序可以从设备传输和接收任意数据。
我将介绍关键点,完整代码的链接将在结尾。
首先,我们根据与UsbHost一起使用的官方文档采取行动。
在清单中添加一行
<uses-feature android:name="android.hardware.usb.host"/>
如果要自动检测设备并启动应用程序,则在主要活动的清单中编写以下内容。
<intent-filter> <action android:name="android.hardware.usb.action.USB_DEVICE_ATTACHED"/> </intent-filter> <meta-data android:name="android.hardware.usb.action.USB_DEVICE_ATTACHED" android:resource="@xml/device_filter"/>
使用资源device_filter.xml在文件中为我们的设备指定其VID和PID
<resources> <usb-device product-id="0037" vendor-id="8742"/> </resources>
我们在onCreate方法中获得了usb管理器。
mUsbManager = (UsbManager) getSystemService(Context.USB_SERVICE)
接下来,我们获得连接到USB的设备的列表,其中我们正在寻找所需的USB_CLASS_PER_INTERFACE类的设备。
UsbDevice findDevice(UsbManager usbManager) { for (UsbDevice usbDevice : usbManager.getDeviceList().values()) { if (usbDevice.getDeviceClass() == UsbConstants.USB_CLASS_PER_INTERFACE) { return usbDevice; } else { UsbInterface usbInterface = findInterface(usbDevice); if (usbInterface != null) return usbDevice; } } return null; } UsbInterface findInterface(UsbDevice usbDevice) { for (int nIf = 0; nIf < usbDevice.getInterfaceCount(); nIf++) { UsbInterface usbInterface = usbDevice.getInterface(nIf); if (usbInterface.getInterfaceClass() == UsbConstants.USB_CLASS_PER_INTERFACE) { return usbInterface; } } return null; }
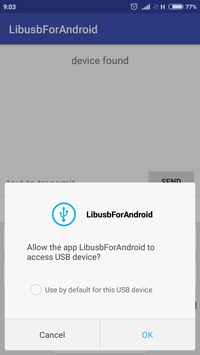
接下来,我们找到所需的接口,别忘了检查权限,我们对所有控制点进行排序,在其中选择读写点,最后进行连接。
private void initUsbDevice() { PendingIntent mPermissionIntent = PendingIntent.getBroadcast(this, 0, new Intent(ACTION_USB_PERMISSION), 0); IntentFilter filter = new IntentFilter(ACTION_USB_PERMISSION); registerReceiver(mUsbReceiver, filter); mUsbManager.requestPermission(mUsbDevice, mPermissionIntent); mUsbInterface = findInterface(mUsbDevice); for (int nEp = 0; nEp < mUsbInterface.getEndpointCount(); nEp++) { UsbEndpoint tmpEndpoint = mUsbInterface.getEndpoint(nEp); if (tmpEndpoint.getType() != UsbConstants.USB_ENDPOINT_XFER_BULK) continue; if ((mOutEndpoint == null) && (tmpEndpoint.getDirection() == UsbConstants.USB_DIR_OUT)) { mOutEndpoint = tmpEndpoint; } else if ((mInEndpoint == null) && (tmpEndpoint.getDirection() == UsbConstants.USB_DIR_IN)) { mInEndpoint = tmpEndpoint; } } if (mOutEndpoint == null) { Toast.makeText(this, "no endpoints", Toast.LENGTH_LONG).show(); } mConnection = mUsbManager.openDevice(mUsbDevice); if (mConnection == null) { Toast.makeText(this, "can't open device", Toast.LENGTH_SHORT).show(); return; } mConnection.claimInterface(mUsbInterface, true); startIoManager(); }
为了处理I / O,数据缓冲,异步和其他便利的事情,使用了辅助管理器类,但是实质上,数据交换被简化为以下代码。
阅读:
mConnection.bulkTransfer(mInEndpoint, data, size, READ_TIMEOUT);
记录:
int bytesWritten = mConnection.bulkTransfer(mOutEndpoint, Arrays.copyOfRange(data, offset, offset + size), size, WRITE_TIMEOUT);
通过这种方式,可以传输和接收BulkTransfer数据包。
结果,我们的简单应用程序可以发送和接收任意数据。
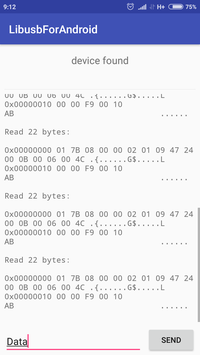
有效!
该
测试应用程序在GitHub上的项目
有用的链接:
- 用于在Android上使用FT232和其他CDC设备的库。
- 与UsbHost一起使用的Android官方文档。