在我们的博客中,我们写了很多有关股票交易的技术和有用工具。 其中之一是免费的
StockSharp平台,该平台可用于C#中交易终端和交易机器人的专业开发。 在本文中,我们将展示如何使用S#.API中包含的图形框架来创建具有运行算法策略能力的交易终端。
需要什么
- Visual Studio 2017(社区,免费版本),我们将在其中进行编程。
- 与交易所交易的连接,在本文的示例中,使用了ITI Capital的SMARTcom接口。
项目创建
在Visual Studio中创建一个新的WPF应用程序:

然后,您需要添加S#.API库。 您可以
在文档中找到如何执行此操作。 最好的选择是使用Nuget进行安装。
由于所有S#.API图形元素均基于DevExpress,而DevExpress库随S#.API一起提供,因此不使用它们将是愚蠢的。 让我们转到窗口编辑器MainWindow.xaml:

用DXWindow替换Window,我们将需要使用它来使用不同的配色方案:

Visual Studio本身将为我们提供插入必要的库。
我们将窗口分为三个部分-顶部有一个带按钮的条带,用于建立连接和连接,底部有一个带日志的窗口,中间是所有其他面板。 打破窗口最简单的方法是使用DevExpress的LayoutControl。
在最后的三部分中,我们将添加所需的元素。
<dx:DXWindow x:Class="ShellNew.MainWindow" xmlns="http://schemas.microsoft.com/winfx/2006/xaml/presentation" xmlns:x="http://schemas.microsoft.com/winfx/2006/xaml" xmlns:d="http://schemas.microsoft.com/expression/blend/2008" xmlns:mc="http://schemas.openxmlformats.org/markup-compatibility/2006" xmlns:dx="http://schemas.devexpress.com/winfx/2008/xaml/core" xmlns:dxlc="http://schemas.devexpress.com/winfx/2008/xaml/layoutcontrol" mc:Ignorable="d" Title="MainWindow" Height="450" Width="800"> <dxlc:LayoutControl Padding="0" Name="LayoutControlRoot" Orientation="Vertical"> <dxlc:LayoutGroup HorizontalAlignment="Stretch" Height="25"> </dxlc:LayoutGroup> <dxlc:LayoutGroup HorizontalAlignment="Stretch" > </dxlc:LayoutGroup> <dxlc:LayoutGroup HorizontalAlignment="Stretch" > </dxlc:LayoutGroup> </dxlc:LayoutControl> </dx:DXWindow>
配置与连接器的连接
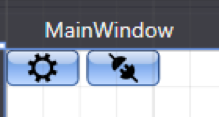
添加两个按钮,一个是连接设置按钮,第二个是连接按钮。 为此,请使用DevExpress中的SimpleButton按钮。 这些按钮将位于应用程序的顶部。 在每个按钮中,我们放置
S#.Designer ,
S#.Data和
S#.Terminal熟悉的图片。
<dx:DXWindow x:Class="ShellNew.MainWindow" xmlns="http://schemas.microsoft.com/winfx/2006/xaml/presentation" xmlns:x="http://schemas.microsoft.com/winfx/2006/xaml" xmlns:d="http://schemas.microsoft.com/expression/blend/2008" xmlns:mc="http://schemas.openxmlformats.org/markup-compatibility/2006" xmlns:dx="http://schemas.devexpress.com/winfx/2008/xaml/core" xmlns:dxlc="http://schemas.devexpress.com/winfx/2008/xaml/layoutcontrol" xmlns:xaml="http://schemas.stocksharp.com/xaml" mc:Ignorable="d" Title="MainWindow" Height="450" Width="800"> <dxlc:LayoutControl Padding="0" Name="LayoutControlRoot" Orientation="Vertical"> <dxlc:LayoutGroup HorizontalAlignment="Stretch" Height="25"> <!-- --> <dxlc:LayoutItem Width="40"> <dx:SimpleButton x:Name="SettingsButton" Click="SettingsButton_Click" > <Image Source="{xaml:ThemedIcons Key=Settings}" Width="16" /> </dx:SimpleButton> </dxlc:LayoutItem> <dxlc:LayoutItem Width="40"> <dx:SimpleButton x:Name="ConnectButton" Click="ConnectButton_Click" > <Image Source="{xaml:ThemedIcons Key=Connect}" Width="16" /> </dx:SimpleButton> </dxlc:LayoutItem> </dxlc:LayoutGroup> <dxlc:LayoutGroup HorizontalAlignment="Stretch" View="Tabs"> <!-- --> </dxlc:LayoutGroup> <dxlc:LayoutGroup HorizontalAlignment="Stretch" > <!-- --> </dxlc:LayoutGroup> </dxlc:LayoutControl> </dx:DXWindow>
在屏幕表单的右上角,我们将看到以下图片:
双击每个按钮以创建用于单击按钮的事件处理程序。 在MainWindow代码中,必须声明连接器,以及将存储连接器设置的位置和文件名。
public readonly Connector Connector; private const string _dir = "Data"; private static readonly string _settingsFile = $@"{_dir}\connection.xml";
在用于单击连接器设置按钮的事件处理程序中,我们将打开连接器配置窗口并将其保存到文件中。
private void SettingsButton_Click(object sender, RoutedEventArgs e) { if (Connector.Configure(this)) { new XmlSerializer<SettingsStorage>().Serialize(Connector.Save(), _settingsFile); } }
在构造函数中,我们将检查是否存在带有连接器设置的目录和文件,如果存在,则将其加载到连接器中:
大多数S#.API对象具有Save and Load方法,可用于从XML文件保存和加载此对象。
在方法处理程序中,单击连接按钮,我们连接连接器。
private void ConnectButton_Click(object sender, RoutedEventArgs e) { Connector.Connect(); }
现在,您可以运行该程序并进行检查。
设置黑暗主题
许多交易者喜欢深色主题而不是交易应用程序。 因此,我们立即使该程序的主题变暗。 您需要找到App.xaml文件:
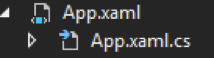
并用图表替换Application:其中的ExtendedBaseApplication,Visual Studio本身将为我们提供插入必要的库。
<charting:ExtendedBaseApplication x:Class="ShellNew.App" xmlns="http://schemas.microsoft.com/winfx/2006/xaml/presentation" xmlns:x="http://schemas.microsoft.com/winfx/2006/xaml" xmlns:charting="http://schemas.stocksharp.com/xaml" StartupUri="MainWindow.xaml"> </charting:ExtendedBaseApplication>
在文件App.xaml.cs中,您需要删除“:Application”。
namespace ShellNew {
在MainWindow的构造函数中,编写
ApplicationThemeHelper.ApplicationThemeName = Theme.VS2017DarkName;目前的完整代码:
public partial class MainWindow { public readonly Connector Connector; private const string _dir = "Data"; private static readonly string _settingsFile = $@"{_dir}\connection.xml"; public MainWindow() {
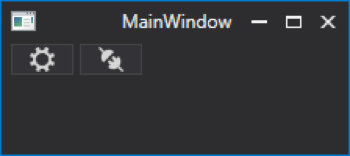
运行以检查黑暗的主题:
创建工具栏
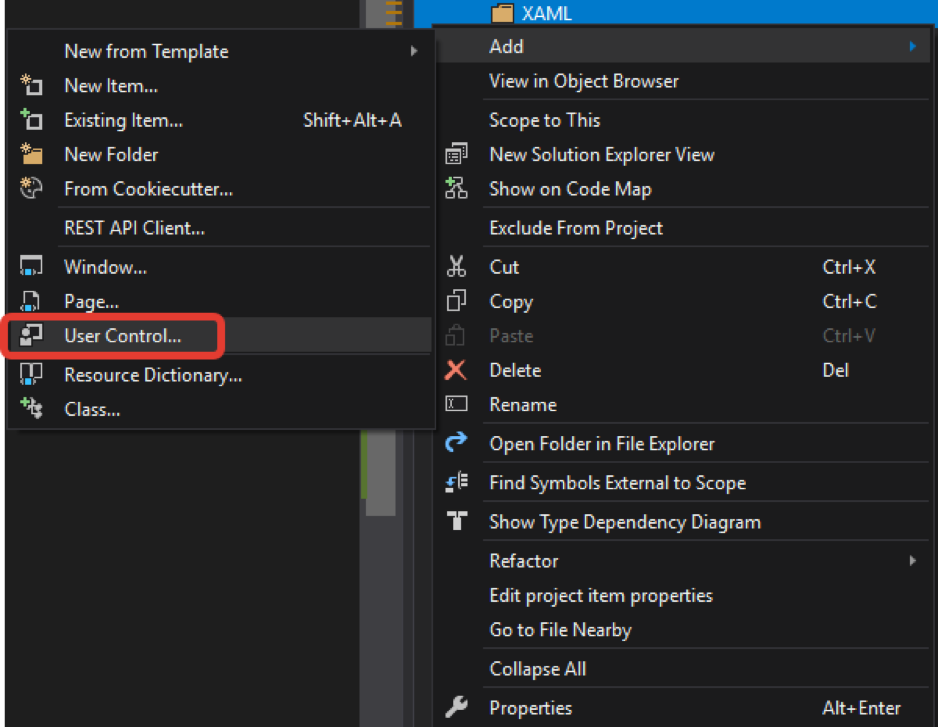
添加一个文件夹,我们将在其中存储创建的所有控件,并将其命名为XAML。 向其中添加我们的第一个UserControll,并将其命名为SecurityGridControl。
我们向其中添加一个SecurityPicker元素。 它将显示可用的工具。 与主窗口类似,我们将使用DevExpress中的LayoutControl。
<UserControl x:Class="ShellNew.XAML.SecurityGridControl" xmlns="http://schemas.microsoft.com/winfx/2006/xaml/presentation" xmlns:x="http://schemas.microsoft.com/winfx/2006/xaml" xmlns:mc="http://schemas.openxmlformats.org/markup-compatibility/2006" xmlns:d="http://schemas.microsoft.com/expression/blend/2008" xmlns:xaml="http://schemas.stocksharp.com/xaml" mc:Ignorable="d" d:DesignHeight="450" d:DesignWidth="800"> <xaml:SecurityPicker x:Name="SecPicker" /> </UserControl>
让我们转到主窗口的设计器,然后将中心部分更改为书签视图。 在其中一个书签中,我们将放置使用SecurityPicker创建的控制器:
<dxlc:LayoutGroup HorizontalAlignment="Stretch" View="Tabs"> <!-- --> <dxlc:LayoutGroup Header="Securities"> <myxaml:SecurityGridControl x:Name="SecurityPanel" /> </dxlc:LayoutGroup> </dxlc:LayoutGroup>
现在有了工具栏,我们需要为其提供数据源,在本例中为连接器。 您可以简单地在
MainWindow
SecurityPanel.SecPicker.SecurityProvider = Connector;
构造函数中
MainWindow
SecurityPanel.SecPicker.SecurityProvider = Connector;
MainWindow
SecurityPanel.SecPicker.SecurityProvider = Connector; 。
但是,您不应使用不适用于它的代码阻塞MainWindow。 因此,我们将创建Instance静态变量,并在MainWindow构造函数中为其分配MainWindow:
… public static MainWindow Instance; … Instance = this; …
现在,在程序的任何位置,我们都可以通过代码MainWindow.Instance.XXX访问MainWindow的属性。
在SecurityGridControl构造函数中,通过这种方式,我们将Connector指定为数据源:
public SecurityGridControl() { InitializeComponent(); SecPicker.SecurityProvider = MainWindow.Instance.Connector; }
运行检查:

添加日志
必须控制程序,连接器或机械手。 为此,S#.API具有一个特殊的LogManager类。 此类从源接收消息,并将消息传递给侦听器。 在我们的例子中,源将是连接器,策略等,侦听器将是文件和日志面板。
在MainWindow代码中,我们声明LogManager对象及其存储位置:
public readonly LogManager LogManager; private static readonly string _logsDir = $@"{_dir}\Logs\";
在MainWindow构造函数中,创建一个LogManager,为其设置Connector源和侦听器文件:
类似于工具栏,在XAML文件夹中创建一个日志面板,添加另一个UserControl。 为它命名为MonitorControl。 向其添加Monitor元素。
<UserControl x:Class="ShellNew.XAML.MonitorControl" xmlns="http://schemas.microsoft.com/winfx/2006/xaml/presentation" xmlns:x="http://schemas.microsoft.com/winfx/2006/xaml" xmlns:mc="http://schemas.openxmlformats.org/markup-compatibility/2006" xmlns:d="http://schemas.microsoft.com/expression/blend/2008" xmlns:xaml="http://schemas.stocksharp.com/xaml" mc:Ignorable="d" d:DesignHeight="450" d:DesignWidth="800"> <xaml:Monitor x:Name="Monitor" /> </UserControl>
在MonitorControl构造函数中,将LogManager设置为Monitor作为侦听器:
public MonitorControl() { InitializeComponent(); MainWindow.Instance.LogManager.Listeners.Add(new GuiLogListener(Monitor)); }
将创建的MonitorControl添加到MainWindow的底部:
<dxlc:LayoutGroup HorizontalAlignment="Stretch" dxlc:LayoutControl.AllowVerticalSizing="True"> <!-- --> <myxaml:MonitorControl x:Name="MonitorControl" /> </dxlc:LayoutGroup>
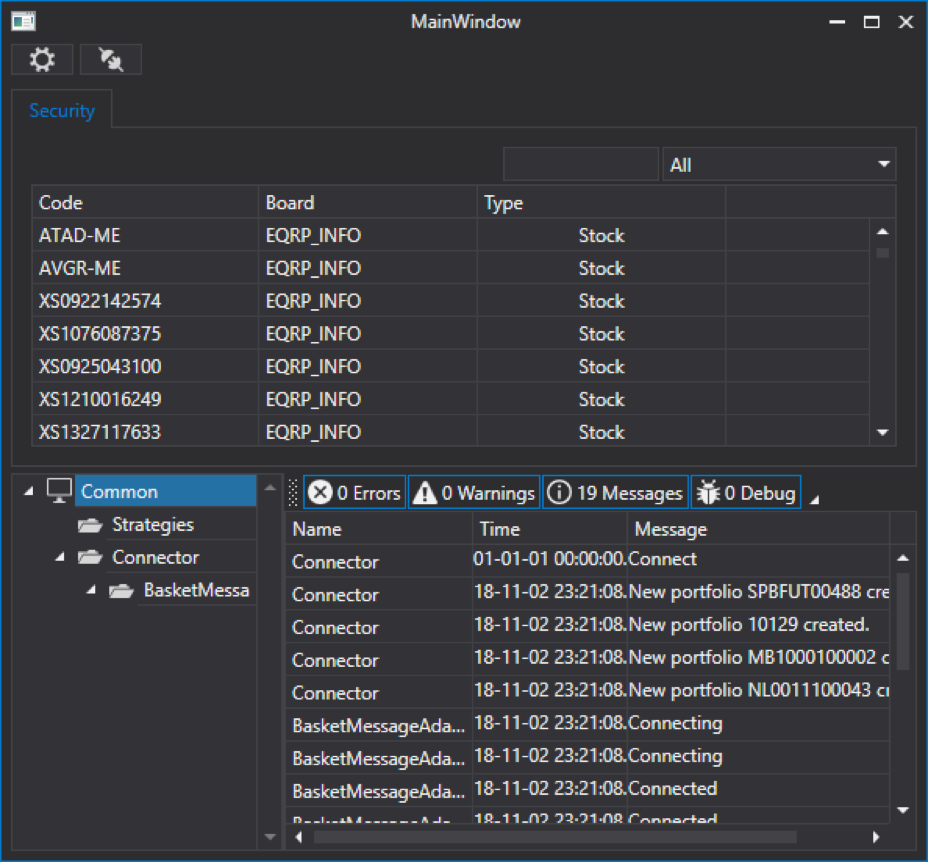
运行检查:
创建玻璃面板
与前面的面板类似,创建一个玻璃面板,然后将另一个UserControl添加到XAML文件夹中。 为它命名为MarketDepthControl。
在MainWindow中,我们已经使用LayoutControl,在此控件中,我们还将使用LayoutControl。 我们将面板水平分为两部分:
<UserControl x:Class="ShellNew.XAML.MarketDepthControl" xmlns="http://schemas.microsoft.com/winfx/2006/xaml/presentation" xmlns:x="http://schemas.microsoft.com/winfx/2006/xaml" xmlns:mc="http://schemas.openxmlformats.org/markup-compatibility/2006" xmlns:d="http://schemas.microsoft.com/expression/blend/2008" xmlns:dxlc="http://schemas.devexpress.com/winfx/2008/xaml/layoutcontrol" mc:Ignorable="d"> <dxlc:LayoutControl Padding="0" Name="LayoutControlRoot" Orientation="Horizontal"> <dxlc:LayoutGroup> <!--Left--> </dxlc:LayoutGroup> <dxlc:LayoutGroup Orientation="Vertical" dxlc:LayoutControl.AllowHorizontalSizing="True"> <!--Rigth--> </dxlc:LayoutGroup> </dxlc:LayoutControl> </UserControl>
将SecurityPicker添加到左侧-创建工具栏时我们遇到了他。
<dxlc:LayoutGroup> <xaml:SecurityPicker x:Name="SecPicker" SecuritySelected="SecPicker_SecuritySelected" /> </dxlc:LayoutGroup> . : <dxlc:LayoutGroup Orientation="Vertical" dxlc:LayoutControl.AllowHorizontalSizing="True"> <dxlc:LayoutItem VerticalAlignment="Stretch"> <xaml:MarketDepthControl x:Name="MarketDepth" MaxHeight="2000" SelectionChanged="MarketDepth_SelectionChanged" /> </dxlc:LayoutItem> </dxlc:LayoutGroup>
MarketDepthControl需要设置一些MaxHeight值,否则应用程序将无法启动。
在玻璃下面,我们将放置投资组合任务,价格和订单量的元素:
<dxlc:LayoutItem Label="Portfolio" Height="20"> <xaml:PortfolioComboBox x:Name="PortfolioComboBox" /> </dxlc:LayoutItem> <dxlc:LayoutItem Label="Price" Height="20"> <dxe:SpinEdit MinValue="0" Name="SpinEditPrice" /> </dxlc:LayoutItem> <dxlc:LayoutItem Label="Volume" Height="20"> <dxe:SpinEdit MinValue="0" Name="SpinEditVolume" /> </dxlc:LayoutItem>
值得注意的是LayoutItem的Label属性,它允许您在元素前面设置文本。 以及DevExpress中的SpinEdit元素,在其中可以方便地设置数值。 这些元素如下所示:

在下方,我们将放置购买和出售按钮:
<dxlc:LayoutGroup Orientation="Horizontal" Height="20" VerticalAlignment="Stretch"> <dxlc:LayoutItem VerticalAlignment="Stretch"> <dx:SimpleButton Content="Buy" x:Name="BuyButton" Click="BuyButton_Click" /> </dxlc:LayoutItem> <dxlc:LayoutItem VerticalAlignment="Stretch"> <dx:SimpleButton Content="Sell" x:Name="SelltButton" Click="SelltButton_Click" /> </dxlc:LayoutItem> </dxlc:LayoutGroup>
完整代码:
<UserControl x:Class="ShellNew.XAML.MarketDepthControl" xmlns="http://schemas.microsoft.com/winfx/2006/xaml/presentation" xmlns:x="http://schemas.microsoft.com/winfx/2006/xaml" xmlns:mc="http://schemas.openxmlformats.org/markup-compatibility/2006" xmlns:d="http://schemas.microsoft.com/expression/blend/2008" xmlns:dxlc="http://schemas.devexpress.com/winfx/2008/xaml/layoutcontrol" xmlns:dx="http://schemas.devexpress.com/winfx/2008/xaml/core" xmlns:xaml="http://schemas.stocksharp.com/xaml" xmlns:dxe="http://schemas.devexpress.com/winfx/2008/xaml/editors" mc:Ignorable="d"> <dxlc:LayoutControl Padding="0" Name="LayoutControlRoot" Orientation="Horizontal"> <dxlc:LayoutGroup> <xaml:SecurityPicker x:Name="SecPicker" SecuritySelected="SecPicker_SecuritySelected" /> </dxlc:LayoutGroup> <dxlc:LayoutGroup Orientation="Vertical" dxlc:LayoutControl.AllowHorizontalSizing="True"> <dxlc:LayoutItem VerticalAlignment="Stretch"> <xaml:MarketDepthControl x:Name="MarketDepth" MaxHeight="2000" SelectionChanged="MarketDepth_SelectionChanged" /> </dxlc:LayoutItem> <dxlc:LayoutItem Label="Portfolio" Height="20"> <xaml:PortfolioComboBox x:Name="PortfolioComboBox" /> </dxlc:LayoutItem> <dxlc:LayoutItem Label="Price" Height="20"> <dxe:SpinEdit MinValue="0" Name="SpinEditPrice" /> </dxlc:LayoutItem> <dxlc:LayoutItem Label="Volume" Height="20"> <dxe:SpinEdit MinValue="0" Name="SpinEditVolume" /> </dxlc:LayoutItem> <dxlc:LayoutGroup Orientation="Horizontal" Height="20" VerticalAlignment="Stretch"> <dxlc:LayoutItem VerticalAlignment="Stretch"> <dx:SimpleButton Content="Buy" x:Name="BuyButton" Click="BuyButton_Click" /> </dxlc:LayoutItem> <dxlc:LayoutItem VerticalAlignment="Stretch"> <dx:SimpleButton Content="Sell" x:Name="SelltButton" Click="SelltButton_Click" /> </dxlc:LayoutItem> </dxlc:LayoutGroup> </dxlc:LayoutGroup> </dxlc:LayoutControl> </UserControl>
在MarketDepthControl构造函数中,为SecurityPicker设置工具的源,并为PortfolioComboBox设置投资组合的源,在我们的示例中,它将是Connector:
public MarketDepthControl() { InitializeComponent(); SecPicker.SecurityProvider = MainWindow.Instance.Connector; PortfolioComboBox.Portfolios = new PortfolioDataSource(MainWindow.Instance.Connector); }
在SecurityPicker中创建工具选择事件处理程序。 在其中,我们检查接收到的工具是否不等于零。 如果不等于零,则将接收到的工具保存在局部变量中,这对于我们更新玻璃板时将很有用。 然后,我们使用RegisterMarketDepth方法清洁并在连接器中注册接收工具,以接收玻璃。 使用GetMarketDepth方法,我们获得了该仪器的当前玻璃,以便使用它来更新MarketDepthControl。
private Security _selectedSecurity; private void SecPicker_SecuritySelected(Security security) { if (security == null) return; _selectedSecurity = security; MainWindow.Instance.Connector.RegisterMarketDepth(_selectedSecurity); var marketDepth = MainWindow.Instance.Connector.GetMarketDepth(_selectedSecurity); MarketDepth.UpdateDepth(marketDepth); }
为了在MarketDepthControl构造函数中不断更新玻璃,我们在连接器上订阅了MarketDepthChanged玻璃更改事件。 在此事件的处理程序中,我们将检查接收到的玻璃杯属于哪个工具,如果它属于SecurityPicker中的选定工具,则我们对其进行更新:MarketDepthControl。
public MarketDepthControl() { InitializeComponent(); SecPicker.SecurityProvider = MainWindow.Instance.Connector; PortfolioComboBox.Portfolios = new PortfolioDataSource(MainWindow.Instance.Connector); MainWindow.Instance.Connector.MarketDepthChanged += Connector_MarketDepthChanged; } private void Connector_MarketDepthChanged(MarketDepth marketDepth) { if (_selectedSecurity == null || marketDepth.Security != _selectedSecurity) return; MarketDepth.UpdateDepth(marketDepth); }
在MainWindow的中央部分,添加创建的MarketDepthControl面板:
<dxlc:LayoutGroup HorizontalAlignment="Stretch" View="Tabs"> <!-- --> <dxlc:LayoutGroup Header="Securities"> <myxaml:SecurityGridControl x:Name="SecurityPanel" /> </dxlc:LayoutGroup> <dxlc:LayoutGroup Header="Portfolios"> <myxaml:PortfolioGridControl x:Name="PortfolioGridControl" /> </dxlc:LayoutGroup> <dxlc:LayoutGroup Header="Orders"> <myxaml:OrderGridControl x:Name="OrderGridControl" /> </dxlc:LayoutGroup> <dxlc:LayoutGroup Header="MyTrades"> <myxaml:MyTradeGridControl x:Name="MyTradeGridControl" /> </dxlc:LayoutGroup> <dxlc:LayoutGroup Header="MarketDepth"> <myxaml:MarketDepthControl x:Name="MarketDepthControl" /> </dxlc:LayoutGroup> </dxlc:LayoutGroup>
在此阶段,您可以运行程序并检查更新眼镜的操作。
创建一个用于单击“购买”和“出售”按钮的事件处理程序。 在每个处理程序中,我们创建一个订单,在其中指示在SecurityPicker中选择的工具,在PortfolioComboBox中选择的投资组合,来自相应SpinEdit的数量和价格。 使用RegisterOrder方法在Connector中注册应用程序。
private void BuyButton_Click(object sender, RoutedEventArgs e) { Order order = new Order() { Security = _selectedSecurity, Portfolio = PortfolioComboBox.SelectedPortfolio, Volume = SpinEditVolume.Value, Price = SpinEditPrice.Value, Direction = StockSharp.Messages.Sides.Buy, }; MainWindow.Instance.Connector.RegisterOrder(order); } private void SelltButton_Click(object sender, RoutedEventArgs e) { Order order = new Order() { Security = _selectedSecurity, Portfolio = PortfolioComboBox.SelectedPortfolio, Volume = SpinEditVolume.Value, Price = SpinEditPrice.Value, Direction = StockSharp.Messages.Sides.Sell, }; MainWindow.Instance.Connector.RegisterOrder(order); }
两种处理器仅在应用程序方向上有所不同。
让我们在选择玻璃杯中的报价时,根据所选报价的价格来更改SpinEditPrice值。 为此,请为MarketDepthControl创建SelectionChanged事件处理程序。 如果所选报价不等于零,我们将以所选报价的价格更新SpinEditPrice的值。
private void MarketDepth_SelectionChanged(object sender, GridSelectionChangedEventArgs e) { if (MarketDepth.SelectedQuote == null) return; SpinEditPrice.Value = MarketDepth.SelectedQuote.Price; }
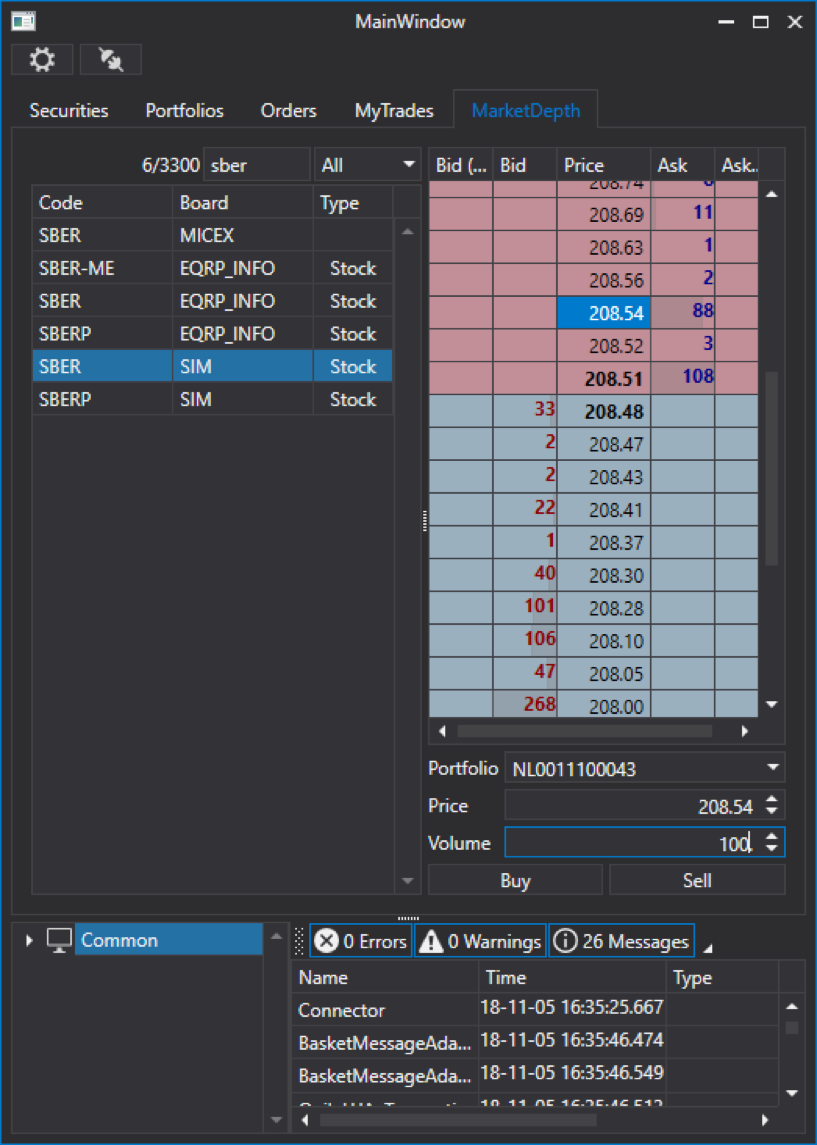
运行检查:
保存市场数据
为了保存投资组合,工具,平台,我们需要CsvEntityRegistry类。 必须重做实体存储位置并调用Init方法以加载它们。
_csvEntityRegistry = new CsvEntityRegistry(_csvEntityRegistryDir); _csvEntityRegistry.Init();
为了节省蜡烛,交易等。 我们需要StorageRegistry:
_storageRegistry = new StorageRegistry { DefaultDrive = new LocalMarketDataDrive(_storageRegistryDir), };
我们还需要快照存储的SnapshotRegistry注册表:
_snapshotRegistry = new SnapshotRegistry(_snapshotRegistryDir);
创建连接器时,所有这些我们传递给它:
Connector = new Connector(_csvEntityRegistry, _storageRegistry, _snapshotRegistry) { IsRestoreSubscriptionOnReconnect = true, StorageAdapter = { DaysLoad = TimeSpan.FromDays(3) }, }; Connector.LookupAll();
在这里,我们还指示断开连接后,连接器将重新连接,并指出要下载多少天的历史记录。 字符串Connector.LookupAll(); 请求可用数据:
加载应用程序后,转到Data文件夹,我们将看到出现了新文件夹:

重新连接时,工具栏和项目组合将已经被填充。
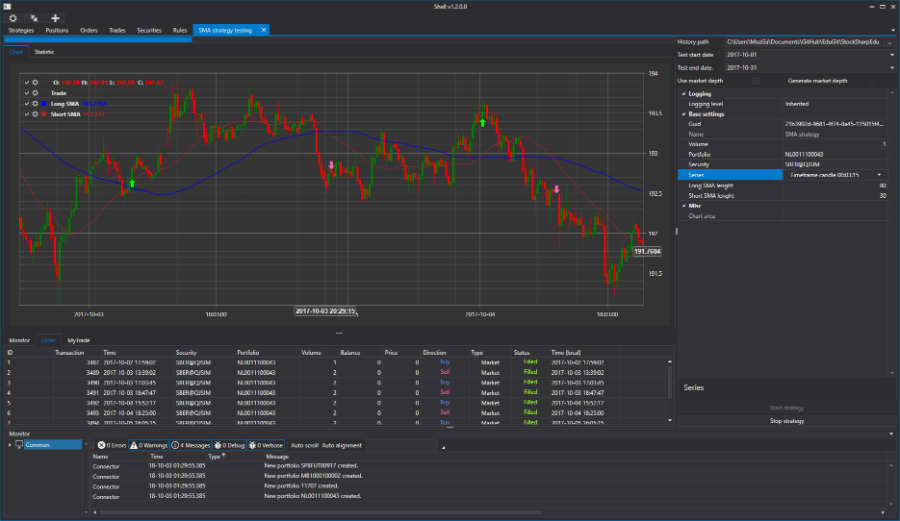
我们顺利地接近了第一部分的结尾。 在此阶段,该程序使您可以显示我们可用的所有市场数据。 下一部分将展示最美味的-即以手动和自动模式进行交易。
待续...作者 :伊万·扎鲁茨基(Ivan Zalutsky)