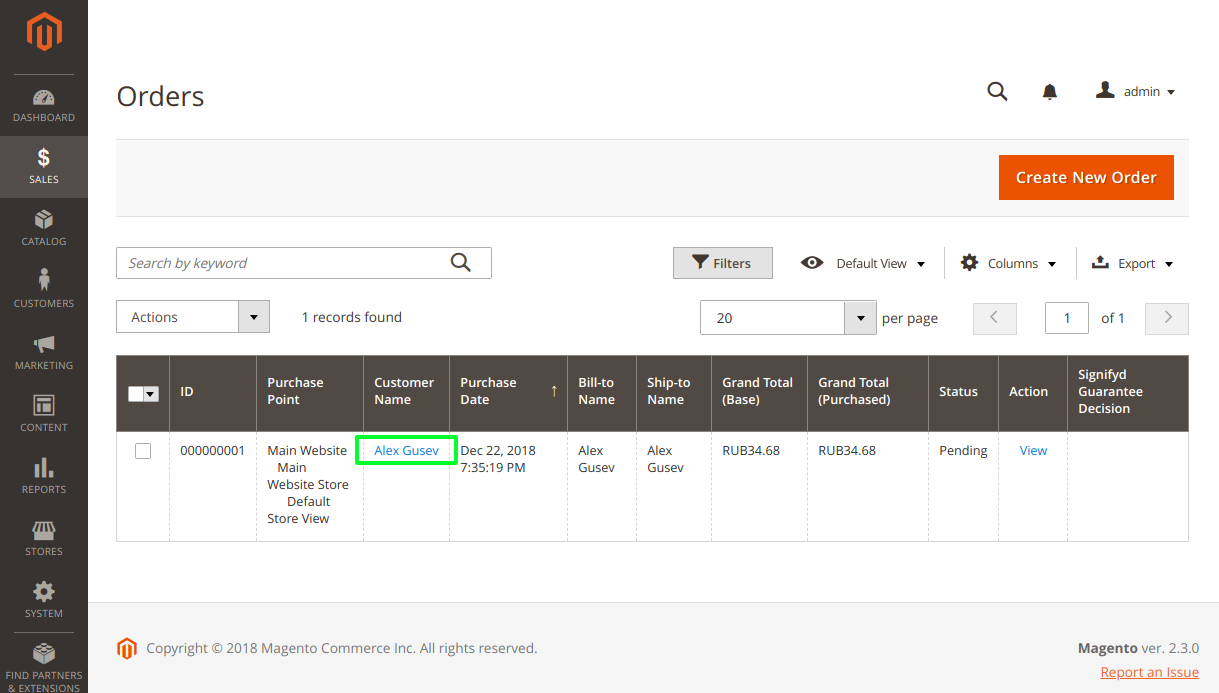
2.3.0版本的发布使在Magento应用程序前端使用PWA的范围更近了。 而且如果在前面可以看到所使用技术的一些变化,那么使用管理面板,一切都将更加稳定-各种文件类型的旧迷宫都需要进行编辑,以使有用的东西出现在UI上,因此不打算进行改进。 在本文中,我描述了在管理面板中为网格列创建自己的渲染器的过程-事情很简单,同时,如果正确使用,它也非常有用。 例如,一个渲染器,用于在指向下订单的客户卡的链接网格中生成链接:

基本渲染器组件
Magento中链接的本机渲染器包含两个文件:
在处理模板的过程中,使用了由代码(对象$col )提供的功能。 用于处理的输入数据也是当前的网格线(对象$row ):
<div class="data-grid-cell-content" if="!$col.isLink($row())" text="$col.getLabel($row())"/> <a class="action-menu-item" if="$col.isLink($row())" text="$col.getLabel($row())" attr="href: $col.getLink($row())"/>
网格的数据是通过数据提供程序下载的。 一个典型的查询是这样的:“ http://.../admin/mui/index/render/?命名空间= sales_order_grid ... ”。 通过浏览器中开发人员的工具栏可以看到数据结构。 对于订单网格,它是这样的:
{ "items": [ { "id_field_name": "entity_id", "entity_id": "1", "status": "pending", "store_id": "Main Website<br\/> Main Website Store<br\/> Default Store View<br\/>", "store_name": "Main Website\nMain Website Store\n", "customer_id": "1", "base_grand_total": "RUB34.68", "base_total_paid": null, "grand_total": "RUB34.68", "total_paid": null, "increment_id": "000000001", "base_currency_code": "RUB", "order_currency_code": "RUB", "shipping_name": "Alex Gusev", "billing_name": "Alex Gusev", "created_at": "2018-12-22 19:35:19", "updated_at": "2018-12-22 19:35:20", "billing_address": "Street,Riga,R\u012bga,1010", "shipping_address": "Street,Riga,R\u012bga,1010", "shipping_information": "Flat Rate - Fixed", "customer_email": "alex@flancer64.com", "customer_group": "1", "subtotal": "RUB24.68", "shipping_and_handling": "RUB10.00", "customer_name": "Alex Gusev", "payment_method": "checkmo", "total_refunded": "RUB0.00", "signifyd_guarantee_status": null, "orig_data": null, "actions": { "view": { "href": "http:\/\/sample.local.flancer64.com\/admin\/sales\/order\/view\/order_id\/1\/", "label": "View" } } } ], "totalRecords": 1 }
自己的渲染器
因此,要创建自己的渲染器,我们需要指定一个由两个文件组成的UI组件 :
我当前的任务是创建一个渲染器,以显示指向将订单放置在订单网格单元中的客户的链接。 要创建到客户端的链接,我需要使用相应客户端的标识符customer_id 。 您可以编写自己的渲染模板,但在这种情况下,我对现有模板( ./module-ui/view/base/web/templates/grid/cells/link.html )感到很满意。 只需编写调用函数$col.getLink($row())和$col.isLink($row())时将返回所需结果的JS代码即可。
我将代码分为两部分。 base.js文件包含用于生成模板中使用的链接的基本逻辑,而customer_name.js文件允许您根据特定列的任务配置用于生成链接的基本逻辑。
基本功能
作为基础,我采用现有的column UI组件:
define([ "Magento_Ui/js/grid/columns/column", "mageUtils" ], function (Column, utils) { ... }
并且(重新)定义其属性,指示ui/grid/cells/link模板(来自Magento_Ui模块)用于渲染:
return Column.extend({ defaults: { /** * Replace idAttrName & route in children. */ /* name of the identification attribute */ idAttrName: "customer_id", /* route part to the page */ route: "/customer/index/edit/id/", bodyTmpl: "ui/grid/cells/link" } });
然后(重新)定义模板中使用的方法。
isLink (如果record数据包含名称存储在this.idAttrName中的属性,则可以形成链接):
isLink: function (record) { const result = !!utils.nested(record, this.idAttrName); return result; }
getLink :
getLink: function (record) { const id = utils.nested(record, this.idAttrName); const result = ROOT_URL + this.route + id; return result; }
客户卡链接
在customer_name.js文件中,以这样一种方式重新定义了基本功能,即根据customer_id customer_id ID形成指向客户卡的链接“ http://.../admin/customer/index/edit/id/ ...”:
define([ "Flancer32_GridLink/js/grid/column/link/base" ], function (Column) { "use strict"; return Column.extend({ defaults: { idAttrName: "customer_id", route: "/customer/index/edit/id/" } }); });
渲染器连接
自定义渲染器使用相应的UI组件的定义连接到文件中的网格。 在我们的例子中,这是./module-sales/view/adminhtml/ui_component/sales_order_grid.xml 。 在本机模块中,创建文件./view/adminhtml/ui_component/sales_order_grid.xml ,在该文件中,我们覆盖相应列的渲染器:
<listing ...> <columns name="sales_order_columns"> <column name="customer_name" component="Vendor_Module/js/grid/column/link/customer_name"> <settings> <visible>true</visible> </settings> </column> </columns> </listing>
需要settings/visible选项,以便“ customer_name”列在网格中可见(默认情况下不可见)。
开机顺序
在Magento中组装应用程序各个部分的所有xml描述符(包括UI组件的描述)时,处理与相同组件相关但位于不同模块中的描述符的顺序很重要。 在我们的例子中,这是./view/adminhtml/ui_component/sales_order_grid.xml 。 如果平台先处理来自我们模块的描述符,然后再处理来自销售模块的描述符,然后在合并描述符时,销售模块配置将在定义了相同属性的那些地方替换我们的配置(例如, settings/visible参数将为“ false” ),尽管我们的渲染器仍将使用(销售模块未为“客户名称”单元格定义渲染器)。
加载顺序./etc/module.xml在./etc/module.xml :
<config ...> <module name="Vendor_Module" setup_version="0.1.0"> <sequence> <module name="Magento_Sales"/> </sequence> </module> </config>
在这种情况下,我们的模块将在Magento_Sales模块之后加载,并且我们的设置(如果与销售模块中的设置一致)将覆盖销售模块的设置。
总结
Magento平台提供的渲染器集非常基础(例如,它没有找到带有右对齐的整数渲染器),但是创建自己的渲染器可以使管理面板中的Magento网格恢复标准外观。
该出版物的代码设计为模块“ mage2_ext_grid_column_renderer ”。