
如您所知,您不能仅在某些样板上走得太远,因此您必须深入研究任何技术来学习如何编写有价值的东西。 本文讨论了Gatsby.js的详细信息,该知识将使您能够创建和维护复杂的网站和博客。
上一篇有关如何使用JAM-stack创建和发布个人博客的文章
下面讨论的主题:
准备工作
在PC上安装Gatsbyyarn global add gatsby-cli
克隆最小项目 npx gatsby new gatsby-tutorial https://github.com/gatsbyjs/gatsby-starter-hello-world cd gatsby-tutorial
储存库初始化 git init git add . git commit -m "init commit"
健康检查 yarn start
如果控制台中以及浏览器中路径http:// localhost:8000都没有错误, 您将看到“ Hello world!”。 这意味着一切正常。 您可以尝试更改/src/pages/index.js文件的内容以检查是否有热重载。
页面结构和路由
要在Gatsby中创建页面,只需将新文件放在/ src / pages文件夹中,它将被编译成单独的HTML页面。 请务必注意,此页面的路径将与名称为的实际路径相对应 。 例如,再添加几页:
src └── pages ├── about.js ├── index.js └── tutorial ├── part-four.js ├── part-one.js ├── part-three.js ├── part-two.js └── part-zero.js
内容还不重要,因此可以使用任何文本来区分页面。
import React from "react"; export default () => <div>Welcome to tutorial/part-one</div>;
签入浏览器:
这样,在构建文件时,您可以立即解决路由问题。
还有一个特殊的createPage API ,您可以使用它来更灵活地控制页面的路径和名称,但是要使用它,我们需要了解Gatsby中数据的操作,因此在本文中我们将对其进行进一步的考虑。
使用链接合并创建的页面,为此,我们使用了Gatsby包中的<Link />组件,该组件是专门为内部导航而创建的。 对于所有外部链接,请使用常规的<a>标记。
/src/pages/index.js
import React from "react"; import { Link } from "gatsby"; export default () => ( <div> <ul> <li> <Link to="/about">about</Link> </li> <li> <Link to="/tutorial/part-zero">Part #0</Link> </li> <li> <Link to="/tutorial/part-one">Part #1</Link> </li> <li> <Link to="/tutorial/part-two">Part #2</Link> </li> <li> <Link to="/tutorial/part-three">Part #3</Link> </li> <li> <Link to="/tutorial/part-four">Part #4</Link> </li> </ul> </div> );
引擎盖下的<Link>具有用于优化页面加载的非常棘手的机制,因此可以代替<a>来导航站点。 可以在这里找到更多详细信息。
创建页面,添加链接,事实证明导航已完成。
组件,模板及其交互
如您所知,在任何项目中总是有重复元素,对于网站来说,它是页眉,页脚,导航栏。 同样,页面(无论内容如何)都是根据某种结构构建的,并且由于Gatsby是React的编译器,因此使用相同的组件方法来解决这些问题。
创建标题和导航面板的组件:
/src/components/header.js
import React from "react"; import { Link } from "gatsby"; /** * * , React-. * , * " ". * "" GraphQL gatsby- */ import logoSrc from "../images/logo.png"; export default () => ( <header> <Link to="/"> <img src={logoSrc} alt="logo" width="60px" height="60px" /> </Link> That is header </header> );
/src/components/sidebar.js
import React from "react"; import { Link } from "gatsby"; export default () => ( <div> <ul> <li> <Link to="/about">about</Link> </li> <li> <Link to="/tutorial/part-zero">Part #0</Link> </li> <li> <Link to="/tutorial/part-one">Part #1</Link> </li> <li> <Link to="/tutorial/part-two">Part #2</Link> </li> <li> <Link to="/tutorial/part-three">Part #3</Link> </li> <li> <Link to="/tutorial/part-four">Part #4</Link> </li> </ul> </div> );
并将它们添加到/src/pages/index.js
import React from "react"; import Header from "../components/header"; import Sidebar from "../components/sidebar"; export default () => ( <div> <Header /> <Sidebar /> <h1>Index page</h1> </div> );
我们检查:
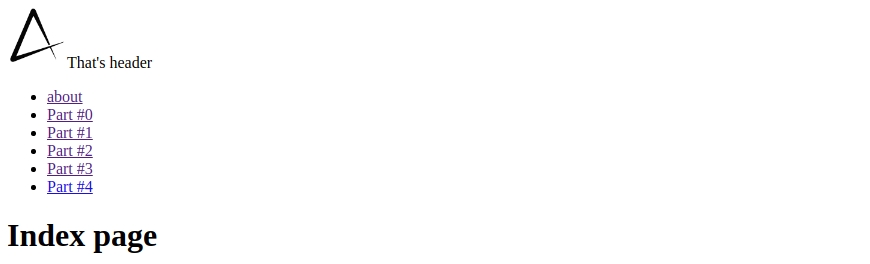
一切正常,但是我们需要分别在每个页面上导入Header和Sidebar,这不是很方便,要解决此问题,创建一个布局组件并用它包装每个页面就足够了。
盖茨比布局==反应容器
是的,这不是严格的平等,因为这几乎是同一件事
/src/components/layout.js
import React from "react"; import Header from "./header"; import Sidebar from "./sidebar"; export default ({ children }) => ( <> <Header /> <div style={{ margin: `0 auto`, maxWidth: 650, backgroundColor: `#eeeeee` }} > <Sidebar /> {children} </div> </> );
/src/pages/index.js (以及所有其他页面)
import React from "react"; import Layout from "../components/layout"; export default () => ( <Layout> <h1>Index page</h1> </Layout> );
完成,看一下浏览器:
为什么项目的所有文件名都带有小写字母? 首先,让我们确定React的命名空间来自以下事实:“每个文件都是一个类,并且该类总是大写。” 在Gatsby中,文件仍然包含类,但是有一个“但是”-“每个文件是潜在页面,其名称是该页面的URL”。 社区得出的结论是,像http://domain.com/User/Settings这样的链接不是comme-il-faut ,也不是kebab -case的文件名。
档案结构 src ├── components │ ├── header.js │ ├── layout.js │ └── sidebar.js ├── images │ └── logo.png └── pages ├── about.js ├── index.js └── tutorial ├── part-eight.js ├── part-five.js ├── part-four.js ├── part-one.js ├── part-seven.js ├── part-six.js ├── part-three.js ├── part-two.js └── part-zero.js
处理数据
现在站点结构已准备就绪,您可以继续进行内容填充。 经典的“硬代码”方法不适合JAM堆栈的创建者,也不适合“从AJAX请求中呈现内容”,因此,他们建议在编译时用内容填充站点。 对于Gatsby而言 , GraphQL对此负责,这使您可以方便地使用任何来源的数据流。
简而言之谈论GraphQL是不可能的,因此建议您自己研究它或等待我的下一篇文章。 您可以在此处阅读有关使用GraphQL的更多信息。
为了与GraphQL一起使用 ,从第二个版本开始, gatsby软件包具有一个gatsby组件,该组件既可以在页面上使用,也可以在简单组件中使用,这是它与先前页面查询的主要区别。 到目前为止,我们的网站尚未连接任何数据源,因此,让我们尝试显示页面的元数据,例如,然后继续进行更复杂的事情。
要生成query您需要打开http://本地主机:8000 / ___ graphql ,并在文档中使用侧边栏来查找有关该站点的可用数据,并且不要忘记自动完成。
/src/components/sidebar.js
import React from "react"; import { Link, StaticQuery, graphql } from "gatsby"; export default () => ( <StaticQuery query={graphql` { allSitePage { edges { node { id path } } } } `} render={({ allSitePage: { edges } }) => ( <ul> {edges.map(({ node: { id, path } }) => ( <li key={id}> <Link to={path}>{id}</Link> </li> ))} </ul> )} /> );
现在,使用query我们可以获取有关在导航面板中呈现的页面的数据,而不必担心链接不匹配名称这一事实,因为所有数据都是自动收集的。

实际上,所有这些数据都可以在我们的网站上使用,而无需使用第三方插件,也无需使用良好的旧“硬编码”,因此,我们顺利地进行了本文的下一个主题-插件。
外挂程式
Gatsby的核心是带有许多插件的编译器。 使用它们,您可以自定义某些文件,数据类型和各种格式的处理。
在应用程序的根目录级别创建文件/gatsby-config.js 。 它负责整个编译器的配置,并尝试配置第一个用于处理文件的插件:
插件安装:
yarn add gatsby-source-filesystem
在/gatsby-config.js文件中进行配置:
module.exports = { plugins: [ { resolve: `gatsby-source-filesystem`, options: { name: `images`, path: `${__dirname}/src/images/`, } } ], }
有关上述文件的更多详细信息 /** * gatsby-config.js * JS * */ module.exports = { /** * 'plugins' pipeline * , */ plugins: [ /** * , * */ `gatsby-example-plugin`, { resolve: `gatsby-source-filesystem`, options: { name: `images`, path: `${__dirname}/src/images/`, } } ], }
还记得我们谈论过将正确的图像导入Gatsby吗?
/src/components/header.js
import React from "react"; import { Link, StaticQuery, graphql } from "gatsby"; export default () => ( <StaticQuery query={graphql` { allFile(filter: { name: { eq: "logo" } }) { edges { node { publicURL } } } } `} render={({ allFile: { edges: [ { node: { publicURL } } ] } }) => ( <header> <Link to="/"> <img src={publicURL} alt="logo" width="60px" height="60px" /> </Link> That is header </header> )} /> );
该站点上没有任何更改,但是现在使用GraphQL代替了图片,而不是简单的Webpack导入。 乍一看,设计似乎太复杂了,是不必要的手势,但是我们不要急于下结论,因为事情是在同一个插件中。 例如,如果我们决定在网站上发布数千张照片,那么无论如何我们都必须考虑优化所有内容的加载,并且为了不从头开始构建延迟加载过程 ,我们只需添加一个gatsby-image插件即可优化所有内容的加载使用query导入的图片。
安装样式插件:
yarn add gatsby-plugin-typography react-typography typography typography-theme-noriega node-sass gatsby-plugin-sass gatsby-plugin-styled-components styled-components babel-plugin-styled-components
gatsby-config.js
module.exports = { plugins: [ { resolve: `gatsby-source-filesystem`, options: { name: `images`, path: `${__dirname}/src/images/` } }, // add style plugins below `gatsby-plugin-typography`, `gatsby-plugin-sass`, `gatsby-plugin-styled-components` ] };
在官方网站上,您可以找到适合各种口味的插件。
应用程式样式
让我们开始使用各种方法来设计应用程序的样式。 在上一步中,我们已经安装了用于处理SASS的插件, 样式化组件和typography.js库,但需要注意的是,现成的css.modules支持。
让我们从全局样式开始,与其他与整个网站相关的样式一样,全局样式必须在/gatsby-browser.js文件中进行配置:
import "./src/styles/global.scss";
有关gatsby-browser.js的更多信息
/src/styles/global.scss
body { background-color: lavenderblush; }
由于各种原因,近年来的趋势倾向于“ CSS in JS”方法,因此您不应滥用全局样式,最好将自己限制在指示字体和重用的类上。 该特定项目计划将Typography.js用于这些目的,因此全局样式将保持空白。
在将gatsby-plugin-typography添加到配置后,您可能已经注意到站点外观的变化-这是因为已应用其默认预设,现在我们将为自己配置它。
/src/utils/typography.js
import Typography from "typography"; import theme from "typography-theme-noriega"; const typography = new Typography(theme); export default typography;
您可以从列表中选择其他任何预设,也可以使用软件包API创建自己的预设(Gatsby官方网站的配置示例 )
/gatsby-config.js
module.exports = { plugins: [ { resolve: `gatsby-source-filesystem`, options: { name: `images`, path: `${__dirname}/src/images/` } }, { resolve: `gatsby-plugin-typography`, options: { pathToConfigModule: `src/utils/typography` } }, `gatsby-plugin-sass`, `gatsby-plugin-styled-components` ] };
并且根据所选的预设,站点的全局样式将被更改。 确定哪种方法可以为自己设置全局样式,这是技术上的个人喜好和差异的问题,但是我们将继续使用styled-components对组件进行样式设置 :
添加具有全局变量/src/utils/vars.js的文件
export const colors = { main: `#663399`, second: `#fbfafc`, main50: `rgba(102, 51, 153, 0.5)`, second50: `rgba(251, 250, 252, 0.5)`, textMain: `#000000`, textSecond: `#ffffff`, textBody: `#222222` };
/src/components/header.js import React from "react"; import { Link, StaticQuery, graphql } from "gatsby"; import styled from "styled-components"; import { colors } from "../utils/vars"; const Header = styled.header` width: 100%; height: 3em; display: flex; justify-content: space-between; align-items: center; background-color: ${colors.main}; color: ${colors.textSecond}; padding: 0.5em; `; const Logo = styled.img` border-radius: 50%; height: 100%; `; const logoLink = `height: 100%;`; export default () => ( <StaticQuery query={graphql` { allFile(filter: { name: { eq: "logo" } }) { edges { node { publicURL } } } } `} render={({ allFile: { edges: [ { node: { publicURL } } ] } }) => ( <Header> That is header <Link to="/" css={logoLink}> <Logo src={publicURL} alt="logo" /> </Link> </Header> )} /> );
/src/components/sidebar.js import React from "react" import { Link, StaticQuery, graphql } from "gatsby" import styled from "styled-components" import { colors } from "../utils/vars" const Sidebar = styled.section` position: fixed; left: 0; width: 20%; height: 100%; display: flex; flex-direction: column; justify-content: center; background-color: ${colors.second}; color: ${colors.textMain}; ` const navItem = ` display: flex; align-items: center; margin: 0 1em 0 2em; padding: 0.5em 0; border-bottom: 0.05em solid ${colors.mainHalf}; postion: relative; color: ${colors.textBody}; text-decoration: none; &:before { content: ''; transition: 0.5s; width: 0.5em; height: 0.5em; position: absolute; left: 0.8em; border-radius: 50%; display: block; background-color: ${colors.main}; transform: scale(0); } &:last-child { border-bottom: none; } &:hover { &:before { transform: scale(1); } } ` export default () => ( <StaticQuery query={graphql` { allSitePage { edges { node { id, path } } } } `} render={({ allSitePage: { edges } }) => ( <Sidebar> { edges.map(({ node: { id, path } }) => ( <Link to={path} key={id} css={navItem} >{id}</Link> )) } </Sidebar> )} /> )

已经对现有元素进行了样式化,是时候将内容与Contentful关联,连接margin插件并使用createPages API生成页面了。
在上一篇文章中阅读有关如何链接Gatsby和Contentful的更多信息。
内容丰富的数据结构 [ { "id": "title", "type": "Symbol" }, { "id": "content", "type": "Text", }, { "id": "link", "type": "Symbol", }, { "id": "orderNumber", "type": "Integer", } ]
软件包安装:
yarn add dotenv gatsby-source-contentful gatsby-transformer-remark
/gatsby-config.js
if (process.env.NODE_ENV === "development") { require("dotenv").config(); } module.exports = { plugins: [ `gatsby-transformer-remark`, { resolve: `gatsby-source-filesystem`, options: { name: `images`, path: `${__dirname}/src/images/`, } }, { resolve: `gatsby-plugin-typography`, options: { pathToConfigModule: `src/utils/typography`, }, }, { resolve: `gatsby-source-contentful`, options: { spaceId: process.env.CONTENTFUL_SPACE_ID, accessToken: process.env.CONTENTFUL_ACCESS_TOKEN, }, }, `gatsby-plugin-sass`, `gatsby-plugin-styled-components`, ], }
删除包含所有文件的/ src / pages文件夹,并创建一个新文件来管理Gatsby中的节点:
/gatsby-node.js
const path = require(`path`); /** * , * */ exports.createPages = ({ graphql, actions }) => { /** * * * */ const { createPage } = actions; return graphql(` { allContentfulArticle { edges { node { title link content { childMarkdownRemark { html } } } } } } `).then(({ data: { allContentfulArticle: { edges } } }) => { /** * * createPage() * */ edges.forEach(({ node }) => { createPage({ path: node.link, component: path.resolve(`./src/templates/index.js`), context: { slug: node.link } }); }); }); };
有关gatsby-node.js的更多信息
创建一个模板文件,它将作为生成页面的基础
/src/templates/index.js
import React from "react"; import { graphql } from "gatsby"; import Layout from "../components/layout"; export default ({ data: { allContentfulArticle: { edges: [ { node: { content: { childMarkdownRemark: { html } } } } ] } } }) => { return ( <Layout> <div dangerouslySetInnerHTML={{ __html: html }} /> </Layout> ); }; export const query = graphql` query($slug: String!) { allContentfulArticle(filter: { link: { eq: $slug } }) { edges { node { title link content { childMarkdownRemark { html } } } } } } `;
为什么在这里不使用<StaticQuery />组件? 事实是,它不支持用于构造请求的变量,但是我们需要使用页面上下文中的$slug变量。
更新导航栏中的逻辑 import React from "react"; import { Link, StaticQuery, graphql } from "gatsby"; import styled from "styled-components"; import { colors } from "../utils/vars"; const Sidebar = styled.section` position: fixed; left: 0; width: 20%; height: 100%; display: flex; flex-direction: column; justify-content: center; background-color: ${colors.second}; color: ${colors.textMain}; `; const navItem = ` display: flex; align-items: center; margin: 0 1em 0 2em; padding: 0.5em 0; border-bottom: 0.05em solid ${colors.main50}; postion: relative; color: ${colors.textBody}; text-decoration: none; &:before { content: ''; transition: 0.5s; width: 0.5em; height: 0.5em; position: absolute; left: 0.8em; border-radius: 50%; display: block; background-color: ${colors.main}; transform: scale(0); } &:last-child { border-bottom: none; } &:hover { &:before { transform: scale(1); } } `; export default () => ( <StaticQuery query={graphql` { allContentfulArticle(sort: { order: ASC, fields: orderNumber }) { edges { node { title link orderNumber } } } } `} render={({ allContentfulArticle: { edges } }) => ( <Sidebar> {edges.map(({ node: { title, link, orderNumber } }) => ( <Link to={link} key={link} css={navItem}> {orderNumber}. {title} </Link> ))} </Sidebar> )} /> );
SEO优化
在技术方面,可以认为该站点已经准备就绪,因此让我们处理其元数据。 为此,我们需要以下插件:
yarn add gatsby-plugin-react-helmet react-helmet
react-helmet为HTML页面生成<head>...</head> ,并与Gatsby渲染结合使用,是使用SEO的强大而便捷的工具。
/src/templates/index.js
import React from "react"; import { graphql } from "gatsby"; import { Helmet } from "react-helmet"; import Layout from "../components/layout"; export default ({ data: { allContentfulArticle: { edges: [ { node: { title, content: { childMarkdownRemark: { html } } } } ] } } }) => { return ( <Layout> <Helmet> <meta charSet="utf-8" /> <title>{title}</title> </Helmet> <div dangerouslySetInnerHTML={{ __html: html }} /> </Layout> ); }; export const query = graphql` query($slug: String!) { allContentfulArticle(filter: { link: { eq: $slug } }) { edges { node { title link content { childMarkdownRemark { html } } } } } } `;
现在title网站的title将始终与该文章的标题匹配,这将显着影响专门针对此问题的搜索结果中网站的发行。 在这里,您可以轻松地添加<meta name="description" content=" ">的描述<meta name="description" content=" "> ,并分别为每篇文章提供描述,从而使用户能够在搜索页面上了解文章的含义,通常来说,所有SEO功能现在都可以使用并且易于管理一个地方。

PWA设置
Gatsby旨在提供开箱即用的一流性能。 它解决了代码分离和最小化的问题,以及在后台进行预加载,图像处理等形式的优化,从而使您创建的站点无需任何手动配置即可具有高性能。 这些性能功能是支持渐进式Web应用程序方法的重要组成部分。
但是,除了上述所有条件外,对于将其定义为PWA的网站,还有三个基本标准:
盖茨比无法解决第一点,因为域 , 托管和协议是部署问题,根本不是开发问题,但是我建议您使用Netlify ,它默认情况下解决了https问题。
我们继续进行其余的项目,为此,我们将安装两个插件:
yarn add gatsby-plugin-manifest gatsby-plugin-offline
并配置它们/src/gatsby-config.js
if (process.env.NODE_ENV === "development") { require("dotenv").config(); } module.exports = { plugins: [ { resolve: `gatsby-plugin-manifest`, options: { name: `GatsbyJS translated tutorial`, short_name: `GatsbyJS tutorial`, start_url: `/`, background_color: `#f7f0eb`, theme_color: `#a2466c`, display: `standalone`, icon: `public/favicon.ico`, include_favicon: true } }, `gatsby-plugin-offline`, `gatsby-transformer-remark`, { resolve: `gatsby-source-filesystem`, options: { name: `images`, path: `${__dirname}/src/images/` } }, { resolve: `gatsby-plugin-typography`, options: { pathToConfigModule: `src/utils/typography` } }, { resolve: `gatsby-source-contentful`, options: { spaceId: process.env.CONTENTFUL_SPACE_ID, accessToken: process.env.CONTENTFUL_ACCESS_TOKEN } }, `gatsby-plugin-sass`, `gatsby-plugin-styled-components`, `gatsby-plugin-react-helmet` ] };
您可以使用文档来自定义清单,也可以通过覆盖插件设置来自定义服务人员策略。
您不会注意到开发模式的任何变化,但是该站点已经满足了Web世界的最新要求,并且在https://域上托管时,它将不相等。
结论
几年前,当我第一次遇到将React应用程序带到互联网,支持它和更新内容的问题时,我无法想象市场上已经存在可以简化所有这些流程的JAM堆栈方法,现在我不会对此感到惊讶简单。 盖茨比(Gatsby)解决了大多数影响网站性能的问题,即开箱即用。如果您对自定义它的复杂性有所了解,您可以在Lighthouse中获得所有项目的100%指标,这将大大影响网站在搜索引擎中的投放(至少在Google上)。
带项目的存储库