朋友们,三月底,我们将在
“数据科学家”课程上开辟一条新的流。 现在,我们开始与您分享课程中的有用材料。
引言回顾我对机器学习(ML)的热情的早期经验,我可以说,为建立一个真正好的模型付出了很多努力。 我咨询了该领域的专家,以了解如何改进我的模型,思考必要的功能,并试图确保考虑到他们提出的所有技巧。 但是我仍然遇到了问题。
如何在实际项目中实现模型? 我对这个分数一无所知。 到目前为止,我研究的所有文献都只关注改进模型。 我没有看到他们开发的下一步。

这就是为什么我现在要编写本指南的原因。 我希望您面对我遇到的问题,但我可以很快解决。 在本文的最后,我将向您展示如何使用Python中的Flask框架实现机器学习模型。
目录内容- 机器学习模型的实现选项。
- 什么是API?
- 安装Python环境和有关Flask的基本信息。
- 创建机器学习模型。
- 保存机器学习模型:序列化和反序列化。
- 使用Flask创建API。
机器学习模型的实现选项。
在大多数情况下,机器学习模型的实际使用是开发的核心部分,即使只是自动电子邮件分发系统或聊天机器人的一小部分。 有时候,实施的障碍似乎是无法克服的。
例如,大多数ML专家都使用R或Python进行科学研究。 但是,使用完全不同的技术堆栈的软件工程师将成为这些模型的使用者。 有两个选项可以解决此问题:
选项1:用开发工程师使用的语言重写所有代码。 在某种程度上,这听起来似乎合乎逻辑,但是要复制已开发的模型需要花费大量时间和精力。 最后,事实证明这只是浪费时间。 大多数语言(例如JavaScript)没有使用ML的便捷库。 因此,不使用此选项将是一个合理的解决方案。
选项2:使用API。 网络API解决了使用不同语言的应用程序的问题。 如果前端开发人员需要使用您的机器学习模型来创建基于其的Web应用程序,则只需获取讨论API的目标服务器的URL。
什么是API?简而言之,API(应用程序编程接口)是两个程序之间的一种契约,它表示如果用户程序以特定格式提供输入数据,则开发人员程序(API)会将其传递给自身并为用户提供输出数据。
您将能够自己阅读几篇文章,这些文章很好地说明了为什么该API在开发人员中相当受欢迎。
大多数大型云服务提供商和规模较小,以机器学习为重点的公司都提供即用型API。 它们满足了不了解机器学习,但想将此技术集成到他们的解决方案中的开发人员的需求。
例如,这些API提供程序之一就是带有
Google Vision API的Google 。
开发人员所需要做的就是简单地使用Google提供的SDK调用REST(代表性状态转移)API。 看看您可以使用
Google Vision API做什么。
听起来不错吧? 在本文中,我们将说明如何使用Python框架Flask创建自己的API。
注意 :Flask不是为此目的的唯一网络框架。 还有Django,Falcon,Hug等许多本文未提及的内容。 例如,对于R,有一个名为
plumber的软件包
安装Python环境和有关Flask的基本信息。1)使用Anaconda创建虚拟环境。 如果您需要为Python创建自己的虚拟环境并维护必要的依赖状态,Anaconda为此提供了很好的解决方案。 下一步将与命令行一起使用。
- 在这里,您将找到适用于Python的miniconda安装程序;
wget https://repo.continuum.io/miniconda/Miniconda3-latest-Linux-x86_64.shbash Miniconda3-latest-Linux-x86_64.sh- 遵循问题的顺序。
source .bashrc- 如果输入:
conda ,则可以看到可用命令和帮助的列表。 - 要创建新环境,请输入:
conda create --name <environment-name> python=3.6 - 请按照要求执行的步骤操作,最后输入:
source activate <environment-name> - 安装所需的Python软件包。 最重要的是烧瓶和金枪鱼。
2)我们将尝试使用gunicorn创建简单的“ Hello world” Flask应用程序。- 打开您喜欢的文本编辑器,然后在文件夹中创建
hello-world.py文件。 - 编写以下代码:
"""Filename: hello-world.py """ from flask import Flask app = Flask(__name__) @app.route('/users/<string:username>') def hello_world(username=None): return("Hello {}!".format(username))
- 保存文件并返回到终端。
- 要启动API,请在终端中运行:
gunicorn --bind 0.0.0.0:8000 hello-world:app - 如果您获得以下内容,那么您就走对了:

- 在浏览器中,输入以下内容:
https://localhost:8000/users/any-name

万岁! 您编写了第一个Flask程序! 由于您已经对这些简单的步骤有所了解,因此我们可以创建可以在本地访问的网络端点。
使用Flask,我们可以包装我们的模型并将其用作Web API。 如果我们要创建更复杂的网络应用程序(例如,使用JavaScript),则需要添加一些更改。
创建机器学习模型。- 首先,让我们看一下“ 贷款预测竞赛”机器学习竞赛 。 主要目标是建立预处理管道并创建ML模型,以促进部署期间的预测任务。
import os import json import numpy as np import pandas as pd from sklearn.externals import joblib from sklearn.model_selection import train_test_split, GridSearchCV from sklearn.base import BaseEstimator, TransformerMixin from sklearn.ensemble import RandomForestClassifier from sklearn.pipeline import make_pipeline import warnings warnings.filterwarnings("ignore")
!ls /home/pratos/Side-Project/av_articles/flask_api/data/
test.csv training.csv
data = pd.read_csv('../data/training.csv')
list(data.columns)
['Loan_ID', 'Gender', 'Married', 'Dependents', 'Education', 'Self_Employed', 'ApplicantIncome', 'CoapplicantIncome', 'LoanAmount', 'Loan_Amount_Term', 'Credit_History', 'Property_Area', 'Loan_Status']
data.shape
(614, 13)
ul>
在列中找到空值/ Nan值:
for _ in data.columns: print("The number of null values in:{} == {}".format(_, data[_].isnull().sum()))
The number of null values in:Loan_ID == 0 The number of null values in:Gender == 13 The number of null values in:Married == 3 The number of null values in:Dependents == 15 The number of null values in:Education == 0 The number of null values in:Self_Employed == 32 The number of null values in:ApplicantIncome == 0 The number of null values in:CoapplicantIncome == 0 The number of null values in:LoanAmount == 22 The number of null values in:Loan_Amount_Term == 14 The number of null values in:Credit_History == 50 The number of null values in:Property_Area == 0 The number of null values in:Loan_Status == 0
red_var = ['Gender','Married','Dependents','Education','Self_Employed','ApplicantIncome','CoapplicantIncome',\ 'LoanAmount','Loan_Amount_Term','Credit_History','Property_Area'] X_train, X_test, y_train, y_test = train_test_split(data[pred_var], data['Loan_Status'], \ test_size=0.25, random_state=42)
- 为了确保即使在进行实验后所有预处理步骤也都正确完成,并且在预测过程中没有遗漏任何内容,我们将创建自己的Scikit学习评估器进行预处理(Scikit学习评估器预处理) 。
要了解我们如何创建它,请阅读
以下内容 。
from sklearn.base import BaseEstimator, TransformerMixin class PreProcessing(BaseEstimator, TransformerMixin): """Custom Pre-Processing estimator for our use-case """ def __init__(self): pass def transform(self, df): """Regular transform() that is a help for training, validation & testing datasets (NOTE: The operations performed here are the ones that we did prior to this cell) """ pred_var = ['Gender','Married','Dependents','Education','Self_Employed','ApplicantIncome',\ 'CoapplicantIncome','LoanAmount','Loan_Amount_Term','Credit_History','Property_Area'] df = df[pred_var] df['Dependents'] = df['Dependents'].fillna(0) df['Self_Employed'] = df['Self_Employed'].fillna('No') df['Loan_Amount_Term'] = df['Loan_Amount_Term'].fillna(self.term_mean_) df['Credit_History'] = df['Credit_History'].fillna(1) df['Married'] = df['Married'].fillna('No') df['Gender'] = df['Gender'].fillna('Male') df['LoanAmount'] = df['LoanAmount'].fillna(self.amt_mean_) gender_values = {'Female' : 0, 'Male' : 1} married_values = {'No' : 0, 'Yes' : 1} education_values = {'Graduate' : 0, 'Not Graduate' : 1} employed_values = {'No' : 0, 'Yes' : 1} property_values = {'Rural' : 0, 'Urban' : 1, 'Semiurban' : 2} dependent_values = {'3+': 3, '0': 0, '2': 2, '1': 1} df.replace({'Gender': gender_values, 'Married': married_values, 'Education': education_values, \ 'Self_Employed': employed_values, 'Property_Area': property_values, \ 'Dependents': dependent_values}, inplace=True) return df.as_matrix() def fit(self, df, y=None, **fit_params): """Fitting the Training dataset & calculating the required values from train eg: We will need the mean of X_train['Loan_Amount_Term'] that will be used in transformation of X_test """ self.term_mean_ = df['Loan_Amount_Term'].mean() self.amt_mean_ = df['LoanAmount'].mean() return self
- 将
y_train和y_test转换为np.array :
y_train = y_train.replace({'Y':1, 'N':0}).as_matrix() y_test = y_test.replace({'Y':1, 'N':0}).as_matrix()
让我们创建一个管道,以确保我们执行的所有预处理步骤都是scikit-learn评估程序的工作。
pipe = make_pipeline(PreProcessing(), RandomForestClassifier())
pipe
Pipeline(memory=None, steps=[('preprocessing', PreProcessing()), ('randomforestclassifier', RandomForestClassifier(bootstrap=True, class_weight=None, criterion='gini', max_depth=None, max_features='auto', max_leaf_nodes=None, min_impurity_decrease=0.0, min_impurity_split=None, min_samples_leaf=1, min_samples_split=2, min_weight_fraction_leaf=0.0, n_estimators=10, n_jobs=1, oob_score=False, random_state=None, verbose=0, warm_start=False))])
为了搜索合适的超参数(度为多项式对象,alpha为边缘),我们将进行网格搜索(Grid Search):
param_grid = {"randomforestclassifier__n_estimators" : [10, 20, 30], "randomforestclassifier__max_depth" : [None, 6, 8, 10], "randomforestclassifier__max_leaf_nodes": [None, 5, 10, 20], "randomforestclassifier__min_impurity_split": [0.1, 0.2, 0.3]}
grid = GridSearchCV(pipe, param_grid=param_grid, cv=3)
grid.fit(X_train, y_train)
GridSearchCV(cv=3, error_score='raise', estimator=Pipeline(memory=None, steps=[('preprocessing', PreProcessing()), ('randomforestclassifier', RandomForestClassifier(bootstrap=True, class_weight=None, criterion='gini', max_depth=None, max_features='auto', max_leaf_nodes=None, min_impurity_decrease=0.0, min_impu..._jobs=1, oob_score=False, random_state=None, verbose=0, warm_start=False))]), fit_params=None, iid=True, n_jobs=1, param_grid={'randomforestclassifier__n_estimators': [10, 20, 30], 'randomforestclassifier__max_leaf_nodes': [None, 5, 10, 20], 'randomforestclassifier__min_impurity_split': [0.1, 0.2, 0.3], 'randomforestclassifier__max_depth': [None, 6, 8, 10]}, pre_dispatch='2*n_jobs', refit=True, return_train_score=True, scoring=None, verbose=0)
print("Best parameters: {}".format(grid.best_params_))
Best parameters: {'randomforestclassifier__n_estimators': 30, 'randomforestclassifier__max_leaf_nodes': 20, 'randomforestclassifier__min_impurity_split': 0.2, 'randomforestclassifier__max_depth': 8}
print("Validation set score: {:.2f}".format(grid.score(X_test, y_test)))
Validation set score: 0.79
test_df = pd.read_csv('../data/test.csv', encoding="utf-8-sig") test_df = test_df.head()
grid.predict(test_df)
array([1, 1, 1, 1, 1])
我们的管道看起来不错,可以继续进行下一个重要步骤:序列化机器学习模型。
保存机器学习模型:序列化和反序列化。“在计算机科学中,在数据存储的上下文中,序列化是将数据结构或对象状态转换为存储格式(例如文件或内存缓冲区),然后在相同或另一个计算机环境中重建它的过程。”
在Python中,酸洗是存储对象并在以后恢复其原始状态的标准方法。 为了更清楚一点,我将举一个简单的示例:
list_to_pickle = [1, 'here', 123, 'walker']
list_pickle
b'\x80\x03]q\x00(K\x01X\x04\x00\x00\x00hereq\x01K{X\x06\x00\x00\x00walkerq\x02e.'
然后,我们再次卸载罐头对象:
loaded_pickle = pickle.loads(list_pickle)
loaded_pickle
[1, 'here', 123, 'walker']
我们可以将罐头对象保存到文件中并使用它们。 例如,此方法类似于在R编程中创建
.rda文件。
注意:有些人可能不喜欢此保留方法进行序列化。 另一种可能是
h5py 。
我们有一个自定义类(Class),在进行培训时需要导入该类,因此我们将使用
dill模块将类评估器与网格对象一起打包。
建议创建一个单独的
training.py文件,其中包含用于训练模型的所有代码。 (
这里可以看到一个示例)。
!pip install dill
Requirement already satisfied: dill in /home/pratos/miniconda3/envs/ordermanagement/lib/python3.5/site-packages
import dill as pickle filename = 'model_v1.pk'
with open('../flask_api/models/'+filename, 'wb') as file: pickle.dump(grid, file)
模型将保存在上面选择的目录中。 封存模型后,可以将其包装在Flask包装器中。 但是,在此之前,您需要确保罐头文件可以工作。 让我们重新加载并进行预测:
with open('../flask_api/models/'+filename ,'rb') as f: loaded_model = pickle.load(f)
loaded_model.predict(test_df)
array([1, 1, 1, 1, 1])
由于我们遵循了预处理步骤,因此新到达的数据成为管道的一部分,因此我们只需要运行预报()。 使用scikit-learn库,使用管道非常简单。 即使最初的实施似乎很疯狂,评估员和管道也会照顾您的时间和神经。
使用Flask创建API让我们保持文件夹结构尽可能简单:
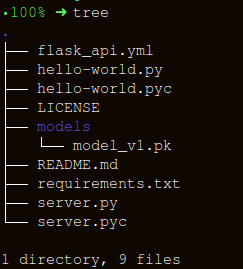
为
apicall()函数创建包装器包含三个重要部分:
- 接收
request数据(将对其进行预测); - 装入罐头评估师;
- 以JSON格式转换我们的预测并接收响应
status code: 200 ;
HTTP消息是从标题和正文创建的。 通常,主体内容以JSON格式传输。 我们将发送(
POST url-endpoint/ )传入数据作为用于接收预测的数据包。
注意:您可以直接发送纯文本,XML,cvs或图片以实现格式的互换性,但是在我们的情况下,最好使用JSON。
"""Filename: server.py """ import os import pandas as pd from sklearn.externals import joblib from flask import Flask, jsonify, request app = Flask(__name__) @app.route('/predict', methods=['POST']) def apicall(): """API Call Pandas dataframe (sent as a payload) from API Call """ try: test_json = request.get_json() test = pd.read_json(test_json, orient='records')
执行后,输入:
gunicorn --bind 0.0.0.0:8000 server:app让我们生成用于预测的数据和用于在
https:0.0.0.0:8000/predict在本地运行API的队列
import json import requests
"""Setting the headers to send and accept json responses """ header = {'Content-Type': 'application/json', \ 'Accept': 'application/json'} """Reading test batch """ df = pd.read_csv('../data/test.csv', encoding="utf-8-sig") df = df.head() """Converting Pandas Dataframe to json """ data = df.to_json(orient='records')
data
'[{"Loan_ID":"LP001015","Gender":"Male","Married":"Yes","Dependents":"0","Education":"Graduate","Self_Employed":"No","ApplicantIncome":5720,"CoapplicantIncome":0,"LoanAmount":110.0,"Loan_Amount_Term":360.0,"Credit_History":1.0,"Property_Area":"Urban"},{"Loan_ID":"LP001022","Gender":"Male","Married":"Yes","Dependents":"1","Education":"Graduate","Self_Employed":"No","ApplicantIncome":3076,"CoapplicantIncome":1500,"LoanAmount":126.0,"Loan_Amount_Term":360.0,"Credit_History":1.0,"Property_Area":"Urban"},{"Loan_ID":"LP001031","Gender":"Male","Married":"Yes","Dependents":"2","Education":"Graduate","Self_Employed":"No","ApplicantIncome":5000,"CoapplicantIncome":1800,"LoanAmount":208.0,"Loan_Amount_Term":360.0,"Credit_History":1.0,"Property_Area":"Urban"},{"Loan_ID":"LP001035","Gender":"Male","Married":"Yes","Dependents":"2","Education":"Graduate","Self_Employed":"No","ApplicantIncome":2340,"CoapplicantIncome":2546,"LoanAmount":100.0,"Loan_Amount_Term":360.0,"Credit_History":null,"Property_Area":"Urban"},{"Loan_ID":"LP001051","Gender":"Male","Married":"No","Dependents":"0","Education":"Not Graduate","Self_Employed":"No","ApplicantIncome":3276,"CoapplicantIncome":0,"LoanAmount":78.0,"Loan_Amount_Term":360.0,"Credit_History":1.0,"Property_Area":"Urban"}]'
"""POST <url>/predict """ resp = requests.post("http://0.0.0.0:8000/predict", \ data = json.dumps(data),\ headers= header)
resp.status_code
200
"""The final response we get is as follows: """ resp.json()
{'predictions': '[{"0":"LP001015","1":1},{...
结论在本文中,我们只做了一半,创建了一个可以提供预测的有效API,并且将ML解决方案直接集成到开发的应用程序中又迈出了一步。 我们已经创建了一个相当简单的API,可以帮助对产品进行原型设计并使其真正发挥作用,但是为了将其发送到生产环境,您需要进行一些机器学习领域不再需要的调整。
创建API时,请注意以下几点:
- 从意大利面条代码创建高质量的API几乎是不可能的,因此请在机器学习中运用您的知识来创建有用且方便的API。
- 尝试对模型和API代码使用版本控制。 请记住,Flask不提供对版本控制工具的支持。 保存和跟踪ML模型是一项艰巨的任务,找到一种对您方便的方法。 这里有一篇文章讨论了如何做到这一点。
- 由于scikit-learn模型的特殊性,您需要确保评估者和培训代码彼此相邻(如果您正在使用自定义评估者进行预处理或其他类似任务)。 因此,固定模型将在其旁边有一个类评估器。
下一步的逻辑步骤是创建用于在小型虚拟机上部署此类API的机制。 有多种方法可以做到这一点,但是我们将在下一篇文章中介绍它们。
本文的代码和说明有用的资料:[1]
不要腌制您的数据。[2]
Building Scikit了解兼容的变压器 。
[3]
在Flask中使用jsonify 。
[4]
Flask-QuickStart。这是这种材料。 如果您喜欢该出版物,请订阅我们,并注册一个免费的
开放式网络研讨会 ,主题为“度量标准分类算法”,该研讨会将于3月12日由具有5年经验的开发人员和数据科学家
亚历山大·尼基汀 (
Alexander Nikitin)举办。