每个程序员的一生中都有他梦when以求的有趣时刻。 许多程序员甚至甚至成功地实现了这些梦想,但这与他们无关。 这是关于那些喜欢玩游戏的人(即使没有知识和经验的情况下)也曾经尝试创建游戏的人,受到了获得全球声誉(和丰厚利润)的孤独英雄的启发,但深层次的理解与他负担不起的大师igrostroya竞争。
而且不要...
小介绍
我将立即预订:我们的目标不是赚钱-哈布雷(Habré)上有很多关于该主题的文章。 不,我们将做一个梦game以求的游戏。
关于梦想游戏的抒情离题我从单一开发商和小型工作室听过多少次这个词。 无论您在哪里看,所有igrodelov的新手都会赶紧向世界展现他们的梦想和“完美的愿景”,然后写长篇文章,讲述他们的英勇努力,工作过程,不可避免的财务困难,发行人的问题以及通常的“球员忘恩负义的狗”。给图和硬币以及所有免费和有偿的都不想要游戏海盗,而我们却因此失去了利润,因为它们在这里。”
人,不要上当。 您不是在制作梦想游戏,而是一款会畅销的游戏-这是两件事。 玩家(尤其是精明的玩家)不在乎您的梦想,他们也不会为此付出代价。 如果您想要获利-研究趋势,了解当前流行的事物,做一些独特的事情,做得更好,比其他人做得不寻常,阅读文章(有很多),与发布者交流-通常,实现最终用户而不是您自己的梦想。
如果您还没有逃脱但仍想实现自己的梦想游戏,请提前放弃利润。 完全不出售您的梦想-免费分享。 给人们您的梦想,带给他们梦想,如果您的梦想有价值,那么即使不是金钱,您也会得到爱和认可。 有时这更有价值。
许多人认为游戏浪费时间和精力,认真的人根本不应该谈论这个话题。 但是聚集在这里的人并不认真,因此我们仅部分同意-如果您玩游戏,确实会花费很多时间。 但是,游戏的开发虽然需要花费很多时间,但却可以带来很多好处。 例如,它使您可以了解非游戏应用程序开发中未找到的原理,方法和算法。 或加深拥有工具(例如,编程语言)的技能,做一些不寻常且令人兴奋的事情。 我可以自己补充(很多人会同意),游戏开发(即使不成功)始终是一种特殊的,无与伦比的体验,您以后会以恐惧和热爱的心情回想起来,我想为每位开发人员一生中至少经历一次。
我们不会使用新型的游戏引擎,框架和库,而是会从本质上审视游戏的本质,并从内部进行体验。 我们放弃了灵活的开发方法(只需组织一个人的工作即可简化任务)。 我们不会花时间和精力寻找设计师,艺术家,作曲家和音响专家-我们将竭尽所能(但是与此同时,我们将明智地做所有事情-如果我们突然有了一位艺术家,我们将不会花费太多精力来固定时尚图形在完成的框架上)。 最后,我们甚至不会真正研究这些工具并选择合适的工具-我们将在我们知道并知道如何使用的工具上进行操作。 例如,在Java中,以便以后在必要时将其传输到Android(或咖啡机)。
“啊! 恐怖! 一场噩梦! 你怎么能把时间花在这种胡说八道上! 离开这里,我会去读一些更有趣的东西!”为什么这样 我的意思是,重新发明轮子吗? 为什么不使用现成的游戏引擎? 答案很简单:我们对他一无所知,但我们现在想要这款游戏。 想象一下普通程序员的心态:“我想做一个游戏! 会有肉,爆炸和抽水,
您可以抢劫korovan ,而该地块正在轰炸,而这在其他任何地方都从未发生过! 我现在就开始写! 让我们看看现在流行的是什么……是的,X,Y和Z。让我们以Z为例,现在每个人都在上面写……”。 并开始研究引擎。 他提出了这个主意,因为已经没有足够的时间了。 翅 或者,好的,它不会放弃,但是如果没有真正学习引擎,它将被用于游戏。 好吧,如果那样的话,他有良心不向任何人展示他的第一个“手工艺品”。 通常不(去任何应用程序商店,自己看看)-好吧,我要利润,没有实力去承受。 一旦创造了游戏,就会有很多热衷于创造的人。 las,这次已经不可挽回地过去了-现在游戏中的主要内容不是灵魂,而是商业模式(至少关于它的讨论更多)。 我们的目标很简单:我们将与灵魂进行游戏。 因此,我们从工具中抽象出来(任何人都会做),并专注于任务。
因此,让我们继续。
我不会详细介绍自己的痛苦经历,但是我会说,程序员开发游戏的主要问题之一是图形。 程序员通常不知道如何绘画(尽管有例外),而艺术家通常不知道如何编程(尽管有例外)。 而且必须承认,没有图形,就可以绕开罕见的游戏。 怎么办
有以下选项:
1.在简单的图形编辑器中自己绘制所有内容 游戏“杀死所有人”的屏幕截图,2003年
 2.自己绘制矢量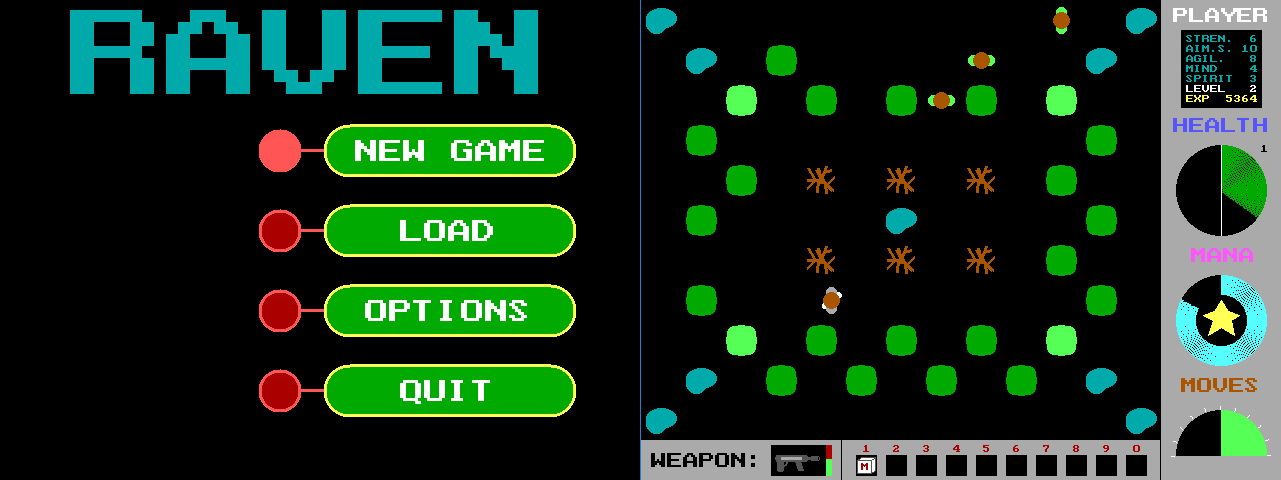 游戏“乌鸦”的屏幕截图,2001年
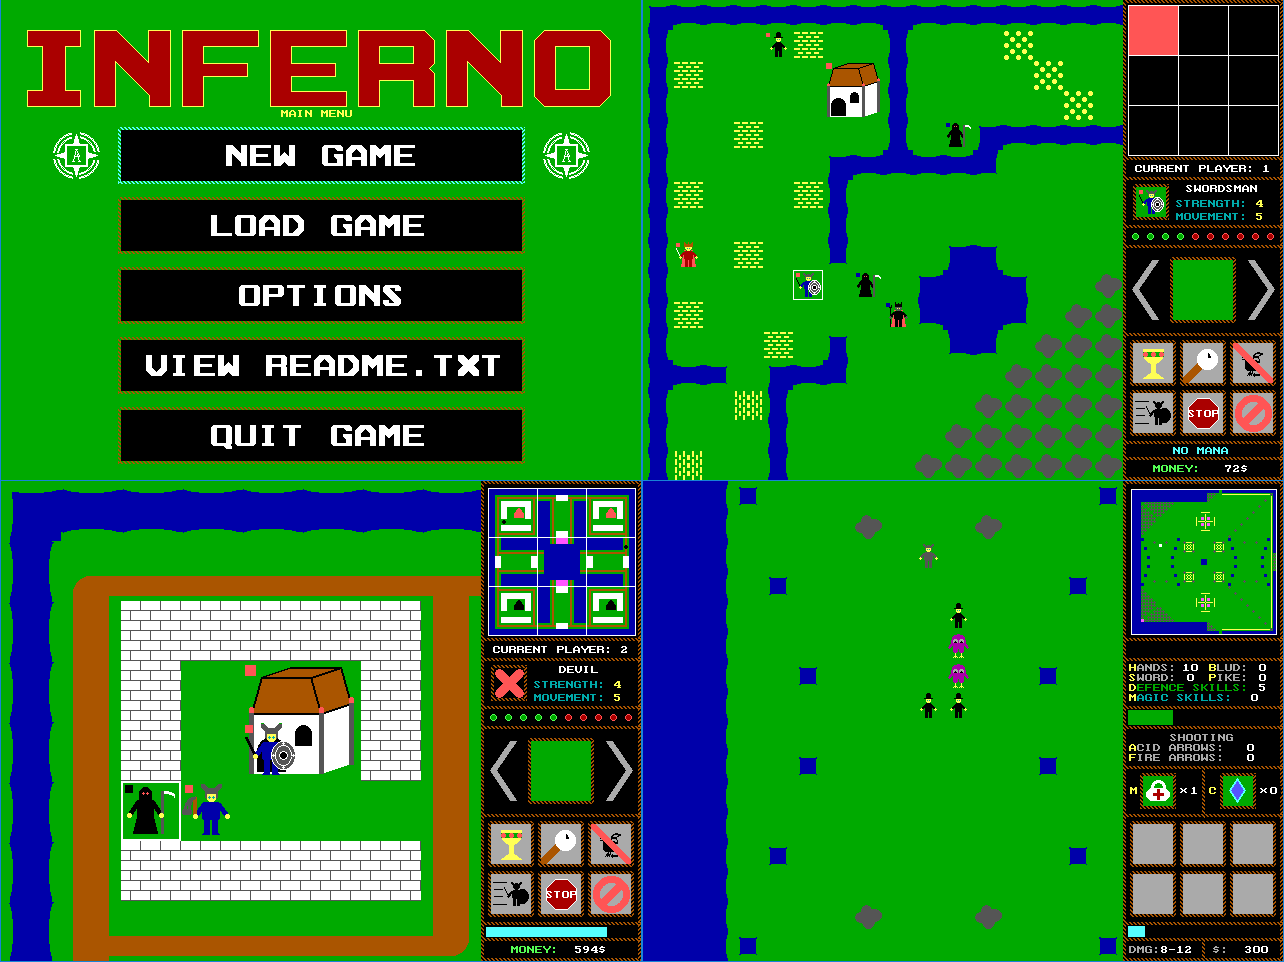 2002年“地狱”游戏的屏幕截图
 3.问一个也不知道如何画画的兄弟(但做得更好) 游戏“ Fucking”的屏幕截图,2004年
 4.下载一些用于3D建模的程序,然后从中拖动资源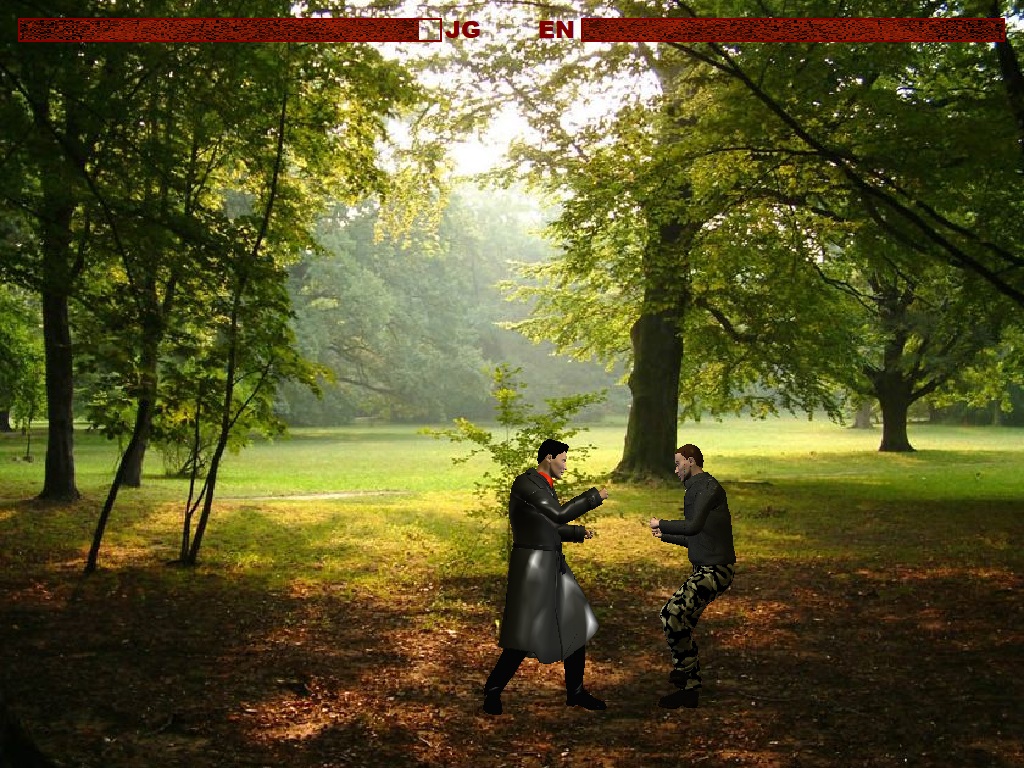 游戏“ Fucking 2. Demo”的屏幕截图,2006年
 5.无奈之下,把头发扯在头上
 游戏“ Fucking”的屏幕截图,2004年
 6.用伪图形(ASCII)自己绘制所有内容 游戏“ Fifa”的屏幕截图,2000年
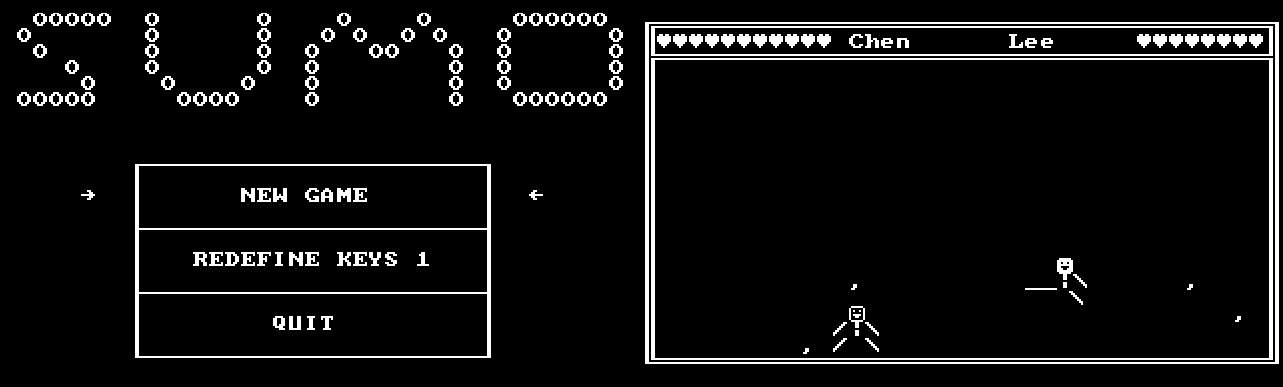 游戏“ Sumo”的屏幕截图,1998年
 让我们关注后者(部分原因是它看起来不像其余的那么令人沮丧)。 许多经验不足的游戏玩家都认为,没有精美现代图形的游戏无法赢得玩家的青睐-即使游戏的名称甚至都无法将它们变成游戏。 诸如
ADOM ,
NetHack和
Dwarf Fortress之类的杰作的开发人员默认反对此类论点。 外观并不总是决定性因素,
ASCII的使用带来了一些有趣的优点:
- 在开发过程中,程序员专注于游戏玩法,游戏机制,剧情组成等,而不会被小事分散注意力;
- 开发图形组件不会花费太多时间-一个工作的原型(即您可以理解的播放版本,但值得继续这样做)将早得多地准备好;
- 无需学习框架和图形引擎;
- 在您开发游戏的五年内,您的图形不会过时;
- 核心工作人员即使在没有图形环境的平台上也可以评估您的产品;
- 如果一切都正确完成,那么很酷的图形可以稍后再固定。
上面的长篇介绍旨在帮助igrodelov新手克服恐惧和偏见,停止担忧并仍然尝试做类似的事情。 准备好了吗 然后开始吧。
第一步。 主意
怎么了 还是不知道吗?
关闭计算机,吃饭,散步,运动。 或睡觉,最坏的情况。 提出游戏并不是要洗窗-对此过程没有深刻的见识。 通常,当您根本不考虑游戏的想法时,就会突然想到它。 如果这突然发生,请更快地拿起铅笔并写下来,直到想法消失。 任何创作过程都以这种方式实施。
您可以复制其他人的游戏。 好吧,复制。 当然,不要无耻地撕扯,告诉每个角落您有多聪明,而要在产品中借鉴他人的经验。 在这之后到底有多少是您梦dream以求的,这是一个次要问题,因为玩家经常会遇到以下问题:他们喜欢游戏中的所有内容,除了一些两三个烦人的事情,但做事是否不同...谁知道也许让一个人想到一个好主意就是你的梦想。
但是,我们将采用简单的方式-假设我们已经有了一个主意,而且很长一段时间都没有考虑过。 作为我们的第一个宏伟项目,我们将从《黑曜石-
探路者冒险》中克隆出一款出色的游戏。
“这到底是什么! 有桌子吗?”正如他们所说,
pourquoi pas? 我们似乎已经放弃了偏见,因此我们大胆地开始完善这个想法。 自然,我们不会一对一地克隆游戏,但是会借鉴基本的机制。 此外,回合制棋盘合作游戏的实施还具有以下优点:
- 这是分步进行的-这使您不必担心计时器,同步,优化,FPS和其他沉闷的事情;
- 它是合作的,也就是说,一个或多个玩家不会互相竞争,而是根据确定性规则与特定的“环境”竞争-这消除了对AI ( AI )进行编程的需要-这是游戏开发中最困难的阶段之一;
- 这很有意义-桌面通常都是异想天开的人,他们什么都不会玩:给他们周到的机制和有趣的游戏玩法-您不会画出一幅美丽的图画(它会给朋友一些东西,对吧?);
- 情节就是这样-许多电子竞技家不会同意,但是对我个人而言,游戏应该讲一个有趣的故事-就像一本书,只能使用其特殊的艺术手段。
- 她的娱乐性并不适合所有人-所描述的方法可以应用于任何后续梦想,无论您有多少梦想。
对于不熟悉规则的人,简要介绍一下:探路者历险记是基于棋盘角色扮演游戏(或者整个角色扮演系统)Pathfinder创建的棋盘游戏的数字版本。 玩家(数量为1到6)为自己选择一个角色,并与他一起进行冒险,分为多种场景。 每个角色都可以使用各种类型的卡(例如:武器,盔甲,咒语,盟军,物品等),在每种情况下,他都必须借助这些卡找到并残酷地惩罚Scoundrel –一种具有特殊属性的特殊卡。
每个场景都提供了玩家需要访问和探索的多个位置或位置(它们的数量取决于玩家的数量)。 每个位置都包含一副面朝下的纸牌,角色依次轮流进行探索-也就是说,他们打开顶部的纸牌并尝试根据相关规则克服它。 除了补充玩家卡组的无害卡之外,这些卡组还包含邪恶的敌人和障碍物-必须击败它们才能进一步前进。 Scoundrel卡也位于其中一个牌组中,但是玩家不知道哪一个-需要找到它。
要打败这些牌(并获得新的牌),角色必须投掷骰子,其大小取决于相应特征的值(从d4到d12),并添加修饰符(已定义),以通过其特征之一的测试(RPG强度,敏捷性,智慧等的标准)。规则和角色发展水平),并通过玩法增强相应手牌的效果。 获胜后,碰到的卡牌将从游戏中移出(如果是敌人)或补充玩家的手(如果是物品),然后移至另一位玩家。 丢失时,角色通常会被损坏,导致他丢弃自己手中的牌。 一个有趣的机制是,角色的健康状况取决于其甲板上的纸牌数量-玩家需要从甲板上抽出一张纸牌(但不存在)后,其角色就会死亡。
我们的目标是通过定位地图找到并击败Scoundrel,并事先封锁了他的退缩之路(您可以通过阅读规则来进一步了解这一点以及更多信息)。 这需要做一段时间,这是游戏的主要困难。 严格限制移动次数,并且所有可用卡的简单枚举都无法达到目标。 因此,您必须应用各种技巧和聪明的技巧。
随着场景的实现,角色将成长和发展,改善其特征并获得新的有用技能。 管理套牌也是游戏中非常重要的元素,因为场景的结果(尤其是在后期阶段)通常取决于正确选择的牌(以及很多运气,但是您希望从带有骰子的游戏中获得什么?)。
总的来说,游戏很有趣,值得,值得关注,并且对我们而言重要的事情很复杂(请注意,我说“难”并不意味着“难”),以使其有趣地实现其克隆。
在我们的案例中,我们将进行一次全球性的概念性更改-我们将放弃这些规则。 相反,我们根本不会拒绝,但我们会用大小,颜色仍不同的立方体替换卡片(从技术上讲,使用它们的“立方体”并不完全正确,因为除了正确的六角形以外还有其他形状,但是我称它们为“骨骼”并不常见)并且令人不快,但是使用美国雏菊是一种不良口味的迹象,因此,让我们保持现状吧。 现在,玩家将拥有甲板而不是甲板。 而且这些地点还将有袋子,研究过程中的玩家将从袋子中抽出任意立方体。 多维数据集的颜色将确定其类型以及相应的通过测试的规则。 结果,角色的个人特征(强度,灵巧性等)将被消除,但新的有趣机制将会出现(稍后会详细介绍)。
玩会很有趣吗? 我不知道,在准备好可以工作的原型之前,没有人能理解这一点。 但是我们不喜欢游戏,而是发展,对吗? 因此,毫无疑问应该成功。
第二步 设计方案
有一个想法只是故事的三分之一。 现在,发展这个想法很重要。 也就是说,不要在公园里散步或洗个蒸气浴,而要坐在桌子旁,用钢笔拿纸(或打开您喜欢的文本编辑器)并仔细地编写设计文档,努力地研究游戏机制的各个方面。 时间将取得突破,因此不要指望一次就完成写作。 而且甚至不希望立即考虑所有问题-在实施时,您会看到需要进行大量更改和更改(有时需要在全局范围内进行某些更改),但是在开发过程开始之前必须有一定的基础。
并且只有在应对了第一波宏伟的想法之后,您才开始思考,确定文档的结构并开始有条不紊地填充内容(每秒检查一下已写的内容,以避免不必要的重复和特别是矛盾)。 逐步地,您逐渐获得了有意义而又简洁的东西,
就像这样 。
描述设计时,请选择易于表达想法的语言,尤其是当您独自工作时。 如果您需要让第三方开发人员参与该项目,请确保他们了解您头脑中正在发生的所有创造性废话。
继续,我强烈建议您至少以对角线的方式阅读所引用的文档,因为将来我将参考此处介绍的术语和概念,而不再详细解释它们。
“作者,靠墙自杀。 字母太多。”第三步 造型
也就是说,所有相同的设计,只会更详细。
我知道许多人已经渴望打开IDE并开始编码,但是要耐心一点。 当想法淹没我们的头脑时,在我们看来您只需要触摸键盘,您的手就会冲向天涯海角-在咖啡有时间沸腾之前,当应用程序的工作版本准备就绪时...就可以扔进垃圾桶了。 为了避免多次重写同一件事(特别是在三个小时的开发后不能确保布局不起作用并且需要重新开始),建议您首先考虑一下(并记录)应用程序的主要结构。
由于我们作为开发人员非常熟悉面向对象编程(OOP),因此我们将在项目中使用其原理。 但是对于OOP而言,除了从一堆无聊的UML图开始开发之外,没有其他期望。 (您不知道
UML是什么?我也几乎忘记了,但我会很高兴地记住它-只是为了展示我是一个勤奋的程序员,呵呵。)
让我们从用例图开始。 我们将在其上描述用户(玩家)与未来系统交互的方式:
“呃……到底是什么?”开个玩笑,开个玩笑...,也许我不再开玩笑了-这是一个严肃的事情(毕竟是一个梦想)。 在用例图上,有必要显示系统提供给用户的可能性。 详细。 但是从历史上来看,这种特殊类型的图表对我来说是最糟糕的-显然,耐心还不够。 而且您不必那样看着我-我们不是在保护文凭的大学,但我们喜欢工作过程。 对于此过程,用例不是那么重要。 正确地将应用程序划分为独立的模块,即以可视界面的功能不会影响游戏机制的方式实现游戏,并且在需要时可以轻松更改图形组件,这一点更为重要。
这一点可以在下面的组件图中详细说明:
在这里,我们已经确定了属于我们应用程序一部分的特定子系统,并且如稍后所示,它们将彼此独立地开发。另外,在同一阶段,我们将弄清楚主游戏周期是什么样的(或者,最有趣的部分是在脚本中实现角色的部分)。为此,活动图适合我们:最后,最好能概括地介绍最终用户通过输入输出系统与游戏引擎进行交互的顺序。夜晚很长,远未到黎明。在桌子上坐了适当的姿势之后,您将平静地画出剩下的两打图表-相信我,将来,它们的存在将帮助您保持轨道,增加自尊心,更新房间的内部,用彩色海报悬挂褪色的墙纸,并简单地将您的视野带入即将很快成群结队奔向新工作室大门的开发人员(我们不是为了成功而奋斗,还记得吗?)。到目前为止,我们不会引用大家都喜欢的类图(类)-期望类会突破很多,起初在三个清晰的屏幕上显示的图片不会增加。在继续开发适当的子系统时,最好将其分解并逐步布置。第四步 工具选择
按照已经达成的协议,我们将开发一个跨平台应用程序,该应用程序既可以在运行各种操作系统的桌面上运行,也可以在移动设备上运行。我们将选择Java作为编程语言,而Kotlin则更好,因为后者是更新和更新的,并且还没有时间游刃有余地激怒了它的前任(与此同时,我还将学习是否有人不拥有它)。如您所知,JVM随处可见(在30亿个设备上),我们将同时支持Windows和UNIX,甚至在远程服务器上,我们也可以通过SSH连接进行播放(对于任何需要它的人都是未知的,但是我们将提供这样的机会)。当我们变得富有并雇用一名艺术家时,我们还将把它转移到Android上,但稍后会介绍更多。图书馆(如果没有图书馆,我们将无处可寻),我们将根据跨平台要求进行选择。我们将使用Maven作为构建系统。或摇篮。还是一样,Maven,让我们开始吧。我建议您立即建立一个版本控制系统(无论您喜欢哪个版本),这样多年后,怀着怀旧的回忆就可以轻松回忆起曾经的辉煌。IDE还选择熟悉,喜欢和方便的方式。实际上,我们不需要任何其他东西。您可以开始开发。第五步 创建和设置项目
如果使用IDE,则创建项目很简单。 您只需要为我们将来的杰作选择一些名字(例如
Dice ),别忘了在设置中启用Maven支持,并在
pom.xml文件中写入必要的标识符:
<modelVersion>4.0.0</modelVersion> <groupId>my.company</groupId> <artifactId>dice</artifactId> <version>1.0</version> <packaging>jar</packaging>
还添加Kotlin支持,默认情况下会丢失:
<dependency> <groupId>org.jetbrains.kotlin</groupId> <artifactId>kotlin-stdlib</artifactId> <version>${kotlin.version}</version> </dependency>
以及一些我们不会详细介绍的设置:
<properties> <project.build.sourceEncoding>UTF-8</project.build.sourceEncoding> <maven.compiler.source>1.8</maven.compiler.source> <maven.compiler.target>1.8</maven.compiler.target> <kotlin.version>1.3.20</kotlin.version> <kotlin.compiler.incremental>true</kotlin.compiler.incremental> </properties>
有关混合项目的一些信息如果您打算在项目中同时使用Java和Kotlin,则除了
src/main/kotlin ,您还将拥有
src/main/java文件夹。 Kotlin开发人员声称,第一个文件夹(
*.kt )中的源文件应比第二个文件夹(
*.java )中的源文件更早地编译,因此强烈建议您更改标准Maven目标的设置:
<build> <plugins> <plugin> <groupId>org.jetbrains.kotlin</groupId> <artifactId>kotlin-maven-plugin</artifactId> <version>${kotlin.version}</version> <executions> <execution> <id>compile</id> <phase>process-sources</phase> <goals> <goal>compile</goal> </goals> <configuration> <sourceDirs> <sourceDir>${project.basedir}/src/main/kotlin</sourceDir> <sourceDir>${project.basedir}/src/main/java</sourceDir> </sourceDirs> </configuration> </execution> <execution> <id>test-compile</id> <goals> <goal>test-compile</goal> </goals> <configuration> <sourceDirs> <sourceDir>${project.basedir}/src/test/kotlin</sourceDir> <sourceDir>${project.basedir}/src/test/java</sourceDir> </sourceDirs> </configuration> </execution> </executions> </plugin> <plugin> <groupId>org.apache.maven.plugins</groupId> <artifactId>maven-compiler-plugin</artifactId> <version>3.5.1</version> <executions> <execution> <id>default-compile</id> <phase>none</phase> </execution> <execution> <id>default-testCompile</id> <phase>none</phase> </execution> <execution> <id>java-compile</id> <phase>compile</phase> <goals> <goal>compile</goal> </goals> </execution> <execution> <id>java-test-compile</id> <phase>test-compile</phase> <goals> <goal>testCompile</goal> </goals> </execution> </executions> </plugin> </plugins> </build>
我不能说这有多重要-没有这份工作表,项目进展顺利。 但是以防万一,您会被警告。
让我们一次创建三个包(为什么要花些时间?):
model -用于描述游戏世界对象的类;game -用于实现游戏玩法的类;ui用于负责用户交互的类。
后者将仅包含接口,我们将使用它们的方法来输入和输出数据。 我们将特定的实现存储在一个单独的项目中,但稍后会介绍更多。 同时,为了避免喷太多,我们将在此处并排添加这些类。
不要试图立即做到完美:仔细考虑软件包名称,接口,类和方法的细节; 彻底规定了对象之间的相互作用-所有这些都会改变,而且会改变十几次。 随着项目的发展,许多事情对于您等而言似乎是丑陋的,笨重的,无效的-可以随意更改它们,因为在现代IDE中进行重构是非常便宜的操作。
我们还将创建一个具有
main功能的类,并为取得巨大成就做好了准备。 您可以使用IDE本身进行启动,但是正如您稍后将看到的那样,此方法不适合我们的目的(标准IDE控制台无法按原样显示我们的图形结果),因此我们将使用批处理(或UNIX系统上的shell)从外部配置启动。文件。 但是在此之前,我们将进行一些其他设置。
mvn package操作完成后,我们将获得带有所有已编译类的JAR归档文件的输出。 首先,默认情况下,此归档文件不包含项目正常运行所必需的依赖项(到目前为止,我们还没有它们,但是它们肯定会在将来出现)。 其次,归档清单文件中未指定包含
main方法的主类的路径,因此我们将无法使用
java -jar dice-1.0.jar启动项目。 通过向
pom.xml添加其他设置来解决此问题:
<build> <plugins> <plugin> <artifactId>maven-assembly-plugin</artifactId> <version>2.6</version> <executions> <execution> <phase>package</phase> <goals> <goal>single</goal> </goals> </execution> </executions> <configuration> <descriptorRefs> <descriptorRef>jar-with-dependencies</descriptorRef> </descriptorRefs> <archive> <manifest> <mainClass>my.company.dice.MainKt</mainClass> </manifest> </archive> </configuration> </plugin> </plugins> </build>
注意主类的名称。 对于包含在类外部的Kotlin函数(例如
main函数),无论如何都将在编译过程中创建类(因为JVM一无所知并且不想知道)。 此类的名称是带有
Kt的文件的名称。 也就是说,如果您将主类命名为
Main ,那么它将被编译到
MainKt.class文件中。 这是我们必须在jar文件清单中指出的最后一个。
现在,在构建项目时,我们将在输出中获得两个jar文件:
dice-1.0.jar和
dice-1.0-jar-with-dependencies.jar 。 我们对第二个感兴趣。 我们将为此编写启动脚本。
dice.bat (对于Windows)
@ECHO OFF rem Compiling call "path_to_maven\mvn.bat" -f "path_to_project\Dice\pom.xml" package if errorlevel 1 echo Project compilation failed! & pause & goto :EOF rem Running java -jar path_to_project\Dice\target\dice-1.0-jar-with-dependencies.jar pause
dice.sh (对于UNIX)
请注意,如果编译失败,我们将被迫中断脚本。 否则,不是最后一个竖琴将被启动,而是先前成功的汇编中剩余的文件(有时我们什至找不到)。 通常,开发人员使用
mvn clean package命令删除所有以前编译的文件,但是在这种情况下,整个编译过程总是从头开始(即使源代码没有更改),这将花费很多时间。 但是我们迫不及待-我们需要制作游戏。
因此,该项目启动正常,但到目前为止没有任何帮助。 不用担心,我们会尽快修复。
第六步 主要对象
逐渐地,我们将开始为
model包填充游戏所必需的类。
多维数据集就是我们的一切,请首先添加它们。 每个模具(
Die类的一个实例)通过其类型(颜色)和尺寸来表征。 对于多维数据集类型,我们将进行单独的枚举(
Die.Type ),将大小标记为4到12之间的整数。我们还实现了
roll()方法,该方法将从多维数据集可用的范围(从1到包含大小在内的值)中产生任意均匀分布的数字。
该类实现
Comparable接口,
Comparable可以将多维数据集彼此进行比较(稍后将在有序行中显示多个多维数据集时很有用)。 较大的立方体将被放置得更早。
class Die(val type: Type, val size: Int) : Comparable<Die> { enum class Type { PHYSICAL,
为了不收集灰尘,将多维数据集存储在手袋中(
Bag类的副本)。 只能猜测包中发生了什么;因此,使用有序集合是没有意义的。 好像是 集合(集合)很好地实现了我们所需的想法,但由于两个原因而不合适。 首先,在使用它们时,您将必须实现
equals()和
hashCode()方法,但由于如何比较多维数据集的类型和大小是不正确的,因此尚不清楚如何实现-在我们的集合中可以存储任意数量的相同多维数据集。 其次,将多维数据集从袋子中拉出来,我们希望每次获得的不仅是不确定的东西,而且是随机的东西。 因此,尽管如此,我还是建议您使用有序集合(列表),并在每次添加新元素时(在
put()方法中)或紧接在发布之前(在
draw()方法中)将其洗牌。
examine()方法适用于厌倦不确定性的玩家在心中摇晃桌子上的袋子内容时(注意分类),而
clear()方法适用于以下情况:如果摇动的立方体不返回袋子。
open class Bag { protected val dice = LinkedList<Die>() val size get() = dice.size fun put(vararg dice: Die) { dice.forEach(this.dice::addLast) this.dice.shuffle() } fun draw(): Die = dice.pollFirst() fun clear() = dice.clear() fun examine() = dice.sorted().toList() }
除了带有立方体的袋子之外,您还需要带有立方体的堆(
Pile类的实例)。 与第一个不同的是,第二个内容的区别在于播放器可见,因此,如有必要,从堆中删除一个多维数据集,播放器可以选择一个特定的感兴趣实例。 我们使用
removeDie()方法实现了这一想法。
class Pile : Bag() { fun removeDie(die: Die) = dice.remove(die) }
现在我们来看看我们的主要角色-英雄。 也就是说,我们现在将其称为英雄的角色(有充分的理由不使用Java中的名称
Character来调用您的班级)。 角色有不同类型(放在类别中,尽管最好不要使用单词
class ),但是对于我们的工作原型,我们只采用两种:
Brawler (即强调力量和力量的Fighter)和
Hunter (又名Ranger / Thief,强调灵巧和隐身)。 英雄的阶级决定了他的特征,技能和最初的魔方集,但是正如后面将要看到的那样,英雄将不会严格地与阶级联系在一起,因此可以轻松地在一个地方更改其个人设置。
我们将根据设计文档为英雄添加必要的属性:名称,最喜欢的多维数据集类型,多维数据集限制,学习和未学习的技能,手,袋和堆以便重置。 注意实现集合属性的功能。 在整个文明世界中,提供对存储在对象内的集合的外部访问(借助getter的帮助)是一种不好的形式-不道德的程序员将可以在不了解类的情况下更改这些集合的内容。 解决此问题的一种方法是实现用于添加和删除元素,获取元素编号并按索引访问的单独方法。 您可以实现getter,但同时不返回集合本身,而是返回其不变的副本-对于少数元素,这样做并不是特别令人恐惧。
data class Hero(val type: Type) { enum class Type { BRAWLER HUNTER } var name = "" var isAlive = true var favoredDieType: Die.Type = Die.Type.ALLY val hand = Hand(0) val bag: Bag = Bag() val discardPile: Pile = Pile() private val diceLimits = mutableListOf<DiceLimit>() private val skills = mutableListOf<Skill>() private val dormantSkills = mutableListOf<Skill>() fun addDiceLimit(limit: DiceLimit) = diceLimits.add(limit) fun getDiceLimits(): List<DiceLimit> = Collections.unmodifiableList(diceLimits) fun addSkill(skill: Skill) = skills.add(skill) fun getSkills(): List<Skill> = Collections.unmodifiableList(skills) fun addDormantSkill(skill: Skill) = dormantSkills.add(skill) fun getDormantSkills(): List<Skill> = Collections.unmodifiableList(dormantSkills) fun increaseDiceLimit(type: Die.Type) { diceLimits.find { it.type == type }?.let { when { it.current < it.maximal -> it.current++ else -> throw IllegalArgumentException("Already at maximum") } } ?: throw IllegalArgumentException("Incorrect type specified") } fun hideDieFromHand(die: Die) { bag.put(die) hand.removeDie(die) } fun discardDieFromHand(die: Die) { discardPile.put(die) hand.removeDie(die) } fun hasSkill(type: Skill.Type) = skills.any { it.type == type } fun improveSkill(type: Skill.Type) { dormantSkills .find { it.type == type } ?.let { skills.add(it) dormantSkills.remove(it) } skills .find { it.type == type } ?.let { when { it.level < it.maxLevel -> it.level += 1 else -> throw IllegalStateException("Skill already maxed out") } } ?: throw IllegalArgumentException("Skill not found") } }
英雄的手(他目前拥有的多维数据集)由一个单独的对象(
Hand类)描述。 将同盟立方体与主臂分开的设计决定是我想到的第一个方案。 最初,它看起来像是一个超酷的功能,但后来却产生了很多问题和不便之处。 但是,我们并不是在寻找简单的方法,因此
dice和
allies列表可以为我们服务,您需要添加,接收和删除所有方法(其中一些方法可以智能地确定要访问两个列表中的哪一个)。 当您从手中移出一个多维数据集时,所有随后的多维数据集将移至列表的顶部,并填充空白-将来,这将极大地方便搜索(无需处理
null情况)。
class Hand(var capacity: Int) { private val dice = LinkedList<Die>() private val allies = LinkedList<Die>() val dieCount get() = dice.size val allyDieCount get() = allies.size fun dieAt(index: Int) = when { (index in 0 until dieCount) -> dice[index] else -> null } fun allyDieAt(index: Int) = when { (index in 0 until allyDieCount) -> allies[index] else -> null } fun addDie(die: Die) = when { die.type == Die.Type.ALLY -> allies.addLast(die) else -> dice.addLast(die) } fun removeDie(die: Die) = when { die.type == Die.Type.ALLY -> allies.remove(die) else -> dice.remove(die) } fun findDieOfType(type: Die.Type): Die? = when (type) { Die.Type.ALLY -> if (allies.isNotEmpty()) allies.first else null else -> dice.firstOrNull { it.type == type } } fun examine(): List<Die> = (dice + allies).sorted() }
DiceLimit类的对象集合对英雄在脚本开始处可以具有的每种类型的多维数据集数设置限制。 没有什么特别的说,我们首先确定每种类型的最大值和当前值。
class DiceLimit(val type: Die.Type, val initial: Int, val maximal: Int, var current: Int)
但是有了技巧,它会变得更加有趣。 它们中的每一个都必须单独实现(稍后再介绍),但是我们将只考虑两个:
Hit和
Shoot (每个类分别一个)。 技能可以从最初的水平发展到最高水平,这通常会影响添加到骰子卷中的修饰符。 这
maxLevel在属性
level maxLevel ,
maxLevel和
maxLevel 。
class Skill(val type: Type) { enum class Type {
请注意
Hero类的辅助方法,这些方法可以让您隐藏或掷骰子,检查英雄是否具有某种技能,还可以提高所学技能的水平或学习新技能。 所有这些迟早都会需要,但现在我们不再详细介绍它们。
请不要担心我们必须创建的类的数量。 对于一个如此复杂的项目,几百个是很平常的事情。 在这里,就像从事任何严重的职业一样,我们从小处着手,逐步加快步伐,在一个月内我们对范围感到恐惧。 不要忘记,我们仍然是一个只有一个人的小工作室-我们没有面临繁重的任务。
“有些事让我讨厌。 我要抽烟或什么东西...”我们将继续。
描述了英雄及其能力之后,该是继续前进对立力量的时候了-伟大而可怕的游戏机制。 更确切地说,是我们的英雄必须与之互动的对象。
三个英勇的方块和卡片将与我们的英勇主角相对:恶棍(
Villain类),敌人(
Enemy类)和障碍物(
Obstacle类),它们统称为“威胁”(
Threat是抽象的“锁定”类,其可能的继承人清单严格有限)。 每个威胁都有一组独特的功能(
Trait ),这些特征描述了面对此类威胁时的特殊行为规则,并为游戏增加了多样性。
sealed class Threat { var name: String = "" var description: String = "" private val traits = mutableListOf<Trait>() fun addTrait(trait: Trait) = traits.add(trait) fun getTraits(): List<Trait> = traits } class Obstacle(val tier: Int, vararg val dieTypes: Die.Type) : Threat() class Villain : Threat() class Enemy : Threat() enum class Trait { MODIFIER_PLUS_ONE,
请注意,
Trait类的对象列表被定义为可变的(
MutableList ),但作为不可变的
List接口给出。 尽管这在Kotlin中可行,但是这种方法是不安全的,因为没有任何方法可以防止将结果列表转换为可变接口并进行各种修改-如果您从Java代码访问该类(其中
List接口是可变的),则这样做特别容易。 保护您的收藏集的最偏执的方法是执行以下操作:
fun getTraits(): List<Trait> = Collections.unmodifiableList(traits)
但是我们在处理此问题时不会太谨慎(但是,您会被警告)。
由于游戏机制的特殊性,
Obstacle类与其他类在存在其他领域方面有所不同,但我们不会专注于它们。
威胁卡(如果您仔细阅读了设计文档,请记住这些是卡)将合并到由
Deck类代表的卡片组中:
class Deck<E: Threat> { private val cards = LinkedList<E>() val size get() = cards.size fun addToTop(card: E) = cards.addFirst(card) fun addToBottom(card: E) = cards.addLast(card) fun revealTop(): E = cards.first fun drawFromTop(): E = cards.removeFirst() fun shuffle() = cards.shuffle() fun clear() = cards.clear() fun examine() = cards.toList() }
这里没有什么异常,除了类是参数化的并且包含一个有序列表(或者是双向队列)之外,可以使用适当的方法将其混合。 当我们开始考虑时,一秒钟内我们将需要敌人和障碍物的甲板……
...
Location类的每个实例都描述了一个独特的地区,我们的英雄必须作为脚本的一部分来访问。
class Location { var name: String = "" var description: String = "" var isOpen = true var closingDifficulty = 0 lateinit var bag: Bag var villain: Villain? = null lateinit var enemies: Deck<Enemy> lateinit var obstacles: Deck<Obstacle> private val specialRules = mutableListOf<SpecialRule>() fun addSpecialRule(rule: SpecialRule) = specialRules.add(rule) fun getSpecialRules() = specialRules }
每个地区都有一个名称,描述,关闭的难度以及“开放/封闭”的标志。 此处的某个小人可能潜伏(或可能不潜伏,因此,
villain财产可能为
null )。 在每个区域都有一个装有立方体的袋子和一副带有威胁的纸牌。 此外,该地区还可以拥有自己独特的游戏功能(
SpecialRule ),就像威胁的属性一样,可以增加游戏玩法的多样性。 如您所见,即使我们不打算在不久的将来实现它(实际上,我们需要建模阶段),我们也为将来的功能奠定了基础。
最后,仍然需要实现脚本(
Scenario类):
class Scenario { var name = "" var description = "" var level = 0 var initialTimer = 0 private val allySkills = mutableListOf<AllySkill>() private val specialRules = mutableListOf<SpecialRule>() fun addAllySkill(skill: AllySkill) = allySkills.add(skill) fun getAllySkills(): List<AllySkill> = Collections.unmodifiableList(allySkills) fun addSpecialRule(rule: SpecialRule) = specialRules.add(rule) fun getSpecialRules(): List<SpecialRule> = Collections.unmodifiableList(specialRules) }
每种情况均以计时器的级别和初始值为特征。 与先前所见类似,设定了特殊规则(
specialRules )和盟友的技能(我们会从考虑中错过)。 您可能认为该脚本还应该包含位置列表(
Location类的对象),并且从逻辑上讲,确实如此。 但是,正如稍后将看到的那样,我们将不会在任何地方使用这种连接,并且它不会提供任何技术优势。
我提醒您,到目前为止,所有考虑到的课程都包含在
model包中-作为儿童,我们作为孩子,在一场史诗般的玩具大战之前,将士兵放在桌子上。
而现在,经过一阵痛苦的时刻,在总司令的信号下,我们将着手战斗,将我们的玩具推到一起并享受游戏的后果。但在此之前,请先了解一下安排本身。“好吧……”第七步。模式和生成器
让我们想象一下生成任何先前考虑的对象的过程将是什么,例如,位置(地形)。我们需要创建一个类的实例,Location使用值初始化其字段,因此对于我们要在游戏中使用的每个位置。但是请稍等:每个位置都应该有一个袋子,这也需要生成。袋子有立方体-这些也是相应类(Die)的实例。我并不是在谈论敌人和障碍物-通常需要将它们收集在甲板上。恶棍并不能确定地形本身,而是场景的特征位于更高一级。好吧,你明白了。上面的源代码可能如下所示: val location = Location().apply { name = "Some location" description = "Some description" isOpen = true closingDifficulty = 4 bag = Bag().apply { put(Die(Die.Type.PHYSICAL, 4)) put(Die(Die.Type.SOMATIC, 4)) put(Die(Die.Type.MENTAL, 4)) put(Die(Die.Type.ENEMY, 6)) put(Die(Die.Type.OBSTACLE, 6)) put(Die(Die.Type.VILLAIN, 6)) } villain = Villain().apply { name = "Some villain" description = "Some description" addTrait(Trait.MODIFIER_PLUS_ONE) } enemies = Deck<Enemy>().apply { addToTop(Enemy().apply { name = "Some enemy" description = "Some description" }) addToTop(Enemy().apply { name = "Other enemy" description = "Some description" }) shuffle() } obstacles = Deck<Obstacle>().apply { addToTop(Obstacle(1, Die.Type.PHYSICAL, Die.Type.VERBAL).apply { name = "Some obstacle" description = "Some Description" }) } }
这也要归功于Kotlin语言和设计apply{}-在Java中,代码的体积是原来的两倍。而且,正如我们所说,会有很多地方,除了这些地方,还有场景,冒险和英雄,其技能和特征-总的来说,游戏设计师需要做一些事情。但是游戏设计师不会编写代码,因此,即使在游戏世界发生最小变化的情况下,我们也很难重新编译该项目。在这里,任何有能力的程序员都会反对将类代码中的对象描述分开-理想情况下,以便在必要时根据前者动态生成后者的实例,类似于从制图工厂制造零件的方式。我们还实现了此类绘图,我们仅将它们称为模板并将它们表示为特殊类的实例。具有这种模式,特殊的程序代码(生成器)将根据先前描述的模型创建最终对象。因此,对于我们对象的每个类,必须定义两个新实体:模板接口和生成器类。并且由于积累了相当数量的对象,因此还会有许多实体...不雅:请深呼吸,仔细听,不要分心。首先,该图并没有显示游戏世界中的所有对象,而是仅显示了主要对象,而这些对象一开始是无法做到的。其次,为了避免不必要的细节使电路过载,省略了其他图中早已提到的某些连接。让我们从简单的事情开始-生成多维数据集。 “如何? -你说。 -我们的构造函数不够吗?是的,就是那种类型和大小的。”不,我会回答,还不够。实际上,在很多情况下(请阅读规则),必须任意生成任意数量的多维数据集(例如:“从一到三个蓝色或绿色的多维数据集”)。此外,应根据脚本的复杂程度选择大小。因此,我们引入了一个特殊的接口DieTypeFilter。 interface DieTypeFilter { fun test(type: Die.Type): Boolean }
此接口的不同实现将检查多维数据集类型是否对应于不同的规则集(仅会想到的规则集)。例如,类型是对应于严格指定的值(“蓝色”)还是值的范围(“蓝色,黄色或绿色”);或者相反,它对应于给定类型以外的任何类型(“如果在任何情况下都不是白色的话-就是那样,不是那样)。” 即使事先不清楚需要什么具体实现,也没关系-可以在以后添加它们,系统不会因此而中断(多态性,还记得吗?)。 class SingleDieTypeFilter(val type: Die.Type): DieTypeFilter { override fun test(type: Die.Type) = (this.type == type) } class InvertedSingleDieTypeFilter(val type: Die.Type): DieTypeFilter { override fun test(type: Die.Type) = (this.type != type) } class MultipleDieTypeFilter(vararg val types: Die.Type): DieTypeFilter { override fun test(type: Die.Type) = (type in types) } class InvertedMultipleDieTypeFilter(vararg val types: Die.Type): DieTypeFilter { override fun test(type: Die.Type) = (type !in types) }
多维数据集的大小也可以任意设置,但稍后会更多。同时,我们将编写一个多维数据集生成器(DieGenerator),与类构造函数不同Die,它将不接受多维数据集的显式类型和大小,但将接受过滤器和复杂性级别。 private val DISTRIBUTION_LEVEL1 = intArrayOf(4, 4, 4, 4, 6, 6, 6, 6, 8) private val DISTRIBUTION_LEVEL2 = intArrayOf(4, 6, 6, 6, 6, 8, 8, 8, 8, 10) private val DISTRIBUTION_LEVEL3 = intArrayOf(6, 8, 8, 8, 10, 10, 10, 10, 12, 12, 12) private val DISTRIBUTIONS = arrayOf( intArrayOf(4), DISTRIBUTION_LEVEL1, DISTRIBUTION_LEVEL2, DISTRIBUTION_LEVEL3 ) fun getMaxLevel() = DISTRIBUTIONS.size - 1 fun generateDie(filter: DieTypeFilter, level: Int) = Die(generateDieType(filter), generateDieSize(level)) private fun generateDieType(filter: DieTypeFilter): Die.Type { var type: Die.Type do { type = Die.Type.values().random() } while (!filter.test(type)) return type } private fun generateDieSize(level: Int) = DISTRIBUTIONS[if (level < 1 || level > getMaxLevel()) 0 else level].random()
在Java中,这些方法是静态的,但是由于我们正在处理Kotlin,因此我们不需要此类,这对于下面讨论的其他生成器也是如此(尽管如此,在逻辑级别上,我们仍将使用类的概念)。两种私有方法分别生成多维数据集的类型和大小-可以说出一些有趣的东西。该方法generateDieType()可以通过以下方式将输入滤波器传递到无限循环中: override fun test(filter: DieTypeFilter) = false
(作者坚信,如果故事中的角色本身将角色指向观众,那么他们可以摆脱逻辑上的矛盾并绘制漏洞)。该方法generateDieSize()根据以数组形式(每个级别一个)指定的分布生成伪随机大小。当我长大以后,给自己买了一包彩色的游戏方块时,我将无法玩骰子,因为我不知道如何从他们那里随机收集一个包(除了问一个邻居,我本人现在要回头)。这不是一副可以颠倒过来的纸牌,它需要特殊的机制和设备。如果有人有想法(他有耐心阅读此地方),请分享评论。由于我们在谈论袋子,因此我们将为它们开发一个模板。与您的伴侣不同,此模板(BagTemplate)将是特定的类。它包含其他模板-每个模板都描述将Plan一个或多个多维数据集(记住以前的要求?)所依据的规则(或)。 class BagTemplate { class Plan(val minQuantity: Int, val maxQuantity: Int, val filter: DieTypeFilter) val plans = mutableListOf<Plan>() fun addPlan(minQuantity: Int, maxQuantity: Int, filter: DieTypeFilter) { plans.add(Plan(minQuantity, maxQuantity, filter)) } }
每个计划都为多维数据集的类型以及满足此模式的多维数据集的数量(最小和最大)定义了一个模式。由于采用了这种方法,您可以按照离奇的规则来生产行李(我再一次痛苦地哭泣,因为我的邻居断然拒绝帮助我)。像这样: private fun realizePlan(plan: BagTemplate.Plan, level: Int): Array<Die> { val count = (plan.minQuantity..plan.maxQuantity).shuffled().last() return (1..count).map { generateDie(plan.filter, level) }.toTypedArray() } fun generateBag(template: BagTemplate, level: Int): Bag { return template.plans.asSequence() .map { realizePlan(it, level) } .fold(Bag()) { b, d -> b.put(*d); b } } }
如果您像我一样对所有这些功能主义感到厌倦,请紧紧固定自己-这样只会变得更糟。但是,与Internet上许多模糊的教程不同,我们有机会研究与实际,可理解的主题领域相关的各种巧妙方法的使用。单靠包包不会躺在地上-您需要将它们交给英雄和地点。让我们从后者开始。 interface LocationTemplate { val name: String val description: String val bagTemplate: BagTemplate val basicClosingDifficulty: Int val enemyCardsCount: Int val obstacleCardsCount: Int val enemyCardPool: Collection<EnemyTemplate> val obstacleCardPool: Collection<ObstacleTemplate> val specialRules: List<SpecialRule> }
用Kotlin语言代替方法,get()可以使用接口属性-这更加简洁。我们已经熟悉了bag模板,请考虑其余方法。该属性basicClosingDifficulty将设置用于关闭地形的检查的基本复杂度。这里的“基本”一词仅意味着最终的复杂性将取决于场景的级别,并且在此阶段尚不清楚。此外,我们需要定义敌人和障碍物(以及反派)的模式。此外,从模板中描述的各种敌人和障碍中,将不会全部使用,而只会使用有限的数量(以增加重放值)。请注意,该区域的特殊规则(SpecialRule)是通过简单的枚举(enum class)实现的,因此不需要单独的模板。 interface EnemyTemplate { val name: String val description: String val traits: List<Trait> } interface ObstacleTemplate { val name: String val description: String val tier: Int val dieTypes: Array<Die.Type> val traits: List<Trait> } interface VillainTemplate { val name: String val description: String val traits: List<Trait> }
并让生成器不仅创建单个对象,还使用它们创建整个平台。 fun generateVillain(template: VillainTemplate) = Villain().apply { name = template.name description = template.description template.traits.forEach { addTrait(it) } } fun generateEnemy(template: EnemyTemplate) = Enemy().apply { name = template.name description = template.description template.traits.forEach { addTrait(it) } } fun generateObstacle(template: ObstacleTemplate) = Obstacle(template.tier, *template.dieTypes).apply { name = template.name description = template.description template.traits.forEach { addTrait(it) } } fun generateEnemyDeck(types: Collection<EnemyTemplate>, limit: Int?): Deck<Enemy> { val deck = types .map { generateEnemy(it) } .shuffled() .fold(Deck<Enemy>()) { d, c -> d.addToTop(c); d } limit?.let { while (deck.size > it) deck.drawFromTop() } return deck } fun generateObstacleDeck(templates: Collection<ObstacleTemplate>, limit: Int?): Deck<Obstacle> { val deck = templates .map { generateObstacle(it) } .shuffled() .fold(Deck<Obstacle>()) { d, c -> d.addToTop(c); d } limit?.let { while (deck.size > it) deck.drawFromTop() } return deck }
如果卡座中的卡数量超过了我们的需要(参数limit),我们将从那里将其删除。能够生成带有立方体和卡片包的袋子,我们最终可以创建地形: fun generateLocation(template: LocationTemplate, level: Int) = Location().apply { name = template.name description = template.description bag = generateBag(template.bagTemplate, level) closingDifficulty = template.basicClosingDifficulty + level * 2 enemies = generateEnemyDeck(template.enemyCardPool, template.enemyCardsCount) obstacles = generateObstacleDeck(template.obstacleCardPool, template.obstacleCardsCount) template.specialRules.forEach { addSpecialRule(it) } }
现在,我们在本章开始时在代码中明确设置的地形将呈现出完全不同的外观: class SomeLocationTemplate: LocationTemplate { override val name = "Some location" override val description = "Some description" override val bagTemplate = BagTemplate().apply { addPlan(1, 1, SingleDieTypeFilter(Die.Type.PHYSICAL)) addPlan(1, 1, SingleDieTypeFilter(Die.Type.SOMATIC)) addPlan(1, 2, SingleDieTypeFilter(Die.Type.MENTAL)) addPlan(2, 2, MultipleDieTypeFilter(Die.Type.ENEMY, Die.Type.OBSTACLE)) } override val basicClosingDifficulty = 2 override val enemyCardsCount = 2 override val obstacleCardsCount = 1 override val enemyCardPool = listOf( SomeEnemyTemplate(), OtherEnemyTemplate() ) override val obstacleCardPool = listOf( SomeObstacleTemplate() ) override val specialRules = emptyList<SpecialRule>() } class SomeEnemyTemplate: EnemyTemplate { override val name = "Some enemy" override val description = "Some description" override val traits = emptyList<Trait>() } class OtherEnemyTemplate: EnemyTemplate { override val name = "Other enemy" override val description = "Some description" override val traits = emptyList<Trait>() } class SomeObstacleTemplate: ObstacleTemplate { override val name = "Some obstacle" override val description = "Some description" override val traits = emptyList<Trait>() override val tier = 1 override val dieTypes = arrayOf( Die.Type.PHYSICAL, Die.Type.VERBAL ) } val location = generateLocation(SomeLocationTemplate(), 1)
场景生成将以类似方式发生。 interface ScenarioTemplate { val name: String val description: String val initialTimer: Int val staticLocations: List<LocationTemplate> val dynamicLocationsPool: List<LocationTemplate> val villains: List<VillainTemplate> val specialRules: List<SpecialRule> fun calculateDynamicLocationsCount(numberOfHeroes: Int) = numberOfHeroes + 2 }
根据规则,动态生成位置的数量取决于英雄的数量。该接口定义了标准计算功能,如果需要,可以在特定实现中重新定义该功能。与此要求相关的是,场景生成器还将为这些场景生成地形-在同一地点,小人将随机分布在各个地点之间。 fun generateScenario(template: ScenarioTemplate, level: Int) = Scenario().apply { name =template.name description = template.description this.level = level initialTimer = template.initialTimer template.specialRules.forEach { addSpecialRule(it) } } fun generateLocations(template: ScenarioTemplate, level: Int, numberOfHeroes: Int): List<Location> { val locations = template.staticLocations.map { generateLocation(it, level) } + template.dynamicLocationsPool .map { generateLocation(it, level) } .shuffled() .take(template.calculateDynamicLocationsCount(numberOfHeroes)) val villains = template.villains .map(::generateVillain) .shuffled() locations.forEachIndexed { index, location -> if (index < villains.size) { location.villain = villains[index] location.bag.put(generateDie(SingleDieTypeFilter(Die.Type.VILLAIN), level)) } } return locations }
许多专心的读者会反对,模板不需要存储在类的源代码中,而应该存储在某些文本文件(脚本)中,以便即使不是编程人员也可以创建和维护模板。我同意,我脱下了帽子,但我没有在自己的头上撒灰烬-因为一个不会干扰另一个。如果需要,只需定义模板的特殊实现,即可从外部文件加载其属性值。生成过程不会因此改变一个实例。好吧,看来他们还没有忘记什么……哦,是的,英雄-他们还需要生成,这意味着他们还需要自己的模板。例如,这是一些: interface HeroTemplate { val type: Hero.Type val initialHandCapacity: Int val favoredDieType: Die.Type val initialDice: Collection<Die> val initialSkills: List<SkillTemplate> val dormantSkills: List<SkillTemplate> fun getDiceCount(type: Die.Type): Pair<Int, Int>? }
立即我们注意到两个奇怪之处。首先,我们不使用模板在其中生成袋子和立方体。怎么了
是的,因为对于每种类型(类)的英雄,初始多维数据集的列表都是严格定义的-使创建它们的过程复杂化没有任何意义。其次,getDiceCount()-这是什么渣?冷静下来,这些是DiceLimit定义多维数据集限制的方法。并且以一种奇怪的形式选择了它们的模板,以便更清楚地记录特定的值。从示例中自己查看: class BrawlerHeroTemplate : HeroTemplate { override val type = Hero.Type.BRAWLER override val favoredDieType = PHYSICAL override val initialHandCapacity = 4 override val initialDice = listOf( Die(PHYSICAL, 6), Die(PHYSICAL, 6), Die(PHYSICAL, 4), Die(PHYSICAL, 4), Die(PHYSICAL, 4), Die(PHYSICAL, 4), Die(PHYSICAL, 4), Die(PHYSICAL, 4), Die(SOMATIC, 6), Die(SOMATIC, 4), Die(SOMATIC, 4), Die(SOMATIC, 4), Die(MENTAL, 4), Die(VERBAL, 4), Die(VERBAL, 4) ) override fun getDiceCount(type: Die.Type) = when (type) { PHYSICAL -> 8 to 12 SOMATIC -> 4 to 7 MENTAL -> 1 to 2 VERBAL -> 2 to 4 else -> null } override val initialSkills = listOf( HitSkillTemplate() ) override val dormantSkills = listOf<SkillTemplate>() } class HunterHeroTemplate : HeroTemplate { override val type = Hero.Type.HUNTER override val favoredDieType = SOMATIC override val initialHandCapacity = 5 override val initialDice = listOf( Die(PHYSICAL, 4), Die(PHYSICAL, 4), Die(PHYSICAL, 4), Die(SOMATIC, 6), Die(SOMATIC, 6), Die(SOMATIC, 4), Die(SOMATIC, 4), Die(SOMATIC, 4), Die(SOMATIC, 4), Die(SOMATIC, 4), Die(MENTAL, 6), Die(MENTAL, 4), Die(MENTAL, 4), Die(MENTAL, 4), Die(VERBAL, 4) ) override fun getDiceCount(type: Die.Type) = when (type) { PHYSICAL -> 3 to 5 SOMATIC -> 7 to 11 MENTAL -> 4 to 7 VERBAL -> 1 to 2 else -> null } override val initialSkills = listOf( ShootSkillTemplate() ) override val dormantSkills = listOf<SkillTemplate>() }
但是在编写生成器之前,我们定义了技能模板。 interface SkillTemplate { val type: Skill.Type val maxLevel: Int val modifier1: Int val modifier2: Int val isActive get() = true } class HitSkillTemplate : SkillTemplate { override val type = Skill.Type.HIT override val maxLevel = 3 override val modifier1 = +1 override val modifier2 = +3 } class ShootSkillTemplate : SkillTemplate { override val type = Skill.Type.SHOOT override val maxLevel = 3 override val modifier1 = +0 override val modifier2 = +2 }
不幸的是,我们无法像敌人和剧本一样成功地分批铆接技能。每项新技能都需要扩展游戏机制,向游戏引擎添加新代码-即使是英雄,在此方面也更加容易。也许可以抽象化此过程,但是我还没有想出办法。是的,说实话,也没有尝试过。 fun generateSkill(template: SkillTemplate, initialLevel: Int = 1): Skill { val skill = Skill(template.type) skill.isActive = template.isActive skill.level = initialLevel skill.maxLevel = template.maxLevel skill.modifier1 = template.modifier1 skill.modifier2 = template.modifier2 return skill } fun generateHero(type: Hero.Type, name: String = ""): Hero { val template = when (type) { BRAWLER -> BrawlerHeroTemplate() HUNTER -> HunterHeroTemplate() } val hero = Hero(type) hero.name = name hero.isAlive = true hero.favoredDieType = template.favoredDieType hero.hand.capacity = template.initialHandCapacity template.initialDice.forEach { hero.bag.put(it) } for ((t, l) in Die.Type.values().map { it to template.getDiceCount(it) }) { l?.let { hero.addDiceLimit(DiceLimit(t, it.first, it.second, it.first)) } } template.initialSkills .map { generateSkill(it) } .forEach { hero.addSkill(it) } template.dormantSkills .map { generateSkill(it, 0) } .forEach { hero.addDormantSkill(it) } return hero }
片刻令人震惊。首先,生成方法本身根据英雄的类别来选择所需的模板。其次,不必立即指定名称(有时在生成阶段我们尚不知道)。第三,Kotlin引入了前所未有的语法糖,一些开发人员不合理地滥用了这种语法糖。并没有感到羞耻。第八步。游戏周期
最后,我们得到了最有趣的-游戏周期的实现。简单来说,他们开始“创造游戏”。除了游戏制作外,许多新手开发人员通常都从这个阶段开始。尤其是各种无意义的小计划,pfff ...但是我们不会着急(距离早晨还很远),因此要多建模一些。是的,再次。如您所见,给定的游戏周期片段比上面引用的片段小一个数量级。我们将只考虑转移路线,探索地形的过程(并且我们将仅用两种类型的立方体描述会议)以及在转弯结束时丢弃立方体的过程。并以失败告终完成了方案(是的,我们还无法成功赢得比赛)-但是您感觉如何?计时器每转一圈都会减少,完成后需要做一些事情。例如,显示一条消息并结束游戏-一切都按规则中的规定进行。英雄死后必须完成另一场比赛,但没人会伤害他们,因此我们将其保留。为了赢得胜利,您需要关闭所有区域,即使只有一个区域也很难做到。因此,让我们离开这一刻。喷太多水是没有道理的-对我们来说,了解精髓,并在以后的空闲时间(或完成它,和你-去写游戏你的梦想)。因此,要做的第一件事就是确定我们需要哪些对象。英雄们脚本。位置。我们已经审查了其创建过程-我们不再重复。我们仅注意到在小示例中将使用的地形图案。 class TestLocationTemplate : LocationTemplate { override val name = "Test" override val description = "Some Description" override val basicClosingDifficulty = 0 override val enemyCardsCount = 0 override val obstacleCardsCount = 0 override val bagTemplate = BagTemplate().apply { addPlan(2, 2, SingleDieTypeFilter(Die.Type.PHYSICAL)) addPlan(2, 2, SingleDieTypeFilter(Die.Type.SOMATIC)) addPlan(2, 2, SingleDieTypeFilter(Die.Type.MENTAL)) addPlan(2, 2, SingleDieTypeFilter(Die.Type.VERBAL)) addPlan(2, 2, SingleDieTypeFilter(Die.Type.DIVINE)) } override val enemyCardPool = emptyList<EnemyTemplate>() override val obstacleCardPool = emptyList<ObstacleTemplate>() override val specialRules = emptyList<SpecialRule>() }
如您所见,袋子中只有“正”立方体-蓝色,绿色,紫色,黄色和蓝色。该地区没有敌人和障碍,也没有发现小人和伤口。也没有特殊的规则-它们的实现是非常次要的。保留立方体的堆。或威慑力堆。由于我们将蓝色立方体放在地形的袋子中,因此可以在支票中使用它们,也可以在使用后保存在特殊的堆中。类的实例对此很有用Pile。修饰符。即,需要从模头轧制结果中增加或减去的数值。您可以为每个多维数据集实现全局修饰符或单独的修饰符。我们将选择第二个选项(更加清晰),因此我们将创建一个简单的类DiePair。 class DiePair(val die: Die, var modifier: Int = 0)
.-, . ,
Map<Location, List<Hero>> , , ( — , ). ,
Location equals() hashCode() — , . , .
.在游戏过程中,英雄们必须不断地进行检查(如下所述),即从手中取出立方体,扔掉它们(添加修饰符),如果存在多个立方体则汇总结果(汇总,取最大/最小,取平均值,等等),然后将它们与抛出进行比较另一个多维数据集(从该区域的袋子中取出一个多维数据集),并根据结果执行以下操作。但首先,有必要了解英雄原则上是否能够通过测试,即,他手中是否有必要的立方体。为此,我们提供了一个简单的界面HandFilter。 interface HandFilter { fun test(hand: Hand): Boolean }
接口实现将英雄的手(类object Hand)作为输入,并根据检查结果返回true两者false。对于我们的游戏片段,我们需要一个单一的实现:如果遇到蓝色,绿色,紫色或黄色的立方体,我们需要确定英雄的手是否具有相同颜色的立方体。 class SingleDieHandFilter(private vararg val types: Die.Type) : HandFilter { override fun test(hand: Hand) = (0 until hand.dieCount).mapNotNull { hand.dieAt(it) }.any { it.type in types } || (Die.Type.ALLY in types && hand.allyDieCount > 0) }
是的,再次是功能主义。活动/选定项目。既然我们已经确定英雄的手适合进行测试,那么玩家有必要从骰子(或立方体)的手中选择他将通过的手。首先,您需要突出显示(突出显示)适当的位置(其中包含所需类型的多维数据集)。其次,您需要以某种方式标记选定的多维数据集。对于这两个要求,都适合使用一个类,该类HandMask实际上包含一组整数(选定位置的数量)以及添加和删除它们的方法。 class HandMask { private val positions = mutableSetOf<Int>() private val allyPositions = mutableSetOf<Int>() val positionCount get() = positions.size val allyPositionCount get() = allyPositions.size fun addPosition(position: Int) = positions.add(position) fun removePosition(position: Int) = positions.remove(position) fun addAllyPosition(position: Int) = allyPositions.add(position) fun removeAllyPosition(position: Int) = allyPositions.remove(position) fun checkPosition(position: Int) = position in positions fun checkAllyPosition(position: Int) = position in allyPositions fun switchPosition(position: Int) { if (!removePosition(position)) { addPosition(position) } } fun switchAllyPosition(position: Int) { if (!removeAllyPosition(position)) { addAllyPosition(position) } } fun clear() { positions.clear() allyPositions.clear() } }
我已经说过,如何将“白色立方体”存放在单独的手中,这让我感到苦恼吗?由于这种愚蠢,您必须处理两个集合并复制每个给出的方法。如果有人对如何简化此要求的实现有想法(例如,使用一组,但对于白色立方体,索引以100开头-或其他同样晦涩的事物)-在注释中共享它们。顺便说一句,需要实现一个类似的类来从堆(PileMask)中选择多维数据集,但是此功能超出了本示例的范围。从手中选择多维数据集。但是,仅“突出显示”可接受的位置是不够的;在选择多维数据集的过程中更改此“突出显示”很重要。也就是说,如果要求玩家仅从其手上拿下一个骰子,那么在选择该骰子时,所有其他位置都将变得不可访问。此外,在每个阶段,都必须控制玩家的目标达成情况-也就是说,了解所选的多维数据集是否足以通过一个或另一个测试。如此艰巨的任务需要复杂类的复杂实例。 abstract class HandMaskRule(val hand: Hand) { abstract fun checkMask(mask: HandMask): Boolean abstract fun isPositionActive(mask: HandMask, position: Int): Boolean abstract fun isAllyPositionActive(mask: HandMask, position: Int): Boolean fun getCheckedDice(mask: HandMask): List<Die> { return ((0 until hand.dieCount).filter(mask::checkPosition).map(hand::dieAt)) .plus((0 until hand.allyDieCount).filter(mask::checkAllyPosition).map(hand::allyDieAt)) .filterNotNull() } }
相当复杂的逻辑,如果您对这门课不理解,我会理解并原谅您。并且仍然尝试解释。此类的实现始终存储对其要处理的手(对象Hand)的引用。每种方法都有一个掩码(HandMask),该掩码反映了选择的当前状态(哪些位置由玩家选择,哪些位置没有)。该方法checkMask()报告所选的多维数据集是否足以通过测试。该方法isPositionActive()说明是否有必要突出显示特定位置-是否有可能在该位置向测试添加多维数据集(或删除已经选择的多维数据集)。isAllyPositionActive()白色骰子的方法相同(是的,我知道,我是个白痴)。好了,帮手方法getCheckedDice()它只是简单地返回了与面具相对应的手中所有多维数据集的列表-这是一次将所有多维数据集,将它们扔到桌子上并享受有趣的敲门所必需的,它们沿着不同的方向散射。我们将需要两个抽象类的实现(惊奇,惊喜!)。第一个控件在获取特定类型(非白色)的新多维数据集时控制通过测试的过程。您还记得,可以将任意数量的蓝色立方体添加到此类支票中。 class StatDieAcquireHandMaskRule(hand: Hand, private val requiredType: Die.Type) : HandMaskRule(hand) { private fun checkedDieCount(mask: HandMask) = (0 until hand.dieCount) .filter(mask::checkPosition) .mapNotNull(hand::dieAt) .count { it.type === requiredType } override fun checkMask(mask: HandMask) = (mask.allyPositionCount == 0 && checkedDieCount(mask) == 1) override fun isPositionActive(mask: HandMask, position: Int) = with(hand.dieAt(position)) { when { mask.checkPosition(position) -> true this == null -> false this.type === Die.Type.DIVINE -> true this.type === requiredType && checkedDieCount(mask) < 1 -> true else -> false } } override fun isAllyPositionActive(mask: HandMask, position: Int) = false }
第二种实现更为复杂。她在回合结束时控制骰子滚动。在这种情况下,可能有两个选择。如果手中的多维数据集数超过其最大允许大小(容量),我们必须丢弃所有多余的多维数据集以及任意数量的额外多维数据集(如果需要)。如果未超过该大小,则您将无法重置任何内容(或根据需要重置)。决不能丢弃灰色骰子。 class DiscardExtraDiceHandMaskRule(hand: Hand) : HandMaskRule(hand) { private val minDiceToDiscard = if (hand.dieCount > hand.capacity) min(hand.dieCount - hand.woundCount, hand.dieCount - hand.capacity) else 0 private val maxDiceToDiscard = hand.dieCount - hand.woundCount override fun checkMask(mask: HandMask) = (mask.positionCount in minDiceToDiscard..maxDiceToDiscard) && (mask.allyPositionCount in 0..hand.allyDieCount) override fun isPositionActive(mask: HandMask, position: Int) = when { mask.checkPosition(position) -> true hand.dieAt(position) == null -> false hand.dieAt(position)!!.type == Die.Type.WOUND -> false mask.positionCount < maxDiceToDiscard -> true else -> false } override fun isAllyPositionActive(mask: HandMask, position: Int) = hand.allyDieAt(position) != null }
Nezhdanchik:该类中Hand突然出现了woundCount以前不存在的属性。您可以自己编写实现,这很容易。同时练习。通过检查。终于找到他们了。当从手拿下骰子时,就该扔它们了。对于每个多维数据集,都必须考虑:其大小,其修改器,其抛出的结果。尽管一次只能从袋子中取出一个立方体,但可以在袋子上放几个骰子,以汇总其掷骰结果。通常,让我们从骰子中抽象出来,代表战场上的部队。一方面,我们有一个敌人-他只是一个敌人,但他坚强而凶猛。另一方面,对手的力量与他相等,但得到支持。战斗的结果将在一场短暂的冲突中确定,胜利者只能是一个...对不起,带走了。为了模拟一般战斗,我们实现了一个特殊的类。 class DieBattleCheck(val method: Method, opponent: DiePair? = null) { enum class Method { SUM, AVG_UP, AVG_DOWN, MAX, MIN } private inner class Wrap(val pair: DiePair, var roll: Int) private infix fun DiePair.with(roll: Int) = Wrap(this, roll) private val opponent: Wrap? = opponent?.with(0) private val heroics = ArrayList<Wrap>() var isRolled = false var result: Int? = null val heroPairCount get() = heroics.size fun getOpponentPair() = opponent?.pair fun getOpponentResult() = when { isRolled -> opponent?.roll ?: 0 else -> throw IllegalStateException("Not rolled yet") } fun addHeroPair(pair: DiePair) { if (method == Method.SUM && heroics.size > 0) { pair.modifier = 0 } heroics.add(pair with 0) } fun addHeroPair(die: Die, modifier: Int) = addHeroPair(DiePair(die, modifier)) fun clearHeroPairs() = heroics.clear() fun getHeroPairAt(index: Int) = heroics[index].pair fun getHeroResultAt(index: Int) = when { isRolled -> when { (index in 0 until heroics.size) -> heroics[index].roll else -> 0 } else -> throw IllegalStateException("Not rolled yet") } fun roll() { fun roll(wrap: Wrap) { wrap.roll = wrap.pair.die.roll() } isRolled = true opponent?.let { roll(it) } heroics.forEach { roll(it) } } fun calculateResult() { if (!isRolled) { throw IllegalStateException("Not rolled yet") } val opponentResult = opponent?.let { it.roll + it.pair.modifier } ?: 0 val stats = heroics.map { it.roll + it.pair.modifier } val heroResult = when (method) { DieBattleCheck.Method.SUM -> stats.sum() DieBattleCheck.Method.AVG_UP -> ceil(stats.average()).toInt() DieBattleCheck.Method.AVG_DOWN -> floor(stats.average()).toInt() DieBattleCheck.Method.MAX -> stats.max() ?: 0 DieBattleCheck.Method.MIN -> stats.min() ?: 0 } result = heroResult - opponentResult } }
由于每个多维数据集都可以有一个修饰符,因此我们将数据存储在object中DiePair。好像是实际上,不,因为除了多维数据集和修饰符之外,您还需要存储其引发的结果(请记住,尽管多维数据集本身会生成此值,但不会在其属性之间存储该值)。因此,将每对包装在包装纸(Wrap)中。注意infix方法with,呵呵。类构造函数定义聚合方法(内部枚举的一个实例Method)和对手(可能不存在)。英雄立方体列表是使用适当的方法形成的。它还提供了一堆方法来获取测试中涉及的配对以及它们的抛出结果(如果有)。方法roll() ,
isRolled . , —
calculateResult() ,
result . ? .
roll() , ( ). ,
( -). ,
0 .
游戏引擎的状态。复杂的对象被整理出来,现在事情变得更简单了。说我们需要控制游戏引擎的当前“进度”,即它所处的阶段或阶段,并不是一个伟大的发现。为此,可以使用特殊的枚举。 enum class GamePhase { SCENARIO_START, HERO_TURN_START, HERO_TURN_END, LOCATION_BEFORE_EXPLORATION, LOCATION_ENCOUNTER_STAT, LOCATION_ENCOUNTER_DIVINE, LOCATION_AFTER_EXPLORATION, GAME_LOSS }
实际上,还有更多阶段,但是我们仅选择了示例中使用的阶段。要更改游戏引擎的阶段,我们将使用方法changePhaseX(),其中的X是上面列出的值。在这些方法中,引擎的所有内部变量将被减小到足以在相应阶段开始时使用的值,但稍后会更多。留言内容保持游戏引擎的状态还不够。用户以某种方式告知他也很重要-否则后者将如何知道他的屏幕上发生了什么?这就是为什么我们需要另一个清单。 enum class StatusMessage { EMPTY, CHOOSE_DICE_PERFORM_CHECK, END_OF_TURN_DISCARD_EXTRA, END_OF_TURN_DISCARD_OPTIONAL, CHOOSE_ACTION_BEFORE_EXPLORATION, CHOOSE_ACTION_AFTER_EXPLORATION, ENCOUNTER_PHYSICAL, ENCOUNTER_SOMATIC, ENCOUNTER_MENTAL, ENCOUNTER_VERBAL, ENCOUNTER_DIVINE, DIE_ACQUIRE_SUCCESS, DIE_ACQUIRE_FAILURE, GAME_LOSS_OUT_OF_TIME }
如您所见,此枚举的值描述了示例中的所有可能状态。对于它们中的每一个,都提供一个文本行,该文本行将显示在屏幕上(除非EMPTY-这是特殊含义),但是稍后我们将对此进行了解。动作对于用户和游戏引擎之间的通信,简单的消息是不够的。重要的是要告知他目前可以采取的行动(研究,通过障碍物,完成举动-都很好)。为此,我们将开设一个特殊的班级。 class Action( val type: Type, var isEnabled: Boolean = true, val data: Int = 0 ) { enum class Type { NONE,
内部枚举Type描述了执行的操作的类型。该字段是isEnabled必需的,以便在非活动状态下显示操作。也就是说,要报告该操作通常可用,但是由于某种原因目前无法执行(这种显示比完全不显示该操作更具信息性)。该属性data(某些类型的动作所必需)存储一个特殊值,该值传达一些其他详细信息(例如,用户选择的位置的索引或列表中所选项目的编号)。克拉斯Action是游戏引擎和输入输出系统之间的主要“接口”(下面将对此进行介绍)。由于通常有多个动作(否则,为什么要选择?),它们将被组合为组(列表)。我们将不使用标准集合,而是编写自己的扩展集合。 class ActionList : Iterable<Action> { private val actions = mutableListOf<Action>() val size get() = actions.size fun add(action: Action): ActionList { actions.add(action) return this } fun add(type: Action.Type, enabled: Boolean = true): ActionList { add(Action(type, enabled)) return this } fun addAll(actions: ActionList): ActionList { actions.forEach { add(it) } return this } fun remove(type: Action.Type): ActionList { actions.removeIf { it.type == type } return this } operator fun get(index: Int) = actions[index] operator fun get(type: Action.Type) = actions.find { it.type == type } override fun iterator(): Iterator<Action> = ActionListIterator() private inner class ActionListIterator : Iterator<Action> { private var position = -1 override fun hasNext() = (actions.size > position + 1) override fun next() = actions[++position] } companion object { val EMPTY get() = ActionList() } }
该类包含许多用于在列表中添加和删除操作(可以链接在一起)以及按索引和按类型获取操作的不同方法(请注意“重载” get()-方括号运算符适用于我们的列表)。接口的实现Iterator允许我们对各种疯狂的屎类进行各种流操作(功能性,aha)。还提供了EMPTY值以快速创建一个空列表。屏幕。最后,另一个清单描述了当前正在显示的各种类型的内容...您知道我,眨了眨眼,我知道。当我开始思考如何更清楚地描述这一堂课时,我大吃一惊,因为我无法真正弄清楚任何事情。我希望自己明白。 enum class GameScreen { HERO_TURN_START, LOCATION_INTERIOR, GAME_LOSS }
仅选择示例中使用的那些。将为它们中的每一个提供单独的渲染方法。我再次莫名其妙地解释。“显示”和“输入”。现在,我们终于到了最重要的一点-游戏引擎与用户(玩家)的交互。如果您尚未对这么长的介绍感到厌烦,那么您可能还记得我们同意在功能上将这两个部分彼此分开。因此,我们将只提供一个接口,而不是I / O系统的特定实现。更确切地说,两个。第一个界面GameRenderer,旨在在屏幕上显示图片。我提醒您,我们从屏幕尺寸,特定的图形库等中抽象出来。我们只需发送命令:“给我画这个”-那些了解我们关于屏幕的conversation昧对话的人已经猜到这些屏幕中的每一个在界面中都有自己的方法。 interface GameRenderer { fun drawHeroTurnStart(hero: Hero) fun drawLocationInteriorScreen( location: Location, heroesAtLocation: List<Hero>, timer: Int, currentHero: Hero, battleCheck: DieBattleCheck?, encounteredDie: DiePair?, pickedDice: HandMask, activePositions: HandMask, statusMessage: StatusMessage, actions: ActionList ) fun drawGameLoss(message: StatusMessage) }
我认为这里无需进行其他解释-上面已详细讨论了所有传输对象的目的。对于用户输入,我们实现了一个不同的界面- GameInteractor(是的,拼写检查脚本将始终强调该单词,尽管它看起来很……)。他的方法将要求玩家在各种情况下所需的命令:从建议的列表中选择一个动作,从列表中选择一个元素,从手中选择立方体,至少按下某物,等等。应当立即注意,输入是同步发生的(游戏是逐步的),也就是说,游戏循环的执行被挂起,直到用户响应该请求为止。 interface GameInteractor{ fun anyInput() fun pickAction(list: ActionList): Action fun pickDiceFromHand(activePositions: HandMask, actions: ActionList): Action }
关于最后一种方法。顾名思义,from邀请用户从手中选择立方体,从而提供一个对象HandMask-有效位置的数量。该方法的执行将继续进行,直到选择了其中的一部分为止-在这种情况下,该方法将返回类型为HAND_POSITION(或HAND_ALLY_POSITIONmda)的动作,并带有字段中所选位置的编号data。此外,还可以从对象中选择其他动作(例如CONFIRM或CANCEL)ActionList。输入法的实现应区分字段isEnabled设置为的情况,false并忽略用户对此类操作的输入。游戏引擎类。我们检查了工作所需的一切,时间到了并且要实施引擎。建立课程Game 具有以下内容:抱歉,这不是向印象深刻的人展示的。 class Game( private val renderer: GameRenderer, private val interactor: GameInteractor, private val scenario: Scenario, private val locations: List<Location>, private val heroes: List<Hero>) { private var timer = 0 private var currentHeroIndex = -1 private lateinit var currentHero: Hero private lateinit var currentLocation: Location private val deterrentPile = Pile() private var encounteredDie: DiePair? = null private var battleCheck: DieBattleCheck? = null private val activeHandPositions = HandMask() private val pickedHandPositions = HandMask() private var phase: GamePhase = GamePhase.SCENARIO_START private var screen = GameScreen.SCENARIO_INTRO private var statusMessage = StatusMessage.EMPTY private var actions: ActionList = ActionList.EMPTY fun start() { if (heroes.isEmpty()) throw IllegalStateException("Heroes list is empty!") if (locations.isEmpty()) throw IllegalStateException("Location list is empty!") heroes.forEach { it.isAlive = true } timer = scenario.initialTimer
方法start()-游戏的入口点。在这里,变量被初始化,英雄被称重,手中充满立方体,记者从四面八方的照相机中发光。主循环将在任何分钟启动,此后将无法停止。该方法drawInitialHand()说明了一切(我们似乎并未考虑drawOfType()类方法的代码Bag,但经过很长的一段路程后,您可以自己编写此代码)。该方法refillHeroHand()有两个选项(取决于参数的值redrawScreen):快速和安静(当您需要在游戏开始时填充所有英雄的手时),以及一堆悲伤的声音,当移动结束时,您需要从包装袋中尖锐地取出立方体,将手放到合适的大小。一堆名字开头的方法changePhase,-正如我们已经说过的,它们用于更改当前游戏阶段,并参与游戏变量的相应值的分配。在这里,形成一个列表,actions其中添加了此阶段的动作特征。广义形式的实用方法pickDiceFromHand()涉及从手中选择立方体。HandMaskRule定义选择规则的熟悉类的对象在此处传递。它还指示拒绝选择(allowCancel)的能力,以及onEachLoop每次更改选定多维数据集的列表(通常是屏幕重绘)时都必须调用其代码的函数。可以使用collectPickedDice()和方法从手中组装通过此方法选择的多维数据集collectPickedAllyDice()。另一种实用方法performStatDieAcquireCheck()完全实现了通过测试以获取新立方体的英雄。该方法的核心作用是对象DieBattleCheck。该过程开始于通过该方法选择多维数据集pickDiceFromHand()(在每个步骤中,“参与者”的列表都会更新DieBattleCheck)。从手上移出选定的多维数据集,然后发生“滚动”-每个骰子更新其值(连续八次),然后计算并显示结果。成功滚动后,新的骰子落入了英雄的手中。参与测试的多维数据集要么被放置(如果为蓝色),要么被丢弃(如果为shouldDiscard = true),或者被隐藏在袋子中(如果为shouldDiscard = false)。主要方法processCycle()包含一个无限循环(我要求您不要晕倒),在该循环中首先绘制屏幕,然后提示用户输入,然后处理此输入-随之而来的是所有后果。该方法drawScreen()调用所需的接口方法GameRenderer(取决于当前值screen),并将所需的对象传递给输入。同时,该类包含几个辅助方法:checkLocationCanBeExplored(),checkHeroCanAttemptStatCheck()和checkHeroCanAcquireDie()。他们的名字不言自明,因此我们将不详细介绍它们。还有类方法调用Audio,用红色波浪线加下划线。请暂时对它们进行评论-我们稍后将考虑它们的目的。谁根本什么都不懂,下面是一张图表(为了清楚起见,可以这么说): 就是这样,游戏已经准备就绪(呵呵)。下面是关于它们的真正的小事。第九步。显示影像
因此,我们来到了今天对话的主题-应用程序的图形组件。如您所记得,我们的任务是实现接口GameRenderer及其三种方法,并且由于我们的团队中仍然没有才华横溢的艺术家,因此我们将自己使用伪图形来实现。但是首先,很高兴了解我们通常希望在出口看到的东西。我们希望看到三个屏幕,大致包含以下内容:我认为大多数人已经意识到,所呈现的图像不同于我们通常在Java应用程序控制台中看到的所有图像,并且通常的功能prinltn()显然对我们来说还不够。我还希望能够跳到屏幕上的任意位置并以不同的颜色绘制符号。Chip和Dale ANSI代码急于为我们提供帮助 <dependency> <groupId>org.fusesource.jansi</groupId> <artifactId>jansi</artifactId> <version>1.17.1</version> <scope>compile</scope> </dependency>
您可以开始创建。该库为我们提供了一个类对象Ansi(通过静态调用获得Ansi.ansi()),该类对象带有一堆可以链接的便捷方法。它的工作原理是StringBuilder-a-首先我们形成对象,然后将其发送以进行打印。在有用的方法中,我们将发现有用的方法:a() -显示字符;cursor() -在屏幕上移动光标;eraseLine() -好像在说自己;eraseScreen() -同样;fg(), bg(), fgBright(), bgBright() -使用文本和背景色的方法非常不便-我们将使自己的文本更加令人愉悦;reset() -重置设置的颜色设置,闪烁等。
让我们ConsoleRenderer使用对我们的工作可能有用的实用程序方法创建一个类。第一个版本如下所示: abstract class ConsoleRenderer() { protected lateinit var ansi: Ansi init { AnsiConsole.systemInstall() clearScreen() resetAnsi() } private fun resetAnsi() { ansi = Ansi.ansi() } fun clearScreen() { print(Ansi.ansi().eraseScreen(Ansi.Erase.ALL).cursor(1, 1)) } protected fun render() { print(ansi.toString()) resetAnsi() } }
该方法resetAnsi()创建一个新的(空)对象Ansi,该对象将填充必要的命令(移动,输出等)。填充完成后,将通过方法将生成的对象发送以进行打印render(),并使用新对象初始化变量。没什么复杂的吧?如果是这样,那么我们将开始用其他有用的方法填充此类。让我们从大小开始。大多数终端的标准控制台尺寸为80x24。我们用两个常数CONSOLE_WIDTH和注意到这一事实CONSOLE_HEIGHT。我们将不附加特定的值,并且将尝试使设计尽可能地具有弹性(例如在网络上)。坐标编号从一个开始,第一个坐标是行,第二个坐标是列。知道了所有这些之后,我们编写了一个实用程序方法drawHorizontalLine() 用指定字符填充指定字符串。 protected fun drawHorizontalLine(offsetY: Int, filler: Char) { ansi.cursor(offsetY, 1) (1..CONSOLE_WIDTH).forEach { ansi.a(filler) }
,
a() cursor() ,
Ansi . , .
for ClosedRange forEach{} — , . ,
, .
drawBlankLine() , ,
drawHorizontalLine(offsetY, ' '),仅带扩展名。有时我们需要使该行不完全为空,而是在开头和结尾处留一条垂直线(是,是)。该代码将如下所示: protected fun drawBlankLine(offsetY: Int, drawBorders: Boolean = true) { ansi.cursor(offsetY, 1) if (drawBorders) { ansi.a('│') (2 until CONSOLE_WIDTH).forEach { ansi.a(' ') } ansi.a('│') } else { ansi.eraseLine(Ansi.Erase.ALL) } }
如何,您从未从伪图形中提取帧?可以将符号直接插入源代码中。按住Alt键,然后在数字键盘上键入字符代码。那放开 我们在任何编码中所需的ASCII码都是相同的,这是最小绅士的设置:然后,就像在《我的世界》中一样,可能性仅受想象力的限制。和屏幕尺寸。 protected fun drawCenteredCaption(offsetY: Int, text: String, color: Color, drawBorders: Boolean = true) { val center = (CONSOLE_WIDTH - text.length) / 2 ansi.cursor(offsetY, 1) ansi.a(if (drawBorders) '│' else ' ') (2 until center).forEach { ansi.a(' ') } ansi.color(color).a(text).reset() (text.length + center until CONSOLE_WIDTH).forEach { ansi.a(' ') } ansi.a(if (drawBorders) '│' else ' ') }
让我们谈谈花。该类Ansi包含Color八种原色(黑色,蓝色,绿色,青色,红色,紫色,黄色,灰色)的常量,您需要将这些常量传递给fg()/bg()深色或fgBright()/bgBright()浅色的方法输入,这样做很不方便,因为通过方式,一个值对我们来说是不够的-我们至少需要两个(颜色和亮度)。因此,我们将创建常量列表和扩展方法(以及将映射颜色绑定到多维数据集类型和英雄类): protected enum class Color { BLACK, DARK_BLUE, DARK_GREEN, DARK_CYAN, DARK_RED, DARK_MAGENTA, DARK_YELLOW, LIGHT_GRAY, DARK_GRAY, LIGHT_BLUE, LIGHT_GREEN, LIGHT_CYAN, LIGHT_RED, LIGHT_MAGENTA, LIGHT_YELLOW, WHITE } protected fun Ansi.color(color: Color?): Ansi = when (color) { Color.BLACK -> fgBlack() Color.DARK_BLUE -> fgBlue() Color.DARK_GREEN -> fgGreen() Color.DARK_CYAN -> fgCyan() Color.DARK_RED -> fgRed() Color.DARK_MAGENTA -> fgMagenta() Color.DARK_YELLOW -> fgYellow() Color.LIGHT_GRAY -> fg(Ansi.Color.WHITE) Color.DARK_GRAY -> fgBrightBlack() Color.LIGHT_BLUE -> fgBrightBlue() Color.LIGHT_GREEN -> fgBrightGreen() Color.LIGHT_CYAN -> fgBrightCyan() Color.LIGHT_RED -> fgBrightRed() Color.LIGHT_MAGENTA -> fgBrightMagenta() Color.LIGHT_YELLOW -> fgBrightYellow() Color.WHITE -> fgBright(Ansi.Color.WHITE) else -> this } protected fun Ansi.background(color: Color?): Ansi = when (color) { Color.BLACK -> ansi.bg(Ansi.Color.BLACK) Color.DARK_BLUE -> ansi.bg(Ansi.Color.BLUE) Color.DARK_GREEN -> ansi.bgGreen() Color.DARK_CYAN -> ansi.bg(Ansi.Color.CYAN) Color.DARK_RED -> ansi.bgRed() Color.DARK_MAGENTA -> ansi.bgMagenta() Color.DARK_YELLOW -> ansi.bgYellow() Color.LIGHT_GRAY -> ansi.bg(Ansi.Color.WHITE) Color.DARK_GRAY -> ansi.bgBright(Ansi.Color.BLACK) Color.LIGHT_BLUE -> ansi.bgBright(Ansi.Color.BLUE) Color.LIGHT_GREEN -> ansi.bgBrightGreen() Color.LIGHT_CYAN -> ansi.bgBright(Ansi.Color.CYAN) Color.LIGHT_RED -> ansi.bgBrightRed() Color.LIGHT_MAGENTA -> ansi.bgBright(Ansi.Color.MAGENTA) Color.LIGHT_YELLOW -> ansi.bgBrightYellow() Color.WHITE -> ansi.bgBright(Ansi.Color.WHITE) else -> this } protected val dieColors = mapOf( Die.Type.PHYSICAL to Color.LIGHT_BLUE, Die.Type.SOMATIC to Color.LIGHT_GREEN, Die.Type.MENTAL to Color.LIGHT_MAGENTA, Die.Type.VERBAL to Color.LIGHT_YELLOW, Die.Type.DIVINE to Color.LIGHT_CYAN, Die.Type.WOUND to Color.DARK_GRAY, Die.Type.ENEMY to Color.DARK_RED, Die.Type.VILLAIN to Color.LIGHT_RED, Die.Type.OBSTACLE to Color.DARK_YELLOW, Die.Type.ALLY to Color.WHITE ) protected val heroColors = mapOf( Hero.Type.BRAWLER to Color.LIGHT_BLUE, Hero.Type.HUNTER to Color.LIGHT_GREEN )
现在,通过一个常数可以唯一标识16种可用颜色中的每一种。我们将编写更多的实用程序方法,但在此之前,我们还要弄清楚另一件事:在哪里存储文本字符串的常量?“字符串常量需要在单独的文件中取出,以便将它们全部存储在一个地方-这使它们更易于维护。而且对于本地化也很重要...”“字符串常量需要移动到单独的文件中……好吧,是的。我们会忍受的。使用这种资源的标准Java机制是java.util.ResourceBundle使用文件的对象.properties。这里我们从这样的文件开始: # Game status messages choose_dice_perform_check=Choose dice to perform check: end_of_turn_discard_extra=END OF TURN: Discard extra dice: end_of_turn_discard_optional=END OF TURN: Discard any dice, if needed: choose_action_before_exploration=Choose your action: choose_action_after_exploration=Already explored this turn. Choose what to do now: encounter_physical=Encountered PHYSICAL die. Need to pass respective check or lose this die. encounter_somatic=Encountered SOMATIC die. Need to pass respective check or lose this die. encounter_mental=Encountered MENTAL die. Need to pass respective check or lose this die. encounter_verbal=Encountered VERBAL die. Need to pass respective check or lose this die. encounter_divine=Encountered DIVINE die. Can be acquired automatically (no checks needed): die_acquire_success=You have acquired the die! die_acquire_failure=You have failed to acquire the die. game_loss_out_of_time=You ran out of time # Die types physical=PHYSICAL somatic=SOMATIC mental=MENTAL verbal=VERBAL divine=DIVINE ally=ALLY wound=WOUND enemy=ENEMY villain=VILLAIN obstacle=OBSTACLE # Hero types and descriptions brawler=Brawler hunter=Hunter # Various labels avg=avg bag=Bag bag_size=Bag size class=Class closed=Closed discard=Discard empty=Empty encountered=Encountered fail=Fail hand=Hand heros_turn=%s's turn max=max min=min perform_check=Perform check: pile=Pile received_new_die=Received new die result=Result success=Success sum=sum time=Time total=Total # Action names and descriptions action_confirm_key=ENTER action_confirm_name=Confirm action_cancel_key=ESC action_cancel_name=Cancel action_explore_location_key=E action_explore_location_name=xplore action_finish_turn_key=F action_finish_turn_name=inish action_hide_key=H action_hide_name=ide action_discard_key=D action_discard_name=iscard action_acquire_key=A action_acquire_name=cquire action_leave_key=L action_leave_name=eave action_forfeit_key=F action_forfeit_name=orfeit
每行包含一个键值对,并由一个字符分隔=。您可以将文件放置在任何位置-主要是它的路径是classpath的一部分。请注意,操作文本由两部分组成:第一个字母不仅在屏幕上显示时以黄色突出显示,而且还确定执行此操作必须按下的键。因此,方便地将它们分开存储。但是,我们从一种特定的格式中抽象出来(例如,在Android中,字符串的存储方式有所不同),并描述了用于加载字符串常量的接口。 interface StringLoader { fun loadString(key: String): String }
密钥被传输到输入,输出是特定的行。该实现与接口本身一样简单(假设文件位于path上src/main/resources/text/strings.properties)。 class PropertiesStringLoader() : StringLoader { private val properties = ResourceBundle.getBundle("text.strings") override fun loadString(key: String) = properties.getString(key) ?: "" }
现在,将不难实现drawStatusMessage()在屏幕上显示游戏引擎当前状态的方法(StatusMessage)和drawActionList()显示可用动作列表的方法(ActionList)。以及只有灵魂渴望的其他官方方法。有很多代码,我们已经看过其中的一部分...所以这里有一个破坏者 abstract class ConsoleRenderer(private val strings: StringLoader) { protected lateinit var ansi: Ansi init { AnsiConsole.systemInstall() clearScreen() resetAnsi() } protected fun loadString(key: String) = strings.loadString(key) private fun resetAnsi() { ansi = Ansi.ansi() } fun clearScreen() { print(Ansi.ansi().eraseScreen(Ansi.Erase.ALL).cursor(1, 1)) } protected fun render() { ansi.cursor(CONSOLE_HEIGHT, CONSOLE_WIDTH) System.out.print(ansi.toString()) resetAnsi() } protected fun drawBigNumber(offsetX: Int, offsetY: Int, number: Int): Unit = with(ansi) { var currentX = offsetX cursor(offsetY, currentX) val text = number.toString() text.forEach { when (it) { '0' -> { cursor(offsetY, currentX) a(" ███ ") cursor(offsetY + 1, currentX) a("█ █ ") cursor(offsetY + 2, currentX) a("█ █ ") cursor(offsetY + 3, currentX) a("█ █ ") cursor(offsetY + 4, currentX) a(" ███ ") } '1' -> { cursor(offsetY, currentX) a(" █ ") cursor(offsetY + 1, currentX) a(" ██ ") cursor(offsetY + 2, currentX) a("█ █ ") cursor(offsetY + 3, currentX) a(" █ ") cursor(offsetY + 4, currentX) a("█████ ") } '2' -> { cursor(offsetY, currentX) a(" ███ ") cursor(offsetY + 1, currentX) a("█ █ ") cursor(offsetY + 2, currentX) a(" █ ") cursor(offsetY + 3, currentX) a(" █ ") cursor(offsetY + 4, currentX) a("█████ ") } '3' -> { cursor(offsetY, currentX) a("████ ") cursor(offsetY + 1, currentX) a(" █ ") cursor(offsetY + 2, currentX) a(" ██ ") cursor(offsetY + 3, currentX) a(" █ ") cursor(offsetY + 4, currentX) a("████ ") } '4' -> { cursor(offsetY, currentX) a(" █ ") cursor(offsetY + 1, currentX) a(" ██ ") cursor(offsetY + 2, currentX) a(" █ █ ") cursor(offsetY + 3, currentX) a("█████ ") cursor(offsetY + 4, currentX) a(" █ ") } '5' -> { cursor(offsetY, currentX) a("█████ ") cursor(offsetY + 1, currentX) a("█ ") cursor(offsetY + 2, currentX) a("████ ") cursor(offsetY + 3, currentX) a(" █ ") cursor(offsetY + 4, currentX) a("████ ") } '6' -> { cursor(offsetY, currentX) a(" ███ ") cursor(offsetY + 1, currentX) a("█ ") cursor(offsetY + 2, currentX) a("████ ") cursor(offsetY + 3, currentX) a("█ █ ") cursor(offsetY + 4, currentX) a(" ███ ") } '7' -> { cursor(offsetY, currentX) a("█████ ") cursor(offsetY + 1, currentX) a(" █ ") cursor(offsetY + 2, currentX) a(" █ ") cursor(offsetY + 3, currentX) a(" █ ") cursor(offsetY + 4, currentX) a(" █ ") } '8' -> { cursor(offsetY, currentX) a(" ███ ") cursor(offsetY + 1, currentX) a("█ █ ") cursor(offsetY + 2, currentX) a(" ███ ") cursor(offsetY + 3, currentX) a("█ █ ") cursor(offsetY + 4, currentX) a(" ███ ") } '9' -> { cursor(offsetY, currentX) a(" ███ ") cursor(offsetY + 1, currentX) a("█ █ ") cursor(offsetY + 2, currentX) a(" ████ ") cursor(offsetY + 3, currentX) a(" █ ") cursor(offsetY + 4, currentX) a(" ███ ") } } currentX += 6 } } protected fun drawHorizontalLine(offsetY: Int, filler: Char) { ansi.cursor(offsetY, 1) (1..CONSOLE_WIDTH).forEach { ansi.a(filler) } } protected fun drawBlankLine(offsetY: Int, drawBorders: Boolean = true) { ansi.cursor(offsetY, 1) if (drawBorders) { ansi.a('│') (2 until CONSOLE_WIDTH).forEach { ansi.a(' ') } ansi.a('│') } else { ansi.eraseLine(Ansi.Erase.ALL) } } protected fun drawCenteredCaption(offsetY: Int, text: String, color: Color, drawBorders: Boolean = true) { val center = (CONSOLE_WIDTH - text.length) / 2 ansi.cursor(offsetY, 1) ansi.a(if (drawBorders) '│' else ' ') (2 until center).forEach { ansi.a(' ') } ansi.color(color).a(text).reset() (text.length + center until CONSOLE_WIDTH).forEach { ansi.a(' ') } ansi.a(if (drawBorders) '│' else ' ') } protected fun drawStatusMessage(offsetY: Int, message: StatusMessage, drawBorders: Boolean = true) {
你问我们为什么都这样做?是的,为了从这个奇妙的类继承我们的接口实现GameRenderer。这是第一个最简单方法的实现的样子: override fun drawGameLoss(message: StatusMessage) { val centerY = CONSOLE_HEIGHT / 2 (1 until centerY).forEach { drawBlankLine(it, false) } val data = loadString(message.toString().toLowerCase()).toUpperCase() drawCenteredCaption(centerY, data, LIGHT_RED, false) (centerY + 1..CONSOLE_HEIGHT).forEach { drawBlankLine(it, false) } render() }
没什么超自然的,只是data在屏幕中心()上用红色绘制了一条文本行(drawCenteredCaption())。其余代码用空白行填充屏幕的其余部分。也许有人会问为什么这是必要的-毕竟有一个方法clearScreen(),在方法的开头调用它,清除屏幕,然后绘制所需的文本就足够了。 las,这是我们不会使用的懒惰方法。原因很简单:通过这种方法,屏幕上的某些位置绘制了两次,这会导致明显的闪烁,特别是当屏幕连续(在动画过程中)连续绘制几次时。因此,我们的任务不仅是在正确的位置绘制正确的字符,而且还要填充整个屏幕的其余部分带有空字符(这样就不会保留来自其他渲染的伪像)。这个任务不是那么简单。以下方法遵循此原理: override fun drawHeroTurnStart(hero: Hero) { val centerY = (CONSOLE_HEIGHT - 5) / 2 (1 until centerY).forEach { drawBlankLine(it, false) } ansi.color(heroColors[hero.type]) drawHorizontalLine(centerY, '─') drawHorizontalLine(centerY + 4, '─') ansi.reset() ansi.cursor(centerY + 1, 1).eraseLine() ansi.cursor(centerY + 3, 1).eraseLine() ansi.cursor(centerY + 2, 1) val text = String.format(loadString("heros_turn"), hero.name.toUpperCase()) val index = text.indexOf(hero.name.toUpperCase()) val center = (CONSOLE_WIDTH - text.length) / 2 ansi.cursor(centerY + 2, center) ansi.eraseLine(Ansi.Erase.BACKWARD) ansi.a(text.substring(0, index)) ansi.color(heroColors[hero.type]).a(hero.name.toUpperCase()).reset() ansi.a(text.substring(index + hero.name.length)) ansi.eraseLine(Ansi.Erase.FORWARD) (centerY + 5..CONSOLE_HEIGHT).forEach { drawBlankLine(it, false) } render() }
在这里,除了居中的文字外,还有两条水平线(请参见上面的屏幕截图)。请注意,中心文字以两种颜色显示。还要确保在学校学习数学仍然有用。好吧,我们看了最简单的方法,现在该是了解实现的时候了drawLocationInteriorScreen()。如您自己所知,这里将有更多数量级的代码。另外,屏幕的内容将响应用户的操作而动态变化,并且必须不断重绘(有时带有动画)。好吧,为了最终完成您的工作:想象一下,除了上面的屏幕截图外,在此方法的框架中,还需要实现三个显示:因此,这是我对您的忠告:不要将所有代码都放入一个方法中。将实现分为几种方法(即使每个方法仅被调用一次)。好吧,不要忘记“橡胶”。如果它开始在您的眼睛中起伏,请眨眼几秒钟-这应该有所帮助 class ConsoleGameRenderer(loader: StringLoader) : ConsoleRenderer(loader), GameRenderer { private fun drawLocationTopPanel(location: Location, heroesAtLocation: List<Hero>, currentHero: Hero, timer: Int) { val closedString = loadString("closed").toLowerCase() val timeString = loadString("time") val locationName = location.name.toString().toUpperCase() val separatorX1 = locationName.length + if (location.isOpen) { 6 + if (location.bag.size >= 10) 2 else 1 } else { closedString.length + 7 } val separatorX2 = CONSOLE_WIDTH - timeString.length - 6 - if (timer >= 10) 1 else 0
检查所有这些代码的操作有一个小问题。由于内置的IDE控制台不支持ANSI转义序列,因此您必须在外部终端中启动该应用程序(我们已经编写了用于较早启动它的脚本)。此外,有了ANSI支持,在Windows中并不是一切都可以-根据我所知,只有第10版的标准cmd.exe才能以高质量的显示使我们满意(而且,还有一些我们不会关注的问题)。而且,PowerShell并没有立即学会识别序列(尽管当前有需求)。如果您不走运,请不要气--总是有其他解决方案(例如)。然后我们继续前进。第十步 用户输入
在屏幕上显示图像仍是成功的一半。正确接收用户的控制命令同样重要。我想告诉您,这项任务在技术上要比以前的任务更加困难。但是首先是第一件事。您还记得,我们面临着实现类方法的需求GameInteractor。它们只有三个,但是需要特别注意。首先,同步。游戏引擎应暂停,直到玩家按下某个键为止。其次,点击处理。不幸的是,标准类的能力Reader,Scanner,Console是远远不够的认识到这些最紧迫的:我们不要求用户在每个命令后按ENTER键。我们需要类似的东西KeyListener但是,但它与Swing框架紧密相关,并且我们的控制台应用程序没有所有这些图形功能。怎么办
当然,搜索库,这一次它们的工作将完全依赖于本机代码。 “跨平台再见”是什么意思? las,我尚未找到以轻量级,独立于平台的形式实现简单功能的库。同时,让我们关注一下Monster jLine,它实现了用于构建高级用户界面(在控制台中)的收割机。是的,它具有本机实现,是的,它同时支持Windows和Linux / UNIX(通过提供适当的库)。是的,用的大部分功能,我们并不需要一百年。所需要的只是一个很少记录的机会,我们现在将分析其工作。 <dependency> <groupId>jline</groupId> <artifactId>jline</artifactId> <version>2.14.6</version> <scope>compile</scope> </dependency>
请注意,我们不需要第三个最新版本,而需要第二个版本,那里有一个ConsoleReader带有method 的类readCharacter()。顾名思义,此方法返回键盘上按下的字符的代码(同步工作时,这是我们所需要的)。剩下的是技术问题:编译符号和动作类型(Action.Type)之间的对应关系表,然后单击一个返回另一个。“您知道不是键盘上的所有键都可以用一个字符表示吗?许多键使用两个,三个,四个不同字符的转义序列。如何与他们在一起?”应该注意的是,如果我们要识别“非字符键”,则输入任务很复杂:箭头,F键,Home,Insert,PgUp / Dn,End,Delete,数字键盘等。但是我们不想要,因此我们将继续。让我们ConsoleInteractor用必要的服务方法创建一个类。 abstract class ConsoleInteractor { private val reader = ConsoleReader() private val mapper = mapOf( CONFIRM to 13.toChar(), CANCEL to 27.toChar(), EXPLORE_LOCATION to 'e', FINISH_TURN to 'f', ACQUIRE to 'a', LEAVE to 'l', FORFEIT to 'f', HIDE to 'h', DISCARD to 'd', ) protected fun read() = reader.readCharacter().toChar() protected open fun getIndexForKey(key: Char) = "1234567890abcdefghijklmnopqrstuvw".indexOf(key) }
设置图mapper和方法read()。另外,我们将提供一种方法,getIndexForKey()用于需要从列表中选择项目或从手中选择多维数据集的情况。仍然需要继承此类的接口实现GameInteractor。而且,实际上,代码是: class ConsoleGameInteractor : ConsoleInteractor(), GameInteractor { override fun anyInput() { read() } override fun pickAction(list: ActionList): Action { while (true) { val key = read() list .filter(Action::isEnabled) .find { mapper[it.type] == key } ?.let { return it } } } override fun pickDiceFromHand(activePositions: HandMask, actions: ActionList) : Action { while (true) { val key = read() actions.forEach { if (mapper[it.type] == key && it.isEnabled) return it } when (key) { in '1'..'9' -> { val index = key - '1' if (activePositions.checkPosition(index)) { return Action(HAND_POSITION, data = index) } } '0' -> { if (activePositions.checkPosition(9)) { return Action(HAND_POSITION, data = 9) } } in 'a'..'f' -> { val allyIndex = key - 'a' if (activePositions.checkAllyPosition(allyIndex)) { return Action(HAND_ALLY_POSITION, data = allyIndex) } } } } } }
我们的方法的实施非常有礼貌并且操作得当,以免引起各种不足的废话。他们自己验证选定的动作是否有效,并且选定的手的位置包括在有效组中。我希望我们所有人对周围的人都保持礼貌。步骤十一。声音和音乐
-? (, , ), , . . , , (, , , ). , ( ), , ( -) , . , , .
由于类型的特殊性,我们的游戏不会以杰作的音效为特征-如果您玩的是棋盘游戏的数字改编版,那么您理解我的意思。声音消除了它们的单调,很快变得无聊,经过一段时间不使用它们再演奏似乎不再是一种严重的损失。由于没有有效的方法来处理这种现象,这个问题变得更加复杂。用完全不同的声音替换游戏声音,随着时间的流逝,它们会变得令人反感。在良好的游戏中,声音会补充游戏的玩法,展现正在进行的动作的气氛,使其生动活泼-如果气氛只是一张桌子,上面放着一堆尘土飞扬的袋子,而整个游戏过程都包含掷骰子,那么这很难实现。不过,这正是我们要说的:丝绸在这里,演员在这里,沙沙作响,沙沙作响,大声尖叫-好像我们不是在屏幕上观察图片,而是与真实的物理对象互动。它们需要完整而清晰地发声-在整个脚本中您会听到一百次,因此声音不应该脱颖而出-只需轻轻地遮盖游戏即可。如何才能胜任?我不知道,我在声音上并不特别。我只能建议您尽可能多地玩游戏,注意并消除明显的缺陷(顺便说一句,此建议不仅适用于声音)。如何才能胜任?我不知道,我在声音上并不特别。我只能建议您尽可能多地玩游戏,注意并消除明显的缺陷(顺便说一句,此建议不仅适用于声音)。如何才能胜任?我不知道,我在声音上并不特别。我只能建议您尽可能多地玩游戏,注意并消除明显的缺陷(顺便说一句,此建议不仅适用于声音)。, , , . : , , ? — , . , . , ( — — ).
freesound.org , - . : — , ( ) .
, , - classpath. , .
enum class Sound { TURN_START,
, . , :
interface SoundPlayer { fun play(sound: Sound) }
前面讨论的接口,如GameRenderer与GameInteractor它的实现也需要被传输到类实例的输入Game。首先,实现可能是这样的: class MuteSoundPlayer : SoundPlayer { override fun play(sound: Sound) {
, .
, , . , , ( , ) ( , - , ). , ( ), , , - . , -
freemusicarchive.org soundcloud.com ( YouTube) - . ambient — , . : , , .
:
enum class Music { SCENARIO_MUSIC_1, SCENARIO_MUSIC_2, SCENARIO_MUSIC_3, }
.
interface MusicPlayer { fun play(music: Music) fun stop() } class MuteMusicPlayer : MusicPlayer { override fun play(music: Music) {
请注意,在这种情况下,需要两种方法:一种开始播放,另一种停止播放。将来很有可能会使用其他方法(暂停/恢复,倒带等),但是到目前为止这两种方法就足够了。每次在对象之间传递对播放器类的引用似乎不是一个非常方便的解决方案。有一段时间,我们只有一个ekzepmlyar玩家的需要,所以我冒昧地建议作出一切必要在一个单独的对象来播放声音和音乐的方法,并使其独来独往(单身)。因此,负责的音频子系统始终可以在应用程序中的任何位置使用,而无需不断地将链接传输到同一实例。它看起来像这样:类Audio是我们的单身。它为子系统提供了一个单一的外观...顺便说一下,这是外观(facade)-另一种设计模式,经过彻底设计并在Internet上重复描述(带有示例)。因此,在已经听到来自后排的令人不满意的尖叫声之后,我不再解释已经很长时间的事情,而是继续前进。代码是: object Audio { private var soundPlayer: SoundPlayer = MuteSoundPlayer() private var musicPlayer: MusicPlayer = MuteMusicPlayer() fun init(soundPlayer: SoundPlayer, musicPlayer: MusicPlayer) { this.soundPlayer = soundPlayer this.musicPlayer = musicPlayer } fun playSound(sound: Sound) = this.soundPlayer.play(sound) fun playMusic(music: Music) = this.musicPlayer.play(music) fun stopMusic() = this.musicPlayer.stop() }
init()只需在开始的某个地方调用一次就足够了(通过使用必要的对象对其进行初始化),并在将来使用方便的方法,完全忘记了实现细节。即使您不这样做,也不必担心,系统会死掉-该对象将通过默认类进行初始化。仅此而已。
它仍然要处理实际的播放。至于播放声音(或聪明的人说的是样本),Java具有方便的类AudioSystem和接口Clip。我们需要做的就是正确设置音频文件的路径(位于我们的类路径中,还记得吗?): import javax.sound.sampled.AudioSystem class BasicSoundPlayer : SoundPlayer { private fun pathToFile(sound: Sound) = "/sound/${sound.toString().toLowerCase()}.wav" override fun play(sound: Sound) { val url = javaClass.getResource(pathToFile(sound)) val audioIn = AudioSystem.getAudioInputStream(url) val clip = AudioSystem.getClip() clip.open(audioIn) clip.start() } }
该方法open()可以将其丢弃IOException(特别是如果他由于某种原因不喜欢该文件格式-在这种情况下,我建议您在音频编辑器中打开该文件并重新保存),这样最好将其包装在一个块中try-catch,但是起初我们不会这样做,因此应用程序声音很大每次因声音问题而崩溃。“我什至都不知道该说些什么……”音乐带来的情况更糟。据我所知,尚无标准的Java播放音乐文件(例如mp3格式)的方法,因此无论如何您都必须使用第三方库(有数十种不同的库)。任何功能最少的轻量级产品都适合我们,例如,颇受欢迎的JLayer。添加取决于: <dependencies> <dependency> <groupId>com.googlecode.soundlibs</groupId> <artifactId>jlayer</artifactId> <version>1.0.1.4</version> <scope>compile</scope> </dependency> </dependencies>
并且我们会在其帮助下实施播放器。 class BasicMusicPlayer : MusicPlayer { private var currentMusic: Music? = null private var thread: PlayerThread? = null private fun pathToFile(music: Music) = "/music/${music.toString().toLowerCase()}.mp3" override fun play(music: Music) { if (currentMusic == music) { return } currentMusic = music thread?.finish() Thread.yield() thread = PlayerThread(pathToFile(music)) thread?.start() } override fun stop() { currentMusic = null thread?.finish() }
首先,该库同步执行回放,阻塞主流直到到达文件末尾。因此,我们必须实现一个单独的线程(PlayerThread),并将其设置为“可选”(守护程序),以便在任何情况下都不会干扰应用程序提早终止。其次,当前播放的音乐文件(currentMusic)的标识符存储在播放器代码中。如果第二个命令突然开始播放,我们将不会从头开始播放。第三,到达音乐文件的末尾后,将再次开始播放-依此类推,直到命令明确停止了流finish() ( , ). -, , — , , , , - , . .
.
, . 怎么了
“没有俄语!..没有俄语!..添加俄语!..由狗开发!”在商店的网站上打开任何有趣的故事游戏(尤其是移动游戏)的页面,然后阅读评论。他们会开始赞美惊人的手绘图形吗?还是惊叹于大气声?还是讨论一个令人兴奋的故事,该故事从一开始就令人上瘾,并且直到最后才放手?不行
不满意的“玩家”将指示一堆部队并通常删除游戏。然后他们也将要求退款-所有这一切都是出于一个简单的原因。是的,您忘了将杰作翻译成所有95种世界语言。或者更确切地说,是那些携带者喊得最大声的人。就是这样!你懂吗
数月的努力工作,漫长的不眠之夜,持续的神经衰弱-所有这些都是尾巴下的仓鼠。您失去了大量玩家,无法解决。因此,请提前考虑。确定您的目标受众,选择几种主要语言,订购翻译服务...通常,做别人在主题文章中多次描述过的所有事情(比我聪明)。我们将专注于问题的技术方面,并讨论如何轻松地本地化我们的产品。首先,我们进入模板。还记得在存储名称和描述之前简单String吗?现在它将无法正常工作。除默认语言外,您还需要提供对计划支持的所有语言的翻译。例如,像这样: class TestEnemyTemplate : EnemyTemplate { override val name = "Test enemy" override val description = "Some enemy standing in your way." override val nameLocalizations = mapOf( "ru" to " -", "ar" to "بعض العدو", "iw" to "איזה אויב", "zh" to "一些敵人", "ua" to "і " ) override val descriptionLocalizations = mapOf( "ru" to " - .", "ar" to "وصف العدو", "iw" to "תיאור האויב", "zh" to "一些敵人的描述", "ua" to " ї і ." ) override val traits = listOf<Trait>() }
对于模板,此方法非常合适。如果您不想为任何一种语言指定翻译,则不需要-始终有一个默认值。但是,在最后的对象中,我不想将线跨到几个不同的字段中。因此,我们将保留一个,但替换其类型。 class LocalizedString(defaultValue: String, localizations: Map<String, String>) { private val default: String = defaultValue private val values: Map<String, String> = localizations.toMap() operator fun get(lang: String) = values.getOrDefault(lang, default) override fun equals(other: Any?) = when { this === other -> true other !is LocalizedString -> false else -> default == other.default } override fun hashCode(): Int { return default.hashCode() } }
并相应地更正生成器代码。 fun generateEnemy(template: EnemyTemplate) = Enemy().apply { name = LocalizedString(template.name, template.nameLocalizations) description = LocalizedString(template.description, template.descriptionLocalizations) template.traits.forEach { addTrait(it) } }
自然,应该对其余类型的模板应用相同的方法。更改准备就绪后,即可轻松使用它们。 val language = Locale.getDefault().language val enemyName = enemy.name[language]
在我们的示例中,我们提供了本地化的简化版本,其中仅考虑了语言。通常,类对象Locale还定义国家和地区。如果这在您的应用程序中很重要,那么您的LocalizedString外观将有所不同,但是无论如何我们对此感到满意。我们处理了模板,仍然需要本地化应用程序中使用的服务行。幸运的是,它ResourceBundle已经包含了所有必要的机制。只需准备带有翻译的文件并更改其下载方式。 # Game status messages choose_dice_perform_check= : end_of_turn_discard_extra= : : end_of_turn_discard_optional= : : choose_action_before_exploration=, : choose_action_after_exploration= . ? encounter_physical= . . encounter_somatic= . . encounter_mental= . . encounter_verbal= . . encounter_divine= . : die_acquire_success= ! die_acquire_failure= . game_loss_out_of_time= # Die types physical= somatic= mental= verbal= divine= ally= wound= enemy= villain= obstacle= # Hero types and descriptions brawler= hunter= # Various labels avg= bag= bag_size= class= closed= discard= empty= encountered= fail= hand= heros_turn= %s max= min= perform_check= : pile= received_new_die= result= success= sum= time= total= # Action names and descriptions action_confirm_key=ENTER action_confirm_name= action_cancel_key=ESC action_cancel_name= action_explore_location_key=E action_explore_location_name= action_finish_turn_key=F action_finish_turn_name= action_hide_key=H action_bag_name= action_discard_key=D action_discard_name= action_acquire_key=A action_acquire_name= action_leave_key=L action_leave_name= action_forfeit_key=F action_forfeit_name=
: , . ( ), , -, , -, , . , — - , (, , , — ).
class PropertiesStringLoader(locale: Locale) : StringLoader { private val properties = ResourceBundle.getBundle("text.strings", locale) override fun loadString(key: String) = properties.getString(key) ?: "" }
。
如前所述,ResourceBundle他本人将负责在本地化文件中查找与当前语言环境最匹配的文件。如果找不到,他将使用默认文件(string.properties)。而且一切都会好起来的...是的 在那里!, Unicode
.properties Java 9. ISO-8859-1 —
ResourceBundle . , , — . Unicode- — , , :
'\uXXXX' . , , Java
native2ascii , . :
# Game status messages choose_dice_perform_check=\u0412\u044b\u0431\u0435\u0440\u0438\u0442\u0435 \u043a\u0443\u0431\u0438\u043a\u0438 \u0434\u043b\u044f \u043f\u0440\u043e\u0445\u043e\u0436\u0434\u0435\u043d\u0438\u044f \u043f\u0440\u043e\u0432\u0435\u0440\u043a\u0438: end_of_turn_discard_extra=\u041a\u041e\u041d\u0415\u0426 \u0425\u041e\u0414\u0410: \u0421\u0431\u0440\u043e\u0441\u044c\u0442\u0435 \u043b\u0438\u0448\u043d\u0438\u0435 \u043a\u0443\u0431\u0438\u043a\u0438: end_of_turn_discard_optional=\u041a\u041e\u041d\u0415\u0426 \u0425\u041e\u0414\u0410: \u0421\u0431\u0440\u043e\u0441\u044c\u0442\u0435 \u043a\u0443\u0431\u0438\u043a\u0438 \u043f\u043e \u0436\u0435\u043b\u0430\u043d\u0438\u044e: choose_action_before_exploration=\u0412\u044b\u0431\u0435\u0440\u0438\u0442\u0435, \u0447\u0442\u043e \u0434\u0435\u043b\u0430\u0442\u044c: choose_action_after_exploration=\u0418\u0441\u0441\u043b\u0435\u0434\u043e\u0432\u0430\u043d\u0438\u0435 \u0437\u0430\u0432\u0435\u0440\u0448\u0435\u043d\u043e. \u0427\u0442\u043e \u0434\u0435\u043b\u0430\u0442\u044c \u0434\u0430\u043b\u044c\u0448\u0435? encounter_physical=\u0412\u0441\u0442\u0440\u0435\u0447\u0435\u043d \u0424\u0418\u0417\u0418\u0427\u0415\u0421\u041a\u0418\u0419 \u043a\u0443\u0431\u0438\u043a. \u041d\u0435\u043e\u0431\u0445\u043e\u0434\u0438\u043c\u043e \u043f\u0440\u043e\u0439\u0442\u0438 \u043f\u0440\u043e\u0432\u0435\u0440\u043a\u0443. encounter_somatic=\u0412\u0441\u0442\u0440\u0435\u0447\u0435\u043d \u0421\u041e\u041c\u0410\u0422\u0418\u0427\u0415\u0421\u041a\u0418\u0419 \u043a\u0443\u0431\u0438\u043a. \u041d\u0435\u043e\u0431\u0445\u043e\u0434\u0438\u043c\u043e \u043f\u0440\u043e\u0439\u0442\u0438 \u043f\u0440\u043e\u0432\u0435\u0440\u043a\u0443. encounter_mental=\u0412\u0441\u0442\u0440\u0435\u0447\u0435\u043d \u041c\u0415\u041d\u0422\u0410\u041b\u042c\u041d\u042b\u0419 \u043a\u0443\u0431\u0438\u043a. \u041d\u0435\u043e\u0431\u0445\u043e\u0434\u0438\u043c\u043e \u043f\u0440\u043e\u0439\u0442\u0438 \u043f\u0440\u043e\u0432\u0435\u0440\u043a\u0443. encounter_verbal=\u0412\u0441\u0442\u0440\u0435\u0447\u0435\u043d \u0412\u0415\u0420\u0411\u0410\u041b\u042c\u041d\u042b\u0419 \u043a\u0443\u0431\u0438\u043a. \u041d\u0435\u043e\u0431\u0445\u043e\u0434\u0438\u043c\u043e \u043f\u0440\u043e\u0439\u0442\u0438 \u043f\u0440\u043e\u0432\u0435\u0440\u043a\u0443. encounter_divine=\u0412\u0441\u0442\u0440\u0435\u0447\u0435\u043d \u0411\u041e\u0416\u0415\u0421\u0422\u0412\u0415\u041d\u041d\u042b\u0419 \u043a\u0443\u0431\u0438\u043a. \u041c\u043e\u0436\u043d\u043e \u0432\u0437\u044f\u0442\u044c \u0431\u0435\u0437 \u043f\u0440\u043e\u0432\u0435\u0440\u043a\u0438: die_acquire_success=\u0412\u044b \u043f\u043e\u043b\u0443\u0447\u0438\u043b\u0438 \u043d\u043e\u0432\u044b\u0439 \u043a\u0443\u0431\u0438\u043a! die_acquire_failure=\u0412\u0430\u043c \u043d\u0435 \u0443\u0434\u0430\u043b\u043e\u0441\u044c \u043f\u043e\u043b\u0443\u0447\u0438\u0442\u044c \u043a\u0443\u0431\u0438\u043a. game_loss_out_of_time=\u0423 \u0432\u0430\u0441 \u0437\u0430\u043a\u043e\u043d\u0447\u0438\u043b\u043e\u0441\u044c \u0432\u0440\u0435\u043c\u044f
. — . — . , IDE ( ) « », — - ( ), IDE, .
, .
getBundle() , , ,
ResourceBundle.Control — - .
class PropertiesStringLoader(locale: Locale) : StringLoader { private val properties = ResourceBundle.getBundle( "text.strings", locale, Utf8ResourceBundleControl()) override fun loadString(key: String) = properties.getString(key) ?: "" }
, , :
class Utf8ResourceBundleControl : ResourceBundle.Control() { @Throws(IllegalAccessException::class, InstantiationException::class, IOException::class) override fun newBundle(baseName: String, locale: Locale, format: String, loader: ClassLoader, reload: Boolean): ResourceBundle? { val bundleName = toBundleName(baseName, locale) return when (format) { "java.class" -> super.newBundle(baseName, locale, format, loader, reload) "java.properties" -> with((if ("://" in bundleName) null else toResourceName(bundleName, "properties")) ?: return null) { when { reload -> reload(this, loader) else -> loader.getResourceAsStream(this) }?.let { stream -> InputStreamReader(stream, "UTF-8").use { r -> PropertyResourceBundle(r) } } } else -> throw IllegalArgumentException("Unknown format: $format") } } @Throws(IOException::class) private fun reload(resourceName: String, classLoader: ClassLoader): InputStream { classLoader.getResource(resourceName)?.let { url -> url.openConnection().let { connection -> connection.useCaches = false return connection.getInputStream() } } throw IOException("Unable to load data!") } }
, … , ( ) — ( Kotlin ). — ,
.properties UTF-8 - .
要以不同的语言测试应用程序的操作,无需更改操作系统的设置-只需在启动JRE时指定所需的语言即可: java -Duser.language=ru -jar path_to_project\Dice\target\dice-1.0-jar-with-dependencies.jar
如果您仍在Windows上工作,请预料到问题, Windows (cmd.exe) 437 ( DOSLatinUS), — . , UTF-8 , :
chcp 65001
Java , , . :
java -Dfile.encoding=UTF-8 -Duser.language=ru -jar path_to_project\Dice\target\dice-1.0-jar-with-dependencies.jar
, , Unicode- (, Lucida Console)
经过我们所有激动人心的冒险,结果可以自豪地向公众展示并大声宣称:“我们不是狗!”那很好。
第十三步 全部放在一起
, , , . -, , . -, , . -, ( , ), , , — ( , ?).
. ,
main() , . 我们将需要:
- 文字和地形;
- 英雄们
- 接口实现
GameInteractor; - 接口实现
GameRenderer和StringLoader; - 接口实现
SoundPlayer和MusicPlayer; - 类对象
Game; - 一瓶香槟。
走吧
fun main(args: Array<String>) { Audio.init(BasicSoundPlayer(), BasicMusicPlayer()) val loader = PropertiesStringLoader(Locale.getDefault()) val renderer = ConsoleGameRenderer(loader) val interactor = ConsoleGameInteractor() val template = TestScenarioTemplate() val scenario = generateScenario(template, 1) val locations = generateLocations(template, 1, heroes.size) val heroes = listOf( generateHero(Hero.Type.BRAWLER, "Brawler"), generateHero(Hero.Type.HUNTER, "Hunter") ) val game = Game(renderer, interactor, scenario, locations, heroes) game.start() }
我们启动并享受了第一个工作原型。你去。步骤十四。游戏平衡
嗯...第十五步。 测验
现在已经编写了第一个工作原型的大部分代码,现在可以添加几个单元测试了……“如何?刚才呢 是的,必须在一开始就编写测试,然后编写代码!”许多读者正确地注意到,编写单元测试应该先于工作代码的开发(TDD和其他流行的方法)。其他人会很生气:即使是至少开始发展某些东西,人们也不会愚弄他们的大脑,否则所有的动力都会丧失。另有几人爬出踢脚线的缝隙,怯怯地说:“我不明白为什么需要这些测试-一切对我都有用”……之后,他们将用靴子推到脸上,然后迅速推回去。我不会开始发起意识形态对抗(互联网上已经充满了意识形态对抗),因此我部分同意所有人的观点。是的,测试有时是有用的(特别是在经常更改或与复杂的计算相关联的代码中),是的,单元测试并不适合所有代码(例如,它不包括与用户或外部系统的交互),是的,除了单元测试外其他许多类型(至少命名了五种),是的,我们不会专注于编写测试-我们的文章是关于其他内容的。只是说:许多程序员(尤其是初学者)忽略了测试。许多人通过说应用程序的功能很少被测试证明自己是合理的。例如,启动应用程序并查看外观和交互是否一切正常要容易得多,而不是将复杂的设计与涉及用于测试用户界面的专用框架进行隔离(并且确实存在)我会告诉您何时实现接口Renderer-我就是这样做的。但是,在我们的代码中,有一些方法的单元测试概念很棒。例如,发电机。仅此而已。这是一个理想的黑匣子:将模板发送到输入,在输出上获得游戏世界的对象。内部正在发生某些事情,但是我们需要对其进行测试。例如,像这样: public class DieGeneratorTest { @Test public void testGetMaxLevel() { assertEquals("Max level should be 3", 3, DieGeneratorKt.getMaxLevel()); } @Test public void testDieGenerationSize() { DieTypeFilter filter = new SingleDieTypeFilter(Die.Type.ALLY); List<? extends List<Integer>> allowedSizes = Arrays.asList( null, Arrays.asList(4, 6, 8), Arrays.asList(4, 6, 8, 10), Arrays.asList(6, 8, 10, 12) ); IntStream.rangeClosed(1, 3).forEach(level -> { for (int i = 0; i < 10; i++) { int size = DieGeneratorKt.generateDie(filter, level).getSize(); assertTrue("Incorrect level of die generated: " + size, allowedSizes.get(level).contains(size)); assertTrue("Incorrect die size: " + size, size >= 4); assertTrue("Incorrect die size: " + size, size <= 12); assertTrue("Incorrect die size: " + size, size % 2 == 0); } }); } @Test public void testDieGenerationType() { List<Die.Type> allowedTypes1 = Arrays.asList(Die.Type.PHYSICAL); List<Die.Type> allowedTypes2 = Arrays.asList(Die.Type.PHYSICAL, Die.Type.SOMATIC, Die.Type.MENTAL, Die.Type.VERBAL); List<Die.Type> allowedTypes3 = Arrays.asList(Die.Type.ALLY, Die.Type.VILLAIN, Die.Type.ENEMY); for (int i = 0; i < 10; i++) { Die.Type type1 = DieGeneratorKt.generateDie(new SingleDieTypeFilter(Die.Type.PHYSICAL), 1).getType(); assertTrue("Incorrect die type: " + type1, allowedTypes1.contains(type1)); Die.Type type2 = DieGeneratorKt.generateDie(new StatsDieTypeFilter(), 1).getType(); assertTrue("Incorrect die type: " + type2, allowedTypes2.contains(type2)); Die.Type type3 = DieGeneratorKt.generateDie(new MultipleDieTypeFilter(Die.Type.ALLY, Die.Type.VILLAIN, Die.Type.ENEMY), 1).getType(); assertTrue("Incorrect die type: " + type3, allowedTypes3.contains(type3)); } } }
大概:
public class BagGeneratorTest { @Test public void testGenerateBag() { BagTemplate template1 = new BagTemplate(); template1.addPlan(0, 10, new SingleDieTypeFilter(Die.Type.PHYSICAL)); template1.addPlan(5, 5, new SingleDieTypeFilter(Die.Type.SOMATIC)); template1.setFixedDieCount(null); BagTemplate template2 = new BagTemplate(); template2.addPlan(10, 10, new SingleDieTypeFilter(Die.Type.DIVINE)); template2.setFixedDieCount(5); BagTemplate template3 = new BagTemplate(); template3.addPlan(10, 10, new SingleDieTypeFilter(Die.Type.ALLY)); template3.setFixedDieCount(50); for (int i = 0; i < 10; i++) { Bag bag1 = BagGeneratorKt.generateBag(template1, 1); assertTrue("Incorrect bag size: " + bag1.getSize(), bag1.getSize() >= 5 && bag1.getSize() <= 15); assertEquals("Incorrect number of SOMATIC dice", 5, bag1.examine().stream().filter(d -> d.getType() == Die.Type.SOMATIC).count()); Bag bag2 = BagGeneratorKt.generateBag(template2, 1); assertEquals("Incorrect bag size", 5, bag2.getSize()); Bag bag3 = BagGeneratorKt.generateBag(template3, 1); assertEquals("Incorrect bag size", 50, bag3.getSize()); List<Die.Type> dieTypes3 = bag3.examine().stream().map(Die::getType).distinct().collect(Collectors.toList()); assertEquals("Incorrect die types", 1, dieTypes3.size()); assertEquals("Incorrect die types", Die.Type.ALLY, dieTypes3.get(0)); } } }
:
public class LocationGeneratorTest { private void testLocationGeneration(String name, LocationTemplate template) { System.out.println("Template: " + template.getName()); assertEquals("Incorrect template type", name, template.getName()); IntStream.rangeClosed(1, 3).forEach(level -> { Location location = LocationGeneratorKt.generateLocation(template, level); assertEquals("Incorrect location type", name, location.getName().get("")); assertTrue("Location not open by default", location.isOpen()); int closingDifficulty = location.getClosingDifficulty(); assertTrue("Closing difficulty too small", closingDifficulty > 0); assertEquals("Incorrect closing difficulty", closingDifficulty, template.getBasicClosingDifficulty() + level * 2); Bag bag = location.getBag(); assertNotNull("Bag is null", bag); assertTrue("Bag is empty", location.getBag().getSize() > 0); Deck<Enemy> enemies = location.getEnemies(); assertNotNull("Enemies are null", enemies); assertEquals("Incorrect enemy threat count", enemies.getSize(), template.getEnemyCardsCount()); if (bag.drawOfType(Die.Type.ENEMY) != null) { assertTrue("Enemy cards not specified", enemies.getSize() > 0); } Deck<Obstacle> obstacles = location.getObstacles(); assertNotNull("Obstacles are null", obstacles); assertEquals("Incorrect obstacle threat count", obstacles.getSize(), template.getObstacleCardsCount()); List<SpecialRule> specialRules = location.getSpecialRules(); assertNotNull("SpecialRules are null", specialRules); }); } @Test public void testGenerateLocation() { testLocationGeneration("Test Location", new TestLocationTemplate()); testLocationGeneration("Test Location 2", new TestLocationTemplate2()); } }
«, , ! ? Java???». , , , . , ,
( , , ). - - , : ( ?).
. ,
HandMaskRule和他的继承人?现在想象一下,为了使用该技能,英雄需要从手中拿下三个骰子,并且这些骰子的类型都受到严格的限制(例如,“第一个骰子必须是蓝色,绿色或白色,第二个必须是黄色,白色或蓝色,第三个-蓝色或紫色--您感到困难吗?)。如何进行课堂实施?好吧……对于初学者,您可以决定输入和输出参数。显然,您需要该类接受三个数组(或集合),每个数组分别包含第一个,第二个和第三个多维数据集的有效类型。然后呢?破坏?递归?如果我错过了什么怎么办?进入深处。现在,由于要求简单,易于理解且易于形式化,因此推迟了类方法的实现并编写了测试。最好编写一些测试...但是我们将考虑一个测试,例如: public class TripleDieHandMaskRuleTest { private Hand hand; @Before public void init() { hand = new Hand(10); hand.addDie(new Die(Die.Type.PHYSICAL, 4));
在开始之前,这很累,但没有看起来那么多(在某些时候变得很有趣)。但是编写了这样的测试(以及在不同场合的其他几个测试)后,您会突然感到镇定和自信。现在,不小的拼写错误会破坏您的方法并导致令人不愉快的意外,这些意外很难手动测试。慢慢一点,我们开始实现该类的必要方法。最后,我们运行测试以确保我们在某个地方犯了错误。找到问题点并重写。重复直到完成。 class TripleDieHandMaskRule( hand: Hand, types1: Array<Die.Type>, types2: Array<Die.Type>, types3: Array<Die.Type>) : HandMaskRule(hand) { private val types1 = types1.toSet() private val types2 = types2.toSet() private val types3 = types3.toSet() override fun checkMask(mask: HandMask): Boolean { if (mask.positionCount + mask.allyPositionCount != 3) { return false } return getCheckedDice(mask).asSequence() .filter { it.type in types1 } .any { d1 -> getCheckedDice(mask) .filter { d2 -> d2 !== d1 } .filter { it.type in types2 } .any { d2 -> getCheckedDice(mask) .filter { d3 -> d3 !== d1 } .filter { d3 -> d3 !== d2 } .any { it.type in types3 } } } } override fun isPositionActive(mask: HandMask, position: Int): Boolean { if (mask.checkPosition(position)) { return true } val die = hand.dieAt(position) ?: return false return when (mask.positionCount + mask.allyPositionCount) { 0 -> die.type in types1 || die.type in types2 || die.type in types3 1 -> with(getCheckedDice(mask).first()) { (this.type in types1 && (die.type in types2 || die.type in types3)) || (this.type in types2 && (die.type in types1 || die.type in types3)) || (this.type in types3 && (die.type in types1 || die.type in types2)) } 2-> with(getCheckedDice(mask)) { val d1 = this[0] val d2 = this[1] (d1.type in types1 && d2.type in types2 && die.type in types3) || (d2.type in types1 && d1.type in types2 && die.type in types3) || (d1.type in types1 && d2.type in types3 && die.type in types2) || (d2.type in types1 && d1.type in types3 && die.type in types2) || (d1.type in types2 && d2.type in types3 && die.type in types1) || (d2.type in types2 && d1.type in types3 && die.type in types1) } 3 -> false else -> false } } override fun isAllyPositionActive(mask: HandMask, position: Int): Boolean { if (mask.checkAllyPosition(position)) { return true } if (hand.allyDieAt(position) == null) { return false } return when (mask.positionCount + mask.allyPositionCount) { 0 -> ALLY in types1 || ALLY in types2 || ALLY in types3 1 -> with(getCheckedDice(mask).first()) { (this.type in types1 && (ALLY in types2 || ALLY in types3)) || (this.type in types2 && (ALLY in types1 || ALLY in types3)) || (this.type in types3 && (ALLY in types1 || ALLY in types2)) } 2-> with(getCheckedDice(mask)) { val d1 = this[0] val d2 = this[1] (d1.type in types1 && d2.type in types2 && ALLY in types3) || (d2.type in types1 && d1.type in types2 && ALLY in types3) || (d1.type in types1 && d2.type in types3 && ALLY in types2) || (d2.type in types1 && d1.type in types3 && ALLY in types2) || (d1.type in types2 && d2.type in types3 && ALLY in types1) || (d2.type in types2 && d1.type in types3 && ALLY in types1) } 3 -> false else -> false } } }
, — . , .
« <...> <...> <...> <...>. ! <...> ! <...> !».
, — , . , . .
. :
- 基本功能:模块,游戏引擎,连接器接口和平台无关的实现(核心);
- 场景,地形,敌人和障碍物的模板-所谓的“冒险”(冒险)的组成部分;
- 特定平台特定的接口的特定实现:在我们的例子中是控制台应用程序(cli)。
分离的结果最终将类似于下图:就像表演结束时的演员一样,我们今天的英雄们全力以赴地重新进入现场 创建其他项目并转移相应的类。我们只需要正确配置项目之间的交互即可。核心项目该项目是纯引擎。所有特定的类都转移到了其他项目中,仅保留了基本功能即核心。图书馆,如果你想。不再有启动类,甚至不需要构建软件包。该项目的程序集将托管在本地Maven存储库中(稍后会详细介绍),并由其他项目用作依赖项。该文件pom.xml如下: <project xmlns="http://maven.apache.org/POM/4.0.0" xmlns:xsi="http://www.w3.org/2001/XMLSchema-instance" xsi:schemaLocation="http://maven.apache.org/POM/4.0.0 http://maven.apache.org/xsd/maven-4.0.0.xsd"> <modelVersion>4.0.0</modelVersion> <groupId>my.company</groupId> <artifactId>dice-core</artifactId> <version>1.0</version> <packaging>jar</packaging> <dependencies> <dependency> <groupId>org.jetbrains.kotlin</groupId> <artifactId>kotlin-stdlib</artifactId> <version>${kotlin.version}</version> </dependency> <dependency> <groupId>junit</groupId> <artifactId>junit-dep</artifactId> <version>4.8.2</version> <scope>test</scope> </dependency> </dependencies> <build> <plugins> <plugin> <groupId>org.jetbrains.kotlin</groupId> </plugin> </plugins> </build> <properties> <project.build.sourceEncoding>UTF-8</project.build.sourceEncoding> <maven.compiler.source>1.8</maven.compiler.source> <maven.compiler.target>1.8</maven.compiler.target> <kotlin.version>1.3.20</kotlin.version> <kotlin.compiler.incremental>true</kotlin.compiler.incremental> </properties> </project>
从现在开始,我们将像这样收集它: mvn -f "path_to_project/DiceCore/pom.xml" install
Cli项目这是应用程序的入口点-最终用户将与该项目进行交互。内核用作依赖项。因为在我们的示例中,我们正在使用控制台,所以该项目将包含使用该控制台的必要类(如果我们突然想在咖啡机上启动游戏,我们只需将该项目替换为具有相应实现的类似项目即可)。我们将立即添加资源(线路,音频文件等)。对外部库的依赖关系将转移到文件中pom.xml: <project xmlns="http://maven.apache.org/POM/4.0.0" xmlns:xsi="http://www.w3.org/2001/XMLSchema-instance" xsi:schemaLocation="http://maven.apache.org/POM/4.0.0 http://maven.apache.org/xsd/maven-4.0.0.xsd"> <modelVersion>4.0.0</modelVersion> <groupId>my.company</groupId> <artifactId>dice-cli</artifactId> <version>1.0</version> <packaging>jar</packaging> <dependencies> <dependency> <groupId>org.jetbrains.kotlin</groupId> <artifactId>kotlin-stdlib</artifactId> <version>${kotlin.version}</version> </dependency> <dependency> <groupId>my.company</groupId> <artifactId>dice-core</artifactId> <version>1.0</version> <scope>compile</scope> </dependency> <dependency> <groupId>org.fusesource.jansi</groupId> <artifactId>jansi</artifactId> <version>1.17.1</version> <scope>compile</scope> </dependency> <dependency> <groupId>jline</groupId> <artifactId>jline</artifactId> <version>2.14.6</version> <scope>compile</scope> </dependency> <dependency> <groupId>com.googlecode.soundlibs</groupId> <artifactId>jlayer</artifactId> <version>1.0.1.4</version> <scope>compile</scope> </dependency> </dependencies> <build> <plugins> <plugin> <groupId>org.jetbrains.kotlin</groupId> </plugin> <plugin> <artifactId>maven-assembly-plugin</artifactId> <version>2.6</version> <executions> <execution> <phase>package</phase> <goals> <goal>single</goal> </goals> </execution> </executions> <configuration> <descriptorRefs> <descriptorRef>jar-with-dependencies</descriptorRef> </descriptorRefs> <archive> <manifest> <mainClass>my.company.dice.MainKt</mainClass> </manifest> </archive> </configuration> </plugin> </plugins> </build> <properties> <project.build.sourceEncoding>UTF-8</project.build.sourceEncoding> <maven.compiler.source>1.8</maven.compiler.source> <maven.compiler.target>1.8</maven.compiler.target> <kotlin.version>1.3.20</kotlin.version> <kotlin.compiler.incremental>true</kotlin.compiler.incremental> </properties> </project>
我们已经看到了用于构建和运行该项目的脚本-我们不会开始重复它。历险记好吧,最后,在一个单独的项目中,我们将情节取出。也就是说,贵公司的场景部门员工可以想象的所有场景,地形,敌人和游戏世界中的其他独特对象(或者,到目前为止,只有我们自己的病态想象力-我们仍然是该地区唯一的游戏设计师)。这个想法是将脚本分组(冒险)并将每个这样的脚本集作为一个单独的项目分发(类似于在棋盘游戏和视频游戏世界中的工作方式)。也就是说,收集jar存档并将其放在单独的文件夹中,以便游戏引擎扫描该文件夹并自动连接其中包含的所有冒险活动。然而,这种方法的技术实施充满了巨大的困难。? -, java- (, — ). , classpath . — jar- ( Java 6 * —
wildcards ).
java -classpath "path_to_project/DiceCli/target/adventures/*" -jar path_to_project/DiceCli/target/dice-1.0-jar-with-dependencies.jar
“一个傻瓜,还是什么?使用-jar开关时,-classpath开关将被忽略!”但是,这将不起作用。可执行jar归档文件的类路径必须显式写在内部文件中META-INF/MANIFEST.MF(该部分称为- Claspath:)。没关系,甚至有一些特殊的插件(maven-compiler-plugin,或者最糟糕的是maven-assembly-plugin)。但是清单中的通配符,las,不起作用-您将必须显式指定从属jar文件的名称。也就是说,提前知道它们,在我们的情况下是有问题的。无论如何,我不想要那样。我希望该项目不必重新编译。到文件夹adventures/您可以投掷任意数量的冒险,以便在执行过程中游戏引擎可以看到所有这些冒险。不幸的是,看似显而易见的功能超出了Java世界的标准表示。因此,这是不受欢迎的。需要采取不同的方法来传播独立冒险。哪一个 我不知道,在评论中写-确保有人有聪明的主意。同时,这里没有想法,这是一个很小的(或很大,取决于您的外观)技巧,使您可以动态地将依赖项添加到类路径中,而无需知道它们的名称,而无需重新编译项目:在Windows中: @ECHO OFF call "path_to_maven\mvn.bat" -f "path_to_project\DiceCore\pom.xml" install call "path_to_maven\mvn.bat" -f "path_to_project\DiceCli\pom.xml" package call "path_to_maven\mvn.bat" -f "path_to_project\TestAdventure\pom.xml" package mkdir path_to_project\DiceCli\target\adventures copy "path_to_project\TestAdventure\target\test-adventure-1.0.jar" path_to_project\DiceCli\target\adventures\ chcp 65001 cd path_to_project\DiceCli\target\ java -Dfile.encoding=UTF-8 -cp "dice-cli-1.0-jar-with-dependencies.jar;adventures\*" my.company.dice.MainKt pause
在Unix上:
这就是窍门。我们不使用键,-jar而是将Cli项目添加到类路径,并明确指定其中包含的类作为入口点MainKt。另外,在这里,我们连接文件夹中的所有档案adventures/。无需再次指出这个错误的决定有多严重-我自己知道,谢谢。最好在评论中提出您的想法。请。(ಥ﹏ಥ)步骤十七。情节
一点歌词。我们的文章是关于工作流程的技术方面的,但是游戏不仅仅是软件代码。这些令人兴奋的世界充满了有趣的事件和生动活泼的角色,您沉浸在脑海中,放弃了真实世界。每个这样的世界以其自己的方式都是不寻常的,并且以自己的方式是有趣的,许多年后您仍然记得其中的许多。如果您也希望以温暖的心情来记住自己的世界,请使其与众不同且有趣。我知道我们是程序员,而不是脚本编写者,但是我们对游戏类型的叙事部分(有经验的游戏玩家来说是正确的)有一些基本想法。就像在任何书中一样,这个故事应该有一个眼睛(我们逐步描述英雄所面临的问题),发展,两个或三个有趣的转折,一个高潮(情节最剧烈的时刻,当读者激动而忘却呼吸时)和结结(在哪些事件逐渐得出其逻辑结论)。避免轻描淡写,合乎逻辑的毫无根据并避免出现漏洞-所有开始的行都应得出适当的结论。好吧,让我们向其他人朗读我们的故事-从侧面公正地看待别人经常会帮助您理解所产生的缺陷并及时进行纠正。游戏情节, , . , : ( ) ( ), . , .
— , . , , .
, , - . , , , , . .
, , , , , , . , . , : , , , — : /, . ( ) (, ).
我想摆脱阴谋陈腐和幻想的消费品-所有这些精灵,地精,龙,黑领主和绝对的世界邪恶(以及:精选英雄,远古预言,超级神器,史诗般的战斗...尽管后者可以留下)。我还真的想让世界栩栩如生,以便每个遇到的角色(甚至是一个很小的角色)都有自己的故事和动机,游戏机制要符合世界的规律,英雄的成长自然而然地发生,位置上敌人和障碍物的存在在逻辑上由位置本身的特征来证明...等等。不幸的是,这种渴望开了一个残酷的玩笑,极大地减缓了开发过程,而且并非总是有可能脱离游戏惯例。然而,最终产品的满意度却提高了一个数量级。? — , , : , — . - , , .
接下来是什么?
game design . , , , — , . - , — , . - , — . : , , — , , .
如果您仍然在这里并且不惜一切代价继续,那么请为困难做准备。缺乏时间,懒惰,缺乏创意灵感-某些事情会不断分散您的注意力。克服所有这些障碍并不容易(同样,有关该主题的文章很多),但是有可能。首先,我建议您仔细计划该项目的进一步发展。幸运的是,我们为我们的工作而高兴,出版商们没有推动我们,没有人要求完成任何特定的截止日期-这意味着有机会在没有不必要的仓促的情况下直达主题。制定项目的“路线图”,确定主要阶段以及(如果有胆量的话)大致的实施条件。给自己一个笔记本(可以电子),并不断写下其中的想法(即使在深夜突然醒来)。用表格标记您的进度(例如此类)或其他辅助设备。开始文档:既是面向外部庞大的粉丝社区的外部,公共(例如Wiki),也包括内部的,对于您自己的(我不会分享此链接)-相信我,一个月的休息后没有它,您将不记得它的确切功能和操作方式。通常,尽可能多地编写有关您的游戏的附带信息,只记得记住编写游戏本身。我提出了一些基本方案,但我没有给出具体建议-每个方案都由他自己决定,让他更方便地组织工作过程。“但是,您是否不想谈论游戏平衡?”立即为第一次创建完美游戏将不起作用这一事实做好准备。一个有效的原型是好的-首先它将显示该项目的可行性,说服您或让您失望,并回答一个非常重要的问题:“值得继续吗?”。但是,他不会回答许多其他问题,主要的问题可能是:“长期玩我的游戏会很有趣吗?”关于这一主题,有大量的理论和文章(再次)。有趣的游戏应该适度困难,因为过于简单的游戏不会对玩家构成挑战。另一方面,如果复杂性令人望而却步,则只有顽固的硬核玩家或试图向某人证明某些东西的人才会留在游戏观众中。游戏应该非常多样化,理想情况下-为实现目标提供多种选择,这样每个玩家都可以选择自己喜欢的选项。一种通过策略不应主导其余策略,否则他们只会使用它……依此类推。换句话说,游戏需要保持平衡。在棋盘游戏中尤其如此,因为规则明确规定。怎么做? . -, ( , ) ( ), —
. . — . , , , . — . , , : « feedback!». , - , , — ( , ?) (-).
除了开玩笑,我希望我们...大家都成功。阅读更多(谁会想到的!)-有关游戏设计的更多信息。我们所研究的所有问题在文章和文献中已经以一种或另一种方式涉及(尽管如果您仍在这里,显然没有必要敦促您阅读)。分享您的印象,在论坛上进行交流-总的来说,您已经越来越了解我。不要偷懒,您会成功。对此乐观的态度,请允许我离开。谢谢大家的关注。待会见!“ E!哪见?现在如何在手机上启动所有这些功能?我是徒劳地等待,还是什么?”后记。安卓系统
为了描述我们的游戏引擎与Android平台的集成,我们让该类放在一边Game,考虑一个相似但简单得多的类MainMenu。顾名思义,它旨在实现应用程序的主菜单,并且实际上是用户开始与之交互的第一类。像类一样Game,它定义了一个无限循环,每次循环都会绘制一个屏幕,并向用户请求命令。这里没有复杂的逻辑,这些命令要小得多。实际上,我们正在实施一件事-“退出”。容易吧? 关于那个和演讲。
该代码也简化了一个数量级。 class MainMenu( private val renderer: MenuRenderer, private val interactor: MenuInteractor ) { private var actions = ActionList.EMPTY fun start() { Audio.playMusic(Music.MENU_MAIN) actions = ActionList() actions.add(Action.Type.NEW_ADVENTURE) actions.add(Action.Type.CONTINUE_ADVENTURE, false) actions.add(Action.Type.MANUAL, false) actions.add(Action.Type.EXIT) processCycle() } private fun processCycle() { while (true) { renderer.drawMainMenu(actions) when (interactor.pickAction(actions).type) { Action.Type.NEW_ADVENTURE -> TODO() Action.Type.CONTINUE_ADVENTURE -> TODO() Action.Type.MANUAL -> TODO() Action.Type.EXIT -> { Audio.stopMusic() Audio.playSound(Sound.LEAVE) renderer.clearScreen() Thread.sleep(500) return } else -> throw AssertionError("Should not happen") } } } }
与用户的交互是使用界面实现的,MenuRenderer并且MenuInteractor工作方式与以前看到的类似。 interface MenuRenderer: Renderer { fun drawMainMenu(actions: ActionList) } interface Interactor { fun anyInput() fun pickAction(list: ActionList): Action }
如您所知,我们有意识地将接口与特定的实现分开了。现在,我们需要的是用一个新项目(称为Droid)替换Cli项目,并添加对Core项目的依赖。来吧 运行Android Studio(通常在其中开发用于Android的项目),创建一个简单的项目,删除所有不必要的标准金属丝,仅保留对Kotlin语言的支持。我们还对Core项目添加了一个依赖项,该依赖项存储在我们机器的本地Maven存储库中。 apply plugin: 'com.android.application' apply plugin: 'kotlin-android' apply plugin: 'kotlin-android-extensions' android { compileSdkVersion 28 defaultConfig { applicationId "my.company.dice" minSdkVersion 14 targetSdkVersion 28 versionCode 1 versionName "1.0" } } dependencies { implementation "org.jetbrains.kotlin:kotlin-stdlib-jdk7:$kotlin_version" implementation "my.company:dice-core:1.0" }
但是,默认情况下,没有人会看到我们的依赖关系-您必须在构建项目时明确指出需要使用本地存储库(mavenLocal)。 buildscript { ext.kotlin_version = '1.3.20' repositories { google() jcenter() mavenLocal() } dependencies { classpath 'com.android.tools.build:gradle:3.3.0' classpath "org.jetbrains.kotlin:kotlin-gradle-plugin:$kotlin_version" } } allprojects { repositories { google() jcenter() mavenLocal() } }
, , — . , , :
SoundPlayer ,
MusicPlayer ,
MenuInteractor (
GameInteractor ),
MenuRenderer (
GameRenderer )
StringLoader , , . , .
(, , ) Android —
Canvas . -
View-这将是我们的“画布”。使用输入时,它会稍微复杂一点,因为我们不再有键盘,而且界面的设计方式必须使用户在屏幕某些部分上的输入视为命令输入。为此,我们将使用相同的继承人View-这样,他将充当用户和游戏引擎之间的中介(类似于系统控制台充当此类中介的方式)。让我们为View创建main活动并将其写入清单中。 <manifest xmlns:android="http://schemas.android.com/apk/res/android" package="my.company.dice"> <application android:icon="@mipmap/ic_launcher" android:label="@string/app_name" android:theme="@style/AppTheme"> <activity android:name=".ui.MainActivity" android:screenOrientation="sensorLandscape" android:configChanges="orientation|keyboardHidden|screenSize"> <intent-filter> <category android:name="android.intent.category.LAUNCHER"/> <action android:name="android.intent.action.MAIN"/> </intent-filter> </activity> </application> </manifest>
我们将活动固定在横向模式下-与其他大多数游戏一样,我们将无法使用人像模式。此外,我们会将其扩展到设备的整个屏幕,并相应地指定主要主题。 <resources> <style name="AppTheme" parent="android:Theme.Black.NoTitleBar.Fullscreen"/> </resources>
并且由于进入了资源,我们从Cli项目中转移了所需的本地化字符串,并将其转换为所需的格式: <resources> <string name="action_new_adventure_key">N</string> <string name="action_new_adventure_name">ew adventure</string> <string name="action_continue_adventure_key">C</string> <string name="action_continue_adventure_name">ontinue adventure</string> <string name="action_manual_key">M</string> <string name="action_manual_name">anual</string> <string name="action_exit_key">X</string> <string name="action_exit_name">Exit</string> </resources>
以及主菜单中使用的声音和音乐文件(每种类型之一)/assets/sound/leave.wav,/assets/music/menu_main.mp3分别将它们放在和中。当我们整理资源时,是时候开始进行设计了(是的,再次)。与控制台不同,Android平台具有其自身的架构功能,这迫使我们使用特定的方法。等待,不要晕倒,现在我将详细解释所有内容。也许我们会从最困难的阶层开始,这个阶层是被称为将我们系统的各个独立部分绑定在一起的DiceSurface继承人View(如果您愿意,您可以从该阶层继承它,SurfaceView甚至可以继承)GlSurfaceView并绘制一个单独的线程,但是我们有一个回合制游戏,动画效果很差,不需要复杂的图形输出,因此我们不会使其复杂化。如前所述,其实现将立即解决两个问题:图像输出和单击处理,每一个都有其自己的意外困难。让我们按顺序考虑它们。, Renderer . — View,
onDraw() , , , .
drawMainMenu() MainMenu ? ?
.
DiceSurface instructions — , ,
onDraw() . Renderer , , . ,
(strategy). :
typealias RenderInstructions = (Canvas, Paint) -> Unit class DiceSurface(context: Context) : View(context) { private var instructions: RenderInstructions = { _, _ -> } private val paint = Paint().apply { color = Color.YELLOW style = Paint.Style.STROKE isAntiAlias = true } fun updateInstructions(instructions: RenderInstructions) { this.instructions = instructions this.postInvalidate() } override fun onDraw(canvas: Canvas) { super.onDraw(canvas) canvas.drawColor(Color.BLACK)
也就是说,所有图形功能仍在Renderer类中,但是这次我们不直接执行命令,而是准备好由View执行它们。注意属性的类型instructions-您可以创建一个单独的接口并调用其唯一方法,但是Kotlin可以大大减少代码量。现在关于交互器。以前,数据输入是同步发生的:当我们从控制台(键盘)请求数据时,应用程序(循环)会暂停,直到用户按下某个键。在Android上,这种技巧将不起作用-它具有自己的Looper,我们在任何情况下都不得中断其工作,这意味着输入必须是异步的。也就是说,Interactor接口方法仍然暂停引擎并等待命令,而Activity及其所有View继续起作用,直到他们迟早发送此命令。使用标准接口可以很容易地实现这种方法BlockingQueue。该类DroidMenuInteractor将调用该方法take(),这将暂停游戏流的执行,直到元素(熟悉的类的实例Action)出现在队列中。DiceSurface,则将根据用户的点击进行调整(标准onTouchEvent()类方法View),生成对象并将其通过方法添加到队列中offer()。它看起来像这样: class DiceSurface(context: Context) : View(context) { private val actionQueue: BlockingQueue<Action> = LinkedBlockingQueue<Action>() fun awaitAction(): Action = actionQueue.take() override fun onTouchEvent(event: MotionEvent): Boolean { if (event.action == MotionEvent.ACTION_UP) { actionQueue.offer(Action(Action.Type.NONE), 200, TimeUnit.MILLISECONDS) } return true } } class DroidMenuInteractor(private val surface: DiceSurface) : Interactor { override fun anyInput() { surface.awaitAction() } override fun pickAction(list: ActionList): Action { while (true) { val type = surface.awaitAction().type list .filter(Action::isEnabled) .find { it.type == type } ?.let { return it } } } }
, Interactor
awaitAction() - , . , . UI- , , , (, ). / .
当然,我们只传输一种命令,而仅传输一种命令。我们需要区分按压的坐标,并根据其值调用此命令。但是,这很不幸-交互器不知道在屏幕上的哪个位置绘制了活动按钮-渲染器负责渲染。我们将如下建立它们的交互。该类DiceSurface将存储一个特殊的集合-活动矩形列表(或其他形状,如果我们到此为止)。这样的矩形包含顶点的坐标和边界的一个Action。 Renderer将生成这些矩形并将其添加到列表中,该方法onTouchEvent()将确定按下了哪个矩形,并将相应的矩形添加到队列中Action。 private class ActiveRect(val action: Action, left: Float, top: Float, right: Float, bottom: Float) { val rect = RectF(left, top, right, bottom) fun check(x: Float, y: Float, w: Float, h: Float) = rect.contains(x / w, y / h) }
check() . , Renderer' ( , ) . ( ) 0 1 . , — . .
DiceSurface , (
addRectangle() clearRectangles() ) ( Renderer'),
onTouchEvent() , .
class DiceSurface(context: Context) : View(context) { private val actionQueue: BlockingQueue<Action> = LinkedBlockingQueue<Action>() private val rectangles: MutableSet<ActiveRect> = Collections.newSetFromMap(ConcurrentHashMap<ActiveRect, Boolean>()) private var instructions: RenderInstructions = { _, _ -> } private val paint = Paint().apply { color = Color.YELLOW style = Paint.Style.STROKE isAntiAlias = true } fun updateInstructions(instructions: RenderInstructions) { this.instructions = instructions this.postInvalidate() } fun clearRectangles() { rectangles.clear() } fun addRectangle(action: Action, left: Float, top: Float, right: Float, bottom: Float) { rectangles.add(ActiveRect(action, left, top, right, bottom)) } fun awaitAction(): Action = actionQueue.take() override fun onTouchEvent(event: MotionEvent): Boolean { if (event.action == MotionEvent.ACTION_UP) { with(rectangles.firstOrNull { it.check(event.x, event.y, width.toFloat(), height.toFloat()) }) { if (this != null) { actionQueue.put(action) } else { actionQueue.offer(Action(Action.Type.NONE), 200, TimeUnit.MILLISECONDS) } } } return true } override fun onDraw(canvas: Canvas) { super.onDraw(canvas) canvas.drawColor(Color.BLACK) instructions(canvas, paint) } }
竞争性集合用于存储矩形- ConcurrentModificationException如果集合由不同线程同时更新和移动(在我们的情况下会发生),则可以避免发生这种情况。类代码DroidMenuInteractor将保持不变,但是DroidMenuRenderer会发生变化。为每个项目在显示屏上添加四个按钮ActionList。将它们放在标题DICE下,均匀分布在屏幕的整个宽度上。好吧,我们不要忘记活动矩形。 class DroidMenuRenderer ( private val surface: DiceSurface, private val loader: StringLoader ) : MenuRenderer { protected val helper = StringLoadHelper(loader) override fun clearScreen() { surface.clearRectangles() surface.updateInstructions { _, _ -> } } override fun drawMainMenu(actions: ActionList) {
在这里,我们再次返回到StringLoader辅助类的界面和功能StringLoadHelper(图中未显示)。第一个的实现有一个名称ResourceStringLoader,用于从(显然)应用程序资源中加载本地化的字符串。但是,由于我们不预先知道资源标识符,因此它是动态进行的-我们被迫在旅途中构造它们。 class ResourceStringLoader(context: Context) : StringLoader { private val packageName = context.packageName private val resources = context.resources override fun loadString(key: String): String = resources.getString(resources.getIdentifier(key, "string", packageName)) }
剩下的就是谈论声音和音乐。android MediaPlayer中有一个很棒的类可以处理这些事情。播放音乐没有什么比这更好的了: class DroidMusicPlayer(private val context: Context): MusicPlayer { private var currentMusic: Music? = null private val player = MediaPlayer() override fun play(music: Music) { if (currentMusic == music) { return } currentMusic = music player.setAudioStreamType(AudioManager.STREAM_MUSIC) val afd = context.assets.openFd("music/${music.toString().toLowerCase()}.mp3") player.setDataSource(afd.fileDescriptor, afd.startOffset, afd.length) player.setOnCompletionListener { it.seekTo(0) it.start() } player.prepare() player.start() } override fun stop() { currentMusic = null player.release() } }
两点。首先,该方法prepare()是同步执行的,如果文件很大(由于缓冲),该方法将使系统挂起。建议您在单独的线程中运行它,或使用异步方法prepareAsync()和OnPreparedListener。其次,最好将回放与活动生命周期关联起来(用户最小化应用程序时暂停,恢复时恢复),但是我们没有。 Ai-ai-ai ...它MediaPlayer也适用于声音,但是如果声音很少且很简单(例如我们的情况),它会起作用SoundPool。它的优点是,当声音文件已经加载到内存中时,它们的播放会立即开始。缺点很明显-可能没有足够的内存(但对于我们来说足够了,我们是谦虚的)。 class DroidSoundPlayer(context: Context) : SoundPlayer { private val soundPool: SoundPool = SoundPool(2, AudioManager.STREAM_MUSIC, 100) private val sounds = mutableMapOf<Sound, Int>() private val rate = 1f private val lock = ReentrantReadWriteLock() init { Thread(SoundLoader(context)).start() } override fun play(sound: Sound) { if (lock.readLock().tryLock()) { try { sounds[sound]?.let { s -> soundPool.play(s, 1f, 1f, 1, 0, rate) } } finally { lock.readLock().unlock() } } } private inner class SoundLoader(private val context: Context) : Runnable { override fun run() { val assets = context.assets lock.writeLock().lock() try { Sound.values().forEach { s -> sounds[s] = soundPool.load( assets.openFd("sound/${s.toString().toLowerCase()}.wav"), 1 ) } } finally { lock.writeLock().unlock() } } } }
创建类时,来自枚举的所有声音Sound都将在单独的流中加载到存储库中。这次我们不使用同步集合,而是使用标准类实现互斥体ReentrantReadWriteLock。现在,最后,我们将内部的所有组件都隐藏在一起了MainActivity-忘了吗?请注意,MainMenu(以及Game随后)必须在单独的线程中启动。 class MainActivity : Activity() { override fun onCreate(savedInstanceState: Bundle?) { super.onCreate(savedInstanceState) Audio.init(DroidSoundPlayer(this), DroidMusicPlayer(this)) val surface = DiceSurface(this) val renderer = DroidMenuRenderer(surface) val interactor = DroidMenuInteractor(surface, ResourceStringLoader(this)) setContentView(surface) Thread { MainMenu(renderer, interactor).start() finish() }.start() } override fun onBackPressed() { } }
实际上,仅此而已。
经历了所有的折磨之后,我们应用程序的主屏幕看起来简直令人赞叹:好吧,也就是说,当一位有才华的艺术家出现在我们的行列中时,这将是惊人的,并且在他的帮助下,这个肮脏的人将被完全重画。有用的链接
我知道,很多人直接滚动到了这一点。没关系-大多数读者已经完全关闭了标签页。那些仍然忍受了所有这些不连贯的chat不休的单位- 尊重与尊重,无限的爱与感激。好吧,链接,当然,没有它们。首先,了解项目的源代码(请记住,项目的当前状态已经远远超出了本文中所考虑的状态):好吧,突然之间,会有人渴望启动并查看项目,并自己收集懒惰,这是工作版本的链接:LINK!在这里,使用了一个方便的启动器来启动(您可以撰写有关其创建的单独文章)。它使用JavaFX,因此可能无法在具有OpenJDK的计算机上启动(写入和帮助),但至少消除了手动注册文件路径的需要。安装帮助包含在readme.txt文件中(还记得吗?)。下载,观看,使用,最后我保持沉默。如果您对项目,所使用的工具,机械原理或某些有趣的解决方案感兴趣,或者我不知道传说游戏,您可以在另一篇文章中对其进行更详细的研究。如果你想要的话。如果您不想要,则只需发送评论,遗憾和建议即可。我会很高兴说话。一切顺利。