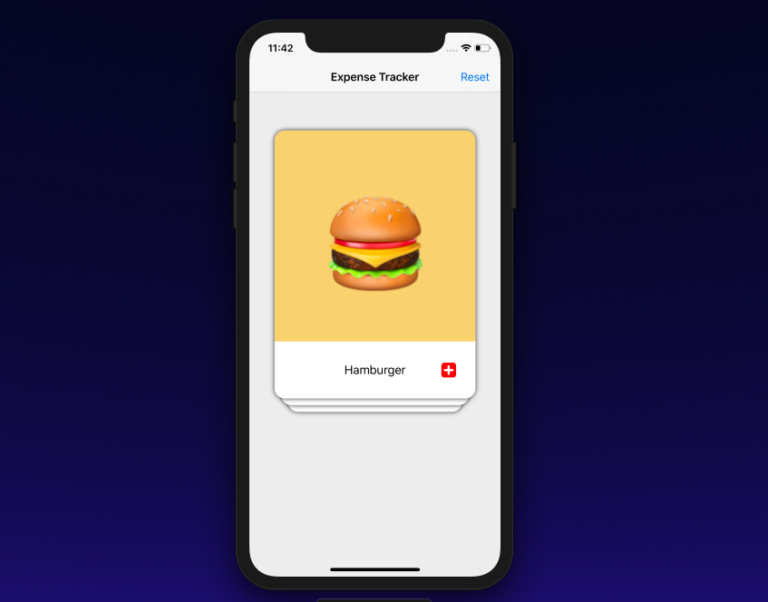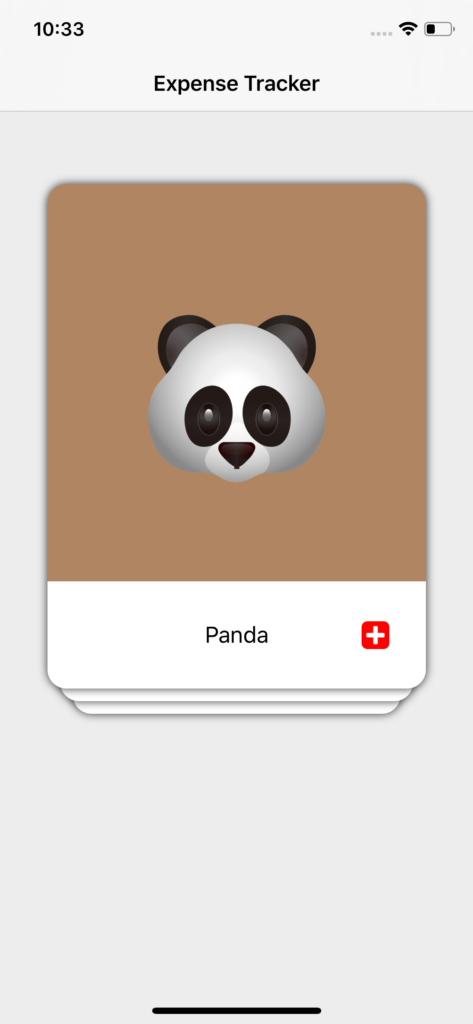
Tinder-我们都知道这是一个约会应用程序,您可以通过向左或向右滑动来拒绝或接受某人。 现在,这种读卡器的想法已用于众多应用中。 如果您已经厌倦了使用表视图和集合视图,则这种显示数据的方法适合您。 关于这个主题的教科书很多,但是这个项目花了我很多时间。
您可以在我的
github上看到完整的项目。
首先,我想赞扬Phill Farrugia在此问题上的
职位 ,然后在Big Mountain工作室的
YouTube系列上就这一主题进行致敬。 那么我们如何制作这个界面呢? 我在出版有关此主题的Phil方面获得了帮助。 本质上,这个想法是创建UIViews并将它们作为子视图插入到容器视图中。 然后,使用索引,我们将为每个UIView进行水平和垂直插入,并稍微改变其宽度。 此外,当我们在一张地图上拖动手指时,将根据新的索引值重新排列视图的所有帧。
我们将从在一个简单的ViewController中创建一个容器视图开始。
class ViewController: UIViewController {
如您所见,我创建了自己的名为SwipeContainerView的类,并使用自动约束配置了stackViewContainer。 不用担心。 SwipeContainerView的大小将为300x400,并且将在X轴上居中,并且仅在Y轴中部上方60像素。
现在我们已经配置了stackContainer,我们将转到StackContainerView的子类并将各种映射加载到其中。 在此之前,我们将创建一个包含三种方法的协议:
protocol SwipeCardsDataSource { func numberOfCardsToShow() -> Int func card(at index: Int) -> SwipeCardView func emptyView() -> UIView? }
将此协议视为TableViewDataSource。 我们的ViewController类符合此协议,将允许将有关我们的数据的信息传输到SwipeCardContainer类。 它具有三种方法:
numberOfCardsToShow () -> Int :返回我们需要显示的卡数。 它只是一个数据数组计数器。card(at index: Int) -> SwipeCardView :返回SwipeCardView(我们将在稍后创建此类)EmptyView >我们将不对其执行任何操作,但是一旦所有卡被删除,调用此委托方法将返回带有某些消息的空视图(在本课程中,我将不会实现,请自行尝试)
将视图控制器与此协议对齐:
extension ViewController : SwipeCardsDataSource { func numberOfCardsToShow() -> Int { return viewModelData.count } func card(at index: Int) -> SwipeCardView { let card = SwipeCardView() card.dataSource = viewModelData[index] return card } func emptyView() -> UIView? { return nil } }
第一种方法将返回数据数组中的元素数。 在第二种方法中,创建一个新的SwipeCardView()实例并发送该索引的数组数据,然后返回SwipeCardView实例。
SwipeCardView是UIView的子类,它具有UIImage,UILabel和手势识别器。 稍后再详细介绍。 我们将使用此协议与容器的表示进行通信。
stackContainer.dataSource = self
上面的代码触发时,将调用reloadData函数,然后调用这些数据源函数。
Class StackViewContainer: UIView { . . var dataSource: SwipeCardsDataSource? { didSet { reloadData() } } ....
ReloadData函数:
func reloadData() { guard let datasource = dataSource else { return } setNeedsLayout() layoutIfNeeded() numberOfCardsToShow = datasource.numberOfCardsToShow() remainingcards = numberOfCardsToShow for i in 0..<min(numberOfCardsToShow,cardsToBeVisible) { addCardView(cardView: datasource.card(at: i), atIndex: i ) } }
在reloadData函数中,我们首先获取纸牌数并将其存储在变量numberOfCardsToShow中。 然后,我们将其分配给另一个名为剩余卡片的变量。 在for循环中,我们使用索引值创建一个映射,该映射是SwipeCardView的实例。
for i in 0..<min(numberOfCardsToShow,cardsToBeVisible) { addCardView(cardView: datasource.card(at: i), atIndex: i ) }
实际上,我们希望一次出现少于3张卡片。 因此,我们使用min函数。 CardsToBeVisible是等于3的常数。如果numberOfToShow大于3,则将仅显示三张卡。 我们根据协议创建以下卡:
func card(at index: Int) -> SwipeCardView
addCardView()函数仅用于将地图作为子视图插入。
private func addCardView(cardView: SwipeCardView, atIndex index: Int) { cardView.delegate = self addCardFrame(index: index, cardView: cardView) cardViews.append(cardView) insertSubview(cardView, at: 0) remainingcards -= 1 }
在此功能中,我们将cardView添加到视图的层次结构中,并将卡添加为子视图,将剩余的卡减少1。一旦将cardView添加为子视图,我们便设置了这些卡的框架。 为此,我们使用另一个函数addCardFrame():
func addCardFrame(index: Int, cardView: SwipeCardView) { var cardViewFrame = bounds let horizontalInset = (CGFloat(index) * self.horizontalInset) let verticalInset = CGFloat(index) * self.verticalInset cardViewFrame.size.width -= 2 * horizontalInset cardViewFrame.origin.x += horizontalInset cardViewFrame.origin.y += verticalInset cardView.frame = cardViewFrame }
这个addCardFrame()逻辑直接取自Phil的帖子。 在这里,我们根据地图的索引设置地图框架。 索引为0的第一张卡片将具有一个框架,就像一个容器一样。 然后,根据插入内容更改框架的原点和地图的宽度。 因此,我们将卡添加到上方卡的右侧一点处,减小其宽度,并且还必须将卡向下拉以产生卡堆叠在一起的感觉。
完成此操作后,您将看到卡堆叠在一起。 还不错!

但是,现在我们需要向地图视图添加滑动手势。 现在让我们将注意力转向SwipeCardView类。
刷卡视图
swipeCardView类是UIView的常规子类。 但是,由于只有Apple工程师才知道的原因,很难为带有圆角的UIView添加阴影。 为了向地图视图添加阴影,我创建了两个UIView。 其中之一是shadowView,然后对其进行swipeView。 本质上,shadowView具有阴影,仅此而已。 SwipeView具有圆角。 在swipeView上,我添加了UIImageView(UILabel)以展示数据和图像。
var swipeView : UIView! var shadowView : UIView!
设置shadowView和swipeView:
func configureShadowView() { shadowView = UIView() shadowView.backgroundColor = .clear shadowView.layer.shadowColor = UIColor.black.cgColor shadowView.layer.shadowOffset = CGSize(width: 0, height: 0) shadowView.layer.shadowOpacity = 0.8 shadowView.layer.shadowRadius = 4.0 addSubview(shadowView) shadowView.translatesAutoresizingMaskIntoConstraints = false shadowView.leftAnchor.constraint(equalTo: leftAnchor).isActive = true shadowView.rightAnchor.constraint(equalTo: rightAnchor).isActive = true shadowView.bottomAnchor.constraint(equalTo: bottomAnchor).isActive = true shadowView.topAnchor.constraint(equalTo: topAnchor).isActive = true } func configureSwipeView() { swipeView = UIView() swipeView.layer.cornerRadius = 15 swipeView.clipsToBounds = true shadowView.addSubview(swipeView) swipeView.translatesAutoresizingMaskIntoConstraints = false swipeView.leftAnchor.constraint(equalTo: shadowView.leftAnchor).isActive = true swipeView.rightAnchor.constraint(equalTo: shadowView.rightAnchor).isActive = true swipeView.bottomAnchor.constraint(equalTo: shadowView.bottomAnchor).isActive = true swipeView.topAnchor.constraint(equalTo: shadowView.topAnchor).isActive = true }
然后,我向这种类型的卡添加了手势识别器,并在识别时调用了选择器功能。 该选择器功能具有很多用于滚动,倾斜等的逻辑。 让我们看看:
@objc func handlePanGesture(sender: UIPanGestureRecognizer){ let card = sender.view as! SwipeCardView let point = sender.translation(in: self) let centerOfParentContainer = CGPoint(x: self.frame.width / 2, y: self.frame.height / 2) card.center = CGPoint(x: centerOfParentContainer.x + point.x, y: centerOfParentContainer.y + point.y) switch sender.state { case .ended: if (card.center.x) > 400 { delegate?.swipeDidEnd(on: card) UIView.animate(withDuration: 0.2) { card.center = CGPoint(x: centerOfParentContainer.x + point.x + 200, y: centerOfParentContainer.y + point.y + 75) card.alpha = 0 self.layoutIfNeeded() } return }else if card.center.x < -65 { delegate?.swipeDidEnd(on: card) UIView.animate(withDuration: 0.2) { card.center = CGPoint(x: centerOfParentContainer.x + point.x - 200, y: centerOfParentContainer.y + point.y + 75) card.alpha = 0 self.layoutIfNeeded() } return } UIView.animate(withDuration: 0.2) { card.transform = .identity card.center = CGPoint(x: self.frame.width / 2, y: self.frame.height / 2) self.layoutIfNeeded() } case .changed: let rotation = tan(point.x / (self.frame.width * 2.0)) card.transform = CGAffineTransform(rotationAngle: rotation) default: break } }
上面的代码的前四行:
let card = sender.view as! SwipeCardView let point = sender.translation(in: self) let centerOfParentContainer = CGPoint(x: self.frame.width / 2, y: self.frame.height / 2) card.center = CGPoint(x: centerOfParentContainer.x + point.x, y: centerOfParentContainer.y + point.y)
首先,我们得到保持手势的想法。 接下来,我们使用转移方法来找出用户击中卡的次数。 第三行本质上是父容器的中点。 我们安装card.center的最后一行。 当用户在卡上滑动手指时,卡的中心将增加x的转换值和y的转换值。 为了获得这种捕捉行为,我们从固定坐标上大大改变了地图的中心点。 手势翻译结束后,我们将其返回给card.center。
对于state.ended:
if (card.center.x) > 400 { delegate?.swipeDidEnd(on: card) UIView.animate(withDuration: 0.2) { card.center = CGPoint(x: centerOfParentContainer.x + point.x + 200, y: centerOfParentContainer.y + point.y + 75) card.alpha = 0 self.layoutIfNeeded() } return }else if card.center.x < -65 { delegate?.swipeDidEnd(on: card) UIView.animate(withDuration: 0.2) { card.center = CGPoint(x: centerOfParentContainer.x + point.x - 200, y: centerOfParentContainer.y + point.y + 75) card.alpha = 0 self.layoutIfNeeded() } return }
我们检查card.center.x是否大于400或card.center.x小于-65。 如果是这样,那么我们将丢弃这些卡,并更改中心。
如果向右滑动:
card.center = CGPoint(x: centerOfParentContainer.x + point.x + 200, y: centerOfParentContainer.y + point.y + 75)
如果向左滑动:
card.center = CGPoint(x: centerOfParentContainer.x + point.x - 200, y: centerOfParentContainer.y + point.y + 75)
如果用户在400到-65之间的中间位置结束手势,那么我们将重置地图的中心。 滑动结束后,我们还将调用委托方法。 稍后再详细介绍。
滑动地图时要获得这种倾斜; 我会很残酷的诚实。 我使用了一些几何图形,并使用了不同的垂线和底线值,然后使用了tan函数来获取旋转角度。 同样,这只是反复试验。 使用point.x和容器的宽度作为两个周长似乎很好。 随意尝试这些值。
case .changed: let rotation = tan(point.x / (self.frame.width * 2.0)) card.transform = CGAffineTransform(rotationAngle: rotation)
现在让我们谈谈委托函数。 我们将使用委托函数在SwipeCardView和ContainerView之间进行通信。
protocol SwipeCardsDelegate { func swipeDidEnd(on view: SwipeCardView) }
此功能将考虑刷卡发生的类型,我们将采取几个步骤将其从子视图中删除,然后重做其下方卡片的所有框架。 方法如下:
func swipeDidEnd(on view: SwipeCardView) { guard let datasource = dataSource else { return } view.removeFromSuperview() if remainingcards > 0 { let newIndex = datasource.numberOfCardsToShow() - remainingcards addCardView(cardView: datasource.card(at: newIndex), atIndex: 2) for (cardIndex, cardView) in visibleCards.reversed().enumerated() { UIView.animate(withDuration: 0.2, animations: { cardView.center = self.center self.addCardFrame(index: cardIndex, cardView: cardView) self.layoutIfNeeded() }) } }else { for (cardIndex, cardView) in visibleCards.reversed().enumerated() { UIView.animate(withDuration: 0.2, animations: { cardView.center = self.center self.addCardFrame(index: cardIndex, cardView: cardView) self.layoutIfNeeded() }) } } }
首先从超级视图中删除该视图。 完成此操作后,检查是否还有剩余的卡。 如果有,那么我们将为要创建的卡创建一个新索引。 我们将减去要与其他卡一起显示的卡总数来创建newIndex。 然后,我们将地图添加为子视图。 但是,此新卡将是最低的,因此我们发送的2卡将基本上保证添加的帧与索引2或最低的卡匹配。
要为剩余卡片的帧设置动画,我们将使用子视图索引。 为此,我们将创建一个数组visibleCards,该数组将容器的所有子视图包含为一个数组。
var visibleCards: [SwipeCardView] { return subviews as? [SwipeCardView] ?? [] }
但是,问题在于visibleCards数组将具有反向的子视图索引。 因此,第一张牌将排在第三位,第二张牌将保持在第二位,第三张牌将处于第一位。 为了防止这种情况的发生,我们将以相反的顺序运行visibleCards数组,以获取实际的子视图索引,而不是它们在visibleCards数组中的位置。
for (cardIndex, cardView) in visibleCards.reversed().enumerated() { UIView.animate(withDuration: 0.2, animations: { cardView.center = self.center self.addCardFrame(index: cardIndex, cardView: cardView) self.layoutIfNeeded() }) }
因此,现在我们将更新其余cardViews的框架。
仅此而已。 这是呈现少量数据的理想方法。