前言
故事始于半年前我购买了Yamaha A-S501放大器的事实。
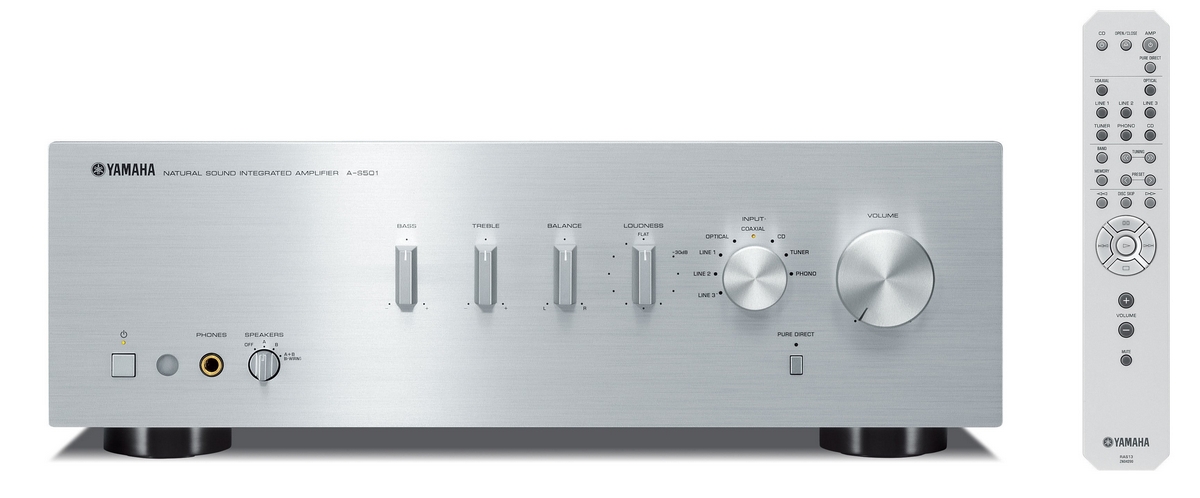
附带的遥控器可以控制放大器和Yamaha CD播放器,而我自然没有。 因此,根本没有使用遥控器上的大多数按钮。 通常,控制台本身不是必需的,它总是放在架子上。
但是,看着他,我被最大程度地使用遥控器的想法所困扰。 例如,躺在沙发上看电影,快速移动手后退,暂停等会很方便。 当然,出于这些目的,我曾经使用智能手机上的应用程序来控制MPC-HC,Foobar2000程序,但是远程控制将更快,更方便。
就像他们说的那样,眼睛在害怕,双手在做。 通过选择技术,一切都将一目了然。 Arduino-我很想和她一起玩,这是一个很大的机会。 对于按钮处理程序,Node.js,因为 我专注于javascript,并且不想切换上下文。
所以,让我们开始...
现成的解决方案
我可以找到的现有类似物之一是Flirc 。 使用它,您可以在计算机的物理键盘上模拟击键。

这种红外接收器的价格为100兹罗提(约合28美元)。 展望未来,它的价格是我的两倍。 另外,在功能方面,结果更好(主观)。
采购零件

我需要:
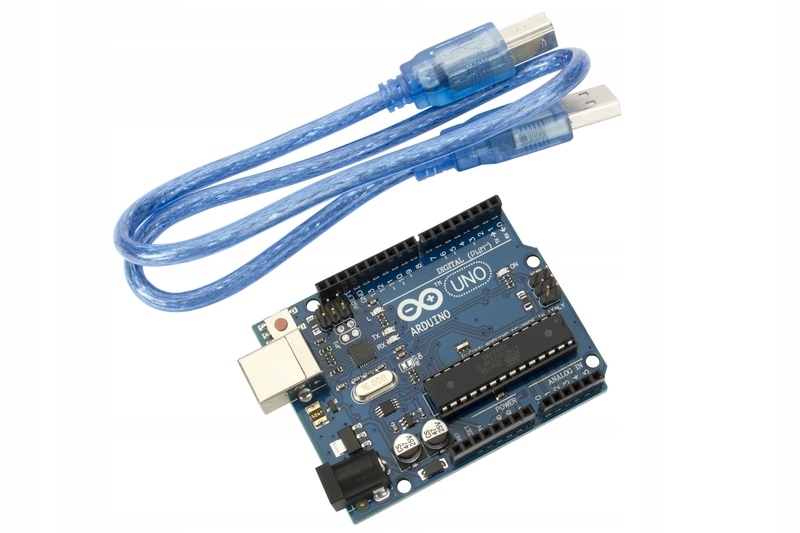
- 实际上,Arduino Uno开发板本身。 值得注意的是,这不是原始板,而是某种波兰克隆。 根据描述-它与原始版本完全相似。 (27.90zł)
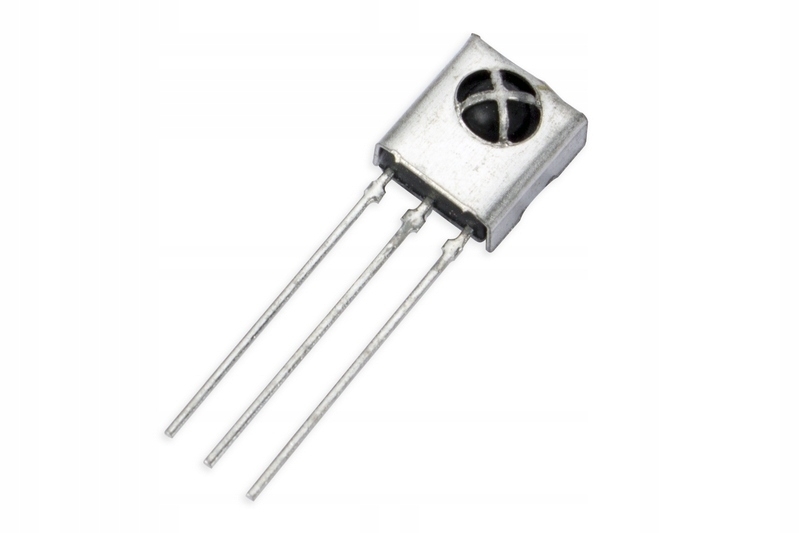
- 红外接收器VS1838B HX1838(电压:3.3-5 V,频率:38 kHz,角度:90°)(1.30zł)
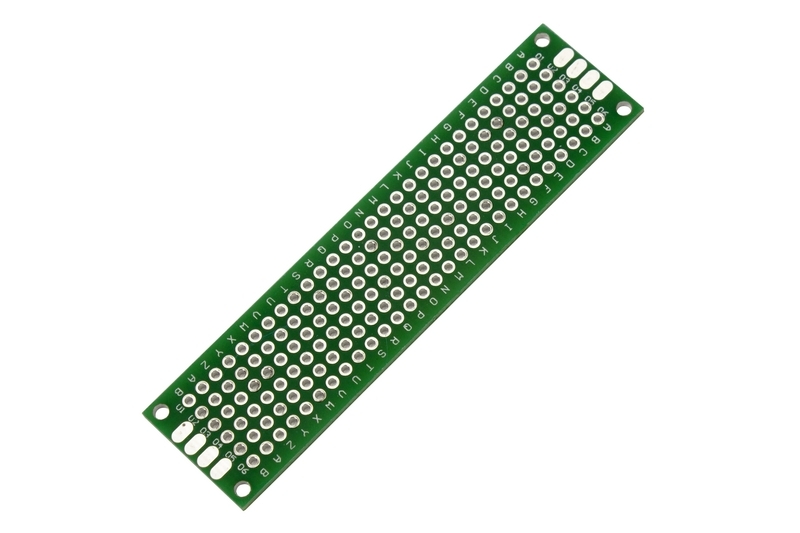
- 原型板+电线(13.90zł)
- 用一块空板焊接所有东西(2.10zł)
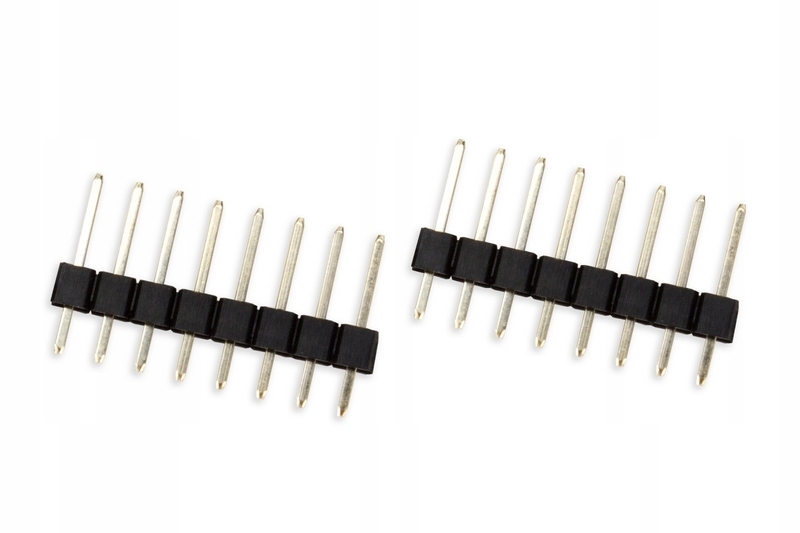
- 连接板的连接器(2,51zł)
总计:47,71zł(≈$ 14)
软体类
在等待交付时,我开始编写“驱动程序”,该驱动程序应从Arduino的串行端口读取数据,并对遥控器上的按下按钮执行某些操作。
想法是能够自定义所有内容。 可以为遥控器上的每个按钮分配某些类型的某些操作:
{ "key": "space" }
{ "exec": ["c:\\Program Files (x86)\\foobar2000\\foobar2000.exe", "/play"] }
{ "if": { "running": "mpc-hc.exe" }, "then": [ ... ], "else": [ ... ] }
每种类型都有自己的处理程序,这些处理程序具有相同的API,因此可以将所有内容折叠到一个简单的循环中,该循环按顺序启动所有处理程序。
const runHandlers = require('./handlers') module.exports = async function run(actions) { if (!Array.isArray(actions)) { actions = [actions] } for (const act of actions) { await runHandlers(act) } }
测试可以告诉您所有内容,而不是一千个文档的单词:
run when "exec" action √ executes the specified file without args (as array) (4ms) √ executes the specified file without args (as string) (1ms) √ executes the specified file with args √ rejects if "exec" has wrong type (5ms) when "key" action √ sends the specified key press if passed string (1ms) √ sends the specified key combination if passed array √ rejects if "key" has wrong type (1ms) when "if" action √ rejects if no "then" (1ms) √ rejects if operator is not supported when operator if "running" √ runs "then" actions if the condition is true (1ms) √ runs "else" actions if the condition is false √ does not run anything if the condition is false and no "else" statement (1ms) when multiple actions √ executes all actions (1ms) when multiple actions are mixed into one √ runs only first one alphabetically
等待珍贵的细节仍然是等待。
铁
我承认,我没有发明任何新东西,所有一切都已经摆在我面前。 我只是使用了文章如何在Arduino上设置IR遥控器和接收器的现成图表。
该方案非常简单:
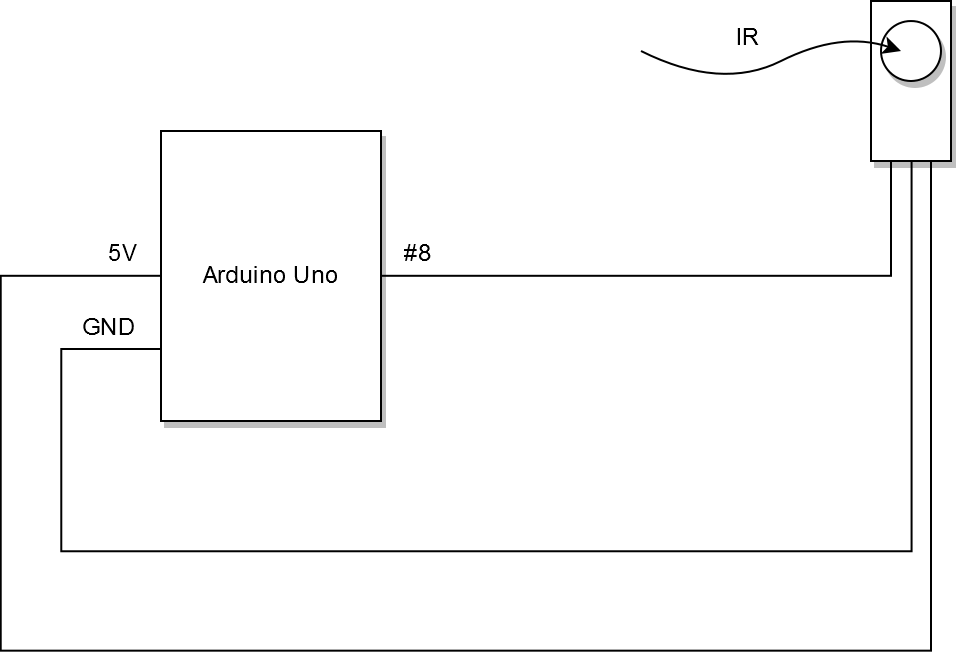
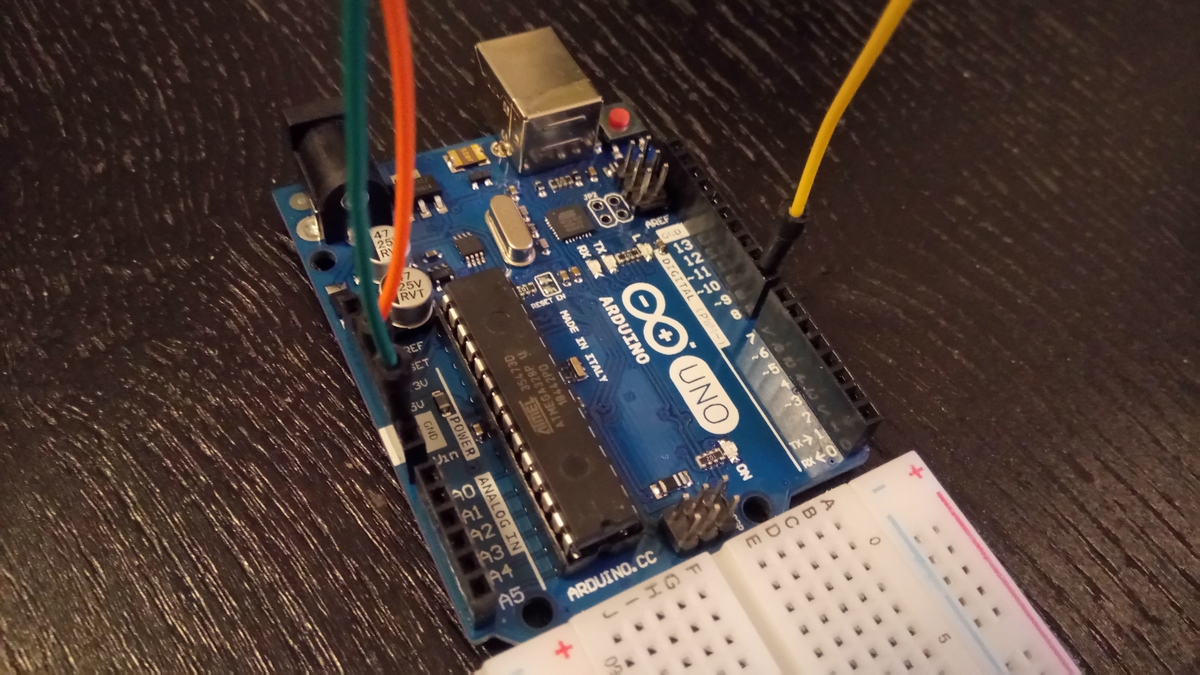
在实践中:

韧体
我还老实地从文章中借用了固件,因为它的工作,我将需要IRremote Arduino库 。
我用遥控器上的实际按钮代码替换了按钮代码:
void loop() { if (irrecv.decode(&results)) { if (results.value == 0xFFFFFFFF) { results.value = key_value; } switch (results.value) { case 0x9E6140BF: Serial.println("play"); break; case 0x9E61AA55: Serial.println("pause"); break; case 0x5EA1A857: Serial.println("cd"); break; default: Serial.println(results.value, HEX); break; } key_value = results.value; irrecv.resume(); } }
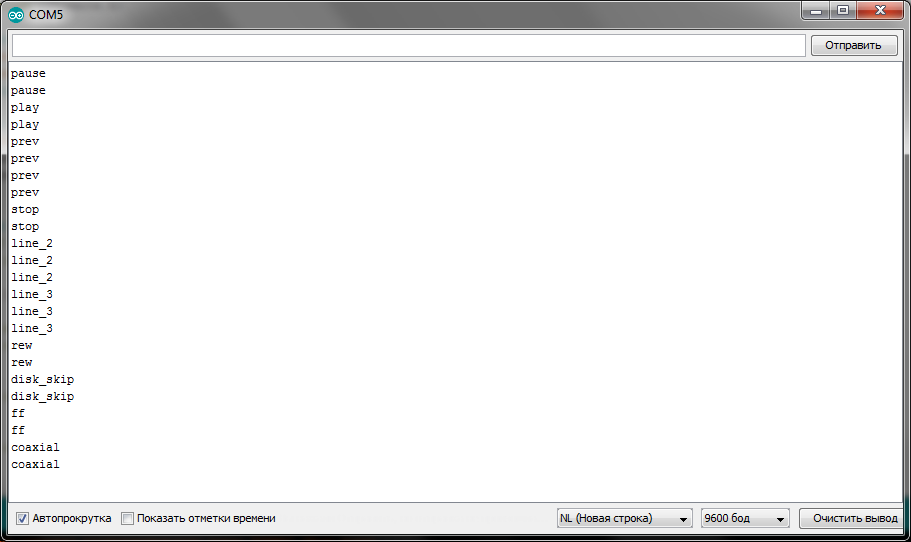
一旦按下的按钮的名称出现在Arduino IDE的端口Monitor窗口中,就需要向驱动程序添加一个用于使用串行端口的组件。
结果是对串行端口库的包装,实际上是来自端口的数据流:
const SerialPort = require('serialport') module.exports = class SerialPortReader { constructor(port) { const serialPort = new SerialPort(port) this.lineStream = serialPort.pipe(new SerialPort.parsers.Readline()) } start(handler) { this.lineStream.on('readable', () => { const data = this.lineStream.read().trim() handler(data) }) } }
后来,有必要将处理程序转变为“防抖”功能,因为遥控器接收到一个快速重复的信号,即使短按按钮,该信号也能发出多次信号。 但是,对于所有按钮,例如对于音量,删除所有按钮的选项也不是完全合适的。
最终代码如下所示:
const debounce = require('debounce') const settings = require('./lib/settings') const run = require('./lib/run') const SerialPortReader = require('./lib/SerialPortReader') const simpleHandle = async button => { const actions = settings.mappings[button] if (!actions) { console.warn(`Action not found for remote control button "${button}"`) return } try { await run(actions) } catch (e) { console.error(e.message) process.exit(1) } } const debouncedHandle = debounce(simpleHandle, settings.debounceDelay, true) const callHandleFn = button => { return (settings.noDebounce.includes(button) ? simpleHandle : debouncedHandle)(button) } const reader = new SerialPortReader(settings.serialPort) reader.start(callHandleFn)
成立独立董事会
确保原型可以正常工作后,我继续创建一个电路板。 值得注意的是,对我而言,这是此类事务的首次经验。 我没有带小针的合适烙铁,只有老式的苏联大针扎紧了。
在痛苦中,我设法焊接了“脚”(两个大的8针连接器中,只有2针幸存了)。 其他一切都更容易。
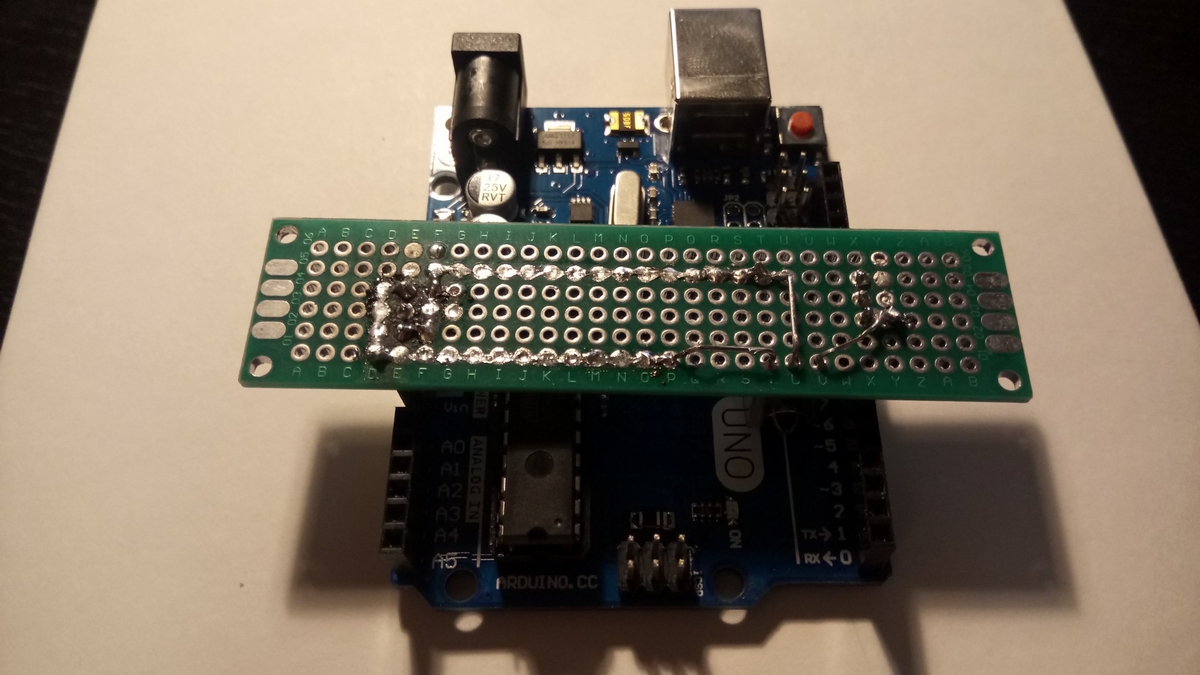
(弯曲。最有可能是由于Arduino克隆。嵌套相对于彼此是不均匀的。)
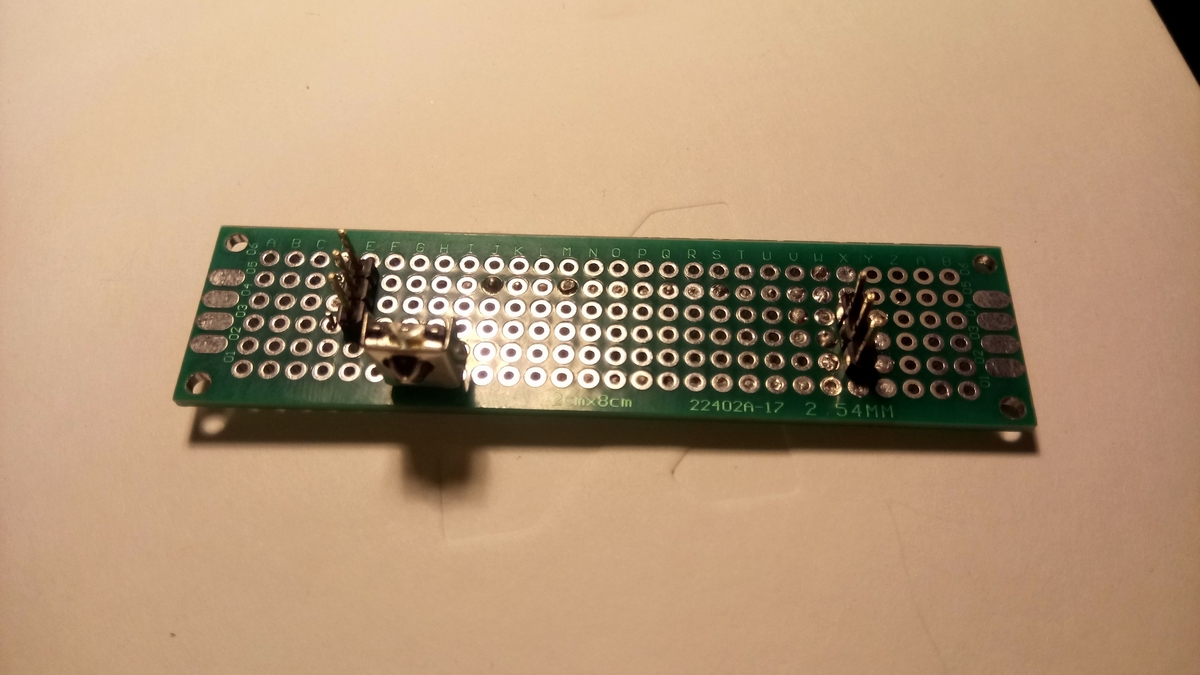
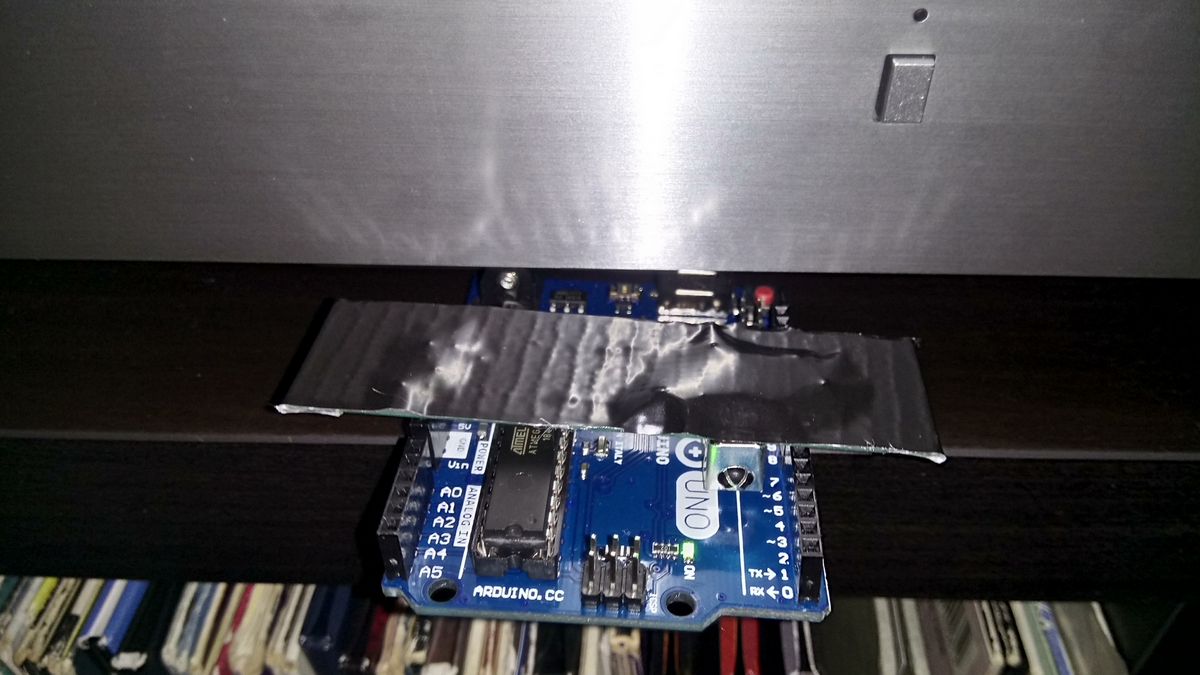
我故意将红外接收器放在两块板之间。 因此,该设备很容易安装在放大器下面。 我决定通过用锡连接板上的孔而不是用电线来连接来制作轨道。 最后,我粘上胶带,以使电路板不会在放大器的金属外壳上闭合。
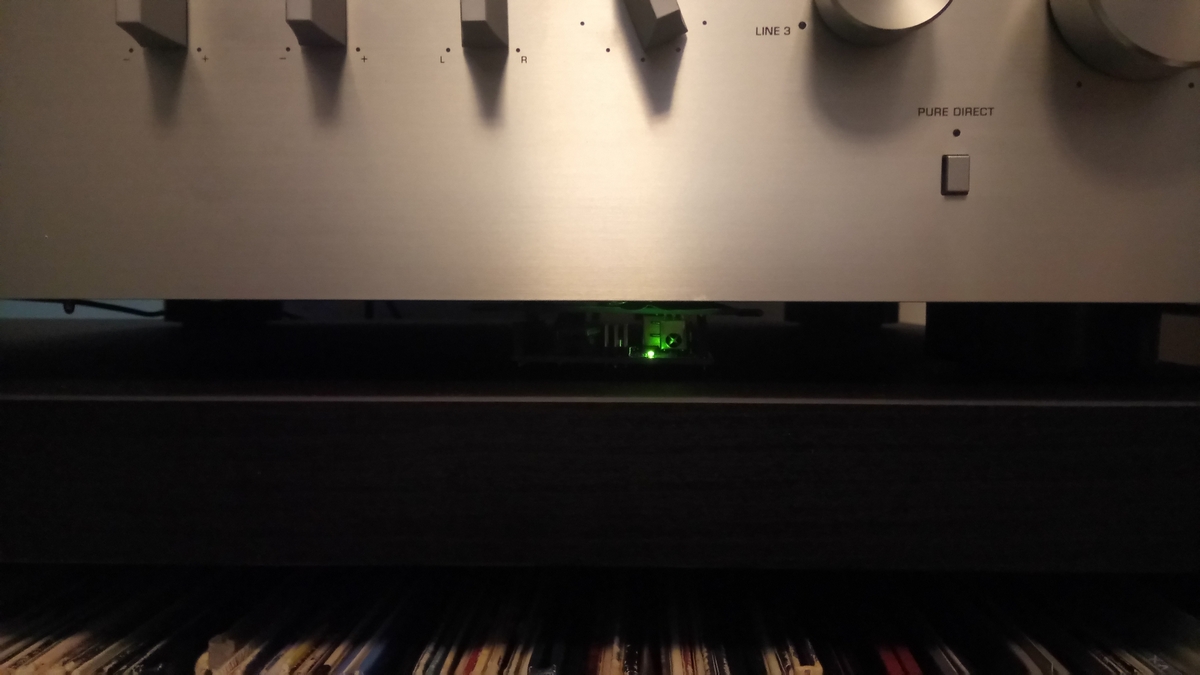
结果是:≈$ 14的功能完备的设备和软件。 所获得的经验以及所做工作的喜悦和结果是无价的! :-)
感谢您的关注!
演示:
来源Github 。
PS感谢拉曼奇克 '你的咨询:)