大家好,我叫Denis,我们正在开发iOS应用程序的订阅分析服务-Apphud 。
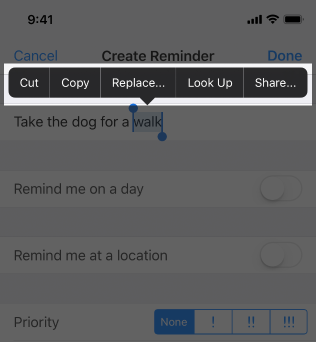
在WWDC 2019上,Apple引入了一种与应用程序界面进行交互的新方法: 上下文菜单 。 他们看起来像这样:

在本文中,我们将考虑使用它们的一些微妙之处,并学习如何制作它们。
上下文菜单是“ Peek and Pop”技术的逻辑延续,当用户可以通过用力按下元素来打开元素的预览时。 但是它们之间有几个显着差异。
要打开上下文菜单,用户只需将手指按住所需的项目或用力按即可(如果设备支持3D Touch)。
使用上下文菜单时的建议
Apple的人机界面指南建议您在设计上下文菜单时遵循这些指南。
正确设计
如果在某些地方为某些元素添加菜单,而在其他地方没有为相似元素添加菜单,那将不是很好。 然后,用户会认为该应用程序无法正常运行。
仅在菜单中包含必要的内容
上下文菜单是存放最常用命令的好地方。 “最经常”是一个关键词。 不要连续添加所有内容。
使用子菜单
使用子菜单可以使用户更容易浏览。 给菜单项简单明了的名称。
使用不超过1级的嵌套
尽管子菜单可以使导航更容易,但是他们可以轻松地使其复杂化。 苹果不建议使用超过1级的嵌套。
将最常用的物品放在顶部
人们主要关注菜单的顶部,因此他们可以更轻松地导航您的应用程序。
使用分组
分组相似菜单项
避免在同一项目上同时使用上下文菜单和编辑菜单
它们之间可能会发生冲突,因为两者都需要长时间调用。
不要在菜单中添加单独的“打开”按钮
用户只需轻按即可打开一个项目。 额外的“打开”按钮将是多余的。
UIView最简单的上下文菜单
现在我们已经学习了使用上下文菜单的基本规则,让我们继续练习。 当然,菜单仅适用于iOS 13及更高版本,并且要进行测试,您将需要Xcode11。您可以在此处下载Xcode 11的测试版。
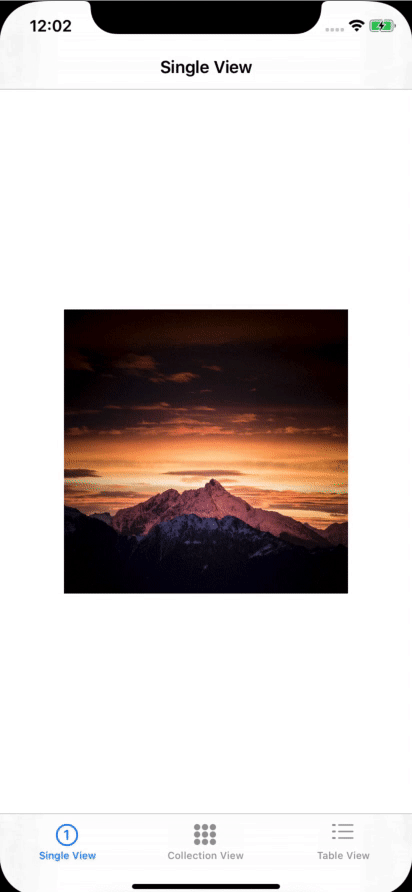
让我们添加一个上下文菜单,例如在UIImageView , 如上面的动画所示 。
为此,只需将UIImageView对象添加到控制器并编写几行代码,例如,在viewDidLoad方法中:
class SingleViewController: UIViewController { @IBOutlet var imageView: UIImageView! override func viewDidLoad() { super.viewDidLoad() imageView.isUserInteractionEnabled = true let interaction = UIContextMenuInteraction(delegate: self) imageView.addInteraction(interaction) } }
UIContextMenuInteraction , UIContextMenuInteraction类的对象。 构造函数要求您指定负责菜单的委托。 让我们稍后再讨论。 并使用addInteraction方法addInteraction将菜单添加到图片中。
现在仍然需要实现UIContextMenuInteractionDelegate协议。 它只有一种强制性方法负责创建菜单:
extension SingleViewController: UIContextMenuInteractionDelegate { func contextMenuInteraction(_ interaction: UIContextMenuInteraction, configurationForMenuAtLocation location: CGPoint) -> UIContextMenuConfiguration? { let configuration = UIContextMenuConfiguration(identifier: nil, previewProvider: nil) { actions -> UIMenu<UIAction>? in let save = UIAction(__title: "My Button", image: nil, options: []) { action in
如果在此方法中返回nil ,则不会调用上下文菜单。 在方法本身内部,我们创建UIContextMenuConfiguration类的对象。 创建时,我们传递以下参数:
元素本身根本没有地方创建:它们指示名称,一个可选图标和一个单击菜单项的处理程序。 仅此而已!
添加一个子菜单
让事情复杂一些。 在我们的图片中添加两个菜单:“保存”和“编辑...”。 通过单击“编辑...”,将打开一个子菜单,其中包含“旋转”和“删除”项。 它看起来应该像这样:
为此,请重写协议方法UIContextMenuInteractionDelegate ,如下所示:
func contextMenuInteraction(_ interaction: UIContextMenuInteraction, configurationForMenuAtLocation location: CGPoint) -> UIContextMenuConfiguration? { let configuration = UIContextMenuConfiguration(identifier: nil, previewProvider: nil) { actions -> UIMenu<UIAction>? in
在这里,我们依次创建“保存”,“旋转”和“删除”按钮,将最后两个添加到“编辑...”子菜单中,并将所有内容包装在主上下文菜单中。
将上下文菜单添加到UICollectionView
让我们向UICollectionView添加一个上下文菜单。 长按单元格,将向用户显示带有“存档”项目的菜单,如下所示:
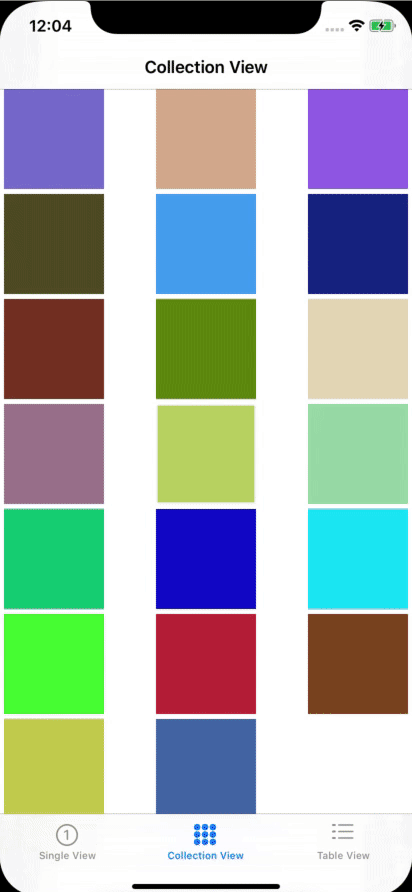
向UICollectionView添加上下文菜单很简单:只需实现可选的func collectionView(_ collectionView: UICollectionView, contextMenuConfigurationForItemAt indexPath: IndexPath, point: CGPoint) -> UIContextMenuConfiguration?方法func collectionView(_ collectionView: UICollectionView, contextMenuConfigurationForItemAt indexPath: IndexPath, point: CGPoint) -> UIContextMenuConfiguration? UICollectionViewDelegate协议。 这是我们得到的:
override func collectionView(_ collectionView: UICollectionView, contextMenuConfigurationForItemAt indexPath: IndexPath, point: CGPoint) -> UIContextMenuConfiguration? { let configuration = UIContextMenuConfiguration(identifier: nil, previewProvider: nil) { actions -> UIMenu<UIAction>? in let action = UIAction(__title: "Archive", image: UIImage(systemName: "archivebox.fill"), options: .destructive) { action in
与以前一样,在此创建元素和菜单本身。 现在,在单元格上长按(强烈)单击,用户将看到一个上下文菜单。
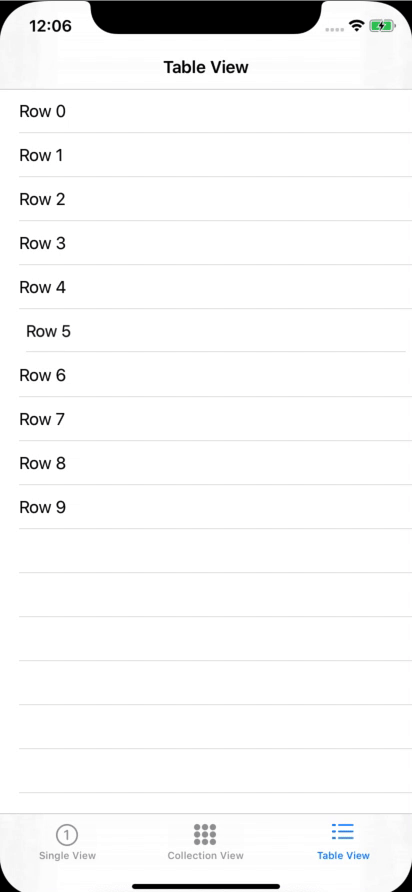
将上下文菜单添加到UITableView
这里的一切都类似于UICollectionView 。 您需要像这样实现UITableViewDelegate协议的contextMenuConfigurationForRowAt方法:
override func tableView(_ tableView: UITableView, contextMenuConfigurationForRowAt indexPath: IndexPath, point: CGPoint) -> UIContextMenuConfiguration? { let configuration = UIContextMenuConfiguration(identifier: nil, previewProvider: nil) { actions -> UIMenu<UIAction>? in let action = UIAction(__title: "Custom action", image: nil, options: []) { action in
但是,如果我们想在上下文菜单中使用自定义屏幕怎么办? 例如,这:
为此,在创建UIContextMenuConfiguration必须将所需的UIViewController传递给previewProvider 。 这是实现此目的的代码示例:
class PreviewViewController: UIViewController { static func controller() -> PreviewViewController { let storyboard = UIStoryboard(name: "Main", bundle: nil) let controller = storyboard.instantiateViewController(withIdentifier: "PreviewViewController") as! PreviewViewController return controller } } extension TableViewController: UITableViewDelegate { override func tableView(_ tableView: UITableView, contextMenuConfigurationForRowAt indexPath: IndexPath, point: CGPoint) -> UIContextMenuConfiguration? { let configuration = UIContextMenuConfiguration(identifier: nil, previewProvider: { () -> UIViewController? in
在示例中,从情节PreviewViewController初始化PreviewViewController并显示在上下文菜单中。
仍然需要向此ViewController添加点击处理。 为此,请实现UITableViewDelegate协议的willCommitMenuWithAnimator方法。 处理程序本身将放置在animator.addCompletion :
override func tableView(_ tableView: UITableView, willCommitMenuWithAnimator animator: UIContextMenuInteractionCommitAnimating) { animator.addCompletion {
结论
上下文菜单是用于用户与应用程序交互的功能强大的新工具。 而且,如您所见,它们的实现非常简单。 但是,您不要忘记,在iOS 13的发行版本发布之前,方法可能会发生变化。
是否想在10分钟内在iOS应用中实现订阅? 整合Apphud并:
- 仅使用一种方法进行购买;
- 自动跟踪每个用户的订阅状态;
- 轻松整合订阅优惠
- 将订阅事件发送到Amplitude,Mixpanel,Slack和Telegram,并考虑到用户的本地货币;
- 降低应用程序的客户流失率并返回未订阅的用户。
读什么?