
Kubernetes已迅速成为交付和扩展容器化应用程序以及对其进行管理的标准。 这是一个非常灵活且用途广泛的开源解决方案。 它具有大量的文档,在其中找到合适的部分并不总是那么容易。 因此,Kubernetes很难掌握。 在计划了集群之后,您仍然需要安装它,但是在这里,一切也不顺利。 因此,有一些部署工具(例如Kubespray)可以简化工作。 我将讨论在OpenStack云(Open Telekom云)中使用Kubespray自动部署Kubernetes集群的过程。
为了自动部署Kubernetes,Kubespray使用Ansible应用程序初始化,配置和交付工具。 Kubespray提供了一个库,用于初始化不同云平台上的资源。 为此,请使用“基础结构作为代码”工具Terraform。 Kubespray项目现在支持适用于AWS,OpenStack和Packet Cloud的Terraform 。 此工具与OpenStack库一起使用,以在这种情况下提供基础结构。
要求条件
首先,让我们看一下部署的先决条件。 它们分为两类:Kubespray的需求和提供程序库的需求。
Kubespray需要以下组件:
- Python 2.7(或更高版本)
- Ansible 2.7(或更高版本)
- Jinja 2.9(或更高版本)
OpenStack提供程序库要求:
要安装Terraform,您需要从Hashicorp网站下载适当的软件包并解压缩。 然后,解压缩文件的路径必须保存在PATH变量中。 使用terraform命令检查是否已安装所有组件。 在这里找到更多。
根据操作系统的不同,可以使用几个命令来安装Ansible。 请参阅Ansible文档。 在这里,我使用Ubuntu并按如下所示安装Ansible。
sudo apt update sudo apt install ansible
然后,您需要安装Kubespray依赖项。 这是通过以下命令完成的。 但是首先,您需要克隆存储库。
git clone https://github.com/kubernetes-sigs/kubespray sudo pip install -r requirements.txt
要使用Open Telekom Cloud,请在根目录中使用.ostackrc配置访问数据,并加载环境变量。
集群规划
Kubernetes非常灵活,因此集群可以适应您的需求。 在这里,我们将不考虑群集的其他选项。 您可以在Kubernetes文档中从头开始创建自定义集群中阅读有关此内容的信息。 例如,我们将使用具有etcd和两个工作节点的主服务器创建集群。 群集没有浮动IP,因此Internet上将不可用。
我们还需要选择CNI(容器网络接口)。 有几个选项(纤毛,印花布,法兰绒,编织网等),但是我们将采用法兰绒,不需要进行配置。 Calico可以使用,但是您需要为服务和Pod的子网配置OpenStack Neutron端口 。
要在部署后在Kubernetes仪表板中管理集群,我们需要安装此仪表板。
集群配置
在存储库目录中使用$ CLUSTER变量中的所需名称运行以下命令。
cp -LRp contrib/terraform/openstack/sample-inventory \ inventory/$CLUSTER cd inventory/$CLUSTER ln -s ../../contrib/terraform/openstack/hosts ln -s ../../contrib
执行完命令后,编辑清单/ $ CLUSTER / cluster.tf文件。
# your Kubernetes cluster name here cluster_name = "k8s-test-cluster" az_list=["eu-de-01", "eu-de-02"] dns_nameservers=["100.125.4.25", "8.8.8.8"] # SSH key to use for access to nodes public_key_path = "~/.ssh/id_rsa.pub" # image to use for bastion, masters, standalone etcd instances, and nodes image = "Standard_CentOS_7_latest" # user on the node (ex. core on Container Linux, ubuntu on Ubuntu, etc.) ssh_user = "linux" # 0|1 bastion nodes number_of_bastions = 0 flavor_bastion = "s2.xlarge.4" # standalone etcds number_of_etcd = 0 flavor_etcd = "s2.xlarge.4" # masters number_of_k8s_masters = 0 number_of_k8s_masters_no_etcd = 0 number_of_k8s_masters_no_floating_ip = 1 number_of_k8s_masters_no_floating_ip_no_etcd = 0 flavor_k8s_master = "s2.xlarge.4" # nodes number_of_k8s_nodes = 0 number_of_k8s_nodes_no_floating_ip = 2 flavor_k8s_node = "s2.xlarge.4" # GlusterFS # either 0 or more than one #number_of_gfs_nodes_no_floating_ip = 1 #gfs_volume_size_in_gb = 150 # Container Linux does not support GlusterFS image_gfs = "Standard_CentOS_7_latest" # May be different from other nodes #ssh_user_gfs = "linux" #flavor_gfs_node = "s2.xlarge.4" # networking network_name = "k8s-test-network" external_net = "Externel_Network_ID" subnet_cidr = "192.168.100.0/24" floatingip_pool = "admin_external_net" bastion_allowed_remote_ips = ["0.0.0.0/0"]
变量说明在这里阅读。 在此示例中,我们将基于最新版本的CentOS 7和s2.xlarge.4创建一个具有一个主节点和两个Kubernetes工作节点的集群。 etcd也安装在向导上。
基础架构部署
现在,我们准备使用Terraform部署集群基础结构。 该图显示了部署后基础结构的外观。 详细信息如下。

要开始Terraform部署,请转到清单/ $ CLUSTER /目录并运行以下命令。 首先,安装必要的插件。 为此,我们需要使用init参数和插件路径。
terraform init ../../contrib/terraform/openstack
此操作非常快。 Terraform现在准备使用apply参数部署基础结构。
terraform apply -var-file=cluster.tf ../../contrib/terraform/openstack
几秒钟后,Terraform应该显示类似的结果,并且实例将可用。
Apply complete! Resources: 3 added, 0 changed, 0 destroyed.
要检查服务器的可用性,请运行以下Ansible命令,然后我们将转到存储库的根文件夹。
$ ansible -i inventory/$CLUSTER/hosts -m ping all example-k8s_node-1 | SUCCESS => { "changed": false, "ping": "pong" } example-etcd-1 | SUCCESS => { "changed": false, "ping": "pong" } example-k8s-master-1 | SUCCESS => { "changed": false, "ping": "pong" }
Kubernetes集群部署
部署了基础架构,现在您需要安装Kubernetes集群。 首先,在文件清单/$CLUSTER/group_vars/all/all.yml中配置群集变量。 在这里,您需要将cloud_provider的值设置为openstack,对于bin_dir,将设置文件的安装路径。 在我们的示例中,我们使用以下配置。
## Directory where etcd data stored etcd_data_dir: /var/lib/etcd ## Directory where the binaries will be installed bin_dir: /usr/local/bin ## The access_ip variable is used to define how other nodes should access ## the node. This is used in flannel to allow other flannel nodes to see ## this node for example. The access_ip is really useful AWS and Google ## environments where the nodes are accessed remotely by the "public" ip, ## but don't know about that address themselves. #access_ip: 1.1.1.1 ## External LB example config ## apiserver_loadbalancer_domain_name: "elb.some.domain" #loadbalancer_apiserver: # address: 1.2.3.4 # port: 1234 ## Internal loadbalancers for apiservers #loadbalancer_apiserver_localhost: true ## Local loadbalancer should use this port instead, if defined. ## Defaults to kube_apiserver_port (6443) #nginx_kube_apiserver_port: 8443 ### OTHER OPTIONAL VARIABLES ## For some things, kubelet needs to load kernel modules. For example, dynamic kernel services are needed ## for mounting persistent volumes into containers. These may not be loaded by preinstall kubernetes ## processes. For example, ceph and rbd backed volumes. Set to true to allow kubelet to load kernel ## modules. #kubelet_load_modules: false ## Upstream dns servers used by dnsmasq #upstream_dns_servers: # - 8.8.8.8 # - 8.8.4.4 ## There are some changes specific to the cloud providers ## for instance we need to encapsulate packets with some network plugins ## If set the possible values are either 'gce', 'aws', 'azure', 'openstack', 'vsphere', 'oci', or 'external' ## When openstack is used make sure to source in the openstack credentials ## like you would do when using nova-client before starting the playbook. ## Note: The 'external' cloud provider is not supported. ## TODO(riverzhang): https://kubernetes.io/docs/tasks/administer-cluster/running-cloud-controller/#running-cloud-controller-manager cloud_provider: openstack ## Set these proxy values in order to update package manager and docker daemon to use proxies #http_proxy: "" #https_proxy: "" ## Refer to roles/kubespray-defaults/defaults/main.yml before modifying no_proxy #no_proxy: "" ## Some problems may occur when downloading files over https proxy due to ansible bug ## https://github.com/ansible/ansible/issues/32750. Set this variable to False to disable ## SSL validation of get_url module. Note that kubespray will still be performing checksum validation. #download_validate_certs: False ## If you need exclude all cluster nodes from proxy and other resources, add other resources here. #additional_no_proxy: "" ## Certificate Management ## This setting determines whether certs are generated via scripts. ## Chose 'none' if you provide your own certificates. ## Option is "script", "none" ## note: vault is removed #cert_management: script ## Set to true to allow pre-checks to fail and continue deployment #ignore_assert_errors: false ## The read-only port for the Kubelet to serve on with no authentication/authorization. Uncomment to enable. #kube_read_only_port: 10255 ## Set true to download and cache container download_container: false ## Deploy container engine # Set false if you want to deploy container engine manually. #deploy_container_engine: true ## Set Pypi repo and cert accordingly #pyrepo_index: https://pypi.example.com/simple #pyrepo_cert: /etc/ssl/certs/ca-certificates.crt
现在配置清单/$CLUSTER/group_vars/k8s-cluster/k8s-cluster.yml文件。 对于kube_network_plugin变量,设置flannel或calico(您需要配置OpenStack Neutron ports )。 我们将有这个法兰绒,不需要配置。 对于resolvconf_mode变量,设置docker_dns。 该值告诉Kubespray设置Docker守护程序的参数。 在下面,您将看到我们集群的示例配置。
# Kubernetes configuration dirs and system namespace. # Those are where all the additional config stuff goes # the kubernetes normally puts in /srv/kubernetes. # This puts them in a sane location and namespace. # Editing those values will almost surely break something. kube_config_dir: /etc/kubernetes kube_script_dir: "{{ bin_dir }}/kubernetes-scripts" kube_manifest_dir: "{{ kube_config_dir }}/manifests" # This is where all the cert scripts and certs will be located kube_cert_dir: "{{ kube_config_dir }}/ssl" # This is where all of the bearer tokens will be stored kube_token_dir: "{{ kube_config_dir }}/tokens" # This is where to save basic auth file kube_users_dir: "{{ kube_config_dir }}/users" kube_api_anonymous_auth: true ## Change this to use another Kubernetes version, eg a current beta release kube_version: v1.13.3 # kubernetes image repo define kube_image_repo: "gcr.io/google-containers" # Where the binaries will be downloaded. # Note: ensure that you've enough disk space (about 1G) local_release_dir: "/tmp/releases" # Random shifts for retrying failed ops like pushing/downloading retry_stagger: 5 # This is the group that the cert creation scripts chgrp the # cert files to. Not really changeable... kube_cert_group: kube-cert # Cluster Loglevel configuration kube_log_level: 2 # Directory where credentials will be stored credentials_dir: "{{ inventory_dir }}/credentials" # Users to create for basic auth in Kubernetes API via HTTP # Optionally add groups for user kube_api_pwd: "{{ lookup('password', credentials_dir + '/kube_user.creds length=15 chars=ascii_letters,digits') }}" kube_users: kube: pass: "{{kube_api_pwd}}" role: admin groups: - system:masters ## It is possible to activate / deactivate selected authentication methods (basic auth, static token auth) #kube_oidc_auth: false #kube_basic_auth: false #kube_token_auth: false ## Variables for OpenID Connect Configuration https://kubernetes.io/docs/admin/authentication/ ## To use OpenID you have to deploy additional an OpenID Provider (eg Dex, Keycloak, ...) # kube_oidc_url: https:// ... # kube_oidc_client_id: kubernetes ## Optional settings for OIDC # kube_oidc_ca_file: "{{ kube_cert_dir }}/ca.pem" # kube_oidc_username_claim: sub # kube_oidc_username_prefix: oidc: # kube_oidc_groups_claim: groups # kube_oidc_groups_prefix: oidc: # Choose network plugin (cilium, calico, contiv, weave or flannel) # Can also be set to 'cloud', which lets the cloud provider setup appropriate routing kube_network_plugin: flannel # Setting multi_networking to true will install Multus: https://github.com/intel/multus-cni kube_network_plugin_multus: false # Kubernetes internal network for services, unused block of space. kube_service_addresses: 10.233.0.0/18 # internal network. When used, it will assign IP # addresses from this range to individual pods. # This network must be unused in your network infrastructure! kube_pods_subnet: 10.233.64.0/18 # internal network node size allocation (optional). This is the size allocated # to each node on your network. With these defaults you should have # room for 4096 nodes with 254 pods per node. kube_network_node_prefix: 24 # The port the API Server will be listening on. kube_apiserver_ip: "{{ kube_service_addresses|ipaddr('net')|ipaddr(1)|ipaddr('address') }}" kube_apiserver_port: 6443 # (https) #kube_apiserver_insecure_port: 8080 # (http) # Set to 0 to disable insecure port - Requires RBAC in authorization_modes and kube_api_anonymous_auth: true kube_apiserver_insecure_port: 0 # (disabled) # Kube-proxy proxyMode configuration. # Can be ipvs, iptables kube_proxy_mode: ipvs # A string slice of values which specify the addresses to use for NodePorts. # Values may be valid IP blocks (eg 1.2.3.0/24, 1.2.3.4/32). # The default empty string slice ([]) means to use all local addresses. # kube_proxy_nodeport_addresses_cidr is retained for legacy config kube_proxy_nodeport_addresses: >- {%- if kube_proxy_nodeport_addresses_cidr is defined -%} [{{ kube_proxy_nodeport_addresses_cidr }}] {%- else -%} [] {%- endif -%} # If non-empty, will use this string as identification instead of the actual hostname #kube_override_hostname: >- # {%- if cloud_provider is defined and cloud_provider in [ 'aws' ] -%} # {%- else -%} # {{ inventory_hostname }} # {%- endif -%} ## Encrypting Secret Data at Rest (experimental) kube_encrypt_secret_data: false # DNS configuration. # Kubernetes cluster name, also will be used as DNS domain cluster_name: cluster.local # Subdomains of DNS domain to be resolved via /etc/resolv.conf for hostnet pods ndots: 2 # Can be dnsmasq_kubedns, kubedns, coredns, coredns_dual, manual or none dns_mode: coredns # Set manual server if using a custom cluster DNS server #manual_dns_server: 10.xxx # Enable nodelocal dns cache enable_nodelocaldns: False nodelocaldns_ip: 169.254.25.10 # Can be docker_dns, host_resolvconf or none resolvconf_mode: docker_dns # Deploy netchecker app to verify DNS resolve as an HTTP service deploy_netchecker: false # Ip address of the kubernetes skydns service skydns_server: "{{ kube_service_addresses|ipaddr('net')|ipaddr(3)|ipaddr('address') }}" skydns_server_secondary: "{{ kube_service_addresses|ipaddr('net')|ipaddr(4)|ipaddr('address') }}" dnsmasq_dns_server: "{{ kube_service_addresses|ipaddr('net')|ipaddr(2)|ipaddr('address') }}" dns_domain: "{{ cluster_name }}" ## Container runtime ## docker for docker and crio for cri-o. container_manager: docker ## Settings for containerized control plane (etcd/kubelet/secrets) etcd_deployment_type: docker kubelet_deployment_type: host helm_deployment_type: host # K8s image pull policy (imagePullPolicy) k8s_image_pull_policy: IfNotPresent # audit log for kubernetes kubernetes_audit: false # dynamic kubelet configuration dynamic_kubelet_configuration: false # define kubelet config dir for dynamic kubelet #kubelet_config_dir: default_kubelet_config_dir: "{{ kube_config_dir }}/dynamic_kubelet_dir" dynamic_kubelet_configuration_dir: "{{ kubelet_config_dir | default(default_kubelet_config_dir) }}" # pod security policy (RBAC must be enabled either by having 'RBAC' in authorization_modes or kubeadm enabled) podsecuritypolicy_enabled: false # Make a copy of kubeconfig on the host that runs Ansible in {{ inventory_dir }}/artifacts # kubeconfig_localhost: false # Download kubectl onto the host that runs Ansible in {{ bin_dir }} # kubectl_localhost: false # dnsmasq # dnsmasq_upstream_dns_servers: # - /resolvethiszone.with/10.0.4.250 # - 8.8.8.8 # Enable creation of QoS cgroup hierarchy, if true top level QoS and pod cgroups are created. (default true) # kubelet_cgroups_per_qos: true # A comma separated list of levels of node allocatable enforcement to be enforced by kubelet. # Acceptable options are 'pods', 'system-reserved', 'kube-reserved' and ''. Default is "". # kubelet_enforce_node_allocatable: pods ## Supplementary addresses that can be added in kubernetes ssl keys. ## That can be useful for example to setup a keepalived virtual IP # supplementary_addresses_in_ssl_keys: [10.0.0.1, 10.0.0.2, 10.0.0.3] ## Running on top of openstack vms with cinder enabled may lead to unschedulable pods due to NoVolumeZoneConflict restriction in kube-scheduler. ## See https://github.com/kubernetes-sigs/kubespray/issues/2141 ## Set this variable to true to get rid of this issue volume_cross_zone_attachment: false # Add Persistent Volumes Storage Class for corresponding cloud provider ( OpenStack is only supported now ) persistent_volumes_enabled: false ## Container Engine Acceleration ## Enable container acceleration feature, for example use gpu acceleration in containers # nvidia_accelerator_enabled: true ## Nvidia GPU driver install. Install will by done by a (init) pod running as a daemonset. ## Important: if you use Ubuntu then you should set in all.yml 'docker_storage_options: -s overlay2' ## Array with nvida_gpu_nodes, leave empty or comment if you dont't want to install drivers. ## Labels and taints won't be set to nodes if they are not in the array. # nvidia_gpu_nodes: # - kube-gpu-001 # nvidia_driver_version: "384.111" ## flavor can be tesla or gtx # nvidia_gpu_flavor: gtx
最后,编辑清单/$CLUSTER/group_vars/k8s-cluster/addons.yml文件,并将dashboard_enabled设置为true以设置仪表板。 配置示例:
# Kubernetes dashboard # RBAC required. see docs/getting-started.md for access details. dashboard_enabled: true # Helm deployment helm_enabled: false # Registry deployment registry_enabled: false # registry_namespace: kube-system # registry_storage_class: "" # registry_disk_size: "10Gi" # Metrics Server deployment metrics_server_enabled: false # metrics_server_kubelet_insecure_tls: true # metrics_server_metric_resolution: 60s # metrics_server_kubelet_preferred_address_types: "InternalIP" # Local volume provisioner deployment local_volume_provisioner_enabled: false # local_volume_provisioner_namespace: kube-system # local_volume_provisioner_storage_classes: # local-storage: # host_dir: /mnt/disks # mount_dir: /mnt/disks # fast-disks: # host_dir: /mnt/fast-disks # mount_dir: /mnt/fast-disks # block_cleaner_command: # - "/scripts/shred.sh" # - "2" # volume_mode: Filesystem # fs_type: ext4 # CephFS provisioner deployment cephfs_provisioner_enabled: false # cephfs_provisioner_namespace: "cephfs-provisioner" # cephfs_provisioner_cluster: ceph # cephfs_provisioner_monitors: "172.24.0.1:6789,172.24.0.2:6789,172.24.0.3:6789" # cephfs_provisioner_admin_id: admin # cephfs_provisioner_secret: secret # cephfs_provisioner_storage_class: cephfs # cephfs_provisioner_reclaim_policy: Delete # cephfs_provisioner_claim_root: /volumes # cephfs_provisioner_deterministic_names: true # Nginx ingress controller deployment ingress_nginx_enabled: false # ingress_nginx_host_network: false # ingress_nginx_nodeselector: # node.kubernetes.io/node: "" # ingress_nginx_tolerations: # - key: "node.kubernetes.io/master" # operator: "Equal" # value: "" # effect: "NoSchedule" # ingress_nginx_namespace: "ingress-nginx" # ingress_nginx_insecure_port: 80 # ingress_nginx_secure_port: 443 # ingress_nginx_configmap: # map-hash-bucket-size: "128" # ssl-protocols: "SSLv2" # ingress_nginx_configmap_tcp_services: # 9000: "default/example-go:8080" # ingress_nginx_configmap_udp_services: # 53: "kube-system/kube-dns:53" # Cert manager deployment cert_manager_enabled: false # cert_manager_namespace: "cert-manager"
更改配置后,通过运行以下命令以我们的配置运行ansible-playbook。
ansible-playbook --become -i inventory/$CLUSTER/hosts cluster.yml
Ansible执行多项操作,如果所有操作均成功完成,则群集将如图所示。

测试中
要测试集群,请进入向导,切换到root用户,然后在kubectl中运行kubectl cluster-info命令以获取有关集群的信息。 您将在群集中看到向导和服务的端点信息。 如果集群一切正常,请使用以下命令创建Kubernetes仪表板用户。
# Create service account kubectl create serviceaccount cluster-admin-dashboard-sa # Bind ClusterAdmin role to the service account kubectl create clusterrolebinding cluster-admin-dashboard-sa \ --clusterrole=cluster-admin \ --serviceaccount=default:cluster-admin-dashboard-sa # Parse the token kubectl describe secret $(kubectl -n kube-system get secret | awk '/^cluster-admin-dashboard-sa-token-/{print $1}') | awk '$1=="token:"{print $2}'
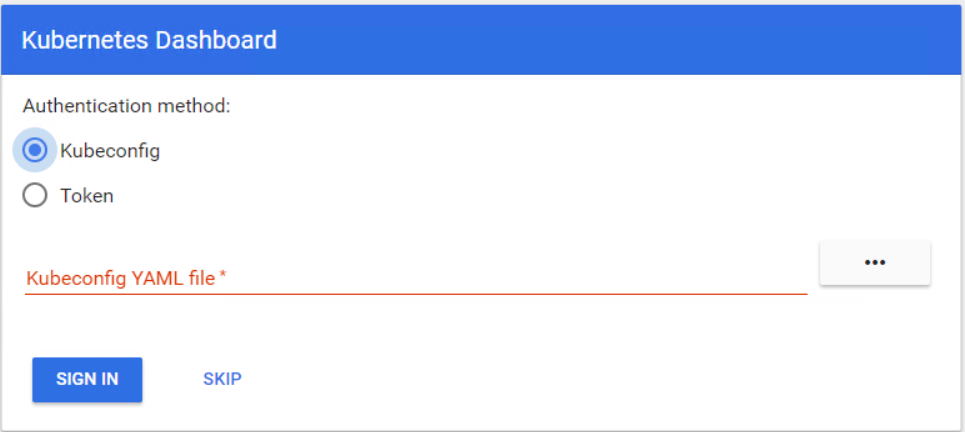
现在,您可以使用令牌进入仪表板。 首先,您需要创建一个通往Kubernetes向导的隧道,因为仍在端口8001上为localhost打开了仪表板。之后,您可以使用localhost:8001访问仪表板。 现在选择令牌,输入令牌并登录。
您已准备好开始在Kubernetes集群中工作。 在本文中,您了解了在OpenStack云中部署和配置Kubernetes集群有多么容易。