对于Web组件,他们经常说:“没有框架,您想要什么? 那里的一切都准备就绪。” 实际上,存在一些基于Web组件组中包含的标准的实现而创建的框架。 甚至还有相对不错的
X-Tag 。 但是今天,我们仍将了解,浏览器API在解决日常开发任务方面变得多么简单,优雅和强大,包括从浏览器执行的上下文中组织组件之间以及与其他对象的交互,并且您始终可以将框架与Web组件一起使用,甚至跨标准开发的工具,包括通过我们今天将要分析的机制(至少如
网站上所述)开发的工具 。
像试剂这样的决定告诉我们,应该有一个大数据面,并且组件应对其更改进行签名,并且在Web组件中,它们还试图辨别不存在这样的子系统,实际上,这意味着即使不自觉地进行反向装箱,并且它已经存在于Web组件中。
每个元素都有我们可以更改的值的属性。 并且,如果您在
observedAttributes挂钩中列出了名称,那么当它们更改时,
attributeChangedCallback()将被自动调用,在其中我们可以确定属性更改时组件的行为。 使用吸气剂魔术,以类似的方式很容易进行反向绑定。
我们已经在
第一部分中草拟了一些项目,今天我们将继续进行进一步的削减。
值得一提的是,至少在当前的实现中,有一个限制,即属性值只能是由文字指定的原始值,并且可以还原为字符串,但通常可以通过使用外部的单引号和双精度的方式来传递“ objecs”项目的值和字段。
<my-component my='{"foo": "bar"}'></my-component>
要在代码中使用此值,您可以实现一个
自动的魔术获取器 ,该获取器将
在其上调用
JSON.parse() 。
但是就目前而言,计数器的数值对我们来说已经足够了。
我们向元素添加一个新属性,将其指定为观察到的属性,单击单击处理程序以增加此计数器,然后通过直接链接到更改挂钩添加显示值的更新,该更改的逻辑在单独的
可重用updateLabel()方法中实现。
export class MyWebComp extends HTMLElement { constructor() { super(); } connectedCallback() { let html = document.importNode(myWebCompTemplate.content, true); this.attachShadow({mode: 'open'}); this.shadowRoot.appendChild(html); this.updateLabel(); } updateLabel() { this.shadowRoot.querySelector('#helloLabel').textContent = 'Hello ' + this.getAttribute('greet-name') + ' ' + this.getAttribute('count'); } static get observedAttributes() { return ['count']; } attributeChangedCallback(name, oldValue, newValue) { if (name === 'count') { this.updateLabel(); } } showMessage(event) { this.setAttribute('count', this.getAttribute('count') + 1); } }
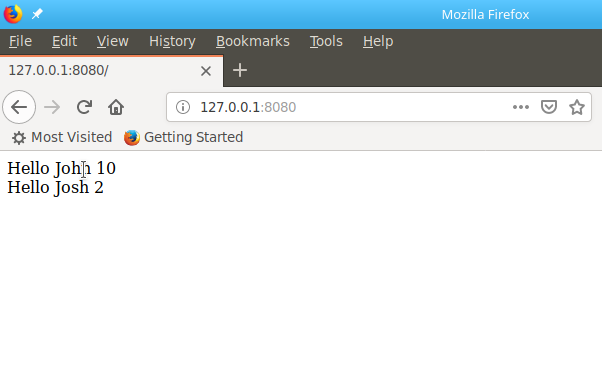
每个项目都有一个独立的,自动更新的计数器。
作业:将计数器转换为数字并通过自动获取器使用;)
当然,可以使用更多高级选项。 例如,如果您不考虑简单的回调和事件,则可以使用本机Proxy以及相同的getter和setter来实现反向绑定的功能。
使用此类添加
my-counter.js文件
export class MyCounter extends EventTarget { constructor() { super(); this.count = 0; } increment() { this.count++; this.dispatchEvent(new CustomEvent('countChanged', { detail: { count: this.count } })); } }
我们从
EventTarget继承了一个类,以便其他类可以订阅该类对象引发的事件,并定义将存储计数器值的count属性。
现在,将此类的实例添加为组件的静态属性。
<script type="module"> import { MyWebComp } from "./my-webcomp.js"; import { MyCounter } from "./my-counter.js"; let counter = new MyCounter(); Object.defineProperty(MyWebComp.prototype, 'counter', { value: counter }); customElements.define('my-webcomp', MyWebComp); </script>
在组件代码中,我们将订阅值更改
updateLabel()标签的update方法,并从全局共享计数器中添加值显示。 在点击处理程序中,直接调用增量方法。
export class MyWebComp extends HTMLElement { constructor() { super(); } connectedCallback() { let html = document.importNode(myWebCompTemplate.content, true); this.attachShadow({mode: 'open'}); this.shadowRoot.appendChild(html); this.updateLabel(); this.counter.addEventListener('countChanged', this.updateLabel.bind(this)); } updateLabel() { this.shadowRoot.querySelector('#helloLabel').textContent = 'Hello ' + this.getAttribute('greet-name') + ' ' + this.getAttribute('count') + ' ' + this.counter.count; } static get observedAttributes() { return ['count']; } attributeChangedCallback(name, oldValue, newValue) { if (name === 'count') { if (this.shadowRoot) { this.updateLabel(); } } } showMessage(event) { this.setAttribute('count', parseInt(this.getAttribute('count')) + 1); this.counter.increment(); } }
尽管每个元素都有两个计数器,但每个元素的值都会独立增加,但是两个元素的共享计数器的值都相同,并且各个值将仅由它们的单击次数决定。

因此,我们在直接绑定中获得了直接绑定,并且由于使用了事件,因此该值在更新中很弱。 当然,通过将
增量()方法绑定到事件的解析器,没有什么可以阻止通过事件实现
增量 :
export class MyCounter extends EventTarget { constructor() { super(); this.count = 0; this.addEventListener('increment', this.increment.bind(this)); } increment() { this.count++; this.dispatchEvent(new CustomEvent('countChanged', { detail: { count: this.count } })); } }
并用事件引发替换方法调用:
export class MyWebComp extends HTMLElement { ... showMessage(event) { this.setAttribute('count', parseInt(this.getAttribute('count')) + 1); this.counter.dispatchEvent(new CustomEvent('increment')); } }
这有什么变化? 现在,如果在开发过程中删除或更改了
增量()方法,则将违反我们代码的正确性,但不会出现解释器错误,即 可操作性将保持不变。 此特性称为弱连接。
在开发中,需要直接绑定和弱绑定,通常习惯在一个组件模块的逻辑内部实现直接绑定,并在不同模块和组件之间进行弱耦合,以提供整个系统的灵活性和可扩展性。 HTML语义意味着高度的这种灵活性,即 优先选择弱连接,但是如果组件内部的连接是直接的,则应用程序将更可靠地工作。
我们可以以旧的方式挂起处理程序,并在全局
文档对象上调用事件。
export class MyWebComp extends HTMLElement { constructor() { super(); } connectedCallback() { let html = document.importNode(myWebCompTemplate.content, true); this.attachShadow({mode: 'open'}); this.shadowRoot.appendChild(html); this.updateLabel(); this.counter.addEventListener('countChanged', this.updateLabel.bind(this)); document.addEventListener('countChanged', this.updateLabel.bind(this)); } disconnectedCallback() { document.removeEventListener(new CustomEvent('increment')); document.removeEventListener(new CustomEvent('countChanged')); } ... showMessage(event) { this.setAttribute('count', parseInt(this.getAttribute('count')) + 1); this.counter.dispatchEvent(new CustomEvent('increment')); document.dispatchEvent(new CustomEvent('increment')); } }
export class MyCounter extends EventTarget { constructor() { super(); this.count = 0; this.addEventListener('increment', this.increment.bind(this)); document.addEventListener('increment', this.increment.bind(this)); } increment() { this.count++; this.dispatchEvent(new CustomEvent('countChanged', { detail: { count: this.count } })); document.dispatchEvent(new CustomEvent('countChanged', { detail: { count: this.count } })); } }
行为没有什么不同,但是现在我们需要考虑如果将元素本身从树中删除,则从全局对象中删除事件处理程序。 幸运的是,Web组件不仅为我们提供了设计挂钩,而且还为我们提供了销毁功能,避免了内存泄漏。
还有一点很重要:树元素的事件可以通过一种称为“冒泡”的机制相互交互。
当用户单击我们的元素时,对元素本身进行处理的事件开始在父对象上调用,就像在水上的圆圈一样,然后在该父对象的父对象上调用,依此类推,直到根元素。
在此调用链中的任何时候,事件都可以被拦截和处理。
当然,这不是完全相同的事件,尽管它的派生词和上下文(例如在
event.path中将包含彼此的链接)彼此包含链接,但它们不会完全重合。
但是,通过这种机制,您可以将子元素与其父母相关联,以使该链接不会违反工程模式,即 没有直接链接,但仅是由于自己的行为。
在远古时代,当某些元素的事件在文档的某些部分中引起“圆圈”或回声,而这是不希望有的反应时,这也会带来很多麻烦。
多年以来,Web开发人员一直在努力应对事件的“传播”(传播或显示),并尽可能地将其停止并打开它们,但是为了便于使用(如ID),仅缺少了阴影树的隔离。
这里的魔力在于事件不会在影子树之外掠夺。 但是,尽管如此,您仍可以在宿主组件中捕获其子级抛出的事件,并以某种其他事件的形式将其滚动到树上,或者,或者仅仅处理它。
为了理解它们的工作原理,我们将
webcomp元素包装在这样的容器中:
<my-webcont count=0> <my-webcomp id="myWebComp" greet-name="John" count=0 onclick="this.showMessage(event)"></my-webcomp> <my-webcomp id="myWebComp2" greet-name="Josh" count=0 onclick="this.showMessage(event)"></my-webcomp> </my-webcont>
容器将具有以下代码:
export class MyWebCont extends HTMLElement { constructor() { super(); } connectedCallback() { this.addEventListener('increment', this.updateCount.bind(this)); } updateCount(event) { this.setAttribute('count', parseInt(this.getAttribute('count')) + 1); } static get observedAttributes() { return ['count']; } attributeChangedCallback(name, oldValue, newValue) { if (name === 'count') { this.querySelectorAll('my-webcomp').forEach((el) => { el.setAttribute('count', newValue); }); } } }
在
connectedCallback()中,我们将在
增量事件上挂起处理程序,这将引发子级。 处理程序将增加元素自己的计数器,并且更改其值的回调将遍历所有子元素并增加其计数器,我们先前开发的处理程序将挂在其上。
子元素的代码将略有变化,实际上,我们所需要做的就是让
增量事件抛出元素本身而不是其聚合,并使用
bubbles:true属性来完成。
export class MyWebComp extends HTMLElement { ... showMessage(event) { this.setAttribute('count', parseInt(this.getAttribute('count')) + 1); this.counter.dispatchEvent(new CustomEvent('increment')); this.dispatchEvent(new CustomEvent('increment', { bubbles: true })); document.dispatchEvent(new CustomEvent('increment')); } }

现在,尽管有一些一般的随机性,但第一个元素计数器将始终显示父级的值。 总而言之,我们今天在这里所做的当然不是要遵循的示例,而只是对可能性和技术的概述,通过这些可能性和技术,您可以组织组件之间真正的模块化交互,而无需使用最少的工具。
您可以在
事件brunch中的同一存储库中找到参考的完成代码。