哈Ha! 每个人都喜欢响应式应用程序。 当他们有相关的动画时,甚至会更好。 在本文中,我将讲述和展示所有“肉”如何正确显示,隐藏,扭曲,旋转以及如何使用弹出屏幕进行所有操作。
最初,我想写一篇文章,指出在iOS 10上出现了一个方便的UIViewPropertyAnimator ,可以解决动画中断的问题。 现在,它们可以停止,倒转,继续或取消。 苹果称此接口为Fluid 。
但是后来我意识到:在不描述如何正确动画化过渡的情况下,很难谈论中断控制器的动画。 因此,将有两篇文章。 在此,我们将弄清楚如何正确显示和隐藏屏幕,以及下一个屏幕的中断。
他们如何运作
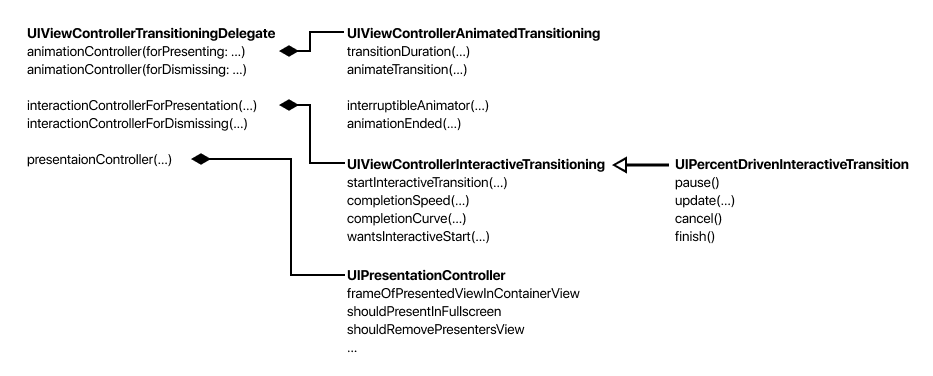
UIViewController具有transitioningDelegate属性。 这是一个具有不同功能的协议,每个都返回一个对象:
- 用于动画的animationController
- 用于中断动画的
interactionController , - 用于显示的
presentationController :层次结构,框架等。
基于所有这些,我们将创建一个弹出面板:

烹饪控制器
您可以为模式控制器和UINavigationController (通过UINavigationControllerDelegate起作用)设置过渡的动画。
我们将考虑模式过渡。 演出前的控制器设置有点不寻常:
class ParentViewController: UIViewController { private let transition = PanelTransition()
- 创建一个描述过渡的对象。
transitioningDelegate标记为weak ,因此您必须通过strong链接分别存储transition 。 - 我们将过渡设置为
transitioningDelegate 。 - 为了控制
presentationController的显示方法,您需要为modalPresentationStyle.指定modalPresentationStyle. 。
所示的控制器完全不知道其显示方式。 那很好。
半屏显示
让我们从presentationController开始PanelTransition的代码。 如果通过UIPopoverController创建了弹出窗口,则可以使用它。 PresentationController控制控制器的显示:框架,层次结构等。 他决定如何在iPad上显示弹窗:使用哪个框架显示按钮的哪一侧,会在窗口的背景上增加模糊效果,并在其下方变暗。

我们的结构类似:我们将背景变暗,将框架置于非全屏状态:

首先,在presentationController(forPresented:, presenting:, source:)方法中,返回PresentationController类:
class PanelTransition: NSObject, UIViewControllerTransitioningDelegate { func presentationController(forPresented presented: UIViewController, presenting: UIViewController?, source: UIViewController) -> UIPresentationController? { return presentationController = PresentationController(presentedViewController: presented, presenting: presenting ?? source) }
为什么传输3个控制器,并且源是什么?Source是控制器,我们将其称为节目的动画。 但是将参与付款的控制器是具有definesPresentationContext = true的层次结构中的第一个。 如果控制器发生变化,则实际指示控制器将位于presenting.参数中presenting.
现在,您可以实现PresentationController类。 首先,让我们设计未来的控制器。 frameOfPresentedViewInContainerView有一个frameOfPresentedViewInContainerView方法。 让控制器占据屏幕的下半部分:
class PresentationController: UIPresentationController { override var frameOfPresentedViewInContainerView: CGRect { let bounds = containerView!.bounds let halfHeight = bounds.height / 2 return CGRect(x: 0, y: halfHeight, width: bounds.width, height: halfHeight) } }
您可以启动项目并尝试显示屏幕,但是什么也不会发生。 这是因为我们现在自己管理视图层次结构,并且需要手动添加控制器视图:
仍然需要为presentedView放置一个框架。 containerViewDidLayoutSubviews是最好的地方,因为这样我们可以响应屏幕旋转:
现在可以运行了。 动画将是UIModalTransitionStyle.coverVertical标准UIModalTransitionStyle.coverVertical ,但帧的大小将减半。
调暗背景
下一个任务是使后台控制器变暗,以专注于显示的内容。
我们将继承PresentationController并将其替换为PanelTransition文件中的新类。 在新类中,将仅存在用于调光的代码。
class DimmPresentationController: PresentationController
创建一个视图,该视图将覆盖在以下视图之上:
private lazy var dimmView: UIView = { let view = UIView() view.backgroundColor = UIColor(white: 0, alpha: 0.3) view.alpha = 0 return view }()
我们将根据过渡动画更改alpha视图。 有4种方法:
presentationTransitionWillBeginpresentationTransitionDidEnddismissalTransitionWillBegindismissalTransitionDidEnd
第一个是最困难的。 将dimmView添加到层次结构中,放下框架并开始动画:
override func presentationTransitionWillBegin() { super.presentationTransitionWillBegin() containerView?.insertSubview(dimmView, at: 0) performAlongsideTransitionIfPossible { [unowned self] in self.dimmView.alpha = 1 } }
使用辅助功能启动动画:
private func performAlongsideTransitionIfPossible(_ block: @escaping () -> Void) { guard let coordinator = self.presentedViewController.transitionCoordinator else { block() return } coordinator.animate(alongsideTransition: { (_) in block() }, completion: nil) }
我们在containerViewDidLayoutSubviews设置dimmView的框架(如上一次):
override func containerViewDidLayoutSubviews() { super.containerViewDidLayoutSubviews() dimmView.frame = containerView!.frame }
动画可以被中断和取消,如果取消,则必须从层次结构中删除dimmView :
override func presentationTransitionDidEnd(_ completed: Bool) { super.presentationTransitionDidEnd(completed) if !completed { self.dimmView.removeFromSuperview() } }
反向过程从hide方法开始。 但是,现在仅在动画完成dimmView需要删除dimmView 。
override func dismissalTransitionWillBegin() { super.dismissalTransitionWillBegin() performAlongsideTransitionIfPossible { [unowned self] in self.dimmView.alpha = 0 } } override func dismissalTransitionDidEnd(_ completed: Bool) { super.dismissalTransitionDidEnd(completed) if completed { self.dimmView.removeFromSuperview() } }
现在背景变暗了。
我们控制动画
我们从下面显示控制器
现在我们可以对控制器的外观进行动画处理。 在PanelTransition类中,返回将控制外观动画的类:
func animationController(forPresented presented: UIViewController, presenting: UIViewController, source: UIViewController) -> UIViewControllerAnimatedTransitioning? { return PresentAnimation() }
协议的实现很简单:
extension PresentAnimation: UIViewControllerAnimatedTransitioning { func transitionDuration(using transitionContext: UIViewControllerContextTransitioning?) -> TimeInterval { return duration } func animateTransition(using transitionContext: UIViewControllerContextTransitioning) { let animator = self.animator(using: transitionContext) animator.startAnimation() } func interruptibleAnimator(using transitionContext: UIViewControllerContextTransitioning) -> UIViewImplicitlyAnimating { return self.animator(using: transitionContext) } }
关键代码有点复杂:
class PresentAnimation: NSObject { let duration: TimeInterval = 0.3 private func animator(using transitionContext: UIViewControllerContextTransitioning) -> UIViewImplicitlyAnimating {
UIViewPropertyAnimator在iOS 9中不起作用解决方法非常简单:您不需要在animateTransition代码中使用动画器,而需要使用旧的UIView.animate… api UIView.animate…例如,如下所示:
func animateTransition(using transitionContext: UIViewControllerContextTransitioning) { let to = transitionContext.view(forKey: .to)! let finalFrame = transitionContext.finalFrame(for: transitionContext.viewController(forKey: .to)!) to.frame = finalFrame.offsetBy(dx: 0, dy: finalFrame.height) UIView.animate(withDuration: duration, delay: 0, usingSpringWithDamping: 1, initialSpringVelocity: 0, options: [.curveEaseOut], animations: { to.frame = finalFrame }) { (_) in transitionContext.completeTransition(!transitionContext.transitionWasCancelled) } } , `interruptibleAnimator(using transitionContext:)`
如果您不设置中断对象,则可以忽略interruptibleAnimator方法。 不连续性将在下一篇文章中进行讨论。
隐藏控制器
一切都是一样的,只是方向相反。 在Panel Transition创建DismissAnimation类:
func animationController(forDismissed dismissed: UIViewController) -> UIViewControllerAnimatedTransitioning? { return DismissAnimation() }
我们意识到了。 DismissAnimation类:
class DismissAnimation: NSObject { let duration: TimeInterval = 0.3 private func animator(using transitionContext: UIViewControllerContextTransitioning) -> UIViewImplicitlyAnimating { let from = transitionContext.view(forKey: .from)! let initialFrame = transitionContext.initialFrame(for: transitionContext.viewController(forKey: .from)!) let animator = UIViewPropertyAnimator(duration: duration, curve: .easeOut) { from.frame = initialFrame.offsetBy(dx: 0, dy: initialFrame.height) } animator.addCompletion { (position) in transitionContext.completeTransition(!transitionContext.transitionWasCancelled) } return animator } } extension DismissAnimation: UIViewControllerAnimatedTransitioning { func transitionDuration(using transitionContext: UIViewControllerContextTransitioning?) -> TimeInterval { return duration } func animateTransition(using transitionContext: UIViewControllerContextTransitioning) { let animator = self.animator(using: transitionContext) animator.startAnimation() } func interruptibleAnimator(using transitionContext: UIViewControllerContextTransitioning) -> UIViewImplicitlyAnimating { return self.animator(using: transitionContext) } }
在这里,您可以与各方进行试验:
-替代方案可能会出现在下面;
-在右侧-快速菜单导航;
-以上-参考消息:
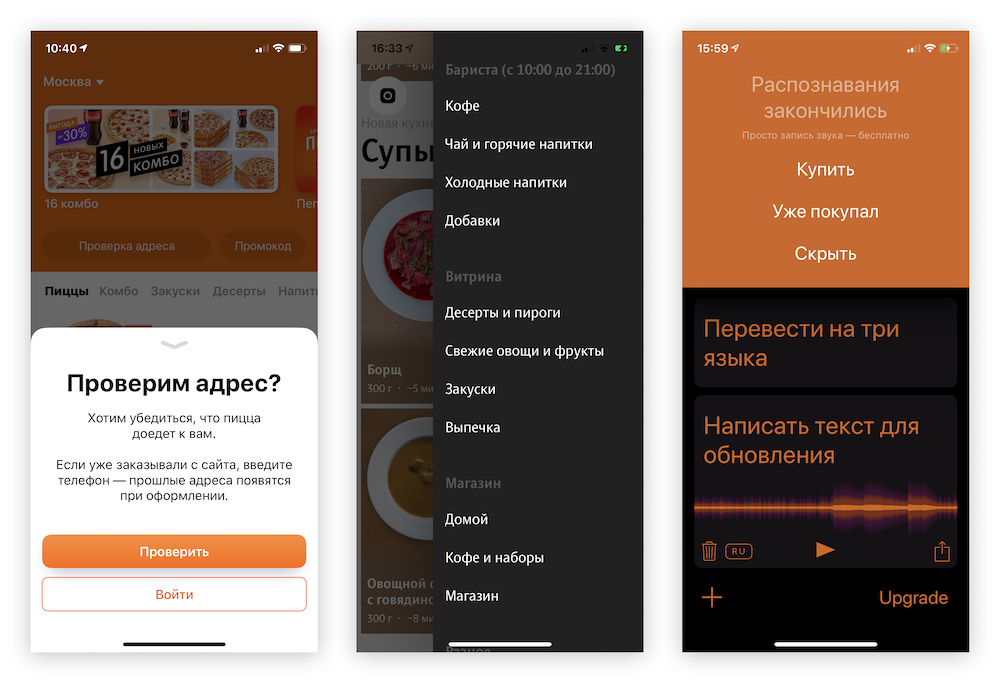
渡渡鸟披萨 , 小吃和零食
下次,我们添加一个带有手势的交互式闭合,然后使它的动画中断。 如果您迫不及待,那么完整的项目已经在github上了。
文章的第二部分到了。
订阅Dodo Pizza Mobile频道。