最后,您无需自己构建Android Studio即可尝试新的Android声明式UI框架。 现在,Jetpack Compose可以作为Google Maven存储库中的第一个开发预览。 有了这个消息,我的星期一早晨开始了。 立刻就想知道他们一直在等待什么工具。

我决定立即开始认识,并尝试将其引入在Google Play上发布的宠物项目中。 而且,很长一段时间以来,我都想制作一个页面“关于应用程序”。 在本文中,我将讨论Compose的主要组件和连接步骤:
- 依赖连接
- 主题和样式。 与项目中现有的集成。
- 辅助功能和UI测试。
- View继承人的主要组成部分和类似物。
- 与国家合作。
依赖连接
首先,我将Studio从3.5更新到3.5.1(徒劳),添加了基本依赖项。 完整的列表可以在Cyril的文章中看到。
// build.gradle ext.compose_version= '0.1.0-dev01' //build.gradle dependencies{ ... implementation "androidx.compose:compose-runtime:$compose_version" kapt "androidx.compose:compose-compiler:$compose_version" implementation "androidx.ui:ui-layout:$compose_version" implementation "androidx.ui:ui-android-text:$compose_version" implementation "androidx.ui:ui-text:$compose_version" implementation "androidx.ui:ui-material:$compose_version" }
然后,由于Firebase的版本分散,我试图收集所有这些信息。 之后,我遇到了撰写障碍:
app/src/main/AndroidManifest.xml Error: uses-sdk:minSdkVersion 16 cannot be smaller than version 21 declared in library [androidx.ui:ui-layout:0.1.0-dev01] .../ui-layout-0.1.0-dev01/AndroidManifest.xml as the library might be using APIs not available in 16 Suggestion: use a compatible library with a minSdk of at most 16, or increase this project's minSdk version to at least 21, or use tools:overrideLibrary="androidx.ui.layout" to force usage (may lead to runtime failures)
是的,Compose仅适用于minSdk 21(Lolipop)。 也许这是一个临时措施,但是可以支持早期版本的OS。
但这还不是全部。 Compose可以在Reflection上工作,而不是像前面在此处所述的Kotlin编译器插件。 因此,为了使一切开始,您还需要添加Kotlin Reflect,具体取决于:
implementation "org.jetbrains.kotlin:kotlin-reflect"
好吧,甜点。 Compose dp为Int,Long,Float实现扩展功能,这些功能用inline关键字标记。 这可能会导致新的编译错误:
Cannot inline bytecode built with JVM target 1.8 into bytecode that is being built with JVM target 1.6. Please specify proper '-jvm-target' option * https://stackoverflow.com/questions/48988778/cannot-inline-bytecode-built-with-jvm-target-1-8-into-bytecode-that-is-being-bui
要解决此问题,您需要为Kotlin明确注册JVM版本:
android { … kotlinOptions { jvmTarget = "1.8" } }
好像就这些了。 比建立自己的工作室容易得多)
让我们尝试运行Hello World(也来自Cyril的文章,但与他不同的是,在Fragment中添加Compose)。 片段的布局是一个空的FrameLayout。
override fun onCreateView(inflater: LayoutInflater, container: ViewGroup?, savedInstanceState: Bundle?): View? { val fragmentView = inflater.inflate(R.layout.fragment_about, container, false) (fragmentView as ViewGroup).setContent { Hello("Jetpack Compose") } return fragmentView } @Composable fun Hello(name: String) = MaterialTheme { FlexColumn { inflexible {
我们开始,出现以下屏幕:
由于Composable使用默认的Material主题,因此获得了紫色的AppBar。 好了,并且正如预期的那样,它根本与应用程序的黑暗主题不一致:
让我们尝试解决它。
主题和样式。 与项目中现有的集成。
为了在Composable内部使用现有样式,我们将它们传递给MaterialTheme构造函数:
@Composable fun Hello(name: String) = MaterialTheme(colors = MaterialColors( primary = resolveColor(context, R.attr.colorPrimary, MaterialColors().primary), secondary = resolveColor(context, R.attr.colorSecondary, MaterialColors().secondary), onBackground = resolveColor(context, R.attr.textColor, MaterialColors().onBackground) )){...}
MaterialTheme本身包含两个部分:MaterialColors和MaterialTypography。
为了解决颜色,我在样式上使用了包装器:
private fun resolveColor(context: Context?, @AttrRes attrRes: Int, colorDefault: Color) = context?.let { Color(resolveThemeAttr(it, attrRes).data.toLong()) } ?: colorDefault private fun resolveThemeAttr(context: Context, @AttrRes attrRes: Int): TypedValue { val theme = context.theme val typedValue = TypedValue() theme.resolveAttribute(attrRes, typedValue, true) return typedValue }
在此阶段,AppBar将变为绿色。 但是要重新粉刷文本,您需要执行以下一项操作:
Text("Hello $name!", style = TextStyle(color = +themeColor { onBackground }))
使用一元加号操作将主题应用于窗口小部件。 与国家合作时,我们仍然会看到它。
现在,新屏幕看起来与主题的两个变体中的其余应用程序一致:
Compose还在源代码中找到DarkTheme.kt文件,该函数可用于确定在Android P和10上打开黑暗主题的各种触发器。
辅助功能和UI测试。
在屏幕开始显示新元素之前,让我们看看它在“布局”检查器中的外观以及在“开发模式”下打开元素边框的显示情况:
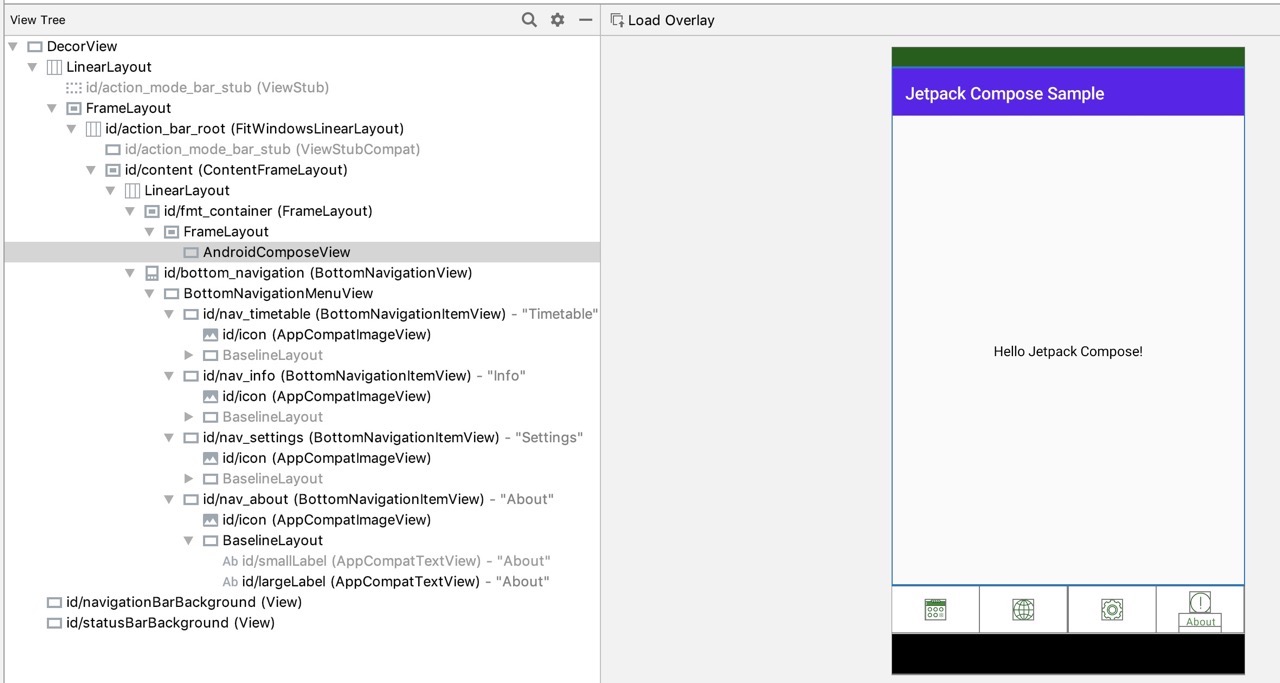
在这里,我们将看到FrameLayout,其中只有AndroidComposeView。 现有的Accebility和UI测试工具不再适用吗? 也许不是它们,而是现在有了一个新的库: androidx.ui:ui-test 。
View继承人的主要组成部分和类似物。
现在,让我们尝试使屏幕信息更丰富。 首先,更改文本,添加一个指向Google Play上的应用程序页面的按钮,以及带有徽标的图片。 我将立即向您显示代码以及发生的情况:
@Composable fun AboutScreen() = MaterialTheme(...) { FlexColumn { inflexible { TopAppBar<MenuItem>(title = { Text(getString(R.string.about)) }) } expanded(1F) { VerticalScroller { Column { Image() Title() MyButton() } } } } } private fun Image() { Center { Padding(16.dp) { Container( constraints = DpConstraints( minWidth = 96.dp, minHeight = 96.dp ) ) { imageFromResource(resources, R.drawable.ic_launcher) } } } } private fun Title() { Center { Padding(16.dp) { Text(getString(R.string.app_name) + " " + BuildConfig.VERSION_NAME, style = TextStyle(color = +themeColor { onBackground })) } } } private fun MyButton() { Center { Padding(16.dp) { Button(getString(R.string.about_button), onClick = { openAppInPlayStore() }) } } }
自从Compose源代码首次出现以来 ,小部件组成的基本原理就没有改变。
来自有趣的:
现在,让我们遍历现有的主要ViewGroup,并尝试在Compose中查找类似物。
可以使用Stack代替FrameLayout。 这里的一切都很简单:子窗口小部件重叠并根据附件使用的功能进行定位:对齐,定位或扩展。
LinearLayout立即被两个小部件取代:Column和Row,而不是使用android:direction参数。 反过来,它们包含FlexColumn和FlexRow,在嵌套子树上具有不灵活的功能层。 好吧,FlexColumn和FlexRow本身是在Flex上构建的,其参数orientation = LayoutOrientation.Vertical或Horizontal 。
FlowColumn,FlowRow和Flow小部件的相似层次结构。 它们的主要区别是:如果内容不适合一行或一行,则下一个将被绘制,并且嵌入式小部件将在此处“流动”。 我很难想象这些小部件的真正用途。
通过将Column或Row放在VerticalScroller或HorizontalScroller内,可以实现ScrollView效果。 它们都在Scroller内部isVertical = true ,传入参数isVertical = true或false 。
为了寻找ConstraintLayout的类似物,或者至少RelativeLayout遇到了一个新的Table小部件。 我试图在我的应用程序DataTableSamples.kt中运行示例代码。 但是,由于我没有尝试简化示例,因此无法使其正常工作。
与国家合作
框架最令人期待的创新之一是它可以立即使用,可以在基于单一状态的单向架构中使用。 并且这应该引入@Model注释来标记提供State来呈现UI的类。
考虑一个例子:
data class DialogVisibleModel(val visible: Boolean, val dismissPushed: Boolean = false) ... @Composable fun SideBySideAlertDialogSample() { val openDialog = +state { DialogVisibleModel(true) } Button(text = "Ok", onClick = { openDialog.value = DialogVisibleModel(true) }) if (openDialog.value.visible) { AlertDialog( onCloseRequest = {
这将为状态模型创建一个数据类,并且不必使用@Model批注进行标记。
初始状态本身是使用+ state在@Composable函数内部创建的。
对话框的可见性由调用value属性获得的模型的visible属性确定。
就像两个按钮的onClick一样,也可以将此属性设置为新的不可变对象。 第一个隐藏自身,第二个隐藏对话。 通过单击在同一@Composable函数内部定义的“确定”按钮,可以重新打开对话框。
尝试使此函数外的状态时,发生错误:
java.lang.IllegalStateException: Composition requires an active composition context.
可以通过在onCreateView中分配setContent {}函数的值来获取上下文,但是例如在Presenter或除Fragment或Activity以外的其他类中如何使用它来更改状态仍不清楚。
至此,我们对新的Jetpack Compose库的评论结束了。 该框架在结构上证明了其名称的合理性,将所有继承(在View层次结构中非常不便)替换为“ composition”。 关于如何实现更复杂的ViewGroup类似物的问题仍然有很多,例如ConstraintLayout和RecyclerView。 没有足够的文档和预览。
绝对清楚,即使在小型战斗应用中,Compose也无法使用。
但这只是Dev Preview的第一个版本。 观察基于Compose的与州政府和社区图书馆合作的概念的发展将会很有趣。
如果您找到更多成功的代码示例或无法获得案例的文档,请在评论中写下。