从本课程中,您将学习如何为任何CMS上的任何站点快速创建RESTful API , MODX只是一个示例。
要创建API,我将使用:
结果在这里:
https://github.com/andchir/modx2-api
我所做的一切都在Linux上进行了描述,但是我认为在Windows上命令的差异不会很大。 我预装了Composer和Symfony实用程序。
创建项目和用户类
我创建一个项目:
composer create-project symfony/skeleton modx2-api
安装必要的软件包以创建API:
cd modx2-api composer req api composer req migrations composer req form composer req maker --dev
我启动本地服务器。
如果安装了Symfony实用程序:
symfony server:start
左右:
php -S 127.0.0.1:8000 -t public
我在浏览器中打开地址以确认一切正常:
http://127.0.0.1:8000/
我打开.env文件,然后在MODX上编辑到项目数据库的连接字符串:
DATABASE_URL=mysql://db_user:db_password@127.0.0.1:3306/db_name
现在,您需要创建一个用户并通过登录名和密码来配置授权系统。
安装其他软件包:
composer req jwt-auth composer req orm-fixtures --dev composer req profiler --dev
.env文件中出现了新的.jvt-authentication-bundle软件包选项。
我创建用户的实体和存储库类(Doctrine ORM):
php bin/console make:user
出现两个文件:
src/Entity/User.php src/Repository/UserRepository.php
我在数据库中创建表“ user”:
bin/console doctrine:schema:create
我按照说明配置用户授权:
控制器代码应用\控制器\ SecurityController <?php namespace App\Controller; use App\Entity\User; use App\Form\Type\LoginType; use App\Form\Type\UpdateProfileType; use Doctrine\ORM\EntityManagerInterface; use Symfony\Bundle\FrameworkBundle\Controller\AbstractController; use Symfony\Component\HttpFoundation\Request; use Symfony\Component\HttpFoundation\Response; use Symfony\Component\Routing\Annotation\Route; use Symfony\Component\Security\Core\Encoder\UserPasswordEncoderInterface; use Symfony\Component\Security\Http\Authentication\AuthenticationUtils; use Symfony\Component\Validator\Validator\ValidatorInterface; class SecurityController extends AbstractController { public function loginAction(AuthenticationUtils $authenticationUtils): Response { if ($this->getUser()) { return $this->redirectToRoute('api_entrypoint'); } $form = $this->createForm(LoginType::class); $error = $authenticationUtils->getLastAuthenticationError(); $lastUsername = $authenticationUtils->getLastUsername(); return $this->render('security/login.html.twig', [ 'form' => $form->createView(), 'last_username' => $lastUsername, 'error' => $error ]); } }
我生成了一个用于创建用户的类:
php bin/console make:fixtures
此处有更多详细信息: https : //symfony.com/doc/current/security.html#a-create-your-user-class
类代码应用程序\ DataFixtures \ UserFixtures <?php namespace App\DataFixtures; use App\Entity\User; use Doctrine\Bundle\FixturesBundle\Fixture; use Doctrine\Common\Persistence\ObjectManager; use Symfony\Component\Security\Core\Encoder\UserPasswordEncoderInterface; class UserFixtures extends Fixture { private $passwordEncoder; public function __construct(UserPasswordEncoderInterface $passwordEncoder) { $this->passwordEncoder = $passwordEncoder; } public function load(ObjectManager $manager) { $user = new User(); $user ->setEmail('admin@admin.com') ->setRoles(['ROLE_USER', 'ROLE_ADMIN']); $user->setPassword($this->passwordEncoder->encodePassword( $user, 'admin'
我创建一个管理员,其电子邮件地址为“ admin@admin.com” ,密码为“ admin” :
php bin/console doctrine:fixtures:load --append --group=UserFixtures
以后可以更改此数据。
我在config / jwt /文件夹中生成密钥:
jwt_passhrase=$(grep ''^JWT_PASSPHRASE='' .env | cut -f 2 -d ''='') echo "$jwt_passhrase" | openssl genpkey -out config/jwt/private.pem -pass stdin -aes256 -algorithm rsa -pkeyopt rsa_keygen_bits:4096 echo "$jwt_passhrase" | openssl pkey -in config/jwt/private.pem -passin stdin -out config/jwt/public.pem -pubout setfacl -R -mu:www-data:rX -mu:"$(whoami)":rwX config/jwt setfacl -dR -mu:www-data:rX -mu:"$(whoami)":rwX config/jwt
检查令牌的创建:
curl -X POST -H "Content-Type: application/json" http://localhost:8000/authentication_token -d '{"email":"admin@admin.com","password":"admin"}'
我创建一个迁移:
php bin/console make:migration
现在有趣的部分。
API和文档生成
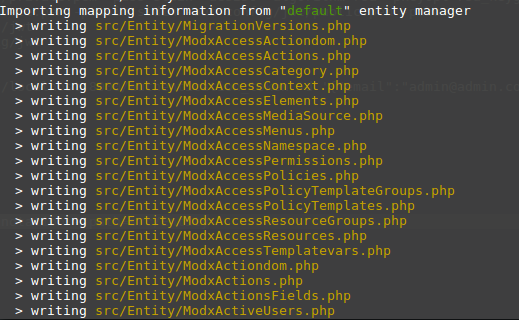
我为所有数据库表生成实体类:
php bin/console doctrine:mapping:import "App\Entity" annotation --path=src/Entity
我为类生成getter和setter:
php bin/console make:entity --regenerate App
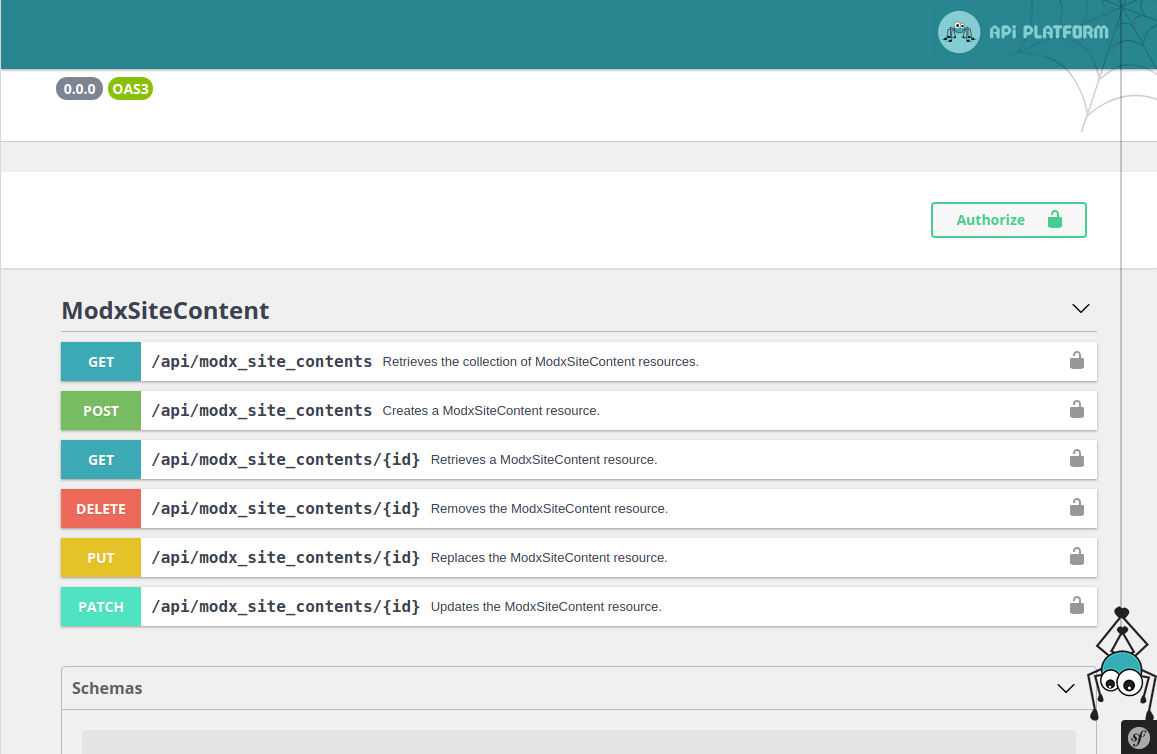
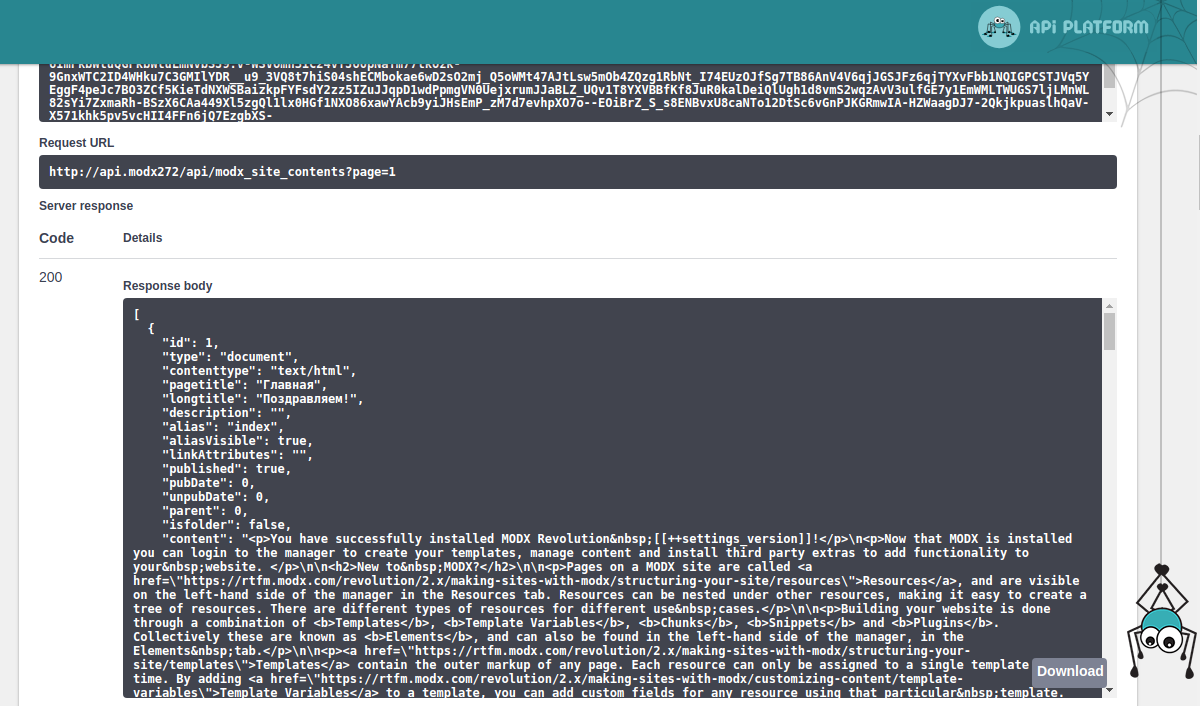
我打开一个类的代码,例如src / Entity / ModxSiteContent.php 。 添加@ApiResource批注:

ModxSiteContent的API 已准备就绪。
我打开页面http://本地主机:8000 / api
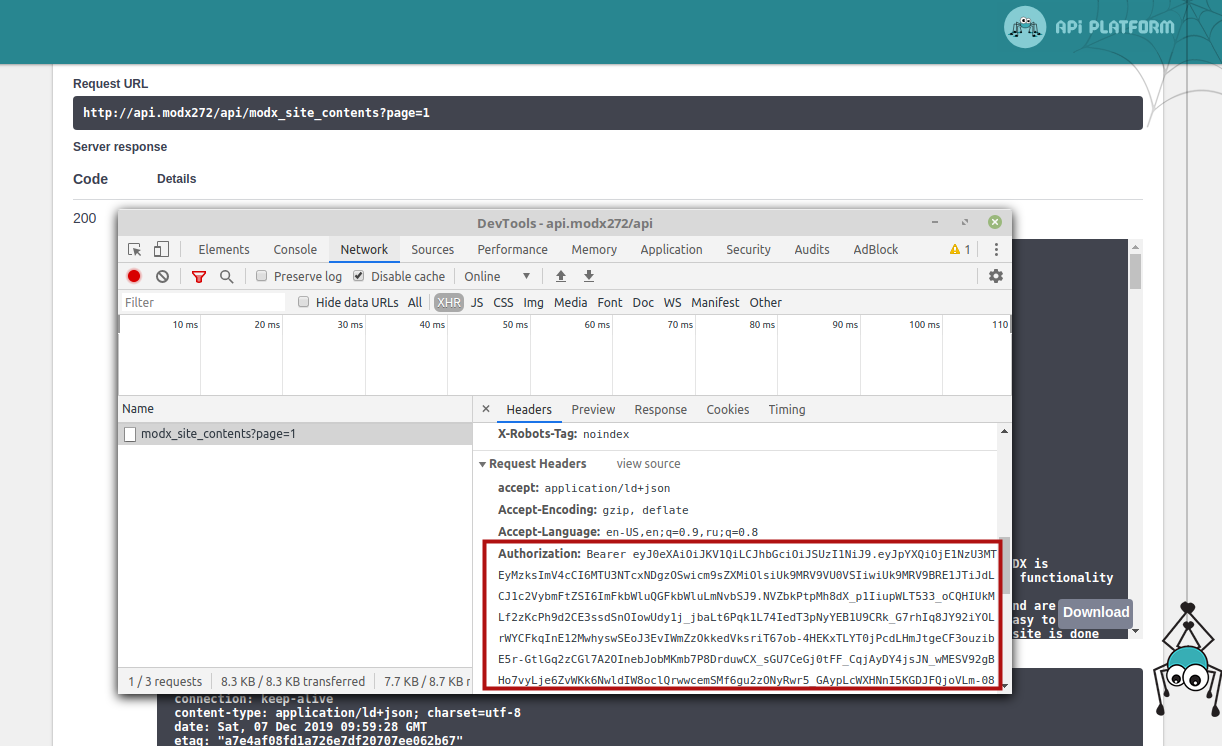
我拿了令牌,单击“授权”按钮,插入带有令牌的行:
Bearer MY_TOKEN
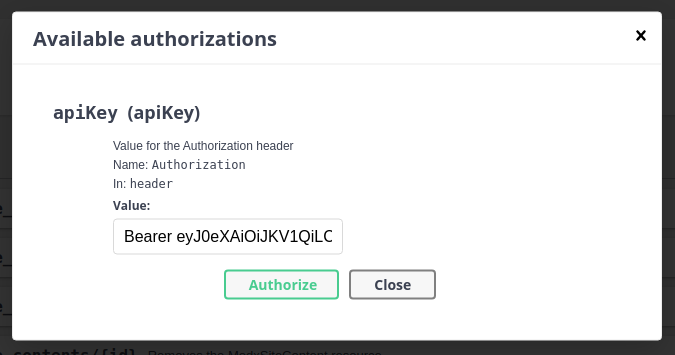
我单击“试用”按钮,然后单击“执行”按钮。 我得到这个结果:
表关系
我将不描述如何创建过滤器,以免重复文档 ,但将举例说明如何为表创建关系,因为 这有点棘手。
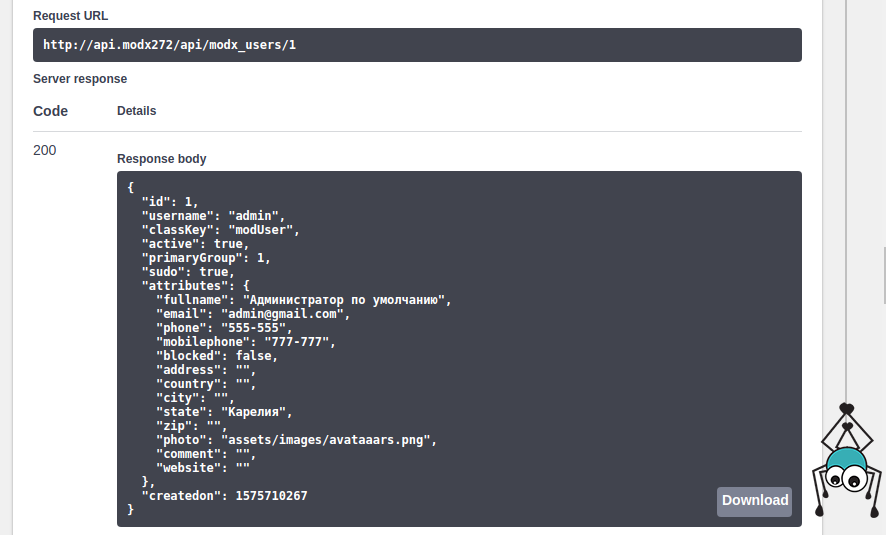
对于MODX,用户数据存储在单独的表“ user_attributes”中 。 例如,我需要通过GET请求将其电子邮件,姓名,电话号码等添加到用户样本中。 我打开类代码App \ Entity \ ModxUsers ,添加私有属性$attributes并在注释“ @ORM \ OneToOne”中描述与类App \ Entity \ ModxUserAttributes的连接:
private $attributes;
我再次添加缺少的getter和setter:
php bin/console make:entity --regenerate App\\Entity\\ModxUsers
请注意,我已将“属性”组添加到@ApiResource批注中
我打开App \ Entity \ ModxUserAttributes类的代码,添加注释@ApiResource并与App\Entity\ModxUsers类建立连接:
private $user;
所有需要添加到选择中的@Groups({"attributes"})都使用@Groups({"attributes"})批注@Groups({"attributes"})插入。
结果:
因此,要在您的应用程序中进行授权,您首先需要向URL “ / authentication_token”发送登录名(电子邮件)和密码,获取令牌,然后在“ Authorization”标头中的每个请求中发送此令牌:
如果项目https://github.com/andchir/modx2-api对用户来说很有趣,那么它将开发。 我也在等待所有想要帮助的人的公关。